Sign In
Upload
Download
Table of Contents
Contents
Add to my manuals
Delete from my manuals
Share
URL of this page:
HTML Link:
Bookmark this page
Add
Manual will be automatically added to "My Manuals"
Print this page
×
Bookmark added
×
Added to my manuals
Manuals
Brands
Xantrex Manuals
Battery Charger
XC3012
Owner's manual
Xantrex XC3012 Owner's Manual
Xantrex xc3012, xc5012, xc1524 and xc2524 battery charger
Hide thumbs
Also See for XC3012
:
Owner's manual
(80 pages)
1
2
3
4
5
6
7
8
9
10
Table Of Contents
11
12
13
14
15
16
17
18
19
20
21
22
23
24
25
26
27
28
29
30
31
32
33
34
35
36
37
38
39
40
41
42
43
44
45
46
47
48
49
50
51
52
53
54
55
56
57
58
59
60
61
62
63
64
65
66
67
68
69
70
71
72
73
74
75
76
77
78
79
80
page
of
80
Go
/
80
Contents
Table of Contents
Troubleshooting
Bookmarks
Table of Contents
Battery Charger
About this Guide
Important Safety Instructions
FCC Information
Table of Contents
1 Introduction
Xantrex XC3012, XC5012, XC1524 and XC2524 Battery Charger Features
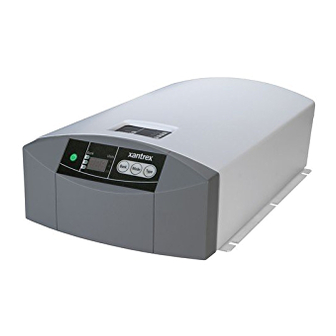
XC Series Appearance
Information Centers of the XC Series
Remote Display
Onboard Status Panel
Rear Panel
Preparing for Installation
Tools and Materials
Location
Wiring Requirements
DC Wiring
AC Wiring
Battery Bank Size Requirements
2 Installation
Installing the XC Series
Installation Sequence
Pre-Installing DC Wiring
Pre-Installing AC Wiring
Mounting the Remote Display
Grounding
Final Connections
Final DC Connections
Final AC Connections
Powering up
Installing Optional Accessories
Battery Temperature Sensor
Drip Protection Rubber Boots
Configuring the XC Series
3 Operation
About Charging
Multiplex 3-Stage Charging
Sequential 2-Stage Charging
Charging Overview
Charging Batteries
Equalizing Flooded Batteries
Transitioning the XC Series to On, Disabled or off
Accessing Charger Information
Reading Remote Display and Onboard Status Indicator Lights
Reporting While Charging or Equalizing
Reporting While Battery Monitoring
Reporting While Disabled
Using a Generator as Source Power
4 Troubleshooting
Care and Maintenance
Indicator Light Flashing Sequences
Error Messages on Remote Display
Problem Solving
A Specifications
Physical Specifications
Electrical Specifications
AC Input Specifications
Temperature Specifications
Protection Features
Approvals
Warranty and Product Information
Return Material Authorization Policy
Information about Your System
Advertisement
Quick Links
1
Xantrex Xc3012, Xc5012, Xc1524 and Xc2524 Battery Charger Features
2
Remote Display
3
About Charging
4
Charging Batteries
Download this manual
Xantrex
XC3012, XC5012,
XC1524 and XC2524
Battery Charger
Owner's Guide
12 V / 30 A
12 V / 50 A
24 V / 15 A
24 V / 25 A
Table of
Contents
Previous
Page
Next
Page
1
2
3
4
5
Advertisement
Table of Contents
Need help?
Do you have a question about the XC3012 and is the answer not in the manual?
Ask a question
Questions and answers
Related Manuals for Xantrex XC3012
Battery Charger Xantrex XC1524 Owner's Manual
12v / 30a / 50a and 24v / 15a / 25a battery charger (80 pages)
Battery Charger Xantrex XC5012 Owner's Manual
Xantrex xc3012, xc5012, xc1524 and xc2524 battery charger (80 pages)
Battery Charger Xantrex XC2524 Owner's Manual
Xantrex xc3012, xc5012, xc1524 and xc2524 battery charger (80 pages)
Battery Charger Xantrex XC Series Installation Instructions
For xantrex xc series and bc series battery chargers (4 pages)
Battery Charger Xantrex Freedom XC 1000 Owner's Manual
(108 pages)
Battery Charger Xantrex Freedom XC 1800 Owner's Manual
12vdc inverter charger (90 pages)
Battery Charger Xantrex Truecharge TC10 Owner's Manual
Xantrex battery charger owner's manual tc10 (26 pages)
Battery Charger Xantrex Truecharge TC10TB Owner's Manual
Xantrex owner's manual multistage battery charger tc10tb (26 pages)
Battery Charger Xantrex Freedom 458 Series Owner's Manual
Inverters (50 pages)
Battery Charger Xantrex Freedom Marine Series Owner's Manual
Freedom marine series inverter/charger (48 pages)
Battery Charger Xantrex Truecharge 20+ Amp Owner's Manual
Multistage battery charger (78 pages)
Battery Charger Xantrex TRACE DR Series Installation & Operator's Manual
Inverter/charger (84 pages)
Battery Charger Xantrex Freedom XC PRO Series Owner's Manual
Inverter/charger (114 pages)
Battery Charger Xantrex TC1012 Owner's Manual
Truecharge2 series (80 pages)
Battery Charger Xantrex Truecharge 40i Operating And Safety Instructions Manual
(48 pages)
Battery Charger Xantrex Freedom HF 1000 Owner's Manual
Inverter/charger (56 pages)
This manual is also suitable for:
Xc5012
Xc1524
Xc2524
Table of Contents
Print
Rename the bookmark
Delete bookmark?
Delete from my manuals?
Login
Sign In
OR
Sign in with Facebook
Sign in with Google
Upload manual
Upload from disk
Upload from URL


Need help?
Do you have a question about the XC3012 and is the answer not in the manual?
Questions and answers