Table of Contents
Advertisement
Advertisement
Table of Contents

Related Manuals for Xantrex truecharge 2 series


Summary of Contents for Xantrex truecharge 2 series
- Page 1 Owner’s Guide Series Battery Charger...
-
Page 3: Contact Information
Xantrex Technology USA Inc., 541 Roske Drive, Suite A, Elkhart, Electrotechnical Commission for "plugs, socket-outlets and cou- Indiana USA 46516. Xantrex Technology USA Inc. reserves the right to revise this plers for industrial purposes". IEC models have an AC input recep- tacle that connects with an IEC cable (not provided). -
Page 4: About This Guide
About This Guide Purpose Conventions Used The purpose of this Owner’s Guide is to provide explanations and The following conventions are used in this guide. procedures for installing, troubleshooting, operating and maintaining the Truecharge2 Series Battery Charger. Scope STATEMENT OF HAZARD The Guide provides safety and operating guidelines, procedures for Contains statements of avoidance or strict compliance. - Page 5 Related Information You can find more information about Xantrex Technology USA Inc. as well as its products and services at www.xantrex.com. The product marking on the left when found imprinted on electrical and electronic units and appliances means that you are to refer to this guide for cautions and warnings.
-
Page 6: Important Safety Instructions
Important Safety Instructions IMPORTANT: R ’ EAD AND SAVE THIS WNER UIDE FOR FUTURE REFERENCE ELECTRICAL SHOCK HAZARD • Do not expose the Truecharge2 Battery Charger to rain, snow, spray, This chapter contains important safety and installation instructions for the or bilge water. - Page 7 FIRE AND BURN HAZARD PERSONAL INJURY HAZARD Do not cover or obstruct the air intake vent openings and/or install in a This battery charger is not intended for use by persons (including zero-clearance compartment. See “Location” on page 10 for proper children) with reduced physical, sensory, or mental capabilities or lack of location requirements.
-
Page 8: Precautions When Working With Batteries
Precautions When Working With Batteries Use extra caution to reduce the risk or dropping a metal tool on the battery. It could spark or short circuit the battery or other electrical parts and could cause an explosion. BURN FROM HIGH SHORT-CIRCUIT CURRENT, FIRE AND EXPLO- Batteries can produce a short circuit current high enough to weld a ring SION FROM VENTED GASES HAZARDS or metal bracelet or the like to the battery terminal, causing a severe... - Page 9 Precautions When Preparing to Charge Precautions When Placing the Battery Charger RISK OF DAMAGE TO THE BATTERY CHARGER EXPOSURE TO CHEMICALS AND GASES HAZARD • Never allow battery acid to drip on the battery charger when reading • Make sure the area around the battery is well ventilated. gravity, or filling battery.
- Page 10 FCC Information to the User This equipment has been tested and found to comply with the limits for a Class B digital device, pursuant to part 15 of the FCC Rules. These limits are designed to provide reasonable protection against harmful interference in a residential installation.
-
Page 11: Table Of Contents
Contents Important Safety Instructions ................iv Introduction . -
Page 13: Introduction
3.The charger can be programmed with custom charge setpoints using PC interface. This programming can only be done using a special configuration tool operated by Xantrex or a designated OEM. 1.Not included with IEC models of Truecharge2 Battery Chargers. 4.The charger can initiate charging a non-damaged but zero voltage battery. - Page 14 Introduction • electronic current limiting provides protection against short circuit The optional Battery Temperature Sensor (BTS) provides these protection conditions on the charger’s output, features: • ignition-protected rating, enabling installation in engine spaces, • battery under-temperature charging protection preventing battery •...
-
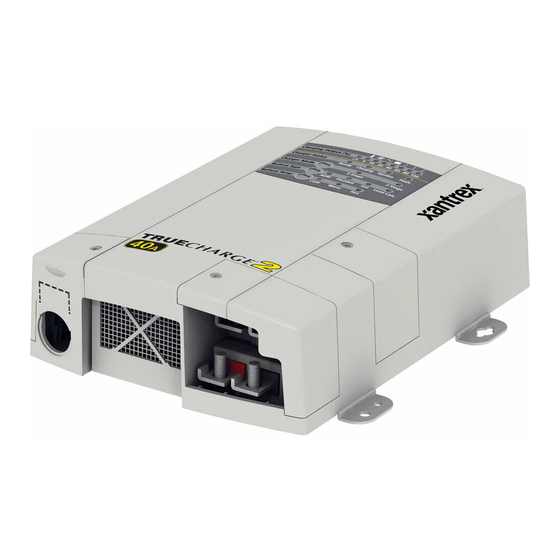
Page 15: Truecharge 2 Battery Charger Features
Truecharge 2 Battery Charger Features This section describes the different parts of the Truecharge2 Battery Charger. Item Description Onboard control and status display panel or simply Front Panel onboard display (see “Onboard Control and Status Display Panel” on page 5 for more information) for controlling the Truecharge2 Battery Charger settings and for monitoring charger status and charging current. -
Page 16: Rear Panel
Truecharge 2 Battery Charger Features Item Description Item Description AC wiring compartment cover provides the installer with BTS port- battery temperature sensor port easy access to the AC wiring compartment, to allow for a Communication port - remote panel port trouble free installation. -
Page 17: Onboard Control And Status Display Panel
Truecharge 2 Battery Charger Features Onboard Control and Status Display Panel To reduce current draw from the connected battery when AC power is not present, the panel’s LED control and status lights are automatically turned This section describes the parts of the onboard control and status display off and the buttons are disabled. - Page 18 Flooded - Lead-acid battery; default setting • GEL - Gel-type lead-acid battery • Lead Calc. - Lead-calcium battery • Custom - Only available if a custom algorithm has been programmed by Xantrex or a designated OEM. Truecharge2 Series Battery Charger Owner’s Guide...
- Page 19 Truecharge 2 Battery Charger Features Item Description Item Description Battery Temp. Select button • Cold - for battery temperature below 5 °C (41 °F); raises • Press and hold the button for three seconds to select one of the charging voltage to compensate continued three settings.
-
Page 20: Preparing For Installation
Preparing For Installation NOTE: Not to scale. For illustration purposes only. IMPROPER INSTALLATION BY AN UNQUALIFIED INSTALLER The battery charger must be installed by a qualified installer in accordance with all applicable local or national installation codes. Examples of such codes are the US National Electrical Code (NFPA 70), the American Boat &... -
Page 21: Tools And Materials
Preparing For Installation You need the following materials: DC positive cables • 3 conductor AC input wiring DC circuit breakers or DC fused disconnects Use the information in “Step 4: Installing AC Wiring” on page 21 and Battery or battery bank your local electrical codes to determine the correct wire and breaker or Battery Temp. - Page 22 Avoid excessive cable Condition Requirement lengths and use the recommended wire sizes. Xantrex recommends installing with cables sized to achieve less The Truecharge2 Battery Charger must be installed in a than 3% voltage drop on battery cables under full load.
- Page 23 Preparing For Installation panel covers are attached and secured. This rating means that it meets standards to prevent dripping water from entering the enclosure, and causing shock hazard and damage to equipment. The other possible mounting orientations [shown in Figure 6 (c) and (d)] Deck Mount - this orientation will not prevent the entry of dripping water, and are not suitable for marine meets IP-32 requirements and is...
-
Page 24: Wiring Requirements
Preparing For Installation Wiring Requirements Vertical Wall Mount (Rear panel facing down or up) - this orientation is allowed in locations that are ELECTRICAL SHOCK AND FIRE HAZARD always dry but is Do not operate the battery charger with damaged or substandard wiring. approved for marine Make sure that all wiring is in good condition and is not undersized. - Page 25 Preparing For Installation DC Wiring Table 2 DC Wiring Examples for 24 V chargers The following tables show some typical wire sizes for various cable length Wire Length Wire Size (AWG and mm runs, based on 3% voltage drop on DC cables, 75 °C (167 °F) rated wire max length one way with wiring being inside the engine compartment –...
- Page 26 Preparing For Installation current and be rated to withstand the short circuit current available from the AC Wiring connected battery bank. Do not substitute devices rated only for AC voltage; they may not operate properly. The current rating of the DC fuses must be correctly matched to the size of the DC wiring used, in accordance with the applicable codes.
-
Page 27: Battery Bank Size Requirements
Preparing For Installation Note that every jurisdiction will have different requirements as will each Battery Bank Size Requirements application, so research the regulations for your local jurisdiction to determine which wire size and type is correct based on the maximum AC The Truecharge2 Battery Charger is designed to work with a minimum input current marked on the chargers and given in “AC Input battery bank size. -
Page 28: Installing The Truecharge 2 Battery Charger
6 cm (2.5 in.) of clearance on either sides (see Figure 7, Installation Sequence “Ventilation Clearance” on page 12). To make charger installation quick and easy, Xantrex recommends that the Drill the four pilot holes for the mounting screws, taking care that installation tasks be performed in the following sequence: there is nothing behind the surface that can be damaged by the drill. - Page 29 Connections to the battery charger must comply with all local and application-specific codes and ordinances. Xantrex recommends that you install a DC chassis ground (earth) wire from the ground stud on the Truecharge2 Battery Charger to the engine bus or DC ground bus.
- Page 30 Installing the Truecharge 2 Battery Charger Install a DC circuit breaker or fused disconnect in each positive cable Step 3: Installing DC Wiring that is as close to the battery positive terminal as possible. Consult your local electrical codes regarding the distance allowed The procedure for installing the DC wiring applies to a single battery, as between the battery and the fuse or breaker.
- Page 31 Installing the Truecharge 2 Battery Charger Install crimp lugs on the charger end of the DC battery cables using the For one battery or bank crimp manufacturer’s instructions and tool. ◆ Connect the negative cable from the negative terminal on the battery to the negative DC terminal on the Truecharge2 Battery Charger.
- Page 32 Installing the Truecharge 2 Battery Charger NOTE: If you are using more than one battery, you will need to connect the negative cable from each of the batteries to the negative ground bar or bus. The negative ground bar or bus will then have a single negative cable connecting to the negative charger terminal.
- Page 33 Installing the Truecharge 2 Battery Charger Step 4: Installing AC Wiring Before connecting AC wiring, make sure the AC source circuit is protected Unscrew the wiring compartment cover from the left rear of the by a breaker switch of the correct size and type, to comply with the Truecharge2 Battery Charger to expose the AC wiring access hole and electrical code for your location and application.
- Page 34 Installing the Truecharge 2 Battery Charger Feed the AC supply wiring through the wider end of strain relief and To connect AC wires with the provided crimp-on butt-splice connector: out the tapered end. Make the connections using the provided crimp-on connectors or with other approved connectors required by your code, and tapered end suitable for your installation.
- Page 35 Installing the Truecharge 2 Battery Charger Insert one wire into one end of the butt-splice, until the insulation screw to secure the hits the internal metal crimp section, insert the butt-splice into the wiring compartment crimper , and crimp firmly. The proper location for the crimp is cover approximately 1.6 mm (1/16 in.) past where the butt-splice insu- lation tapers down as shown.
- Page 36 Installing the Truecharge 2 Battery Charger Step 5: Powering Up Make one last check that all connections are correct and secure. The Truecharge2 Battery Charger charger may now be powered up. Close the DC disconnect switch or breaker. EXPLOSION AND/OR FIRE HAZARD The final connection of the DC battery circuit will generate an arc.
-
Page 37: Installing A Parallel Configuration
Installing a Parallel Configuration A parallel configuration is when two Truecharge2 Battery Chargers are Installing a parallel configuration: coupled together to increase the output capacity. For example, a 40-amp Follow the installation sequence (from steps 1 through 4) for a single Truecharge2 Battery Charger can be connected with another 40-amp unit - “Installing the Truecharge 2 Battery Charger”... - Page 38 Installing a Parallel Configuration Fault and Warning Conditions Powering up after installing a parallel configuration: • When one charger encounters a fault condition, the other charger Follow the procedures in “Step 5: Powering Up” on page 24. remains charging but the remote panel will stop synchronizing the two Observe that the Parallel LED on the remote panel lights up to indicate chargers’...
-
Page 39: Installing Batteries
Installing Batteries Battery installation should always be treated like a brand new installation. Reconnect the battery cables to the new battery. This means, that all safety and precautionary guidelines that were followed NOTE: For Negative chassis systems, reconnect the positive cable first, prior and during the installation of the battery charger, must again be then the negative cable. - Page 40 Installing Batteries Multi-Stage Charging Remote panel NOTE: Not to scale. For illustration purposes only. (optional) Most Truecharge2 Battery Charger models have three outputs that share the full rated current enabling it to charge three different batteries or battery AC source banks that either have the same chemistry or can tolerate the same charge sequence and thresholds.
- Page 41 Installing Batteries Three-Stage Charging The three-stage charging mode employs the following sequence: Bulk, Vbat = Vabs lout < 10% lrating for 1 minute for 1 minute Absorption, and Float. During the Bulk stage the batteries are accepting a Battery Voltage Vbat = Vgas Vbat <...
- Page 42 Installing Batteries Two-Stage Charging Vbat = Vabs lout < 10% lrating for 1 minute for 1 minute The two-stage charging mode employs the following sequence: Bulk and Battery Voltage Vbat = Vgas Absorption. It runs similar to the three-stage sequence except that there is for 1 minute no float stage;...
-
Page 43: Temperature Considerations
(Volts) Flooded 28.8 27.0 32.0 Temperature Considerations 28.4 27.6 not applicable Xantrex strongly recommends that you purchase and install the optional 28.6 26.8 not applicable Battery Temperature Sensor (BTS) to protect your battery and improve Lead-Calcium 31.0 27.0 32.0 charging accuracy. Attach the BTS to the warmest battery. - Page 44 Installing Batteries Setting the Battery Temperature without a BTS NOTE: Cold is for battery temperature below 5 °C (41 °F). Warm (default setting) is for battery temperature between 5 and 30 °C (41 and 86 °F). Hot is for battery temperature above 30 °C (86 °F). See RISK OF BATTERY DAMAGE Table 7, “Battery Temperature Compensation Levels”...
- Page 45 Installing Batteries Operating DC Loads When the Truecharge™ 2 Battery Charger is operating, DC loads such as fans and lights may vary in speed or intensity. This is normal. The Truecharge™ 2 Battery Charger will not harm any load connected to it as long as the load can withstand the following maximum voltages: •...
-
Page 46: Configuring The Truecharge2 Battery Charger
Flooded (default), GEL, Lead Calc., AGM, and Custom. The Custom setting is indicated when all four battery type LEDs are illuminated. This setting should only be used if a custom algorithm has been programmed by Xantrex or a designated OEM. Truecharge2 Series Battery Charger Owner’s Guide... -
Page 47: Charging Batteries
Charging Batteries Before you start to charge batteries read the “Important Safety Instructions” The charger can be in one of eight different situations which will be on page iv and follow all safety precautions when working with batteries. indicated on the onboard display in the Charger Status LEDs: To charge your batteries: Mode Charger Status LED—ON... - Page 48 Charging Batteries After charging is complete, the Truecharge2 Battery Charger enters into one of these modes: Float mode When the ready and charging indicator LEDs both illuminate, all batteries are fully charged and ready for use. If you selected the three-stage charging mode, the Truecharge2 Battery Charger is in float mode and will maintain the batteries’...
-
Page 49: Equalizing Flooded Batteries
Use the correct settings for your battery types. Xantrex recommends that you run a complete normal charge cycle on the Failure to follow these instructions can damage the unit and/or batteries before you equalize them. -
Page 50: Performing An Equalization
Equalizing Flooded Batteries NOTE: If battery acid contacts skin or clothing, wash immediately with soap Performing An Equalization and water. If acid enters your eye, immediately flood it with running cold water for at least twenty minutes and get medical attention immediately. To equalize your batteries: RISK OF EQUIPMENT DAMAGE •... - Page 51 Equalizing Flooded Batteries Press and hold for five seconds the Charger Mode Select button and Battery Temp Select button at the same time to put the Truecharge2 Battery Charger into equalization mode. IMPORTANT: The onboard display and remote panel buttons will not allow selection of equalization for AGM and GEL batteries.
-
Page 52: Transitioning The Charger To On, Standby, Or Disabled
Transitioning the Charger to ON, Standby, or Disabled There are two ways to turn ON the Truecharge2 Battery Charger: • Connect the batteries to the charger (i.e., charger is on standby) then connect AC power at the source. If the batteries are not fully charged ELECTRICAL SHOCK HAZARD then charging begins immediately. -
Page 53: Accessing Charger Information
Accessing Charger Information The Truecharge2 Battery Charger provides a lot of information about the status of the charger and the batteries. Type of fault and warning Charging Output (%) LEDs Charging Output (%) Reading Onboard Display LEDs Charging Output (%) values <5 5 10 20 40 60 80 100 Fault LED... - Page 54 Accessing Charger Information To interrupt or cease the charging process, disconnect the AC power source Reporting Without AC Power or While on from the charger. If you have the optional remote panel, you can put the Standby charger in Standby mode by pressing the button to interrupt STANDBY the charging process.
- Page 55 Accessing Charger Information Table 9 Interpreting Fault and Warning Indicators Fault or Warning Solution Temp Battery Fuse Charger Remote Fault Condition AC input out of range • Check AC connections. Change to a more stable AC fault (<85 V or >265 V) power source and check that the voltage and voltage frequency are within acceptable operating range.
- Page 56 Accessing Charger Information Table 9 Interpreting Fault and Warning Indicators Fault or Warning Solution Temp Battery Fuse Charger Remote Fault Condition Low Battery Temp fault • Check the batteries. Do not charge a frozen battery. (< -25°C) Charging a frozen battery may present a risk of explosion.
- Page 57 • Disconnect AC and DC sources before replacing the fuse(s) on the charger. See “Replacing the DC Output Fuse” on page 48. Internal fault • Call Xantrex for support. Flashing LED Solid LED 975-0526-01-02...
-
Page 58: Using A Generator As Source Power
Using A Generator As Source Power The Truecharge2 Battery Charger can be run from a regular AC power source or from an alternate power source such as a generator. Refer to “AC Input Specifications” on page 54 for AC input current draw to determine the size of generator you need. -
Page 59: Maintaining The Charger
Maintaining the Charger Periodically, disconnect all AC and DC sources and check all DC and AC wiring connections to be sure they have not loosened or deteriorated. Also check all cable clamps to ensure they are tightly fastened. ELECTRICAL SHOCK HAZARD Loose battery terminals and lugs exposed to open air corrode rapidly. -
Page 60: Replacing The Dc Output Fuse
IMPROPER INSTALLATION BY AN UNQUALIFIED INSTALLER See “Fuse Replacement Ratings” on page 49. Xantrex recommends that the installer should have knowledge and Replace the fuse cover making sure that it aligns and fits perfectly, experience in installing electrical equipment, knowledge of the applicable... - Page 61 Replacing the DC Output Fuse Fuse Replacement Ratings RISK OF EQUIPMENT DAMAGE ® For continued protection, replace only with Littelfuse type 257 (or equivalent) with ratings as shown below. Failure to follow these instructions can damage the unit and/or damage other equipment. Amperage Voltage Model...
-
Page 62: Troubleshooting
Troubleshooting In the event that you have a problem with your Truecharge2 Battery Charger, the following tables will help you to identify the problem and offer possible solutions to the problem. Symptom Symptom Indicator LEDs do not illuminate when charger is connected to an AC The initial power up display test is not performed upon connection of power source. - Page 63 Troubleshooting Symptom Symptom Fault indicator LED illuminates. Temp and Battery indicator Truecharge2 Battery Charger completes a charging cycle, but the battery LEDs flash. voltage seems too low. Possible Cause Solution Battery has a shorted cell. Disconnect AC to the charger and EXPLOSION HAZARD check the battery voltage approximately Never charge a frozen battery.
- Page 64 Troubleshooting Symptom Symptom The Truecharge2 Battery Charger appears to be taking too long to charge The Truecharge2 Battery Charger appears to have quickly charged the battery. Ready indicator LED does not illuminate after 24 hours of battery. Ready indicator LED illuminates sooner than expected. charging.
- Page 65 Troubleshooting Symptom The Truecharge2 Battery Charger will not perform equalization. Possible Cause Solution Battery is the wrong type, or set Determine if the battery type is set to to the wrong type to equalize. GEL or AGM. These battery types cannot be equalized.
-
Page 66: Specifications
Specifications NOTE: Specifications are subject to change without prior notice. AC Input Specifications Physical Specifications AC input voltage range Base Unit Dimensions: L × W × H Nominal: 120 Vac, 230 Vac, 240 Vac TC2012, TC4012 250×170×70 mm (9.84×6.70×2.76 in.) Full Performance: 104 –... - Page 67 Specifications DC Output Specifications DC Output Specifications Number of isolated battery 3 separated outputs Normal operating output bank outputs range 12-volt units: 0 – 16 Vdc DC output voltage range 24-volt units: 0 – 32 Vdc including dead battery charging voltage 12-volt units: 0 –...
- Page 68 Specifications DC Output Specifications DC Output Specifications Float voltage: Voltage regulation Uncompensated load voltage 12-volt units 24-volt units regulation 25 °C (77 °F) 25 °C (77 °F) < 0.1Vdc drop from 0 Amps to rated Flooded 13.5 ±0.1 27.0 ±0.2 current output at charger output 13.8 ±0.1 27.6 ±0.2...
- Page 69 Specifications Protection Features Protection Features Battery reverse polarity Protected by replaceable DC output Battery under-temperature Charger shuts down if battery fuses protection temperature below –25 °C (–13 °F) is sensed by the battery temperature Over-voltage limits The Truecharge2 Battery Charger will sensor (BTS).
-
Page 70: Warranty And Return Information
Xantrex maintains a network of regional Authorized Service Centers. Call through inspection establishes the existence of such a defect and that it is Xantrex or check our website to see if your product can be repaired at one covered by this Limited Warranty. - Page 71 Xantrex product specifications including but not limited to high input voltage from generators and lightning strikes; the product if repairs have been done to it other than by Xantrex or its authorized service centers (hereafter “ASCs”); the product if it is used as a component part of a product expressly warranted by another manufacturer;...
- Page 72 NOT APPLY TO YOU IMITED ARRANTY GIVES YOU SPECIFIC LEGAL RIGHTS OPERATION OF THE PRODUCT BY PERSONS NOT AUTHORIZED BY XANTREX OU MAY HAVE OTHER RIGHTS WHICH MAY VARY FROM STATE TO STATE PROVINCE TO PROVINCE OR JURISDICTION TO JURISDICTION...
-
Page 73: Return Material Authorization Policy
Warranty and Return Information Ship the unit prepaid to the address provided by your Xantrex customer Return Material Authorization Policy service representative. If you are returning a product from outside of the USA or For those products that are not being repaired in the field and are being... -
Page 74: Information About Your System
Warranty and Return Information If you need to contact Customer Service, please record the following details Information About Your System before calling. This information will help our representatives give you better service. As soon as you open your Truecharge2 Series Battery Charger package, record the following information and be sure to keep your proof of ❐... - Page 76 Xantrex Technology USA Inc. 1 800 670 0707 Tel 1 800 994 7828 Fax www.xantrex.com 975-0526-01-02 Printed in China.
Need help?
Do you have a question about the truecharge 2 series and is the answer not in the manual?
Questions and answers