
Related Manuals for turbofan E33T C-Store


Summary of Contents for turbofan E33T C-Store
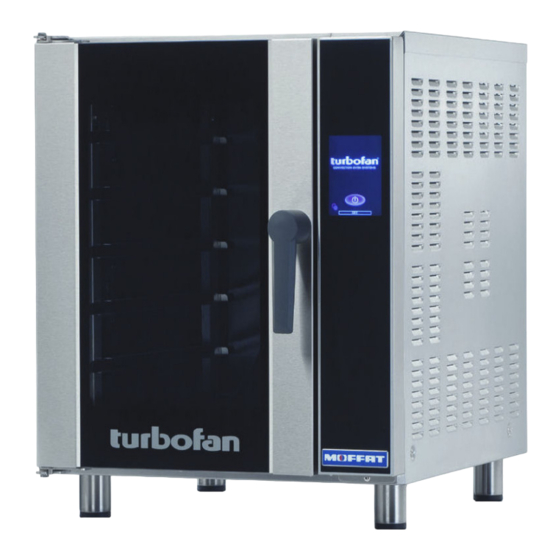
- Page 1 30TSERIES E 3 3 T C - S t o r e C o n v e c t i o n O v e n I n s t a l l a t i o n a n d O p e r a t i o n M a n u a l 238681-1...
- Page 2 Telephone 03-389 1007 Facsimile 03-389 1276 sales@moffat.co.nz Designed and manufactured by ISO9001 All Turbofan products are designed and manufactured by Moffat using the internationally recognised ISO9001 quality management system, covering design, manufacture and final inspection, Ensuring consistent high quality at all times.
- Page 3 Contents List E33T Turbofan Convection Oven. E33T C-Store Convection Oven Introduction ..........................3 Safety Information Specifications ..........................4 Installation ..........................5 Installation Requirements Unpacking Location Clearances Stand Mounted Ovens Electrical Connection Water Connection Recommended Water Specifications Positioning and Levelling of Oven...
-
Page 4: Cleaning And Maintenance
Cleaning and Maintenance ..................... 18 Cleaning Guidelines Oven Cleaning Periodic Maintenance Electrical Schematics ......................20 Electrical Schematic E33T C-Store (High Speed Option - 2 Speed Fan Motor) Electrical Schematic E33T C-Store (Standard 2 Speed Fan Motor) Replacement Parts List ......................22... -
Page 5: Introduction
TURBOFAN dealer promptly. In many cases a phone call could answer your question. Should you contact your TURBOFAN dealer on any matter concern- Service Provider: ing this oven, please have the information provided opposite, readily available. -
Page 6: Specifications
Specifications E33T USA / Canada Other Markets Oven Power Ratings 208V, 60Hz, 5.4kW. 220V, 50Hz or 60Hz, 6.0kW. 220 - 240V, 60Hz, 6.0kW. 230 - 240V, 50Hz or 60Hz, 6.0kW. 5 Shelf - 13” x 18” Bun Pan. 5 Shelf, 1/1 GN Pan. Tray Capacity 12”... -
Page 7: Installation
It is most important that this oven is installed correctly and that oven operation is correct before use. If you have any questions regarding the proper installation and / or operation of this oven, please contact your local Turbofan distributor. Unpacking Clearances... -
Page 8: Electrical Connection
Installation Electrical Connection Positioning and Levelling of Oven Correctly locate the oven into its final operating position and using a spirit level, adjust the oven feet so that the oven is Warning level and at the correct height. HIS OVEN MUST BE EARTHED GROUNDED Initial Start-Up Each oven should be connected to an adequately protected power... -
Page 9: Operation - Oven Mode
Operation - Oven Mode Oven Mode 1. CONTROL OFF Press key to turn control ON. 2. CONTROL ON Press to show HELP screen. (All screens) Press to turn oven light On/Off. Press OVEN to start using oven. Press to cool down oven. Press to turn OFF controller. - Page 10 Operation - Oven Mode 5. SELECT PRODUCT SELECT product from list. Press scroll bar to scroll up/down recipes. Alarm will sound when oven is ready to load. Part Oven Load Full Oven Load 6. LOAD TRAY(S) LOAD TRAY(S) to selected shelf or shelves. Always select empty shelves nearest top of oven first.
-
Page 11: Manager Mode - Recipe Programming
Manager Mode - Recipe Programming Entering Recipe Programming Press to show HELP screen. 1. ENTER MANAGER MODE Press MANAGER to enter Manager Mode. 2. ENTER PASSCODE ENTER passcode (4500). Press to confirm. Press to cancel. Press to show HELP screen. 3. ENTER RECIPE PROGRAMMING Press to exit. - Page 12 Manager Mode - Recipe Programming Press to show HELP screen. 5. RECIPE NAMING Press to return to previous screen. In the Edit Recipe screen. Press recipe name to edit name. Edit / add recipe name using keypad. Press to confirm. Press to cancel.
- Page 13 Manager Mode - Recipe Programming Press to show HELP screen. 7. RECIPE CATEGORY Press to return to previous screen. Press Select Categories in Edit Recipe screen. Choose a category and press add a recipe to a category. Press to create a new Category. NOTE: Recipes can be added to more than Press and the Category to be deleted,...
- Page 14 Manager Mode - Recipe Programming Press to show HELP screen. 9. SET RECIPE TIME AND TEMP Press to return to previous screen. Press to enter recipe settings Press to set stage temperature Press to set stage time. Press to select fan speed. Press to set time to count Down. Press to set FLEX time to No.
-
Page 15: Manager Mode - Settings
Manager Mode - Settings Selecting Manager Mode Press to show HELP screen. 1. CONTROL ON Select MANAGER. 2. ENTER PASSCODE ENTER Passcode (4500). Press to confirm. Press to cancel. Press to show HELP screen. 3. MANAGER SCREEN #1 Press to exit MANAGER screens. Press to select . - Page 16 Manager Mode - Settings Press to show HELP screen. 4. MANAGER SCREEN #2 Press to exit MANAGER screens. Press to adjust. Press to turn On / Off. Press to turn On / Off. Press to enable / disable key press beep. Press for next / previous MANAGER screen.
-
Page 17: Enter Passcode
Manager Mode - Settings Press to show HELP screen. HANGE ASSCODE CREEN Press to return to previous screen. Press to change passcode. Press , numeric key pad will display. Enter passcode. Press , numeric key pad will display. Verify passcode. Press to confirm. -
Page 18: Real Time Setting
Manager Mode - Settings Press to show HELP screen. 7. MANAGER SCREEN #5 Press to exit MANAGER screens. Press to enter / Press to change from AM to PM. change real time settings. Press to enter / change date settings. Press to enter Press for next / previous Language selection. - Page 19 Manager Mode - Settings Press to show HELP screen. 8. MANAGER SCREEN #6 Press to exit MANAGER screens. CALIBRATE OUCH CREEN Press to Re-Calibrate the Touch Screen. NOTE; This should only be done if the touch positions on the screen become difficult to operate. Press for previous MANAGER screen.
-
Page 20: Cleaning And Maintenance
Cleaning and Maintenance Cleaning Guidelines Side Racks Removal Right Rack / Fan Baffle Lift up and unhook RH side rack from locating pegs Caution on RH side of oven. The fan baffle is an integral part of the RH Side Rack. Always turn electrical... - Page 21 Cleaning and Maintenance Side Racks Re-Fitting Oven Lamp Remove the LH side rack as shown previously. Right Rack Align the bottom of the rack with the 2 brackets in the bottom RH side of the oven. RH Lower Mounting Brackets Wash the glass lens with a soft sponge using warm water and a detergent solution.
-
Page 22: Periodic Maintenance
Cleaning and Maintenance Door Seal Door Glass Cleaning To remove the door seal, pull the 1 piece seal Ensure that the oven door is cool before forward until it pulls out of the location groove cleaning the oven door glass. around the oven. -
Page 23: Electrical Schematics
Electrical Schematics Electrical Schematic E33T C-Store - (High Speed Option - 2 Speed Fan Motor). - Page 24 Electrical Schematics Electrical Schematic E33T C-Store - (Standard 2 Speed fan Motor).
-
Page 25: Replacement Parts List
For further information and servicing instructions, contact your nearest authorized service provider or Turbofan Dealer. When ordering replacement parts, please quote the part number and the description as listed below. If the part required is not listed below, request the part by description and quote model number and serial number which is shown on the Technical Data Plate. - Page 26 Replacement Parts List Replacement Parts List (Cont.d) Item Description 235615 Oven Seal - E33T. 236203 Door Outer Glass Assembly E33. Door Hinge Kit ( includes Door Hinge Set Bottom, Door Hinge Set Top, Door Hinge Pivot Pin, 237167 Pivot Bush, Washer M8 Nord-Lock, Gaskets and Screws). 234752 Hinge Pivot Kit (Includes Door Hinge Pivot Pin, Pivot Bush, Washer M8 Nord-Lock).
Need help?
Do you have a question about the E33T C-Store and is the answer not in the manual?
Questions and answers