
Related Manuals for turbofan H Series


Summary of Contents for turbofan H Series
- Page 1 H 8 T - U C / H 8 T - F S - U C / H 1 0 T / H 1 0 T - F S S e r i e s H o t H o l d i n g C a b i n e t s ( T o u c h S c r e e n O p e r a t i o n ) I n s t a l l a t i o n a n d O p e r a t i o n M a n u a l 240225-5...
- Page 2 Moffat Limited Rolleston 7675 New Zealand AUSTRALIA Moffat Pty Limited Web: www.moffat.com.au E.Mail: vsales@moffat.com.au Main Office: (tel) +61 (03) 9518 3888 (fax) +61 (03) 9518 3838 Service: (tel): 1800 622 216 Spares: (tel): 1800 337 963 Customer Service: (tel): 1800 335 315 (fax): 1800 350 281 CANADA Serve Canada...
-
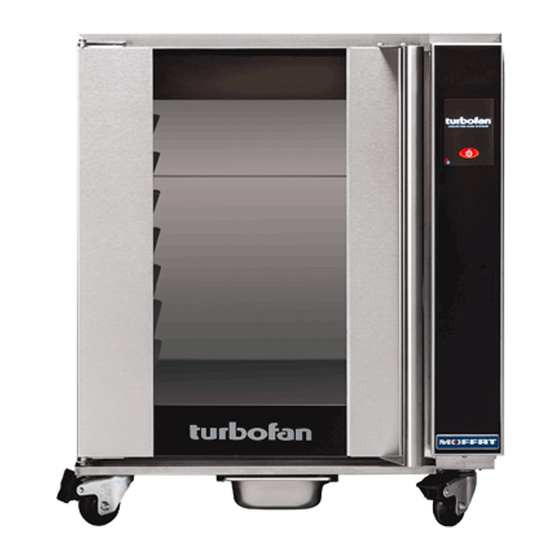
Page 3: Control On
H 8 T - U C / H 8 T - F S - U C / H 1 0 T / H 1 0 T - F S S e r i e s H8T-UC - Turbofan Hot Holding Cabinet - Under Counter, 8 x 1/1 GN / 8 x US Half Size Trays. H8T-FS-UC - Turbofan Hot Holding Cabinet - Under Counter, 8 x US Full Size Trays. -
Page 4: Table Of Contents
Contents List Selecting Manager Mode Control ON Enter Passcode Manager Screen #1 Set Hold Temperature Hold Programming Pre-Heat Option Copy Hold Timers To / From USB Manager Screen #2 Piezo/Buzzer Volume Adjustment Cook Done Beeper On/Off Setting Ready Beeper On/Off Setting Keypress Feedback Enable/Disable Manager Screen #3 Manager Passcode Protection - Enable/Disable... - Page 5 Holding Cabinet, contact your TURBOFAN dealer promptly. In many cases a phone call could answer your question. Should you contact your TURBOFAN dealer on any matter concerning this Holding Cabinet, please have the information provided opposite, readily available.
- Page 6 Specifications 230V-240V, 50HZ, 1P+N+E, 2.05kW. Tray Size; Qty 8, 18” x 26” US Full Size Pans. Tray Spacing 74mm / 2 ”. 208V-240V, 60HZ, 1P+N+E, 2.05kW 220V-240V, 50HZ, 1P+N+E, 2.05kW 220V-240V, 60HZ, 1P+N+E, 2.05 kW 81kgs (179lbs) (Ex cluding Baking Trays).
- Page 7 Specifications 230V-240V, 50HZ, 1P+N+E, 1.3kW. Tray Size; Qty 8, 12” x 20” 1/1 GN Steam Pans. Qty 8, US Half Size Sheet Pans. 110V-120V, 60HZ, 1P+N+E, 1.3kW Tray Spacing 74mm / 2 ”. 220V-240V, 50HZ, 1P+N+E, 1.3kW 220V-240V, 60HZ, 1P+N+E, 1.3kW 65kgs (143lbs) (Ex cluding Baking Trays).
- Page 8 Specifications Tray Size; Qty 10, 12” x 20” 1/1 GN Steam Pans. 230V-240V, 50HZ, 1P+N+E, 1.3kW. Qty 10, US Half Size Sheet Pans. 110V-120V, 60HZ, 1P+N+E, 1.3kW Tray Spacing 74mm / 2 ”. 220V-240V, 50HZ, 1P+N+E, 1.3kW 220V-240V, 60HZ, 1P+N+E, 1.3kW 77.5kgs (171lbs) (Ex cluding Baking Trays).
- Page 9 Specifications 230V-240V, 50HZ, 1P+N+E, 2.05kW. Tray Size; Qty 10, 18” x 26” US Full Size Pans. Tray Spacing 74mm / 2 ”. 208V-240V, 60HZ, 1P+N+E, 2.05kW. 220V-240V, 50HZ, 1P+N+E, 2.05kW. 220V-240V, 60HZ, 1P+N+E, 2.05kW. 88kgs (194lbs) (Ex cluding Baking Trays).
- Page 10 It is most important that this Holding Cabinet is installed correctly and that Holding Cabinet operation is correct before use. If you have any questions regarding proper installation and / or operation of this Holding Cabinet, please contact your local Turbofan distributor. • Remove all packing. ...
- Page 11 Operation - Crew Mode Press key to turn control ON. Press to show HELP screen. (All screens) Press CREW to start using Holding Cabinet. Press to turn lights On/Off. Press to cool down Cabinet. Press to turn OFF controller. Press to show HELP screen.
- Page 12 Operation - Crew Mode Press Scroll Bar to scroll up / down through recipes Select Product from list. When shelves are green, Product Available. Shelves selected will show in Green. When shelves are green; Shelf timer counts down the pre-set Hold Time. Press shelf for 2 seconds to cancel, in case of incorrect shelf selection.
-
Page 13: Enter Passcode
Manager Mode - Settings Press to show HELP screen. Select MANAGER. ENTER Passcode (4500). Press to confirm. Press to cancel. Press to show HELP screen. Press to exit MANAGER screens. Press , to enter Hold Mode settings. Press for next MANAGER screen. The following screen will appear on the display. -
Page 14: Hold Programming
Manager Mode - Settings ROGRAMMING Press to show HELP screen. Press to return to previous screen. On the Hold Settings Screen, press to enter Hold Programming. Select recipe to edit. Press name to edit and enter new recipe name on the Keypad. MAGE Press and from the Image Library... -
Page 15: Pre-Heat Option
Manager Mode - Settings PTIONS Press to show HELP screen. Press to exit. On ‘Manager Screen 1, press to enter the ‘Configure Pre-Heat Screen. The following ‘Configure Preheat’ screen will appear. Press to return to previous Press and enter the Pre-Heat temperature screen. - Page 16 Manager Mode - Settings Press to show HELP screen. Press to exit MANAGER screens. Press to adjust volum e Up / Dow n. Press to turn DON E beep On / Off. Press to turn R EADY beep On / Off. Press to enable / disable key press beep.
-
Page 17: Change Passcode
Manager Mode - Settings Press to show HELP screen. HANGE ASSCODE CREEN Press to return to previous screen. Press to enter new Passcode, num eric key pad will display. Verify new passcode. Press to confirm. Press to cancel. UTOSTART CREEN Press to show HELP screen. - Page 18 Manager Mode - Settings Press to show HELP screen. Press to exit MANAGER screens. Press to enter / change real tim e settings. Press to change from AM to PM. Press to enter / change real date settings. Press to enter Language selection. Press to change Tem perature Unit settings, °C / °F.
- Page 19 Manager Mode - Settings Press to show HELP screen. Press to exit MANAGER screens. Press to enter Touch Screen Re-Calibrate mode. Press for previous MANAGER screen.
- Page 20 Cleaning and Maintenance Side Racks 1. Lift up and remove side racks for cleaning. 2. Clean racks with a mild anti bacterial detergent and hot water solution, using a soft bristled brush. 3. Dry racks thoroughly with a dry cloth and polish with a soft dry cloth.
- Page 21 Fault Finding You may encounter a problem not covered in this section, please This section provides a reference to the more common problems contact your service provider who will require the following that may occur during the operation of your Hot Holding Cabinet. information:- This fault finding guide is intended to help you correct, or at least accurately diagnose problems with your Hot Holding Cabinet.
- Page 22 Electrical Schematic...
- Page 23 For further information and servicing instructions, contact your nearest authorized service provider or Turbofan Dealer. When ordering replacement parts, please quote part number and description as listed below. If part required is not listed, request part by description and quote model number and serial number which is shown on Technical Data Plate.
Need help?
Do you have a question about the H Series and is the answer not in the manual?
Questions and answers