
Subscribe to Our Youtube Channel
Related Manuals for SecurityMan NiteCam2


Summary of Contents for SecurityMan NiteCam2
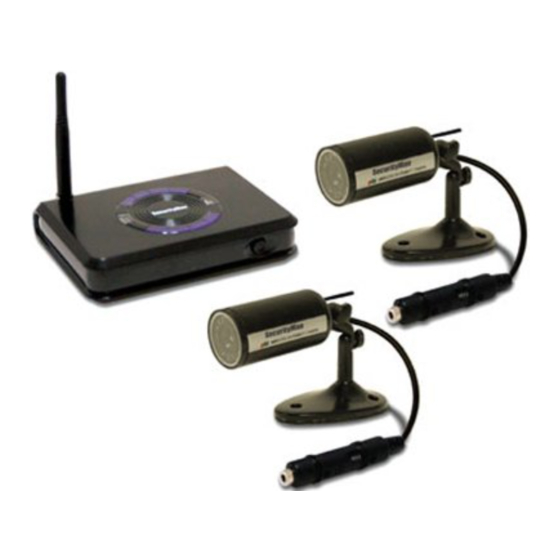
- Page 1 SecurityMan ® NiteCam2 2.4GHz Wireless Outdoor/Indoor Bullet Color Cameras(2) Kit w/Night Vision & Audio...
- Page 2 The content of this manual is furnished for informational use only, is subject to change without notice, and should not be construed as a commitment by SecurityMan. SecurityMan assumes no responsibility or liability for any errors or inaccuracies that may appear in this book.
- Page 3 Limitation of liability The liability of SecurityMan arising from this warranty and sale shall be limited to a refund of the purchase price. In no event shall SecurityMan be liable for costs of procurement of substitute products or services, or for any lost profits, or for any consequential, incidental, direct or indirect damages, however caused and on any theory of liability, arising from this warranty and sale.
- Page 4 1 feet away from any heart pacemaker. Radio waves might potentially influence heart pacemaker and lead to respiratory disturbance. DO NOT use this product for any illegal activities. SecurityMan shall not be responsible for any consequences of illegal conducts by users...
- Page 5 Conditions Please read the following messages to make sure whether your working envi- ronment is suitable. • Ensure there is enough space around the receiver for ventilation. • The temperature should be kept between -20°C and 50°C (-4°F-122°F). The relative humidity should remain from 20% to 80%. •...
-
Page 6: Table Of Contents
CONTENTS Introduction Package Contents Technical Support NiteCam2 Features Installation Diagram Product Basics Installation & Setup Camera Installation Camera Channel Setup Night Vision Receiver Mode Setup Channel set Channel-scan set Specifications Troubleshooting... -
Page 7: Introduction
Introduction Thank you for purchasing the NiteCam2 2.4GHz wireless indoor/outdoor bullet color camera kit with night vision and audio. It consists of two vivid CMOS color camera with night vision (B/W) and audio, and a compact 4-channel receiver with sharp 380 TV lines picture display output. The camera converts video and... -
Page 8: Nitecam2 Features
NiteCam2 Features • Perfect for monitoring around your home or business • Wireless video direct to TV, VCR, or DVR • 380TV lines sharp picture display • Built-in IR LEDs for night vision (up to 23ft) • Weather-proof design for outdoor use •... -
Page 9: Product Basics
Product Basics Camera Receiver... -
Page 10: Installation & Setup
Installation & Setup Connect the adapter (DC 8V 300mA) to the camera. Power Outlet Set the camera to desired channel. Connect the antenna to the receiver. - Page 11 Connect the receiver to a monitor/TV with AV cable (yellow for video and red audio). Turn on the monitor/TV and select AV mode. Connect the power jack of adapter (DC 7.5V 300mA) to receiver. Press the Power ON/OFF button and the channel indicator lights up green.
- Page 12 Press the Channel Select Button “CH” on the receiver until the channel indicator matches to the channel on the corresponding camera, and monitor/TV will display pictures. Adjust the brightness, contrast and color of the monitor/TV for the perfect effect.
-
Page 13: Camera Installation
Camera Installation 1. Locate where you would like to install the camera Please follow the steps below to install the camera to a wall or ceiling. 1.1 Secure the three screw anchors into wall (or ceiling) to match the hole pattern in the camera bracket 1.2 Align holes in the camera bracket and the anchors, and secure the camera on the wall with three screws 2. -
Page 14: Camera Channel Setup
Note: If camera is being installed on to the ceiling, it is recommended to remove the angle bar and connect the universal bracket with the camera directly. Angle bar Camera Channel Setup This camera has 4 selectable channels to avoid possible interference from other nearby wireless devices. -
Page 15: Night Vision
Night Vision The built-in Infra-red lights in camera provide 7m night vision range for 24hrs surveillance. The Infra-red lights will be automatically activated at night or in dark places. The picture will turn Black & White (monochrome) in Night Vision mode. Receiver Mode Setup The receiver can support up to 4 cameras working at the same time. -
Page 16: Channel Set
Channel Set You can confirm which channel is set to receive signal from correspond- ing camera. With this function, you could set the unused channels to OFF, so that they will be skipped during the Manual mode or Channel Scan mode. Channel-scan Set... - Page 17 1. Manual mode: Slide Mode Control switch to M to enter Manual mode. In this mode, the receiver channel won’t change until you press the Channel Select Button “CH” Tip: Channel-Scan function can also be activated by pressing and holding the Channel Select Button "CH"...
-
Page 18: Specifications
Specifications of Camera (SM-202T) Image Sensor 1/4-inch CMOS CMOS Total Pixels 510 X 492 (NTSC) View Angle 45-50° Minimum Illumination 3 Lux/F2.0 & 0Lux (IR ON) Gain Control Automatic Frequency ISM 2400~2483 MHz 4CH (Auto-loop/Manual) Transmission Power 10mW/CE; 2mW/FCC Modulation ModeBandwidth Power Supply 18MHzDC +8V 300mA Consumption Current... -
Page 19: Troubleshooting
Troubleshooting Abnormal Phenomena Possible Reasons/Solutions *Check the camera / receiver connected to power supplies, and power on. *Check if the channel of receiver is corresponding to camera; *Check the distance and blocks. *Interfered by other sources; *Check the distance and blocks. *Interfered with other devices nearby;... - Page 20 www.securitymaninc.com...
Need help?
Do you have a question about the NiteCam2 and is the answer not in the manual?
Questions and answers