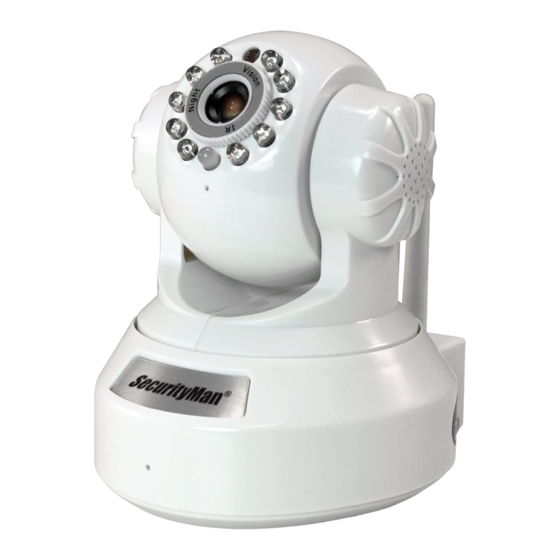
SecurityMan IPCAM-SD Quick Start Manual
Wifi security camera for smartphone, tablet, and computer
Hide thumbs
Also See for IPCAM-SD:
- Specifications (2 pages) ,
- User manual (151 pages) ,
- User manual (147 pages)
Advertisement
Quick Links
Download this manual
See also:
User Manual
IPcam-SD Quick Start Guide
WiFi Security Camera for Smartphone, Tablet, and Computer
Step 1: Hardware Installation
1.
Wireless antenna: Attach the wireless antenna (included) to the ANT
port located at the back of the IPcam-SD.
2.
Ethernet cable: Plug the Ethernet cable (included) into the network
port of the IPcam-SD and then plug the other end of the Ethernet
cable into your router's network port.
3.
AC adapter: Plug one end of power adapter (5VDC, 2000mA,
included) into the power socket of the IPCam-SD and then plug the
other end of the AC adapter into an electric power outlet.
Network Port
Antenna Mount
Microphone
Step 2: Software Installation
1.
Insert the Installation CD into the CD-ROM drive, and double click the
"Open folder to view files" option from the the AutoPlay window.
2.
Next, double-click on the "CMS_V3.0.9.14.T.20130410.exe" file to
start the software installation process as shown above.
NOTE: Please note that software revision may change without
noticed.
3.
The CMS (Central Management Software) Setup screen will
appear as shown below. Select "Yes" in the User Account Control
window and then click "Next" to continue or "Cancel" to cancel the
installation.
Micro SD Slot
Speaker
Alarm In/Out
Power Socket
1
4.
Input the user name and company name. Then click "Next" to continue
as illustrated above.
5.
The default Install CMS directory is C:\Program Files\CMS, click
"Change" to select a different destination folder, or click "Next" to
continue (recommended).
6.
The default shortcut icon folder is CMS. Click the drop-down menu
for more selections, or click "Next" to start installing the CMS to your
computer (recommended) as illustrated above.
7.
Click "Next" in the Ready to Install window and then click "Finish" to
complete the CMS software installation as shown below.
8.
After the installation is complete, a "CMS" short-cut icon will
automatically be created on your desktop as shown above. Double-
click on the "CMS" icon to open the CMS software for IPcam-SD.
Step 3: IP Address Setup (CMS)
1.
Double-click on the "CMS" short-cut icon on your desktop. Select
"English" or other languages and then click "OK" to advanced to
"Device list is empty, please add device..." prompt. Next, input the
User Name and Password at the login window as illustrated below.
The default User Name is "super" and the default Password is empty.
Click the "Login" button to login to CMS. A "Device list is empty, add
your..." window will appear as shown below, click on "OK" to continue.
NOTE: The default User Name is "super", password leave blank.
2
Advertisement

Summary of Contents for SecurityMan IPCAM-SD
- Page 1 Ethernet cable: Plug the Ethernet cable (included) into the network as illustrated above. port of the IPcam-SD and then plug the other end of the Ethernet The default Install CMS directory is C:\Program Files\CMS, click cable into your router’s network port.
- Page 2 “Default Gateway” to what you wrote down on Step 7. The final step is to assign an IP address to the IPcam-SD. There are 4 sets of numbers in an IP address. The first three sets have to be the same...
-
Page 3: Step 4: Wifi Setup
Step 4: WiFi Setup NOTE: IPCam-SD and computer must be connected to same router via Ethernet cables to setup. Double click on your device name (Fig. 4.1). should change to if connect successful. Click on to expand selection (Fig. 4.2). - Page 4 URL to register for a user name and a password or select connect “By Device”. Connect “By Device” requires the Serial ID number of the IPCam-SD which is located in the IPCam Config/Info/Version of the CMS CMS Remote Access (Intranet) In the main CMS screen, double-click on the IP address, and then software.
- Page 5 Next, click on “My Devices” in the upper left corner of the screen then double- IE Browser Remote Access click on the device name in blue and then click “OK” to login to the IPcam-SD. Open the IE Browser, in this demonstration we are using IE 9.0.
- Page 6 List screen. For example, if you are using the app to remotely monitor 2 x IPcam-SD (one at home and one at work), the device name for the first camera could be “HOME” and the second camera could be “WORK”.
- Page 7 *Not applicable with IPcam-SD model. Lets you adjust the light level. Aperture adjustment *Not applicable with IPcam-SD model. Lets you adjust the light level. Aperture adjustment *Not applicable with IPcam-SD model. NOTE: For Android and other SmartPhones please reference the IPcam-SD user’s manual.


Need help?
Do you have a question about the IPCAM-SD and is the answer not in the manual?
Questions and answers