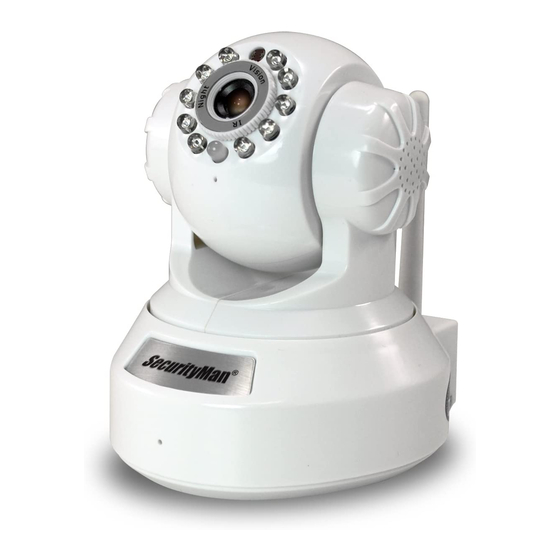
SecurityMan IPcam-SD User Manual
Wifi security camera for smartphone, tablet, and computer
Hide thumbs
Also See for IPcam-SD:
- Specifications (2 pages) ,
- Quick start manual (7 pages) ,
- User manual (147 pages)
Table of Contents
Advertisement
Quick Links
Advertisement
Table of Contents

Related Manuals for SecurityMan IPcam-SD


Summary of Contents for SecurityMan IPcam-SD
- Page 1 IPcam-SD User’s Manual WiFi Security Camera for Smartphone, Tablet, and Computer...
- Page 2 Limitation of Liability The liability of SecurityMan Inc, arising from this warranty and sale shall be limited to a refund of the purchase price. In no event shall SecurityMan be liable for costs of procurement of substitute products or services, or for any lost profits, or for any consequential, incidental, direct or indirect damages, however caused and on any theory of liability, arising from this warranty and sale.
-
Page 3: Table Of Contents
Table of Contents Introduction Features Important Restrictions Conditions Package contents Product Basics Camera Setup Software (CMS) Installation IPcam-SD IP Adress Setup CMS Quick Connect (Intranet) CMS Graphic User Interface Menu Area PTZ Control Color SYSTEM PC Config Base Config Log Maintenance... - Page 4 Domain Cloud Edit Device Add Device Example How to Add the IPcam-SD to the CMS Modify Delete Import Config Export Config Connection Test IPCam Config Device List Sub-Menu Icons Main Menu Icons REC/Playback Video Snapshot Alarm Video Motion Video Blind...
-
Page 5: Introduction
Introduction Stay connected wherever you go with the SecurityMan IPcam-SD. You can remotely access your IPcam-SD from anywhere in the world; monitor your home or business through a secure and password protected connection from your PC, Mac, iPhone, iPad, iPod Touch, or any compatible Smartphone. Simply connect the IPcam-SD... - Page 6 PROHIBITED by law. This device should be used only in compliance with all applicable federal, state and local statutes. • DO NOT attempt to move the pan/tilt functions of the IPcam-SD by hand as this may result in damage to the internal motors.
- Page 7 Conditions Please read the following messages to make sure your working environment is suitable. • Please read the following messages to make sure your working environment is suitable. • The temperature should be kept between –10˚C and 50˚C (14˚F to 122˚F). The relative humidity should be kept between 20% and 80%.
-
Page 8: Package Contents
Package Contents IPcam-SD Antenna 2 x IP cameras (IPcam-SDX2) 2 x Antennas (IPcam-SDX2) Ceiling/Wall mount bracket Power adapter (with screws) 2 x Power adapters (IPcam-SDX2) 2 x Mounting bracket (IPcam-SDX2, screws) I/O terminal CD (PC software and (1 IN, 1 OUT) -
Page 9: Product Basics
NOTE: The reset button located at the bottom of the camera is used to reset the IPcam-SD to its original “factory default” settings. To apply, power up your camera then press and hold-in the reset button using a small non-pointed/non-metallic... -
Page 10: Camera Setup
IPcam-SD and the other end into a power outlet. NOTE: The IPcam-SD will perform a 30 second self test every time it is powered up. This test will include the head rotating in a range of motions before coming to a stop. - Page 11 1. Insert the Installation CD into the CD-ROM drive, and double click the “Open folder to view files” option from the the AutoPlay window. 2. Next, double-click on the “CMS_V3.0.9.14.T.20130410.exe” file to start the software installation process as shown above. NOTE: Please note that software revision may change with noticed.
- Page 12 “please add a device”. Click OK to proceed. 8. After the installation is complete, a “CMS” short-cut icon will automatically be created on your desktop as shown above. Double-click on the “CMS” icon to open the CMS software for IPcam-SD.
-
Page 13: Ipcam-Sd Ip Adress Setup
In “Add/Remove IPCam” window, click on “ADD AREA” to open the “Zone” window as illustrated above. The “zone” could be the location where the IPcam-SD camera is installed, example Office, Warehouse, etc. In “Zone” window, please enter a zone name, and then click “OK” to confirm and go back to the Add/Remove IPCam window. - Page 14 “Default Gateway” to what you wrote down on Step 7. The final step is to assign an IP address to the IPcam-SD. There are 4 sets of numbers in an IP address. The first three sets have to be the same as “Default Gateway” and then assign the 4th set of numbers between 100~200 (for example 189) as illustrated below.
-
Page 15: Cms Quick Connect (Intranet)
“Add/Remove IPCam” window. Click “OK” again to go back to main CMS window. NOTE: Repeat Steps 2 ~ 9 to setup IPCam-SD wireless connection. Be sure to select the Wifi IP address in step 9 to complete Wifi setup. - Page 16 To record video files to your computer, click “System”, and then click “PC Config”. In “PC Config” window under “Base Config”, the default directory are C:\ Program Files\CMS\Record(Picture) folders, click “Browse” to choose a different destination folder. Next, select the “Record Setting” and make sure “Overwrite”...
-
Page 17: Cms Graphic User Interface
J. Menu Area A. Device Display Area The DEVICE DISPLAY AREA lists all the devices (IPcam-SD’s) that are accessible through the CMS software. Device display area can be added through the “Add/ Remove IPCam” under System in the menu area. - Page 18 1, the operation log window will display a message showing the event type, date/time, IP address, user and the channel number when an event occurs. G. Time The TIME section on the CMS interface displays the IPcam-SD’s current date and time. H. Local Disk Status The LOCAL DISK STATUS area represents the total amount of disk space available and remaining on the local computer.
-
Page 19: Menu Area
The MENU AREA is located at the bottom right corner of the CMS interface and is designed to give you quick access to the most commonly used features such as PTZ Controls, Color Adjustment, IPcam-SD and CMS configuration and Playback. The menu area consists of the following:... -
Page 20: Ptz Control
5). Set to 8 to navigate at a higher rate when panning or tilting the IP camera set to 1 to slowly navigate when panning or tilting the IP camera. C. Pan The PAN feature Enables/Disables the IPcam-SD’s “Auto Pan” (full left-to-right movement) feature. - Page 21 This will save you from manually changing the position of the camera. To add a preset point, first move the IPcam-SD to the desired location, choose the Preset number, and click the “+” to add it or use the “-“...
-
Page 22: Color
The COLOR menu consists of settings that will allow you to control the picture quality of your IPcam-SD. To access the color control menu simply click on the “Color” option from the CMS interface screen located on the bottom right hand corner of the screen. -
Page 23: System
B. IPCam/CMS Account – used to manage CMS users and rights. C. Local Log – used to view CMS event logs. D. Add/Remove IPCam – used to add/remove cameras to/from the CMS. E. IPCam Config – used to configure your IPcam-SD’s settings and parameters. -
Page 24: Pc Config
These categories are: A. Base Config – CMS recording configuration. B. Alarm Setting – CMS alarm configuration. C. Record Settings – Allows you to program the IPcam-SD to record on specific days and times. D. Version Info – Displays detailed device information. -
Page 25: Base Config
CMS software will record and operate. These categories are: A. Log Maintenance – IPcam-SD alarm log configuration. B. Snapshot – snapshot file path and format settings. C. Local Record – event (recording) file path configuration. -
Page 26: Log Maintenance
• • • LOG MAINTENANCE The LOG MAINTENANCE area located on the Basic Config tab consists of 3 settings that are used to configure the CMS log parameters. These settings are: SAVE ALARM LOG (DAY) The SAVE ALARM LOG (DAY) feature allows you to specify how long of an alarm log the CMS should keep before removing its contents. -
Page 27: Snapshot
• • • SNAPSHOT The SNAPSHOT area located on the Basic Config tab consists of 2 settings that are used to configure the CMS snapshot parameters. These settings are: PICTURE DIRECTORY The PICTURE DIRECTORY feature allows you to specify the location (on your computer) that you would like to store the snapshots that are taken. -
Page 28: Local Record
• • • LOCAL RECORD The LOCAL RECORD area located on the Basic Config tab consists of a record directory feature that allows you to specify the location on your computer where you want to store recorded events to. RECORD DIRECTORY The RECORD DIRECTORY feature allows you to specify the location (on your computer) that you would like to store the recorded events. -
Page 29: Device
Enabling the AUTOMATICALLY EXPAND CHANNEL AFTER CONNECTED feature allows the CMS software to automatically expand the Add/Remove IPCam list if you have more than 2 IPcam-SD listed in the same zone, the default setting is unchecked. SINGLE-SCREEN MAIN-STREAM, MULTI-SCREEN EXTRA STREAM... -
Page 30: Sync Time With Pc
• • • SYNC TIME WITH PC The SYNC TIME WITH PC option area located on the Base Config tab allows you to specify how often the CMS should update its date/time by synchronizing with your computer date and time. The options available are: Never (default) Every Wed Everyday... -
Page 31: Start Up
• • • START UP The START UP area located on the Basic Config tab consists of 7 settings that are used to configure the actions to be taken every time both the computer and the CMS are initiated. These settings are: Language Automatic Lock Screen Run On Start Up... - Page 32 RUN ON START UP The RUN ON STAR TUP feature allows the CMS to automatically run whenever the computer is turned on or restarted. If this option failed, please exit out from CMS and then right mouse click on the CMS short-cut and then select “Run as administrator”.
-
Page 33: Alarm Setting
• • ALARM SETTING The “Alarm Setting” tab located in the PC Config settings consists of 4 Alarm related tabs that will let you configure how the CMS software will record and operate when an alarm event is triggered. These tabs are: A. -
Page 34: I/O Trigger
I/O events occur. These settings are: A. Device List – used to select which device you want to configure. B. Camera Mapping – camera-to-I/O mapping. Map the IPcam-SD (right side) to the Alarm Input Mapping (left side) by selecting CAM1 and “Add”. - Page 35 DEVICE LIST The DEVICE LIST displays all the devices (IPcam-SD) that are configurable by the CMS and currently established connection. ALARM ENABLE The ALARM ENABLE (system default) check box enables “I/O Trigger” options for the selected camera or unchecked to disable local PC alarm notification.
-
Page 37: Video Motion
• • • VIDEO MOTION The VIDEO MOTION tab located on the Alarm Setting tab consists of 6 settings that are used to configure how the CMS will operate whenever Motion Detection events occur. These settings are: A. Device List – used to select which device you want to configure. B. - Page 38 DEVICE LIST The DEVICE LIST displays all the devices (IPcam-SD) that are configurable by the CMS and currently established connection. VIDEO MOTION ENABLE The VIDEO MOTION ENABLE check box enables “Motion Detection” options for the selected camera. NOTE: None of the motion detection options will be available (grayed out) if the Video Motion Enable box is un-checked (disabled).
-
Page 39: Video Blind
• • • VIDEO BLIND The VIDEO BLIND tab located on the Alarm Setting tab consists of 4 settings that are used to configure how the CMS will operate whenever the cameras image is interrupted/blocked (blind). These settings are: A. Device List – used to select which device you want to configure. B. - Page 40 DEVICE LIST The DEVICE LIST displays all the devices (IPcam-SD) that are configurable by the CMS and currently established connection. VIDEO BLIND ENABLE The VIDEO BLIND ENABLE check box enables “Video Blind” options for the selected camera. NOTE: None of the video blind options will be available (grayed out) if the Video Blind Enable box is un-checked (disabled).
-
Page 41: Device Disconnect
“X” located at the top right corner of the screen exit. DEVICE LIST The DEVICE LIST displays all the devices (IPcam-SD) that are configurable by the CMS and currently established connection. ALARM SOUND... -
Page 42: Record Setting
SOUND FILE PATH The SOUND FILE PATH feature allows you to specify the location (on your computer) of the audible alert tone that you would like to be played whenever an event is triggered. To use this feature, simply click on the BROWSE button located to the right of the current destination description to make your selection. -
Page 43: Basic Settings
NOTE: Supports external attached storage device and network drives. Alarm Event only records video footages, it does not record snapshots/pictures. • • • DEVICE LIST The DEVICE LIST displays all the devices (IPcam-SD) that are configurable by the CMS and currently established connection. • • • SCHEDULE TYPE SELECTOR The SCHEDULE TYPE SELECTOR is used to send the plan (schedule) template from the plan template area to the selected day of the week. -
Page 44: Plan Template Window
6 different recording periods and 3 different recording types (per period) for each day of the week. By doing this, you can create templates that will allow you manipulate when the IPcam-SD should record and the type of recording that should be implemented during the set schedule (Regular, Detect, Alarm), thus saving space and the amount of unwanted recordings that would be generated during a 24hr manual recording implementation. - Page 45 EDIT TEMPLATE The EDIT TEMPLATE button located on the Record Setting tab lets you edit any of the pre-configured plan templates and even create a new one based on your requirements. To begin, click on the “Edit Template” button using your mouse to bring up the “PLAN TEMPLATE SCREEN”...
-
Page 46: Plan Template Window
PLAN TEMPLATE SCREEN The “PLAN TEMPLATE SCREEN” consists of 9 options/settings that will allow you to edit, create and delete plan templates as needed. These options/settings are: A. Name – plan name edit/input box. B. Period – start and end time parameters. C. -
Page 47: Plan Template Window
NAME The NAME EDIT box allows you to create/edit the current plans name tag. For example if you wanted to rename “AllDay” to “Continuous” (for 24hr recording) you would highlight the “AlDay” plan name from the Plan Template Window, click in the NAME EDIT box to edit the name tag and then click the MODIFY button to make the change. -
Page 48: Schedule View
MODIFY The MODIFY button allows you to modify an existing plan template. For example if you wanted to rename “AllDay” to “Continuous” (for 24hr recording) you would highlight the “AlDay” plan name from the Plan Template Window, click in the NAME EDIT box to edit the name tag and then click the MODIFY button to make the change. -
Page 49: Ipcam/Cms Account
• IPCAM/CMS ACCOUNT The IPCAM/CMS Account option consists of 2 tabs that will allow you to create, modify or delete users and their permissions. Please note that only the users with “CMS Account” rights can add, create or modify these settings. The 2 tabs located on the CMS Account window are: NOTE: The IP Cam/CMS Account settings only pertain to users who are able to access and use the CMS software only “not IPCam users”. -
Page 50: Group
• • GROUP The “Group” tab located in the CMS Account settings consists of 4 categories/options that will let you create user groups with specific rights/ privileges that can be applied to newly created users. These options are: A. Group List – displays all the groups available. B. -
Page 51: Add Group
• • • ADD GROUP The ADD GROUP button allows you to create a new user group based on what you want users who are assigned to a specific group to do. For example, you can create a group called “Monitoring” and only enable the options available under Monitor (in the group rights section) if you want to allow users to only be able to “Monitor/View”... - Page 52 Right List Local Log Monitor IPCam/CMS Account Playback Add/Remove IPCam Record Setting PC Config IPCam Config NOTE: You can enable a specific right/privilege to all cameras that are connected to the CMS by checking the box located to the left of the rights label (Monitor, Playback etc) or you can apply the right to specific cameras by clicking on the “+”...
-
Page 53: User
• • USER The “User” tab located in the CMS Account settings consists of 4 categories/ options that will let you create, delete and modify CMS user accounts. These options are: A. User Account Window – displays all CMS users. B. - Page 54 • • • DELETE USER The DELETE USER button allows you delete any of the user accounts that are no longer needed. To delete, simply highlight the user account and then click on the “Delete User” button. Press OK button to confirm or CANCEL to cancel. NOTE:The “Super”...
-
Page 55: Local Log
• LOCAL LOG The Local Log is a feature that allows you to view important events that have occurred over time and also allows you to search for a specific event in a specified date/time range. The screen consists of the following search parameters: A. -
Page 56: Log Type
Please keep in mind that the options available change based on the event group reelected. These options include: ALARM I/O Trigger Video Motion Video Loss (N/A to IPcam-SD) Intelligent Analysis (N/A to IPcam-SD) Video Blind Disk Error Disk Full OPERATION... -
Page 57: Search
• • SEARCH The SEARCH option initiates the search. Once selected, the CMS will begin its event search based on the parameters that you have selected and display the information in the detail screen. To begin the search, simply move the mouse cursor over to the SEARCH button and click it when you are ready. -
Page 58: Add/Remove Ipcam
The Add/Remove IPCam screen consists of 8 options that will allow you to add or remove IPCam-SD units to and from the CMS. These options are: 1. Area List – displays all the cameras that have been added to the CMS. - Page 59 • • ADD AREA The ADD AREA option will allow you to join your IPcam-SD cameras into groups to help keep your security system organized. For example you can create a group called “HOME” and add child groups called downstairs (for all cameras monitoring the 1st floor of a home) and one called upstairs (for all cameras monitoring the 2nd floor of a home).
-
Page 60: Add Device
A. Device List – displays all devices found in the local area network. B. IP Search – initiates the “find device” feature. C. Device Name – allows you to manually name your IPcam-SD. D. Login Type – used to specify the cameras login protocol. -
Page 61: Device List
Edit Device/Add Device. • • • DEVICE NAME The DEVICE NAME edit box allows you to give your IPcam-SD a name that is visible though out the CMS. If left alone the CMS will automatically use the cameras IP address as the name. -
Page 62: Zone
• • • ZONE The ZONE edit box lets you specify the zone that the IPcam-SD will belong to. NOTE: The zone will automatically be chosen based on the zone selected prior to clicking on the “Add Device” option. • • • DOMAIN The DOMAIN edit box allows you to manually input the Domain name you’ve... -
Page 63: Add Device
The ADD DEVICE option adds the selected/configured device to your CMS “Area List”. • • • EXAMPLE HOW TO ADD THE IPCAM-SD TO THE CMS The first thing you need to do is create a group. Highlight “Zone List” (in the device list area) and click on the “ADD AREA”... - Page 64 Next, make sure your IPcam-SD is connected to your network and turned on. Select the area you created (HOME) and click on the “ADD DEVICE” option to bring up the “EDIT” window as shown.
- Page 65 Click on the “IP Search” button so that the CMS can search for your camera and display it in the “device list window” as shown in the image below. NOTE: The default IP address given to the IPcam-SD when connected via the Ethernet cable (wired) is 192.168.1.10 and 192.168.1.11 when connected over a wireless network (WiFi).
- Page 66 Click OK to close the EDIT window and click ok once more to close the Add/Remove IP Camera window as illustrated.
- Page 67 The CONNECTION TEST option allows you to test your network setting and network connection to the IPcam-SD to see if it is normal or abnormal state. To test, simply highlight a desired IPcam-SD profile name and then click on the...
-
Page 68: Ipcam Config
IPcam-SD will operate as a “standalone” unit. The “IPCam Config” section will allow you to configure and change settings that are specifically related to how the IPcam-SD will operate and be controlled. The IPCam Config section consists of the following sections: 1. -
Page 69: Device List
• • DEVICE LIST The DEVICE LIST area displays all the IPcam-SD’s that can be configured through the CMS. NOTE: You will be prompted to select a device from the device list in order to view the IPCam Config options. -
Page 70: Main Menu Icons
The MAIN MENU ICONS area displays all the menu options that are available in configuring your IPcam-SD. These options include: 1. Record/Playback – Used to set up the IPcam-SD’s video and photo recording parameters. 2. Alarm – Used to set up the IPcam-SD’s alarm parameters. - Page 71 • • • RECORD/PLAYBACK The RECORD/PLAYBACK menu located in the IPCam Config settings allows you to configure the IPcam-SD’s video and snapshot recording parameters and consists of the following 2 sub-menus: 1. Video – Video recording configuration. 2. Snapshot – Photo snapshot configuration.
-
Page 72: Video
• • • • VIDEO The VIDEO sub-menu located in the “Record” menu option consists of 9 settings that are used to configure the IPcam-SD’s video recording features. These settings are: A. Channel – used to select which camera you want to configure. - Page 73 By doing this, you can create schedules that will allow you manipulate when the IPcam-SD should start and stop record thus saving space and the amount of unwanted video footage that would be generated during a 24hr manual recording implementation.
-
Page 74: Snapshot
• • • • SNAPSHOT The SNAPSHOT sub-menu located in the “Record” menu option consists of 9 settings that are used to configure the IPcam-SD’s photo snapshot features. These settings are: A. Channel – used to select which camera you want to configure. - Page 75 PRESNAP The PRESNAP option is used to specify the amount of photos that you want the IPcam-SD to take when an event (motion detection, video blind, and alarm input) occurs. NOTE: The maximum number of snapshots per event is is 30. Please limit this number to under 5 photos, any number set higher can create more traffic in your network.
-
Page 76: Alarm
• • • ALARM The ALARM menu located in the IPcam Config settings allows you to configure the IPcam-SD’s event based recording parameters and consists of the following 6 sub-menus: 1. Video Motion – Motion detection configuration. 2. Video Blind – Video blind configuration. -
Page 77: Video Motion
C. Sensitivity (drop down) – used to adjust the motion detection sensitivity level. D. Schedule – used to setup a recording schedule. E. Action Area – used to control what the IPcam-SD should do when an event occurs. F. PTZ Activation – enables motion activated tour and preset movement. - Page 78 • Record Channel – enables video recording to save to the MicroSD card of the IPcam-SD. • Snapshot - enables photo snapshots to save to the MicroSD card of the IPcam-SD.. PTZ ACTIVATION The PTZ ACTIVAION button lets you select the tour/preset that you would like to use when ever motion has been detected.
- Page 79 Netservice/FTP. INTERVAL The INTERVAL is the time frame to dictate when the IPcam-SD should start recording whenever motion is detected. For example, if motion is detected at 5:00:00 pm and you have the interval set to 15 seconds, the actual recording will not take place until 5:00:15 pm.
-
Page 80: Video Blind
• • • •VIDEO BLIND The VIDEO BLIND sub-menu located in the “Alarm” menu option consists of 13 settings that are used to configure how the IPcam-SD will respond when the its lens has become obstructed (blind). These settings are: A. - Page 81 • Record Channel – enables video recording to save to the MicroSD card of the IPcam-SD. • Snapshot - enables photo snapshots to save to the MicroSD card of the IPcam-SD. PTZ ACTIVATION The PTZ ACTIVAION button lets you select the tour/preset that you would like to use whenever a blind event has occurred.
- Page 82 DELAY The DELAY (post-record) time frame lets you dictate how much longer the IPcam-SD should keep recording after its default 10 second (per blind event) recording has expired. For example, if a blind event occurs at 5:00:00 pm and you have the delay time set to 15 seconds, the actual recording will not stop until 5:00:35 pm (10 second default + 15 second delay).
-
Page 83: Alarm Inpu
• • • • ALARM INPUT The ALARM INPUT sub-menu located in the “Alarm” menu option consists of 12 settings that are used to configure how the IPcam-SD will respond when the cameras alarm input port triggered. These settings are: A. - Page 84 • Record Channel – enables video recording to save to the MicroSD card of the IPcam-SD. • Snapshot - enables photo snapshots to save to the MicroSD card of the IPcam-SD. PTZ ACTIVATION The PTZ ACTIVAION button lets you select the tour/preset that you would like to use whenever an alarm input occurs.
-
Page 85: Alarm Output
INTERVAL The INTERVAL is the time frame to dictate when the IPcam-SD should start recording whenever an alarm input event occurs. For example, if an event occurs at 5:00:00 pm and you have the interval set to 15 seconds, the actual recording will not take place until 5:00:15 pm. - Page 86 5VDC only. Using other output devices that has higher power rating or self powered output devices may not be supported. The ON check box enables the IPCam-SD alarm output device to be active or stay on 24/7. This option will not be related the the alarm input setting.
- Page 87 “Less Than %” option. • SD Card Un-Readable – sends an alert when the IPcam-SD cannot read the SD card. • IP Conflict – sends an alert when the IPcam-SD’s IP address comes into conflict with another device.
- Page 88 • • • SYSTEM The SYSTEM menu located in the IPCam Config settings allows you to configure the IPcam-SD’s basic system parameters (which should be configured prior to using the camera) and consists of the following 5 sub-menus: 1. General – Time/Date configuration.
-
Page 89: General
America, PAL for European counties, please check your local listing for video standards used. H. DST - used to enable and configure the IPcam-SD for daylight savings. I. Refresh – restores any changes made. J. OK – saves the changes. - Page 90 • 24-HOUR LANGUAGE The LANGUAGE drop down lets you change the language of the IPcam-SD’s menu. It is important that you stay away from making changes unless you are really sure that you want to change the language. Having the menus in a foreign language can make it difficult to navigate through the options to try and get back the right one.
- Page 91 • PAL - Phase Altering Line (PAL) is the common format in European nations By default the IPcam-SD is set to NTSC which is the standard for North America. To chance the STANDARD to PAL (European), move your cursor over to the drop down arrow and left click it to display the options available.
-
Page 92: Encode
• • • •ENCODE The ENCODE sub-menu located in the “System” menu option consists of 15 basic settings that will allow you to adjust the IPcam-SD’s video quality settings. These settings include: NOTE: You can make changes to both “Extra Stream” and “Main Stream” individually. - Page 93 30fps and the default for extra stream is set at 15fps. BIT RATE TYPE The IPcam-SD supports two bit-rate types: CBR and VBR. CBR stands for Constant Bit Rate which means the DVR will always use the bit rate (Kb/S) setup under the Bit Rate setting below as priority to sustained the transmission speed and quality.
- Page 94 The BIT RATE option will play a huge factor on the live feed when viewing the IPcam-SD remotely over the internet. The higher the BIT RATE setting the better quality of video you will see, however if you have a slow internet connection and set the BIT RATE to a higher setting than the connection can handle the feed will become sluggish.
-
Page 95: Network
A. Net Card – used to select the type of network you want to configure (wired, Wifi, PPPoE) B. IP Address – IPcam-SD’s identification number that lets it be found over the Internet. C. Subnet Mask – used to input your networks Subnet Mask. - Page 96 The IP ADDRESS edit box allows you to manually input the IP address that you have assigned for the IPcam-SD according to your local area network. If you are unsure please check with your ISP (Internet Service Provider) to help to assign an IP address for you (recommended) or copy from one of your local area network computer.
- Page 97 The GATEWAY edit box allows you to manually input the GATEWAY address that the IPcam-SD will be using to access the network. To obtain the gateway go to the computer that is on your local area network. Go to the command prompt;...
- Page 98 • Fluency Preferred – select this option if you preferred the IPcam-SD as priority and consider quality second when remote accessing the IPcam-SD. • Network Priority – select this option if you preferred to have your network flow as priority over the video quality when remote accessing the IPcam-SD.
-
Page 99: Net Service
• • • •NET SERVICE The NET SERVICE sub-menu located in the “System” menu option consists of 12 settings related to many of the Net Services available in the IPcam-Sd. Double click on any of the services available to bring up its corresponding configuration window. - Page 100 The IP FILTER service allows you create a list of specific IP Address’s that are white listed (allowed) or black listed (disallowed) from accessing the IPcam-SD remotely. Double click on this option to bring up its corresponding configuration window as shown below. Make sure to check Enable box, select between black/white list, input the IP address to privilege and click Add.
- Page 101 When an event occurs, the system will send you alert email with attached snapshot of the IPcam-SD images. To set up an email alert feature; check the Enable box, put in your email SMTP server (ie. smtp.1and1.com), mail server port number (ie.
- Page 102 NOTE: Please check with your email provider for proper smtp server, port, user name and password of your email account informations. The NTP option allows configuration to update and automatically synchronize the date and time using network time protocol in your local area networking. To set up NTP, place a check mark to enable, input the server IP name/IP, the server port number, initial time zone, and how periodically you want NTP to update the date/time in minute.
- Page 103 Point-to-Point remote access service to work without having to open ports from your router. See IPcam-SD quick start guide for additional information on Point-to-Point remote access. Click OK to confirm set up or click CANCEL to cancel.
- Page 104 Player such as real time player, VLC player, and etc can be used to live steam and monitor the IPcam-SD after this service is set up. Make sure that “RTP over RTSP (TCP)” is selected under preferences/options>Inputs/Codecs sections of the players before streaming.
- Page 105 For example: open VLC in this example and choose Media>Open Network Steam...> as shown below. In the Network Steam window, input “rtsp://192.168.248.91:34569/user=admin &password=&channel=1&stream=0.sdp?” * rtsp:// [starting command used in VLC player] * 192.168.248.91 [IP address assigned to the IP camera] * :34569 [port number designated for real time player streaming.
-
Page 106: Gui Display
The CANCEL button discards any changes made and exits back to the previous screen. • • • •GUI DISPLAY The GUI DISPLAY sub-menu located in the “System” menu option consists of 14 basic settings related to the IPcam-SD’s live view display. These settings include:... - Page 107 NOTE: The maximum alphabets and numbers can be up to 20 characters long. ANTI JITTER The ANTI JITTER feature enables/disables the IPcam-SD’s anti flicker option helps stabilize or prevent the shaking of the camera lens when the camera pan and tilt. The system default setting is enable (checked), to disable (unchecked) anti jitter option.
- Page 108 MIRROR IMAGE The MIRROR IMAGE option allows you to reverse the image from left to right and right to left as if you are looking into a reverse mirror image. FLIP IMAGE The FLIP IMAGE option allows you to flip the camera image up side down. This option is used whenever the IP camera is installed to a ceiling.
-
Page 109: Advanced
• • • ADVANCED The ADVANCED menu located in the IPcam Config settings allows you to configure the IPcam-SD’s advanced features such as SD card management, auto maintenance controls, etc. These options include: 1. SD Card Manage – SD card management. -
Page 110: Sd Card Manage
F. Cancel – exits the menu without saving the changes. DISPLAY WINDOW The DISPLAY WINDOW displays all the current partitions and types that are currently on the SD card being used in the IPcam-SD. The display windows consists of Index, Disk, Event, Status, and partitions information. READ/WRITE The READ/WRITE option is used to convert the selected partition/drive into a read/write partition. - Page 111 SNAPSHOT The SNAPSHOT option is used to convert the selected partition into a snapshot partition. A snapshot partition is required for the IPcam-SD to take and store snapshot pictures when an event occurs. To set up a Snapshot partition, simply highlight the partition and then click on the Snapshot button and follow through with the conversion.
-
Page 112: Read/Write, Snapshot, Format Disk, Partition
C. Modify Group – used to modify group rights.. D. Modify PW – used to modify the selected users password. E. Add User – used to add users to the IPcam-SD’s user account list. F. Add Group – used to create new user groups. - Page 113 DISPLAY WINDOW The DISPLAY WINDOW displays all the active user accounts that you had created. The “admin” and “guest” accounts are pre-generated by the system. MODIFY USER The MODIFY USER option is used to modify previously created users. Once selected, a “Modify User” pop up screen will be displayed (as shown below) which will allow you to modify the users rights and group.
- Page 114 MODIFY PW. The MODIFY PW. option is used to modify previously created user passwords. Once selected, a “Modify PW.” pop up screen will be displayed(as shown below) which will allow you to modify the password. Please elect the user name you want to modify, type in the old password, type in the new password, and confirm the new password, click OK to accept or CANCEL to cancel.
- Page 115 ADD USER The ADD USER button allows you to create new IPcam-SD user accounts. To create a new user, click on the “Add User” button to bring up the “Add User” window as shown in the image below. The add user widow will allow you to select the user group you want the user to be associated with and also allow you to create the user name and user password for the account.
- Page 116 ADD GROUP The ADD GROUP button allows you to create a new user group based on what you want users who are assigned to a specific group to do. For example, you can create a group called “Monitoring” and only enable the options available under Monitor (in the group rights section) if you want to allow users to only be able to “Monitor/View”...
-
Page 117: Maintenance
The IPCAM REBOOT consists of 2 drop down menus that let you specify when you would like the IPcam-SD to restart itself. The first drop down is used to specify the day and the second drop down is used to specify the time for the IPcam-SD to run maintenance system reboot. -
Page 118: Default
The DELETE FILES (SD) consists of 2 options that let you specify when you would like the IPcam-SD to free up space by deleting old files. The first drop down is used to specify between Never (default) or Schedule. Once Schedule is selected, the edit box allows you to specify how many day(s) ago you want the files to be deleted. - Page 119 I. IPCam/CMS Account - Place a check mark on “IPCam/CMS Account” and click on OK button to restore all IPcam-SD account settings back to the manufacturer default settings. J. OK – saves the changes.
-
Page 120: Import/Export
• • • •IMPORT/EXPORT The IMPORT EXPORT sub-menu located in the “Advanced” menu option consists of 3 options that are used to save and restore your current IPcam-SD’s current configuration/settings. These options are: A. Import(cfg)- imports saved device configuration/settings. B. Export(cfg)-exports the current device configuration/settings. - Page 121 The reboot option is used simply to reboot your IPcam-SD. To reboot the IPcam_SD, click on the reboot menu and then click on OK to reboot. NOTE: Rebooting is not required, however, if the IPcam-SD becomes erratic or not responsive, please use this option to reboot the camera as shown below.
-
Page 122: Sd Card Info
• • • •SD CARD INFO The SD CARD INFO sub-menu located in the “Info” menu options displays the information about the memory card being used in the IPcam-SD. This information includes: • Index: displays the numbers of partitions on the SD card. - Page 123 • • • •LOG The LOG sub-menu located in the “Info” menu is a feature that allows you to view important events that have occurred over time and also allows you to search for a specific event in a specified date/time range. The log window consists of the following search parameters:...
- Page 124 A. Type (drop down) – allows you to choose the event type to look in. B. Start Time – used to specify a specific start date/time to search between. C. End Time – used to specify a specific end date/time to search between. D.
- Page 125 SEARCH The SEARCH option initiates the search. Once selected, the IPcam-SD will begin its event search based on the parameters that you have selected and display the information in the detail screen. To begin the search, simply move the mouse cursor over to the SEARCH button and click it when you are ready.
- Page 126 • • • •VERSION The VERSION sub-menu located in the “Info” menu displays specific IPcam-SD device information. This information includes: • Record Channel – Number of recordable channels available. • Extra Channel – Number of extra channels available. • Alarm In – Number of alarm inputs available.
- Page 127 The playback window consists of the following options: • IPCam – Used to select the IPcam-SD profile name you want to search for recorded events on. • Query Mode – search query by name or by time.
- Page 128 • IPCam Playback Tab To start playing back recorded video footages/photos form the IPcam-SD, select “IPCam Playback”, under “IPCam” select the desired IP camera profile name, select “By Name” under query mode, select an event type from the drop down contextual...
- Page 129 NOTE: To search “By Time” you must select the “Select All” and then click on the “Add” button so that “CAM1” is added into the category under “MultiReplay”. Double click on the one of the many files found in the lower left hand corner to playback or simply place a check mark on the file intended to playback and then click on the “Play”...
- Page 130 CMS forcing the next user who wishes to use the CMS to login using their own name and password credentials. This is a time saving feature that allows you to secure your IPcam-SD from unwanted users without having to shut down and restart the CMS.
- Page 131 Remote accessing the IPcam-SD from the web or using the CMS software provided are plug and play. By default, the IPcam-SD is plug and play, meaning you do not need to open ports or do port forwarding in your router for remote access. However, the “UPnP”...
- Page 132 IMPORTANT NOTE: For static IP address subscribers (recommended), you should have given a static IP address by your ISP (Internet Service Provider), this is the WAN IP address you will need to access the IPCam-SD over the Internet using the IE Browser and Smartphone Applications. For those with...
- Page 133 “ActiveX controls and plug-ins” to “Enable” everything under the ActiveX controls, then click “OK” to confirm settings as shown below. 4. To remote access IPcam-SD, open Internet Explorer, for LAN (Local Area Network) access, please use the local area networking IP address which is the IP address assigned to the IPcam-SD, for example http://192.168.248.189.
- Page 134 5. “Bit Rate Type” window will appear. Users can choose “Connect all video (Main Stream)”, or “Connect all video (Extra Stream”, or just leave it as default setting and click “OK” to continue. 6. The image of camera will appear momentarily. Note: Users can also use Firefox, Chrome, Safari to remote access;...
- Page 135 SMARTPHONE REMOTE ACCESS (iPhone, iPad/Tablet) 1. Open the App Store and search for “vMEyeV2” as shown in IMAGE #1 and then select the “vmeyev2” application from the list. Then tap on “FREE” to initiate the download [IMAGE #2]. NOTE: Although the app is free, an Apple ID is required in order to download and install the application.
- Page 136 ActiveX controls, then click “OK” to confirm settings as shown below. 4. Tap on the “Device Management” icon [IMAGE #8] and then select “Add” located at the top right corner of the screen [IMAGE #9] to add the IPCam-SD camera to the list.
- Page 137 • Address – IP address of the IP camera or static IP address given by your ISP. This depends on whether you are accessing the IP camera from within your local area network or the wide area network (static IP address). NOTE: DDNS users can simply input the domain name here.
- Page 138 Pans the camera to the right. Pan RIGHT *Only applies to cameras with PTZ capabilities. Zooms in. Zoom IN *Not applicable with IPcam-SD model. Zooms out. Zoom OUT *Not applicable with IPcam-SD model. Used to focus the image after zooming in/out.
- Page 139 SMARTPHONE REMOTE ACCESS (ANDROID) Please make sure that you have successfully set up PortForwarding and that your IPcam- SD can be viewed over the internet from outside your network before you proceed. NOTE: The images shown below are subject to change without notice due to updates that may be imposed by the application developers.
- Page 140 [IMAGE #6] to begin configuring the application so that you can access your IPcam-SD. 4. Click on the home button located at the top right corner of the screen [IMAGE #7]...
- Page 141 List screen. For example, if you are using the app to remotely monitor 2 x IPcam-SD (one at home and one at work), the device name for the first camera could be “HOME” and the second camera could be “WORK”.
- Page 142 7. When you are done, select the “OK” button located on the top right corner of the screen [IMAGE #12] and your device will now be displayed in the Device List as shown in IMAGE #13.
- Page 143 8. There are 3 ways you can initiate the live view. You can select the IPCAM-SD from the list screen as shown in IMAGE #14 and then select the channel you want to view from the drop down [red arrow in IMAGE #14], you can select the “Play”...
- Page 144 Pans the camera to the right. Pan RIGHT *Only applies to cameras with PTZ capabilities. Zooms in. Zoom IN *Not applicable with IPcam-SD model. Zooms out. Zoom OUT *Not applicable with IPcam-SD model. Used to focus the image after zooming in/out.
-
Page 145: Smartphone Remote Access (Android)
SMARTPHONE REMOTE ACCESS (BLACKBERRY) 1. Download VMeye from App World, or acquire the app from the CD. At App World, search for “VMEye” ,and then select the “VMeye” application from the list [IMAGE #1]. IMAGE #1 2. Then click “install”, the application will be automatically installed to BlackBerry [IMAGE #2]. - Page 146 Title: The name of equipment, which can help users to identify different devices. Address: IPCAM-SD IP address or DDNS. Port: Enter the mobile port of IPCAM-SD. The default port is 34568. User ID: the default is “admin” Password: By default there is no password, so leave it blank.
- Page 147 Smartphone Remote Access (Windows Mobile) 1. Connect Windows Mobile phone to the computer. 2. Insert the IPCam-SD software CD to your CD/DVD-ROM drive. In the software CD, look for “MEYE_WM.zip”. Copy and paste the “MEYE_VM” application from the CD provided to the Windows Mobile device directory (any folder in the directory).
-
Page 148: P2P Remote Access
“By Device”. Connect “By Device” requires the MAC address of the IPcam-SD. Then input the 4 digit on-screen code to verify the login attempt as illustrated below. Finally click on the “Login”... - Page 149 Next, click on “My Devices” in the upper left corner of the screen then double-click on the device name in blue below and click “OK” to login to the IPCam-SD. Login successful! The graphic user interface will display as demonstrated below...
-
Page 150: Specifications
Specifications Image Sensor 1/5” CMOS, color Video compression H.264 high profile, BMP snapshot and JPG (email notification) Signal system NTSC/PAL (default NTSC) Lens Min. Illumination 0.1 Lux (IR OFF), 0 Lux (IR ON) Frame rate 30fps NTSC (25fps PAL) Video Resolution VGA (640x480), QVGA (320x240) Video adjustment...
Need help?
Do you have a question about the IPcam-SD and is the answer not in the manual?
Questions and answers