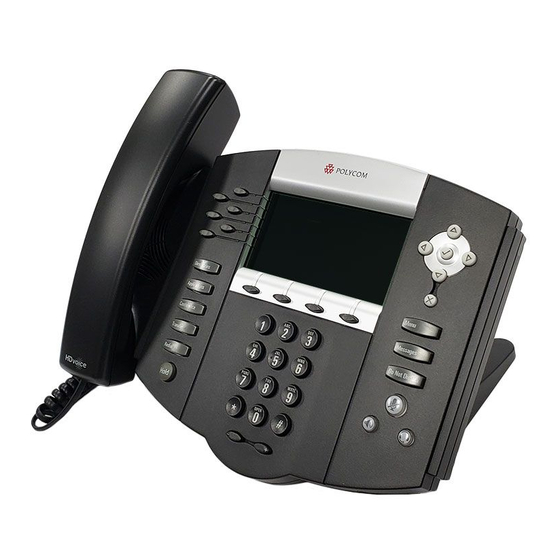
Polycom SoundPoint IP 670 User Manual
Desk phone for 8x8 virtual office
Hide thumbs
Also See for SoundPoint IP 670:
- User manual (126 pages) ,
- Configuring (9 pages) ,
- Quick start manual (4 pages)

Subscribe to Our Youtube Channel
Related Manuals for Polycom SoundPoint IP 670


Summary of Contents for Polycom SoundPoint IP 670
- Page 1 User Guide for the Polycom® SoundPoint IP® 670 Desk Phone for 8x8 Virtual Office Version 1.0 October 2010 PM352/1010 SIP 3.2.3 October 2010 1725-12679-001 Rev. C...
- Page 2 As between the parties, Polycom, Inc., retains title to and ownership of all proprietary rights with respect to the software contained within its products. The software is protected by United States copyright laws and international treaty provision.
-
Page 3: About This Guide
This guide provides everything you need to quickly use your new phone. Be sure to verify with your system administrator that your network is prepared for configuring your SoundPoint IP 670 desk phone. As well, be sure to read Parts List... -
Page 4: Table Of Contents
Contents About This Guide........iii Contents . -
Page 5: Contents
Contents Managing Contacts ..........2–13 Adding Contacts . - Page 6 Regulatory Notices ......Safety Notices–1 End-User License Agreement for Polycom® Software Index ......... . . Index–1...
-
Page 7: Getting Started With Your Phone
This chapter provides basic installation instructions and information for obtaining the best performance with the SoundPoint IP 670 desk phone. The SoundPoint IP 670 desk phone provides a powerful, yet flexible IP communications solution, delivering excellent voice quality. The high-resolution graphic display supplies content for call information, multiple languages, directory access, and system status. -
Page 8: Parts List
If you require additional information or assistance with your new phone, contact your system administrator. Parts List The following components are included in your for the Polycom® SoundPoint IP® 670 Desk Phone package: • Polycom for the Polycom® SoundPoint IP® 670 Desk Phone... -
Page 9: Assembling Your Phone
Check this list before installation to ensure that you have received each item. If you are missing any items, contact your system administrator. Assembling Your Phone This section describes how to assemble your for the Polycom® SoundPoint IP® 670 Desk Phone. These topics include: 1 - 3... -
Page 10: Connecting Network And Power Source
Getting Started with Your Phone • Connecting Network and Power Source • Connecting the Handset and Optional Headset • Attaching the Base If your phone is already assembled, go directly to Features of Your Phone page 1-9. Connecting Network and Power Source You have two options for network and power source connections. -
Page 11: Connecting The Handset And Optional Headset
Connect the headset (optional) to the headset jack on the back of the phone. Headset Handset (optional) For information on supported headsets, go to http://www.polycom.com/support/voice/soundpoint_ip/VoIP_Technical_Bulletins_pu b.html and look for “Technical Bulletin 37477: Headset Compatibility List”. 1 - 5... -
Page 12: Attaching The Base
Getting Started with Your Phone Attaching the Base You can attach the base to the for the Polycom® SoundPoint IP® 670 Desk Phone in one of two ways: • As a desk mount • As a wall mount Note The wall mount is not included in for the Polycom® SoundPoint IP® 670 Desk Phone 670 package. - Page 13 Getting Started with Your Phone Snap them together to lock the base to the phone. To attach the base as a wall mount: Place all cords in the recessed area above the modular jacks. On the back of the phone, remove the key located behind the hookswitch and reposition it so that the end tab (at a 45 angle) is facing up.
-
Page 14: Registering Your Phone
With mounting tab of the base unit facing up, fasten the base unit to the wall mount using wall anchors (not included). The wall mount is not included in for the Polycom® SoundPoint IP® 670 Desk Note Phone 670 package. Contact your system administrator if you require one. -
Page 15: Features Of Your Phone
Getting Started with Your Phone Features of Your Phone The features of your SoundPoint IP 670 desk phone are: Item Description Message Waiting Alert for voice and text (instant) Indicator messages. Arrow Keys Scroll through displayed information. Select a field of displayed data. - Page 16 Getting Started with Your Phone Item Description Feature Keys Access important features using these keys. Access to local directories and call lists. Access to special applications (contact system administrator). Allows connection with multiple other parties for a conference. Transfer of current call to third party. Dials most recently dialed party.
- Page 17 Getting Started with Your Phone Item Description Speaker For ringer and hands-free audio output. Soft Keys These keys are automatically labeled to identify their context-sensitive functions. Graphic Display Shows information about calls, messages, soft keys, time, date, and other relevant data. •...
- Page 18 Getting Started with Your Phone Icons associated with the line keys appear on the graphic display and represent: Icon Description Registered line (solid) Registered shared line Unregistered line (outline) voicemail/Text messages Speed dial Ringing Call in progress with HD Voice Call in progress Call Forward Do Not Disturb...
-
Page 19: Before You Use Your Phone
Getting Started with Your Phone Before You Use Your Phone The background and key colors that appear on your for the Polycom® SoundPoint Note IP® 670 Desk Phone may differ from what appears in this user guide. For more information, refer to Changing the Graphic Display Background on page 2-9. -
Page 20: Cleaning The Lcd Glass
Getting Started with Your Phone • Prompt text (for example, “Enter number”) • Time and date text The following figures provide some examples: Cleaning the LCD Glass Clean the glass with a clean lint-free cloth. Fingerprints tend to show more on the color LCD. -
Page 21: Customizing Your Phone
Customizing Your Phone You can customize your SoundPoint IP 670 desk phone by adjusting the setting for time and date, display contrast, and ring type, for example. You can add contacts to the phone’s directory manually or from call lists. You can handle incoming calls from different contacts in different ways. -
Page 22: Configuring Basic Settings
You can mute the microphone and adjust the volume using separate keys. Changing the Appearance of Time and Date The time and date appears on the graphic display of the for the Polycom® SoundPoint IP® 670 Desk Phone. If the phone cannot obtain a time and date from the call server, the display will flash. -
Page 23: Changing The Display Contrast
Customizing Your Phone Select from Clock Date, Clock Time, Clock Order, or Enable/Disable. Using , scroll through the options under each of these selections. Press the Select soft key to confirm your choice. The following figure shows the Clock Time menu. Press to return to the idle display. -
Page 24: Changing The Backlight Intensity
Customizing Your Phone Press to return to the idle display. Changing the Backlight Intensity Backlight intensity on the SoundPoint IP 670 desk phone has three components: • Backlight On • Backlight Idle • Maximum Intensity You can modify the Backlight On intensity and the Backlight Idle intensity separately. - Page 25 Customizing Your Phone Select Backlight On Intensity. or keypad to select high, medium, low, or off, and then press the Select soft key. The default level is medium. Select Backlight Idle Intensity. or keypad to select high, medium, low, or off, and then press the Select soft key.
-
Page 26: Enabling The Headset Memory Mode
Customizing Your Phone 10. Press to return to the idle display. Enabling the Headset Memory Mode This feature is especially useful for permanent or full-time headset users. To permanently enable the Headset Memory Mode: Press Select Settings > Basic > Preferences > Headset... > Headset Memory... to select Enabled, and then press the Select soft key. -
Page 27: Selecting The Correct Headset For Electronic Hookswitch
This feature allows you to answer your phone when you are using a headset. For information on supported headsets to provide electronic hookswitch features for placing, answering, and ending calls, go to www.polycom.com/support/voice enter “Headset Compatibility List” in the Knowledge Base text box or contact your system administrator. -
Page 28: Changing The Language
Press the Select soft key to change to the selected ring type. Press to return to the idle display. If you configure your for the Polycom® SoundPoint IP® 670 Desk Phone with a Note silent ring, press the flashing Line key or the Answer soft key to answer the call. If your handset is off hook, the call is routed to the handset. -
Page 29: Changing The Graphic Display Background
Customizing Your Phone Press the Select soft key. Text that appears on the graphic display will change to the language of your choice. Press to return to the idle display. Changing the Graphic Display Background You can change the picture or design that appears on the graphic display. A default background displays when the phone starts up (shown below). -
Page 30: Changing The Soft Key Label Color
Customizing Your Phone to highlight the background you want. Press the Select soft key. Press to return to the idle display. Changing the Soft Key Label Color You can change the soft key label color that appears on the graphic display. A default soft key label color displays when the phone starts up (shown below). -
Page 31: Muting The Microphone
Customizing Your Phone Select Settings > Basic > Preferences > Label Color. Using the dialpad keys 1, 3, 7, and 9 change the soft key color to your desired color. The Label soft key on the right reflects your changes. When the color of the label reaches a certain level of whiteness, “Cannot save this Note color. -
Page 32: Managing Call Lists
Customizing Your Phone Managing Call Lists Your phone maintains local lists of missed, received, and placed calls. Each list contains 100 entries. Press followed by Call Lists > Missed Calls, Received Calls, or Placed Calls. The following shows a Placed Calls list. Manage the call list by doing the following: •... -
Page 33: Managing Contacts
Customizing Your Phone Managing Contacts You can store a large number of contacts in your phone's local contact directory. Contact your system administrator for the exact number. You can dial or search for a contact in this directory. You may be able to add, edit, and delete contacts. - Page 34 Customizing Your Phone Enter first and/or last name of the contact from the keypad. Use the 1/A/a soft key to select between numeric and upper/lower case alphanumeric modes. Use the Encoding soft key to access special characters in other languages. Enter a contact number.
- Page 35 Customizing Your Phone 10. Press the Save or Cancel soft keys to accept or cancel changes. 11. Press to return to the idle display. Adding Contacts From Call Lists To add a contact to the local contact directory from a call list: Do one of the following: —...
-
Page 36: Editing Contacts
Customizing Your Phone Search for the contact. Refer to Searching the Corporate Directory on page 2-19. Press the View soft key. The contact’s information appears on the graphic display. Press the Save soft key to save the contact in the local contact directory. “Entry saved”... -
Page 37: Deleting Contacts
Customizing Your Phone Edit the contact information. Press the Save or Cancel soft keys to accept or cancel changes. Press to return to the idle display. You can quickly edit a contact associated with a speed dial key by pressing and Note holding the contact’s speed dial key, and then complete steps 5 to 7. - Page 38 Customizing Your Phone to highlight the contact. You can also use the * key to page up and the # key to page down. Press the Dial soft key. To place a call to a contact in the corporate directory: Press Select Corporate Directory.
-
Page 39: Searching For Contacts
Customizing Your Phone Searching for Contacts Searching the Contact Directory To search for a contact in the local contact directory: Press Select Contact Directory. Press the More soft key, and then the Search soft key. Using the dial pad, enter the first few characters of the contacts first or last name. - Page 40 Customizing Your Phone Search for the contact in one of the following ways: — In the search line, enter the first few characters of the contacts last name using the dial pad. For example, to search for Carol Woller, enter wo in the search line.
-
Page 41: Managing Incoming Calls
Customizing Your Phone — Press the AdvFind soft key, enter search values in the displayed fields. For example, enter Byron Smith as the first name and last name. Press the Submit soft key. In this example, Bryon Smith appears in the search results. - Page 42 Customizing Your Phone To set a distinctive ring type for a contact: Press Select Contact Directory. to highlight the contact. You can also use the * key to page up and the # key to page down. Press the Edit soft key, and then scroll to the Ring Type field. Enter the number corresponding to one of the ring types available.
-
Page 43: Rejecting Calls
Customizing Your Phone Rejecting Calls You can customize your phone so that incoming calls from a particular party are immediately sent to your voicemail. Note Rejecting calls is not available on shared lines. To send incoming calls from a contact directly to voicemail: Press Select Contact Directory. -
Page 44: Diverting Calls
Customizing Your Phone Diverting Calls You can customize your phone so that incoming calls from a particular contact are transferred directly to a third party. To divert incoming calls from a particular contact: Press Select Contact Directory. to highlight the contact. You can also use the * key to page up and the # key to page down. -
Page 45: Using The Features Of Your Phone
Using the Features of Your Phone Your Polycom® SoundPoint IP® 670 Desk Phone is designed to be used like a regular phone on a public switched telephone network (PSTN). You can place calls, transfer a call to someone else, or conduct a conference call. -
Page 46: Placing Calls
If you require additional information or assistance with your new phone, contact your system administrator. Placing Calls You can place a call in many ways using your Polycom® SoundPoint IP® 670 Desk Phone: • Using the handset •... - Page 47 The maximum URL or IP address length is 32 characters. For example, 10.3.0.42, sip:jane@polycom.com . Press the URL soft key and enter the URL or IP address. Use * for “.” and # for “@”.
-
Page 48: Answering Calls
Using the Features of Your Phone >> Do one of the following: — With the handset on-hook, press , or the New Call soft key to obtain a dial tone. Dial the number using the dial pad. — With the handset on-hook, dial the number using the dial pad. Press , or the Dial soft key. - Page 49 Using the Features of Your Phone • A single Line Key per line Multiple Line Keys per line • If your phone is configured with multiple call appearances, refer to Using Multiple Call Appearances on page for instructions on how to answer a call.
- Page 50 Using the Features of Your Phone To answer a call using Hands-Free Speakerphone mode: If “Handsfree mode disabled” appears on the graphic display after you press the Note speakerphone key your system administrator has disabled the speakerphone on your phone. >>...
- Page 51 Using the Features of Your Phone To answer an incoming call on a line configured for a single Line Key: >> Do one of the following: — Press or the Hold soft key to put the original call on hold. The incoming call is answered.
-
Page 52: Ending Calls
Using the Features of Your Phone Ending Calls To end a call: >> Do one of the following: — If you are using the handset, press the EndCall soft key or replace the handset. — If you are using a headset, press —... -
Page 53: Hosting Local Conference Calls
Using the Features of Your Phone Hosting Local Conference Calls You can create a conference with other parties using the phone’s local conference feature. You can create a conference at any time between an active call and a call on hold (on the same or another line) by pressing the Join soft key. - Page 54 Using the Features of Your Phone Note If configured for single key-press conferences, all conference participants hear the dial tone and ringback when the conference host places a call to a new party. Call the second party. When the second party answers, press or the Confrnc soft key again to join all parties in the conference.
-
Page 55: Splitting Conference Calls
Using the Features of Your Phone A conference similar to this one will now exist. Repeat steps 5 to 7 until you have added all intended parties. Splitting Conference Calls To split a conference call: >> From the Active Conference page, press the More soft key, and then press the Split soft key to split the conference. -
Page 56: Using Conference Bridges
Using the Features of Your Phone Using Conference Bridges A key business tool, the conference bridge allows users with an extension and voicemail passwords to schedule and manage conference calls. Basic functionality includes the ability to create and log into conference bridges. -
Page 57: Transferring Calls
Using the Features of Your Phone Delete Existing Conference - (Option 3): Enter your extension then press # . Enter your password then press # . (Voicemail Password) Enter the conference ID you want to delete then press # . Transferring Calls A call can be transferred in one of three ways: •... - Page 58 Using the Features of Your Phone As soon as you hear the ring-back sound or after the party answers (and you speak to the party), press or the Trnsfer soft key. You can talk privately to the party to which you are transferring the call before the transfer is completed.
-
Page 59: Forwarding Calls
You can also forward calls while your phone rings. You can forward all incoming calls to another party while Do Not Disturb is enabled on your phone. For more information, contact your system administrator. Polycom 670 desk phone offers two methods of call forwarding: • Online Call Forwarding •... -
Page 60: Phone-Based Call Forwarding
Using the Features of Your Phone Phone-based Call Forwarding Static Forwarding To forward all incoming calls to another party: From the idle display, press the Forward soft key. (Optional) If multiple lines are configured on your phone, select the line to forward from the list using Using , select the forwarding type you want to change,... - Page 61 Using the Features of Your Phone If you selected No Answer, enter a number to forward all unanswered incoming calls to and how many rings to wait before forwarding (one ring is approximately six seconds). A value of 2 is recommended. If you selected Busy, enter a number to forward all future incoming calls to when you are already in another call.
-
Page 62: Enabling Do Not Disturb
Using the Features of Your Phone Dynamic Forwarding To forward an incoming call to another party: When the phone rings, press the Forward soft key. Enter a number to forward the incoming call to. Press the Enable soft key. The incoming call is forwarded to the other party. If call forwarding is disabled, all future calls will not be forwarded and forwarding will remain disabled. -
Page 63: Placing Calls On Hold
Using the Features of Your Phone To disable Do Not Disturb: >> Press again. Multiple Lines and Do Not Disturb If multiple lines are configured on your phone, Do Not Disturb can be set on a line-by-line basis from the menu using . -
Page 64: Returning The Last Call
Using the Features of Your Phone Multiple Calls on Hold If multiple calls are on hold on a single Line Key, use to switch between the calls, and then press the Resume soft key to retrieve the desired call. If more than two calls are on hold on a single Line Key, an indication appears on the graphic display, for example “2/3”, indicating that this is the second call out of three calls. -
Page 65: Using The Intercom
Using the Features of Your Phone Using the Intercom You can use the Intercom key to automatically connect with a remote extension. To automaticallly connect with a remote extension: Press the Intercom soft key. Dial the number you wish to Intercom to and then press the Enter soft key. -
Page 66: Using Call Lists
Using the Features of Your Phone To search an extensive Corporate Directory: Press and select Applications, then select Home, then Corporate Directory Search. Input name, extension, or other data into the search field, then scroll down and select Search. Select the matching entry to speed dial the user (or select Back to do a new search). -
Page 67: Recording Calls (Virtual Office Pro Users Only)
Using the Features of Your Phone Your phone indicates the presence of new voicemail messages by a flashing Message Waiting Indicator LED on the front of the phone and a visual notification on the screen. If your phone has multiple lines, an individual line indicator icon indicates voicemail messages on that line. -
Page 68: Using Call Queues (Call Queue Users Only)
Using the Features of Your Phone Using Call Queues (Call Queue Users Only) Phones on 8x8 Call Queues can log in and out of Call Queues if the Call Queue Admin has granted log in/out permission to the user. To enter or exit a Call Queue: Press and select Applications >... - Page 69 Using the Features of Your Phone To add or edit a speed dial index for an existing contact: Press Select Contact Directory. to highlight the contact. You can also use the * key to page up and the # key to page down. Press the Edit soft key.
- Page 70 The index can be any value between the next available index value and the maximum (value of 9999). Polycom recommends that you assign speed dial index values consecutively. For example, if you assign the third Line Key to the speed dial index value “2”, assign the fourth Line Key to the speed dial index value “3”.
-
Page 71: Troubleshooting Your Phone
Troubleshooting Your Phone This chapter contains general troubleshooting information to help you solve any problems you might encounter when you use your SoundPoint IP 670 desk phone. The tables in this chapter list possible trouble symptoms, the likely causes of these problems, and the recommended corrective actions to take. -
Page 72: Power And Startup
Troubleshooting Your Phone Power and Startup Symptom Problem Corrective Action There are power issues. The for the Polycom® Do one of the following: SoundPoint IP® 670 Desk • Verify that no lights appear on the Phone has no power. phone when it is powered up. -
Page 73: Controls
Corrective Action The dial pad does not work. The dial pad on the for the Do one of the following: Polycom® SoundPoint IP® 670 • Check for a response from other Desk Phone does not respond. feature keys or from the dial pad. -
Page 74: Access To Screens And Systems
Troubleshooting Your Phone Access to Screens and Systems Symptom Problem Corrective Action There is no response when you The for the Polycom® Do one of the following: press a feature key. SoundPoint IP® 670 Desk • Press the keys more slowly. -
Page 75: Calling
Problem Corrective Action There is no dial tone. Power is not correctly applied to Do one of the following: the Polycom SoundPoint IP 670 • Check that the screen is illuminated. desk phone. • Make sure the LAN cable is inserted... - Page 76 Troubleshooting Your Phone Symptom Problem Corrective Action You turned off the ringer. Do one of the following: • During an incoming call, lift the handset, press the Speakerphone key, or press the Headset key to obtain a dial tone. • Press the ringing Line Key or the Answer soft key to answer the call.
-
Page 77: Displays
Problem Corrective Action There is no display. Power is not correctly applied to Do one of the following: the SoundPoint IP 670 desk The display is incorrect. • Check that the screen is illuminated. phone. The display has bad contrast. -
Page 78: Audio
Troubleshooting Your Phone Audio Symptom Problem Corrective Action There is no audio on the The connections are not correct. Do one of the following: headset. • Ensure the headset is plugged into the jack marked Headset at the rear of the phone. -
Page 79: Testing Phone Hardware
Troubleshooting Your Phone Testing Phone Hardware Your system administrator may ask you to access a diagnostics menu on your phone to test your phone hardware. From the diagnostics menu, you can test your phone’s microphones, speaker, handset, third-party headset (if present), keypad mappings, and LCD display. -
Page 80: Regulatory Notices
Polycom, Inc. Do not remove (or allow anybody else to remove) any product identification, copyright or other notices. - Page 81 Replacement products or parts may be new or reconditioned. Polycom is expected to warrant any replaced or repaired product or part for ninety (90) days from shipment, or the remainder of the initial warranty period, whichever is longer. Products returned to Polycom must be sent prepaid and packaged appropriately for safe shipment, and it is recommended that they be insured or sent by a method that provides for tracking of the package.
- Page 82 In accordance with Part 15 of the FCC Rules, the user is cautioned that any changes or modifications not expressly approved by Polycom, Inc. could void the user’s authority to operate the equipment. This equipment may not be used on a coin service or party line.
- Page 83 Safety and Compliance (continued) CE and VCCI Mark This Polycom SoundPoint IP 670 SIP is marked with the CE mark. This mark indicates compliance with EC Directives 2006/95/EC and 2004/108/EC. A full copy of the Declaration of Conformity can be obtained from Polycom Ltd., 270 Bath Road, Slough, Berkshire, SL1 4DX, UK.
- Page 84 PTC220 Paragraph 8.3.1 Digital Telephone Loudness Rating This Polycom SoundPoint IP560 VoIP Telephone was made to comply with PTC220 paragraph 8.2.1 by installing a New Zealand specific version of software known as 3.1.0.5891. All samples of this telephone connected to the Telecom network must have this software version installed to be fully compliant with this Telepermit.
- Page 85 Modification of these Polycom Soundpoint IP 320, 330, 430, 550, 650 VoIP Telephones for the New Zealand network 5. All samples of Polycom Soundpoint IP 320, 330, 430, 550, 650 VoIP Telephones connected to the Telecom network shall be modified as described in KTL Test Report Nos.
-
Page 86: End-User License Agreement For Polycom® Software
Agreement. 1. GRANT OF LICENSE. Subject to the terms of this Agreement, Polycom grants to you a nonexclusive license to install and use the Software Product included with the Polycom product that incorporates or uses the Software Product (the “Product”). - Page 87 If the Software Product is labeled as an upgrade, you must be properly licensed to use the software identified by Polycom as being eligible for the upgrade in order to use the Software Product. A Software Product labeled as an upgrade replaces and/or supplements the software that formed the basis for your eligibility for the upgrade.
- Page 88 Polycom with a copy of your receipt, or to replace any defective media with software which substantially conforms to applicable Polycom published specifications. Any replacement Software Product will be warranted for the remainder of the original warranty period or thirty (30) days, whichever is longer.
- Page 89 10.3 Contact. If you have any questions concerning this Agreement, or if you desire to contact Polycom for any reason, please contact the Polycom office serving your country.
-
Page 90: Index
Index Symbols * key, page up shortcut 1–13 electronic hookswitch 2–7 # key, page down shortcut 1–13 ending calls 3–8 AC power 1–4 features 3–1 list of 1–9 Announced transfer 3–13 phone 1–9 answering calls 3–4, 3–5 forwarding calls 3–15 assembling your phone 1–3 online call forwarding 3–15 assigning speed dial keys 3–24... - Page 91 Index LCR 3–20 phone adjusting backlight intensity 2–4 left arrow key, Received Calls shortcut 2–12 adjusting display contrast 2–3 local conference calls adjusting volume 2–11 ending 3–11 answering calls 3–4, 3–5 introduction 3–9 assembling 1–3 setting up 3–9 attaching base 1–6 splitting 3–11 auto attendant 3–21 call lists 3–22...
- Page 92 Index received call lists 2–12 recording calls 3–23 redialing numbers 3–8 right arrow key, Placed Calls shortcut 2–12 ring type 2–7 RJ-9 1–5 silent ring, answering calls 3–5 speakerphone. See hands-free mode speed dial keys, assigning 3–24 status information 1–13 time and date 2–2 transferring calls 3–13 troubleshooting...
Need help?
Do you have a question about the SoundPoint IP 670 and is the answer not in the manual?
Questions and answers