NordicTrack Xlt 1200 Elliptcal User Manual
Uk manual
Hide thumbs
Also See for Xlt 1200 Elliptcal:
- Gebruiksaanwijzing (28 pages) ,
- Manuel de l'utilisateur (28 pages) ,
- Bedienungsanleitung (28 pages)
Table of Contents
Advertisement
Model No. NTEVEL2086.0
Serial No.
Write the serial number in the
space above for future reference.
Serial
Number
Decal
QUESTIONS?
As a manufacturer, we are
committed to providing com-
plete customer satisfaction. If
you have questions, or if there
are missing or damaged parts,
please call:
08457 089 009
Or write:
ICON Health & Fitness, Ltd.
Unit 4
Revie Road Industrial Estate
Revie Road, Beeston
Leeds, LS11 8JG
UK
email: csuk@iconeurope.com
CAUTION
Read all precautions and instruc-
tions in this manual before using
this equipment. Save this man-
ual for future reference.
USER'S MANUAL
Visit our website at
www.iconeurope.com
Advertisement
Table of Contents

Related Manuals for NordicTrack Xlt 1200 Elliptcal


Summary of Contents for NordicTrack Xlt 1200 Elliptcal
- Page 1 Model No. NTEVEL2086.0 Serial No. USER'S MANUAL Write the serial number in the space above for future reference. Serial Number Decal QUESTIONS? As a manufacturer, we are committed to providing com- plete customer satisfaction. If you have questions, or if there are missing or damaged parts, please call: 08457 089 009...
-
Page 2: Table Of Contents
ORDERING REPLACEMENT PARTS ..........Back Cover NordicTrack is a registered trademark of ICON IP, Inc. -
Page 3: Important Precautions
IMPORTANT PRECAUTIONS WARNING: To reduce the risk of serious injury, read the following important precau- tions before using the elliptical exerciser. 1. Read all instructions in this manual and all 13. The pulse sensors are not medical devices. warnings on the elliptical exerciser before Various factors, including the user's move- using the elliptical exerciser. -
Page 4: Before You Begin
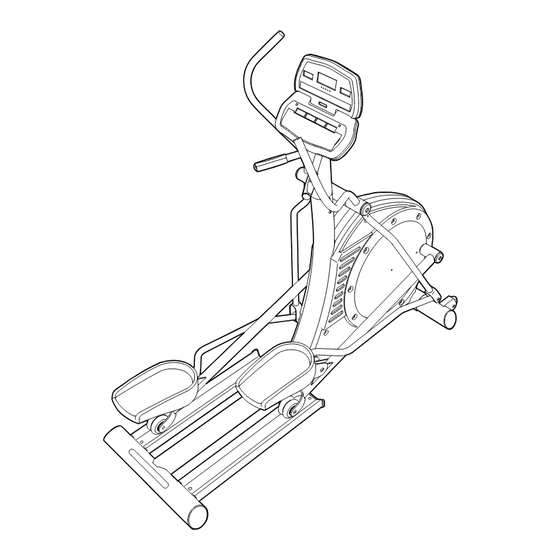
BEFORE YOU BEGIN Congratulations for selecting the new NordicTrack XLT tions after reading this manual, please see the front 1200 elliptical exerciser. The XLT 1200 elliptical exer- cover of this manual. To help us assist you, note the ciser is an incredibly smooth exerciser that moves your... -
Page 5: Assembly
ASSEMBLY Assembly requires two persons. Set the elliptical exerciser in a cleared area and remove all packing materials. Do not dispose of the packing materials until assembly is completed. Assembly requires the included tools and your own adjustable wrench Use the drawings below to identify the small parts used for assembly. The number in parentheses below each drawing is the key number of the part, from the PART LIST on page 24. - Page 6 To make assembly easier, read the informa- tion on page 5 before you begin assembling the elliptical exerciser. Attach the Stabilizer (8) to the Frame (1) with two M10 x 116mm Carriage Bolts (38) and two M10 Nylon Locknuts (70). 2.
- Page 7 3. Attach the Track Frame (4) to the Frame (1) with two M10 x 123mm Button Screws (87) and two M10 Split Washers (85). Finger tighten a Button Screw into the lower hole first, and then finger tighten a Button Screw into the upper hole. Then, tighten both Button Screws.
- Page 8 5. Attach a Pedal (21) to the Left Pedal Leg (14) with seven M10 x 13mm Button Screws (54), seven M10 Split Washers (85), and seven M10 Washers (67). Attach the other Pedal (not shown) to the Right Pedal Leg (not shown) in the same way. 6.
- Page 9 7. Identify the Left Handlebar (19), which is marked with an “L.” Insert the Left Handlebar into one of the Handlebar Legs (17); make sure that the Handlebar Leg is turned so the hexagonal holes are on the indicated side. Attach the Left Handlebar with two M8 x 38mm Button Screws (58) and two M8 Nylon Locknuts (72).
- Page 10 9. Apply a film of grease to the barrel of an M8 x 55mm Bolt Set (92) and to a 7mm Spacer (55). Slide an M8 Washer (69) and the Spacer onto the barrel. While another person holds the front end of the Left Pedal Leg (14) inside the bracket on the left Handlebar Leg (17), insert the barrel of the Bolt Set (92) through both parts.
- Page 11 HOW TO USE THE CHEST PULSE SENSOR To get the best performance from the chest pulse sen- saline solution such as saliva or contact lens solution, sor, please read the instructions below. wet both electrode areas. Then, return the sensor unit to a position against your chest.
- Page 12 Next, hold the chest pulse sensor near the console. CHEST PULSE SENSOR CARE While holding one thumb stationary, begin tapping the other thumb against the electrode area at a rate • Thoroughly dry the chest pulse sensor after each of about one tap per second. Check the heart rate use.
-
Page 13: How To Operate The Elliptical Exerciser
HOW TO OPERATE THE ELLIPTICAL EXERCISER HOW TO MOVE AND LEVEL THE ELLIPTICAL CAUTION: To decrease the risk of injury, bend your EXERCISER legs and keep your back straight. Make sure to use your legs rather than your back to lift the elliptical Due to the size and weight of the elliptical exer- exerciser. - Page 14 DIAGRAM OF THE CONSOLE FEATURES OF THE CONSOLE In addition, the console offers nine preset programs. Each program automatically changes the resistance of The advanced console offers a selection of features the pedals and prompts you to increase or decrease designed to make your workouts more effective.
- Page 15 Follow your progress with the displays. HOW TO USE THE MANUAL MODE The matrix—When the manual mode is Begin pedaling to turn on the console. selected, the matrix will show a track The elliptical exerciser requires no batteries or representing 1/4 external power source.
- Page 16 The Calories dis- sensor and hold the handgrip pulse sensor at play—If no calorie the same time, the console will not display goal was set, this your heart rate accurately. display will show the approximate If there are number of calories sheets of clear you have burned.
- Page 17 When the first segment of the program ends, a se- HOW TO CREATE AND USE A CUSTOM ries of tones will sound and the current resistance PROGRAM level and the current pace setting will be saved in memory. The columns of indicators will then move one column to the left, and the resistance level for Turn on the console.
- Page 18 the Time display. When the first segment ends, all HOW TO USE A PRESET PROGRAM resistance levels will move one column to the left. The resistance level for the second segment will then be shown in the flashing Current Segment Turn on the console.
- Page 19 Put on the chest pulse sensor or hold the HOW TO USE A HEART RATE PROGRAM handgrip pulse sensor. To use a heart rate program, you must wear the Turn on the console. chest pulse sensor (see page 11) or use the handgrip pulse sensor.
- Page 20 Both heart rate programs—As you pedal, the Note: During the program, you can manually over- console will regularly compare your heart rate to ride the resistance level for the current segment, if the target heart rate setting. If your heart rate is desired, with the One-touch Resistance buttons.
-
Page 21: Maintenance And Troubleshooting
MAINTENANCE AND TROUBLESHOOTING Inspect and tighten all parts of the elliptical exerciser HOW TO ADJUST THE DRIVE BELT regularly. Replace any worn parts immediately. First, remove the two M6 x 16mm Button Screws (49) To clean the elliptical exerciser, use a damp cloth and attaching the left Pedal Disc (5). -
Page 22: Exercise Guidelines
EXERCISE GUIDELINES During the first few minutes of exercise, your body WARNING: uses easily accessible carbohydrate calories for en- ergy. Only after the first few minutes of exercise does Before beginning this or any exercise pro- your body begin to use stored fat calories for energy. If your goal is to burn fat, adjust the intensity of your ex- gram, consult your physician. - Page 23 SUGGESTED STRETCHES The correct form for several basic stretches is shown at the right. Move slowly as you stretch—never bounce. 1. Toe Touch Stretch Stand with your knees bent slightly and slowly bend forward from your hips. Allow your back and shoulders to relax as you reach down toward your toes as far as possible.
-
Page 24: Part List
PART LIST—Model No. NTEVEL2086.0 R1206A Key No. Qty. Description Key No. Qty. Description Frame Crank Screw Upright Stand Off Track M6 x 12mm Button Screw Track Frame M10 x 13mm Button Screw Pedal Disc 7mm Spacer Left Side Shield M8 x 19mm Button Screw Right Side Shield M4 x 19mm Screw Stabilizer... -
Page 25: Exploded Drawing
EXPLODED DRAWING A—Model No. NTEVEL2086.0 R1206A... - Page 26 EXPLODED DRAWING B—Model No. NTEVEL2086.0 R1206A...
- Page 27 EXPLODED DRAWING C—Model No. NTEVEL2086.0 R1206A 90 91...
-
Page 28: Ordering Replacement Parts
To help us assist you, please be prepared to give the following information: • the MODEL NUMBER of the product (NTEVEL2086.0) • the NAME of the product (NordicTrack XLT 1200 elliptical exerciser) • the SERIAL NUMBER of the product (see the front cover of this manual) •...
Need help?
Do you have a question about the Xlt 1200 Elliptcal and is the answer not in the manual?
Questions and answers