Icom IC-F4029SDR Instruction Manual
Hide thumbs
Also See for IC-F4029SDR:
- Service manual (48 pages) ,
- Service manual addendum (57 pages) ,
- Instruction manual (48 pages)
Table of Contents
Advertisement
Quick Links
Download this manual
See also:
Service Manual
Advertisement
Table of Contents

Subscribe to Our Youtube Channel
Related Manuals for Icom IC-F4029SDR


Summary of Contents for Icom IC-F4029SDR
- Page 1 INSTRUCTION MANUAL UHF TRANSCEIVER iF4029SDR...
-
Page 2: Important
fire or electric shock. operation, or after being placed in extremely cold areas. DO NOT modify the transceiver for any reason. Optional unit installation should be done at authorized Icom service center only. KEEP the transceiver from the heavy rain, and Never immerse it in the water. -
Page 3: Table Of Contents
TABLE OF CONTENTS IMPORTANT ..................i 6 TONE SQUELCH OPERATION EXPLICIT DEFINITIONS ..............i (Analog mode operation only) ........... 16–18 I Operation ................16 PRECAUTIONS ................i I Tone scan operation ............. 18 TABLE OF CONTENTS ..............ii 1 ACCESSORIES ..............1–2 7 DIGITAL OPERATION ............ -
Page 4: Accessories
ACCESSORIES I Supplied accessories I Accessory attachments ï Battery pack Battery pack Battery charger To attach the battery pack: Slide the battery pack in the direction of the arrow (q), then lock it with the battery release button. • Slide the battery pack until the battery release button makes a ‘click’ sound. -
Page 5: Accessories
ACCESSORIES D Belt clip ï Jack cover To attach the belt clip: Attach the jack cover when the optional speaker-microphone q Release the battery pack if it is attached. or headset is not used. w Slide the belt clip in the direction of the arrow until the belt clip is locked and makes a ‘click’... -
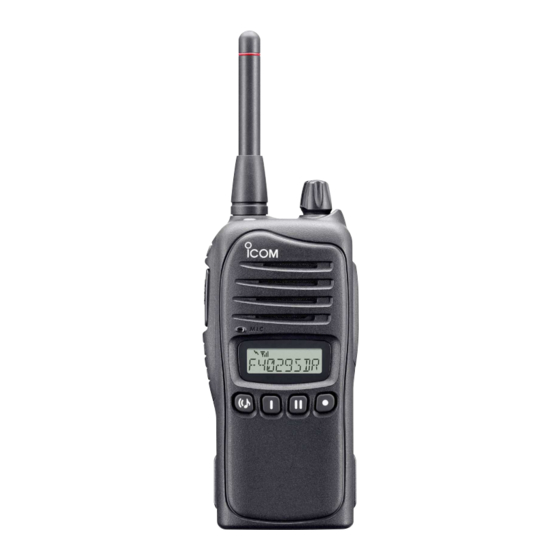
Page 6: Panel Description
PANEL DESCRIPTION I Front panel Digital mode operation: [CODE] Push to display the programmed Common ID, then push [Side2] (CH Up)/[Side3] (CH Down) to select the desired Antenna • Desired function can be programmed by your dealer. (p. 6) e PTT SWITCH [PTT] Push and hold to transmit;... - Page 7 PANEL DESCRIPTION y DEALER-PROGRAMMABLE KEYS ( u FUNCTION DISPLAY (p. 5) The following functions are assigned to each programma- Displays a variety of information, such as an operating ble key as the default. channel number/name, CTCSS frequency, the status mes- sage, etc.
-
Page 8: I Function Display
PANEL DESCRIPTION I Function display y RINGER INDICATOR Appears while sending a Smart-Ring call or Call-Ring. (Analog mode operation only) u BELL INDICATOR ➥ Blinks when the matched Smart-Ring call is received. (Analog mode operation only) ➥ Blinks when the Ringer call is received. (Digital mode operation only) q TRANSMIT INDICATOR i CALL CODE INDICATOR... -
Page 9: I Programmable Function Keys
Repeat steps w and e until the desired key function is [Scan B Start/Stop]. selected. Consult your Icom dealer or system operator for details con- ZONE KEY cerning [Top], [Side1], [Side2] and [Side3] programming. Push this key, then change the zone up or down using [CH Up]/[CH Down]. - Page 10 PANEL DESCRIPTION SCAN A START/STOP KEY USER SET MODE KEY ➥ Push to start and cancel scanning operation. ➥ Push and hold to enter user set mode. • During user set mode, push this key to select an item, and In case of transmission during scan, scanning will be can- change the value or condition using push [CH Up]/[CH Down].
-
Page 11: Panel Description
PANEL DESCRIPTION CALL KEY (Digital mode operation only) Push to transmit the programmed Common ID on the select- ed channel to make a group call. CLEAR KEY (Digital mode operation only) Push to finish the conversation (sending a clear down signal) and return to standby condition. -
Page 12: Basic Operation
BASIC OPERATION I Receiving and transmitting Prior to using the transceiver for the first time, the battery IMPORTANT: To maximize the readability of your signal; pack must be fully charged for optimum life and operation. 1. Pause briefly after pushing [PTT]. (P. -
Page 13: I Lock Function
BASIC OPERATION ‘ ‘ Lock function ‘ ‘ All channel mode and Select channel mode The lock function provides accidental channel changes and function access. The transceiver has 2 indication mode— All channel mode ➥ Push [Top] (LOCK) for 1 sec. to toggle the lock function ON and Select channel mode. -
Page 14: I Select Channel Setting
BASIC OPERATION ‘ ‘ Select channel setting ‘ ‘ “My Name” function For Select channel mode operation, add the desired channels The transceiver displays up to 8-character its name (or a as ‘Select channels’ or clear the unwanted channels (Non- comment) when turning power ON and when the [My Name] select channels). -
Page 15: Scan Operation
SCAN OPERATION I Scan types I Scan list setting Scanning is an efficient way to locate signals quickly over all 2 scanning lists (“SCAN 1” and “ZONE”) are available for channel. wide variety and flexible scanning operation. Setting ‘Select channels’ (p. 11) and using Select channel SCAN1 mode (p. -
Page 16: I Starting A Scan
SCAN OPERATION I Starting a scan To speed up the scanning interval, set the desired channels as ‘Select channels’ and set Select channel mode in advance. (pgs. 10, 11) q Push [Scan A] or [Scan B] to start scanning. w When a signal is received, scan pauses and resumes according to the included CTCSS frequency or DTCS code. -
Page 17: Ringer Function (Analog Mode Operation Only)
RINGER FUNCTION (Analog mode operation only) I Smart-Ring operation The ring function has an answer back feature. This allows you to confirm whether or not a call has reached to the member of Push (S-Ring/Ringer) your group even if the operator is temporarily away from the transceiver. -
Page 18: I Call-Ring Operation
RINGER FUNCTION (Analog mode operation only) I Call-Ring operation I Auto channel function q Set the same operating channel and CTCSS tone code for The auto channel function automatically searches a clear all of your group transceivers. channel during scan when (S-Ring/Ringer) is pushed. -
Page 19: Tone Squelch Operation (Analog Mode Operation Only)
TONE SQUELCH OPERATION (Analog mode operation only) ‘ ‘ Operation y When the received signal includes a matching tone, By default, the transceiver uses a CTCSS/DTCS squelch sys- squelch opens and the signal can be heard. tem. The CTCSS tone squelch. DTCS opens only when •... - Page 20 TONE SQUELCH OPERATION (Analog mode operation only) D D DTCS code setting This transceiver is equipped with 84 DTCS codes. DTCS • Available DTCS code list operation provides communication with silent standby since Code Code Code Code Code you will only receive calls from group members using the same DTCS code number.
-
Page 21: Tone Scan Operation
TONE SQUELCH OPERATION (Analog mode operation only) ‘ ‘ Tone scan operation This transceiver can detect the CTCSS tone frequency or DTCS code in the received signal. By monitoring a signal that is being transmitted from the other station, you can determine the tone frequency or DTCS code necessary to open a squelch. -
Page 22: Digital Operation
DIGITAL OPERATION I Transmitting a call r Push [PTT] to transmit; release to receive. The [Side1] (Code) key toggles between the standby mode t Push and the Common ID selection mode when pushed. During in (Clear) to send the ‘Clear down’ signal. the ID code selection mode, [Side2] (CH Up) or [Side3] (CH •... -
Page 23: I Receiving A Call
DIGITAL OPERATION I Receiving a call I Ringer operation q When a call is received; Before starting communication, you can send the Ringer call • “ ” and “ ” appears and the mute is released. to announce your group station that you are going to trans- mit. -
Page 24: I Break-In Request Call
DIGITAL OPERATION I Break-in request call D D Receiving a break-in request call The break-in request function allows you to announce to q When the break-in request call is received after transmit- another station that you want to talk. ting, the audio sounds. D D Transmitting a break-in request call •... - Page 25 DIGITAL OPERATION • How to use the break-in request? The break-in request call allows you to announce to anoth- er station that you want to talk. Another station will receive it after the transmission is finished. • Station A, B and C are communicating using the same common ID.
-
Page 26: I Status Message
DIGITAL OPERATION I Status message D D General D D Receiving a status message q When a status message is received; The status message can be selected with the programmed • Beeps sound. text, and the message text is also displayed on the function •... -
Page 27: I Digital Mode Indication
DIGITAL OPERATION I Digital mode indication The following indications are available for the digital mode operation. • BREAK : Appears when the break-in request call is received. • CANCELED : Appears when the break-in request call is cancelled. • COMPLETE : Appears when the break-in request call is succeeded. -
Page 28: Set Mode
SET MODE I Set mode programming q Turn power OFF. Set mode is used to change the conditions of the transceiver’s w Push and hold [User Set Mode] to enter the set mode. functions: Backlight, Beep, Beep level, Squelch level* , Mic e Push [User Set Mode] several times to select the desired gain, Battery voltage, Signal monitor*... -
Page 29: I Set Mode Items
SET MODE I Set mode items D Automatic backlighting D Beep tone level This function is convenient for nighttime operation. Select the key-touch beep minimum output level from 1 to 5. • ON : Backlight turns ON continuously. The beep output level is adjustable with [VOL] control. •... -
Page 30: Battery Voltage Indication
SET MODE D Battery voltage indication D Ringer type Select the Battery voltage indicator function ON and OFF. Call-Ring emission type is selectable with 16 different individ- Battery voltage displays on the LCD display for 2 sec., when ual sounds. the POWER is turned ON. -
Page 31: Set Mode
SET MODE D Ringer2 beep output level D Power save Select the ringer 2 beep output level when receiving a call The power save function reduces the current drain to con- from 1 to 5, or minimum output level from 1 to 5. serve the battery power. -
Page 32: I Caution
Icom radios or Icom charger. Only Icom battery seawater, or any other liquids. Do not charge or use a wet packs are tested and approved for use and charge with Icom battery. If the battery gets wet, be sure to wipe it dry before radios or Icom charger. -
Page 33: Battery Charging
• R DANGER! NEVER charge the battery pack in areas with abnormal odor, heats up, or is discolored or deformed. If any of these conditions occur, contact your Icom dealer or dis- extremely high temperatures, such as near fires or stoves, tributor. -
Page 34: I Battery Chargers
BATTERY CHARGING I Battery chargers ï AD-106 installation NOTE: See each instruction manual for details of the q Install the AD-106 desktop charger adapter into the holder charger LED indication, operation, etc. space of the BC-119N/BC-121N. w Connect the plugs of the BC-119N/BC-121N to the AD-106 ï... - Page 35 BATTERY CHARGING ï Rapid charging with the BC-119N+AD-106 ï Rapid charging with the BC-121N+AD-106 The optional BC-119N provides rapid charging of battery The optional BC-121N allows up to 6 battery packs to be packs. The following items are additionally required. charged simultaneously.
- Page 36 BATTERY CHARGING IMPORTANT!: Battery charging Ensure the guide lobs on the battery pack are correctly aligned with the guide rails inside the charger adapter. (This illustration is described showing the BC-160.) Lobs Guide rail...
-
Page 37: Battery Case
BATTERY CASE I Optional battery case (BP-240) When using the optional battery case, install 6 AAA (LR03) Fig.1 size alkaline batteries as illustrated at right. BP-240 q Unhook the battery cover release hook (q), and open the cover in the direction of the arrow (w). (Fig.1) w Then, install 6 AAA (LR03) size alkaline batteries. -
Page 38: Swivel Belt Clip
SWIVEL BELT CLIP I MB-93 contents e Clip the belt clip to a part of your belt. And insert the trans- ceiver into the belt clip until the base clip inserted fully into the groove. Qty. q Belt clip ……………………………………………………… 1 w Base clip ……………………………………………………... -
Page 39: I To Detach
SWIVEL BELT CLIP I To detach q Turn the transceiver upside down in the direction of the w Release the battery pack if it is attached. (p. 1) e Pinch the clip (q), and slide the base clip in the direction arrow and pull out from the belt clip. -
Page 40: Specifications
SPECIFICATIONS I Specifications D D General D D Receiver • Frequency coverage • Receive system : Double conversion Analog : 446.00625–446.09375 MHz superheterodyne Digital : 446.103125–446.196875 MHz • Sensitivity (20 dB SINAD) : 26.5 dBµV/m • Mode : 16K0G3E (FM) •... -
Page 41: I Channel Frequency Lists
SPECIFICATIONS I Channel frequency lists Zone 1 (Analog mode) Zone 2 (Analog mode) Channel Frequency (MHz)* Tone (Hz)* Frequency (MHz)* Tone (Hz)* 446.006250 No setting 446.006250 94.8 446.018750 No setting 446.093750 88.5 446.031250 No setting 446.031250 103.5 446.043750 107.2 446.068750 79.7 446.056250 110.9... -
Page 42: Specifications
SPECIFICATIONS I Channel frequency lists (Continued) Zone 3 (Analog mode) Zone 4 (Digital mode) Channel Frequency (MHz)* Tone (Hz)* Frequency (MHz)* Common ID* 446.006250 67.0 446.103125 446.018750 71.9 446.109375 446.031250 74.4 446.115625 446.043750 77.0 446.121875 446.056250 79.7 446.128125 446.068750 82.5 446.134375 446.081250 85.4... -
Page 43: Options
OPTIONS D BATTERY PACK D BELT CLIPS • MB-93 SWIVEL BELT CLIP Battery pack Voltage Capacity Battery life* • MB-94 BELT CLIP Analog mode 10.4 hrs. The same as supplied with the transceiver. BP-231 7.4 V 1150 mAh Digital mode 8 hrs. -
Page 44: Doc
CE versions of the IC-F4029SDR which dis- play the “CE” symbol on the serial number seal, comply with the essential requirements of the European Radio and Telecommunication Terminal Directive 1999/5/EC. This warning symbol indicates that this equip- ment operates in non-harmonised frequency bands and/or may be subject to licensing con- ditions in the country of use. - Page 45 DECLARATION OF CONFORMITY We Icom Inc. Japan 0168 1-1-32, Kamiminami, Hirano-ku Osaka 547-0003, Japan Declare on our sole responsibility that this equipment complies with the essential requirements of the Radio and Telecommunications Terminal Equipment Directive, 1999/5/EC, and that any applicable Essential Test 1st Feb.
-
Page 46: About Voice Coding Technology
ABOUT VOICE CODING TECHNOLOGY The AMBE+2™ voice coding Technology embodied in this product is protected by intellectual property rights including patent rights, copyrights and trade secrets of Digital Voice Systems, Inc. This voice coding Technology is licensed sole- ly for use within this Communications Equipment. The user of this Technology is explicitly prohibited from attempting to extract, remove, decompile, reverse engineer, or disassem- ble the Object Code, or in any other way convert the Object... - Page 47 MEMO...
- Page 48 < Intended Country of Use > A-6499H-1EU-e Printed in Japan 1-1-32 Kamiminami, Hirano-ku, Osaka 547-0003, Japan © 2006 Icom Inc.
Need help?
Do you have a question about the IC-F4029SDR and is the answer not in the manual?
Questions and answers