Table of Contents
Advertisement
Advertisement
Table of Contents

Related Manuals for Leica S2


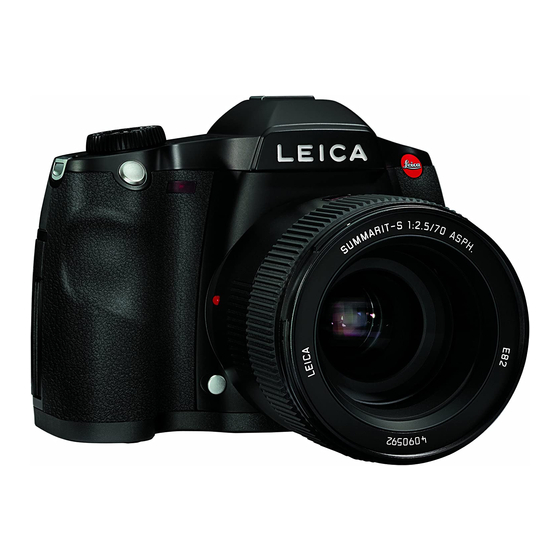
Summary of Contents for Leica S2
- Page 1 LEICA S2 Instructions...
- Page 3 1.10 1.11 1.12 1.12a 1.13c 1.13a 1.13b 1.13 1.15 1.16 1.16a 1.17 1.18 1.14 1.19 1.24 1.23 1.22 1.21 1.20 1.4c 1.4b 1.4a...
- Page 4 1.37a 1.37 1.37b 1.40 1.34 1.26a 1.30 1.31 1.28 1.26 1.25 1.35 1.27 1.32 1.29 1.33 1.36 1.38a 1.38b 1.38 1.38c/d 1.39 1.48 1.48b 1.49b 1.49a 1.42 1.44a 1.49 1.45 1.47 1.48a 1.41 1.44 1.46 1.43...
- Page 5 LEICA S2 Instructions...
- Page 6 This equipment has been tested and found to comply with the Model No.: LEICA S2 Equipment (VCCI). If this is used near a radio or television recei- limits for a Class B digital device, pursuant to Part 15 of the FCC Responsible party/ ver in a domestic environment, it may cause radio interference.
-
Page 7: Foreword
Foreword Dear Customer, Leica would like to thank you for purchasing the LEICA S2 and congratulate you on your choice. With this unique digital SLR camera, you have made an excellent selection. We wish you a great deal of pleasure and success using your new LEICA S2. -
Page 8: Table Of Contents
Charge level displays ............17 Inserting and removing the memory cards ......17 Picture mode Changing the focusing screen..........19 Shutter release button............32 Leica S lenses ..............20 Serial exposures ...............32 Attaching and removing the lens ........20 Setting the focus ..............33 Eyepiece adjustment............21 Manual focus setting - MF ..........33... - Page 9 Selecting the amount of zoom ..........48 Spare parts................55 The B (Bulb) setting............39 Simultaneously viewing several smaller pictures ....49 Maintenance tips for your LEICA S2 and lenses Taking photographs with the self-times .......40 Selecting one of the smaller pictures .........49 Precautions and care instructions ........56 Mirror pre-release..............40...
-
Page 10: Warning Messages
As people can easily pick up charges of tens tries with segregated waste collection systems) of thousands of volts, by walking on synthetic carpets for example, a discharge can occur when you touch your LEICA S2, Legal notes This device contains electrical and/or electronic components particularly if it is placed on a conductive surface. -
Page 11: Scope Of Delivery
Scope of delivery Before using your LEICA S2 for the first time, please check that the accessories supplied are complete. A. Battery B. Charger C. Power plug D. USB connecting cord E. Carrying strap F. Bayonet cap G. Eyepiece protective cover... -
Page 12: Designation Of Parts
Designation of parts Rear view Bottom view 1.14 Brightness sensor 1.34 Hole for portrait format handle guide pin Front view 1.15 Main switch with indented positions 1.35 Battery Shutter release button Camera turned off 1.36 Battery release lever Focal plane shutter in camera activated Self-timer LED / Sensor for white balance Detail: Central shutter in lens activated... -
Page 13: Displays / In The Viewfinder / 9
Indication of warning message on the monitor Shutter speed / exposure time Displays a. Manually set value for and , automatically con- Exposure compensation indicator trolled value for und ; displayed in half steps, or Metering method symbol 2. In the viewfinder (high) or (low) for over or under expo(lsure (not displayed for metering memory lock) -
Page 14: In The Top Panel Display
Displays Start screen Standard screen (appears for 4s after turning on the camera, can be switched to (white displays: manually set, yellow displays: set with click the standard screen at any time by tapping the shutter release wheel, green displays: set automatically) 3. -
Page 15: In The Monitor
Displays Normal play mode Additional information for INFO review (pictures(s) fill the entire monitor area) (reduced picture) 4.2.1 Histogram 4.1.1 Shutter speed 4. In the monitor 4.2.2 Function of button 1.20 4.1.2 Aperture 4.1.1 4.1.2 4.1.3 4.1.4 4.1.5 4.1.6 4.2.3 Symbol for protected pictures 4.1.3 Sensitivity (only appears for delete or protection operations) 4.1.4 Number of picture(s) shown... - Page 16 Image data review Menu control Displays 4.3.1.- Functions of buttons 1.20/.21/.23/.24 4.4.1- Functions of buttons 1.20/.21/.23/.24 4.4.4 4.3.4 4. In the monitor (cont.) 4.4.5 Current menu sections displayed Top left quadrant, settings in CAMERA menu 4.4.6 Scroll bar indicating current menu screen displayed 4.3.7 4.3.8 4.3.5 Picture sequence 4.4.7 Menu functions...
-
Page 17: Menu Items
Menu items CAMERA menu Page 1 5.1 Drive mode Single picture/picture series/self timer Focus Mode AFs / AFc / MF Exposure Metering Exposure Compensation Exposure Bracketing Automatic bracketing Page 2 Auto Slow Synch Limits the shutter speeds used Flash Synch Mode Start or end of exposure Mirror up Mode IMAGE menu... -
Page 18: Attaching The Carrying Strap
• In case of noise, discoloration, deformation, overheating of leaking fluid, the battery must be removed from the camera The LEICA S2 is supplied with the required power by a lithium or charger immediately and replaced. Continued use of the Attaching the carrying strap ion battery (A). - Page 19 First aid: Notes: • Even when used under optimum conditions, every battery • If battery fluid comes into contact with the eyes, there is a • The battery can only be charged outside the camera. has a limited service life! After several hundred charging risk of blinding.
- Page 20 Preparing the charger If using the charger in the USA Connecting the charger If using the charger outside the USA 1. Insert the appropriate plug for the local mains supply into the 1. Disconnect the factory fitted mains plug from the charger 1.
-
Page 21: Inserting / Removing The Battery To/From The Camera
Charge level displays (3.2) Inserting and removing the memory cards The charge level of the battery is indicated in eight stages in the The LEICA S2 enables you to use 2 card types simultaneously camera top panel display (1.11). to store your picture data, and has card slots for SD/SDHC = approx. - Page 22 Otherwise the not yet (completely) saved picture data may be lost. 4. completely remove it. • The LEICA S2 provides various options for saving picture data. More information on this topic can be found under SD/SDHC cards 3. Insert the memory card (s) you want to use as follows: „Saving picture data / memory card management“...
-
Page 23: Changing The Focusing Screen
Important: Follow these instructions exactly when changing the focusing The LEICA S2 allows you to change the focusing screen for opti- screen. Take the utmost care to protect the sensitive surfaces mum adaptation to the relevant subjects and situations (see of the focusing screens from scratches. -
Page 24: Leica S Lenses
Leica S lenses Attaching and removing the lens All lenses and accessories with a Leica S bayonet can be at - Leica S lenses all have characteristic external features: tached to the LEICA S2. - Their distance setting ring (1.7) works differently depending on which focus mode is set: - In manual mode (MF, see p. -
Page 25: Eyepiece Adjustment
LED (1.19) lights up until the camera is ready (2 s) and the The eyepiece (1.16) can therefore be adjusted by ± 2 diopters, so The LEICA S2 is turned on and off using the main switch (1.15). displays in the viewfinder (1.16/2) and in the top panel display that it is exactly set to match your eye. -
Page 26: Menu Control / Settings Menu Control
- To switch to picture mode: • If the monitor was previously inactive (dark), the first time Most of the modes and settings on the LEICA S2 are operated Tap the shutter release button (1.1) you press the button the image data review screen using menus. - Page 27 • If you do this from play mode, there is an intermediate stage 2. Briefly pressing one of the buttons 1.24, 1.23 and 1.21 again 3. Briefly pressing the buttons 1.24, 1.23 and 1.21 again allows in which the four fields (4.1.8 - MENU, 4.1.9 - INFO, 4.1.10 - selects the first screens for the relevant menu function you to call up each page for the relevant menu function group DELETE and 4.1.11 –...
- Page 28 4. Turning the click wheel (1.18) selects the individual menu • The submenu appears, containing a list of the options or values Note: items - turning to the right moves down and to the left moves that can be set for the relevant function. The currently active When the button (1.20) is labeled BACK you can return to the up.
-
Page 29: Quick Access To Menu Functions
Quick access to menu functions For quick operation, you can use the buttons 1.24, 1.23 and 1.21 to directly call up three of the most important or frequently used menu functions. To do this, first specify which menu function you want to access using each individual button. -
Page 30: Presets
4. Turn the click wheel (1.16) to set the figures or the months This function turns the LEICA S2 off automatically after a pre- and press to switch between the three groups. set time. This is equivalent to setting the main switch to 5. -
Page 31: Button Acknowledgement And Signal Tones
Selecting Off for Warnings Note: On the LEICA S2, you can decide whether you want messages or Even if you select Off, an acoustic warning signal will sound in A monitor image is only available in play mode (see p. 46). If ther autofocus mode (see p. -
Page 32: Basic Picture Settings File Format / Compression Rate
Basic picture settings File format / Compression rate Notes: Two file formats are available for recording the picture data - • The resolution is always 37.5 MP, regardless of the for- DNG and JPEG. You can select, whether your picture data mats/compression rates used. -
Page 33: White Balance
Note: 3. then the desired value. When using the LEICA SF58 or electronic flash units that meet the technical requirements of System Camera Adaption (SCA) for the System 3000 and have an SCA-3502 adapter (version 5 onwards), the white balance can be set to Auto to achieve correct color reproduction. -
Page 34: Iso Sensitivity
With 1/f the camera only switches to a higher sensitivity if a not overexposed. lower brightness would cause the shutter speed to fall below As well as the fixed settings, the LEICA S2 also features the To set the sensitivity automatically the 1/f threshold, e.g. at speeds of slower than... -
Page 35: Image Properties/Contrast, Sharpness, Color Saturation
All three image properties can be adjusted – independently – to The LEICA S2 permits allows you to set one of three color If two memory cards are inserted (see p. 17), on the LEICA S2 three different levels using the menu control, so that you can spaces - sRGB, Adobe RGB or ECI RGB. -
Page 36: Shutter Release Button
2. Pressing the shutter release button to the first pressure point Serial exposures and holding it in this position stores the metered exposure You can use the LEICA D-LUX S2 to take single pictures and value in , modes (see p. 38/39). When using also to produce sequences of pictures. -
Page 37: Setting The Focus
Turn the distance setting ring (1.9) on the lens until your subject Two autofocus modes are available. In both of them, the setting With all S lenses, the LEICA S2 allows you to choose between or the most important part of the subject is shown sharply in the procedure is started by tapping (1 pressure point, see p. -
Page 38: Exposure Metering
2. Press the shutter release button (1.1) to the 2 pressure The LEICA S2 provides three different exposure metering depending on the metering method, and weights them differ - point. As long as the button remains depressed, the value is... -
Page 39: Exposure Compensation
Storing with button 1.17 Exposure compensation Bracketing Entering and cancelling an exposure compensation The following are available: Setting the function 1. In the CAMERA section of the menu (see p. 13/22), select - 4 graduations: 0,5EV, 1EV, 2EV and 3EV 4. -
Page 40: Values Above And Below The Metering Range
3. Confirm the setting by pressing the click wheel. Notes: Values above and below the metering range • The setting for Interval is marked as ready for editing. The • Depending on the exposure mode (see „Exposure control“ If the camera’s metering range is not reached, accurate expo- corresponding number of red arrows appears above the section on p. -
Page 41: Exposure Control
2 controls, the shutter speed setting dial (1.10) 4000 - With the integrated central shutter in some Leica S lenses – and the click wheel (1.18). main switch 1.15 to (see p. 21) – from 8 s to s. -
Page 42: Exposure Modes
Exposure modes Program shift Aperture priority - A The program shift function on the LEICA S2 enables you to The LEICA S2 provides you with a choice of four exposure FIRMWARE change the shutter speed/aperture combination set by the Setting the mode modes. -
Page 43: Shutter Priority
Note: speed if possible. However, a correct exposure is normally with slow shutter speeds the LEICA S2 automatically takes a If automatic sensitivity setting is activated at the same time still used in such cases, by automatic setting of the appropri - second „black picture“... -
Page 44: Taking Photographs With The Self-Times
The delay time then begins. and closing of the lens aperture, the LEICA S2 includes the option release, the function must be set to in the menu. -
Page 45: Depth Of Field Preview Button And Depth Of Field
1. In the IMAGE section of the menu (see p. 13/22), select User 1. In the IMAGE section of the menu (see p. 13/22), select User You can use the depth of field preview button (1.4) on the LEICA S2 Profile (5.13). -
Page 46: Folder Management
After confirming the settings by pressing button 1.21, labeled Important: of 999 folders. The LEICA S2 allows you to create new folders at OK in this case, or after setting last position by pressing Simple formatting does not cause the data on the card to be any time and to specify their name yourself. -
Page 47: Flash Photography
If, for example, you want to connect a studio flash system to the LEICA S2 that If flash units not specially designed for the LEICA S2 are used, the white balance... -
Page 48: Selecting The Firing Moment
TTL operation (e.g. „TTL-HSS“ on the tions available on the LEICA S2 and system compatible flash chronization with the end of the exposure, i.e. immediately LEICA SF 58), the following actions are necessary on the LEICA S2 units. before the 2 shutter curtain begins to close the image apertu- •... -
Page 49: Strobe Flash Mode With System Compatible Flash Units
In such cases the LEICA S2 will not fire the flash unit even ty, the focal length and the distance to the subject (see flash though it is switched on and ready for use. -
Page 50: Preview Mode
The function allows you to • Even pictures that have not yet been transferred from the After turning on, the LEICA S2 is always in record mode, i.e. the - select the time for which the picture is displayed, and camera's buffer memory onto a card - the LED 1.19 is still... -
Page 51: Normal Review 4.1
Normal review 4.1 The histogram Image data review 4.3 The LEICA S2 allows you to choose between four histogram This view lists the settings used to produce the image previously variations: Based on either the overall brightness or separately shown. -
Page 52: Viewing Other Pictures / „Scrolling" In The Memory
Viewing other pictures / Image review, zoom in Horizontal movement „Scrolling“ in the memory 1. In normal review mode (see above) press the click wheel In normal review mode (see above), turning the click wheel 2. You can turn the click wheel to move the zoomed area to the (1.18). -
Page 53: Simultaneously Viewing Several Smaller Pictures
Retaining the zoom when „scrolling“ Simultaneously viewing several smaller pictures Switching to the other memory card When the Zoom Lock function is activated, the set zoom is Turning the click wheel (1.18) to the left 1. Turn the click wheel (1.18) to the left beyond the display of 9 retained when you view other pictures. -
Page 54: Protecting Pictures / Clearing Delete Protection
Protecting pictures / Notes: Clearing delete protection • If protection or canceling protection for single pictures is active, other pictures can be called up by turning the click 1. In normal review mode (4.1) press any of the 4 buttons 1.20, wheel (1.18). -
Page 55: Deleting Pictures
Deleting pictures To delete only one picture To delete all pictures 1. In normal review mode (4.1) press any of the 4 buttons 1.20, 1.21, 1.23, or 1.24. • The image field shows -for 5s - the 4 fields 4.1.9 – MENU, 4.1.10 –... -
Page 56: Additional Functions
(1.32) on the LEICA S2 to a free USB port on the com- (1.32) on the LEICA S2 to a free USB port on the computer. To do using a USB hub or extension cables can result in malfunctions. -
Page 57: Connecting And Transferring Data With The Camera As An External Drive
Windows signature. Ignore this message and continue with the installation. Connecting and transferring data with the camera as an external drive / Connecting and transferring data using card readers / LEICA Image Shuttle/ 53... -
Page 58: Installing Firmware Updates
6. Press button 4.5.3 Leica is constantly working on developing and optimizing its With the LEICA S2 you can view the saved pictures at any size • The entries in fields 4.5.5 and 4.5.3 change. products. As digital cameras have many functions that are con-... -
Page 59: Miscellaneous
Thanks to its shape and conveniently positioned controls, the Filters S2 hand grip makes it much easier to take portrait format pic - UVa filters and polarization filters are available for Leica S lenses tures. In addition, it allows a supplementary battery to be used fitted with standard filter threads. -
Page 60: Precautions And Care Instructions
• and and dust can damage the camera and the memory card. radio equipment). Take particular care when changing lenses and when inser- • If you place the LEICA S2 on or very close to a television set, ting and removing the cards. its magnetic field could interfere with picture recordings. -
Page 61: Condensation
• Always remove the battery if you will not be using the LEICA S2 months. It is also recommended that you repeatedly move for a long period of time. Otherwise, after several weeks the For memory cards and use all other controls. -
Page 62: Cleaning The Sensor
However, if the battery capacity is lower, the warning message damage may occur! fied by dark spots or marks on the pictures. The LEICA S2 can Attention - Battery too low for sensor cleaning appears be sent to Leica AG's Customer Service department for the sen- instead to indicate that the function is not available, i.e. -
Page 63: Storage
Storage • If you will not be using the LEICA S2 for an extended period, we recommend that you a. turn it off (see p. 21), b. remove the memory cards (see p. 17), and c. remove the battery (see p. 17), (after a maximum of 3 months, the set time and date will be lost, see p. -
Page 64: Index
Enlarge, see play mode and viewing pictures........48 Connection cords ...............55 Flash units ..................55 Exposure control / Exposure metering ........37/34 Filters ..................55 Bracketing ...............35/36 Hand grip S2 ................55 Exposure compensation .............35 Interchangeable lenses ...............55 Metering methods...............34 Remote release cord S ..............55 Center-weighted metering............34 S Pro battery charger ..............55... - Page 65 Shutter speed setting dial ...............37 Sounds (acknowledge (response) tones).........27 Menu items..................13 Menu language ................26 Spare parts..................55 Mirror pre-release................40 Storing the LEICA S2...............58 Monitor..................27/11 Switch off, automatic..............26 Setting the brightness / illumination...........27 Technical Data ................62 Noise reduction ................39 Time and date .................26 Parts, designation................8...
-
Page 66: Technical Data
P and A exposure modes and with system compatible flash units with appropriate features Flash exposure compensation On LEICA SF 58, ± 3 EV ad - justable in EV steps. - Page 67 8000 und glass screen with cross hairs, universal screen (ground possible with all faster shutter speeds than s (with LEICA stable 4pin LEMO socket for remote control accessories, stable glass screen with micro-prism ring and wedge, standard equip- SF58 and HSS compatible SCA 3002 standard flash units and 5pin LEMO socket for data output (USB 2.0 standard), contact...
-
Page 68: Leica Academy
As well as outstanding high-performance products for taking, Current information about products, news, events and the Leica AG’s Customer Service center, or the repair service of the reproducing and viewing photographs, for many years we have Leica company is available on our homepage on the Internet at:... - Page 69 Trademark of the Leica Camera Group/ Registered Trademark © 2009 Leica Camera AG...
- Page 70 Leica Camera AG / Oskar-Barnack-Str. 11 / D-35606 Solms www.leica-camera.com / info@leica-camera.com Telefon +49 (0) 64 42- 208-0 / Telefax +49 (0) 64 42- 208-333...
-
Page 71: Firmware Update
4. Simplified image review operation 5. Improved monitor image quality 6. Increased functional reliability when changing exposure modes 7. Correction of an error when using LEICA Image Shuttle software 8. Optimization of JPEG image quality 9. Additional functions: 9.1. Additional white balance preset HMI 9.2. - Page 72 Step 2: Downloading the latest firmware Check the version of the firmware currently installed firmware 1. Download and save the file FW_S2_1_0_0_16.S2 7.48 to Leica recommends updating your camera firmware when the your computer/desktop. installed version is an earlier version than the current update.
- Page 73 PC. Should your PC not have an appropriate slot, please use an external card reader. Please note: 3. Copy the file FW_S2_1_0_0_16.S2 into the root directory of If the battery does not have sufficient charge, you will see a your memory card (*1).
- Page 74 Detailed description of the changes 1. Consistent, continuous image numbering 2. Correction of an error when using memory cards not The camera automatically numbers new images sequentially. formatted in the camera The numbering sequence is continued when a new or format- Memory cards formatted with a computer or other devices ted memory card is inserted into the camera (following on must be reformatted in the camera before they can be used.
- Page 75 3. Improvement of data transfer speed for computer- 4. Simplified image review operation 5. Improved image review quality tethered photography A short press of button 1.20 (upper right-hand button next to The image review quality in the monitor has been improved. The speed of the saving and transfer procedure for tethered monitor) calls up normal review mode.
- Page 76 If the shutter speed has been set in (please refer to the camera instructions, pages 38–39). LEICA Image Shuttle, or is different from the speed on the The operational mode of the click wheel can be adjusted in the shutter dial, it is displayed in blue on the top panel display.
- Page 77 9. Additional functions 9.1 Additional white balance preset HMI 9.2 Additional viewfinder information: exposure compen- The camera now has the following additional functions: (Hydrargym Medium Arc Length Iodide) The additional white sation balance preset, HMI, has been added. Exposure compensation values are now indicated in the viewfinder’s light balance.
- Page 78 9.3 Custom settings for depth of field preview button 9.4 Selectable top panel standby time 9.5 Control element lock For particularly fast handling, the functions of the buttons The standby time of the top panel display can now be selected A new function has been implemented with which the control 1.21, 1.23, 1.24, and 1.3 can be customized to provide im- in the menu.
- Page 79 9.6 Extended custom functions 10. Improved lens performance 11. Automatic detection of interchangeable focusing For particularly fast handling, the functions of the buttons Lens performance has been improved further. screen types 1.21, 1.23, 1.24, and 1.3 can be customized to provide im- Interchangeable focusing screen types (e.g.
- Page 80 Version FW S2 1.0.0.17 Update version 1.0.0.17 File name/size FW_S2_1_0_0_17.S2 / 7,9 MB Description of Changes Update date 2010/16/9 Support of the new Leica lens: Leica Apo-Macro-Summarit-S Download location https://owners.leica-camera.com 1:2,5/120mm ASPH. Important: When updating firmware, you should never: - turn off the camera...
- Page 81 FAILURE TO COMPLY WITH THIS MAY LEAD TO SEVERE DAMAGE TO YOUR CAMERA! Should the functionality of your camera be impaired following a firmware update, please contact your Leica dealer or your nearest Leica Customer Service partner. Firmware Update 1.0.0.24 / 1...
- Page 82 S2 Firmware Update 1.0.0.24 1. Extending the memory card compatibility 2. Lossless DNG compression The memory card compatibility has been extended to 64GB DNG (digital negative) can now be compressed lossless in line Detailed description of changes (UDMA6). with the DNG standard.
- Page 83 3. Clipping Definition 4. Improvement in histogram for automatic picture review 5. Extension of exposure time to 125s The light and shade warning can now be defined. This provides The histogram display for automatic picture review has been Long-time exposure - the maximum exposure time has been direct control in terms of the pre-printing stage settings enlarged to improve legibility.
- Page 84 6. Shutter speed pre-selection in BULB mode 7. Extension of setting options for AF/AE lock button MF mode In BULB exposure mode (B), the extended menu can be called The functioning of the AF/AE lock button (1.17) can now be In MF mode, the AF/AE lock button can be assigned the up by pressing the click wheel.
- Page 85 AF mode 8. Optimization of AF performance - dynamic AF metering In AF mode, the AF/AE lock button can be assigned the field width following functions: We have been able to further increase the metering accuracy of the autofocus function. In particular, very small image AF-L - Autofocus lock (AFs / AFc) details can now be focused better.
- Page 86 FAILURE TO COMPLY WITH THIS MAY LEAD TO SEVERE DAMAGE TO YOUR CAMERA! Should the functionality of your camera be impaired following a firmware update, please contact your Leica dealer or your nearest Leica Customer Service partner. Firmware Update 1.0.1.8 / 1...
- Page 87 This features a quick access to settings and gives the traditional way by taking picture by picture. This feature is very photographers the opportunity to customize the Leica S2 to helpful if you use the pictures for HDR processing afterwards.
- Page 88 Version FW S2 1.0.2.0 Update version 1.0.2.0 File name/size FW_S2_1_0_2_0.S2 / 7,9 MB Description of Changes Update date 2011/20/12 Support of the new Leica lens: LEICA ELMARIT-S 2.8/30mm Download location https://owners.leica-camera.com ASPH. Important: When updating firmware, you should never: - turn off the camera...
- Page 89 Update version 1.0.3.3 File name/size FW_S2_1_0_3_3.S2 / 7.5 MB Description of Changes Update date 2012/10/5 - Support of the new Hasselblad lens adapter Leica Download location https://owners.leica-camera.com S-Adapter H –full functionality (order no. 16030) - Improvement of flash synchronization with...
- Page 90 Update version 1.0.4.2 File name/size FW_S2_1_0_4_2.S2 / 7.5 MB Description of Changes Update date December, 7th 2012 - Support of the new Leica S-lens: Leica Super-Elmar-S Download location https://owners.leica-camera.com 1:3.5/24mm ASPH. - Support of the new Leica S-lens: Leica Vario-Elmar-S 1:3.5-5.6/30-90mm ASPH.
Need help?
Do you have a question about the S2 and is the answer not in the manual?
Questions and answers