Table of Contents
Advertisement
Available languages
Available languages
Quick Links
Advertisement
Table of Contents

Related Manuals for Drobo Roboticsl


Summary of Contents for Drobo Roboticsl
- Page 1 User Guide...
- Page 4 Drobo guia de usuario en su idioma. www.drobo.com/support/intl Veuillez voir le site Web ci-dessous pour le manuel d’utilisateur de Drobo dans votre langue. www.drobo.com/support/intl Si prega di consultare il sito web sotto per la Drobo Guida utente nella vostre lingua. www.drobo.com/support/intl 次のウェブサイトで、Drobo ユーザーガイドの最新更新 日本語...
- Page 8 DroboShare ....................11 Initialize your Drobo ................11 Picking a file system and volume size ........... 11 Formatting for PC using Drobo Dashboard ........... 12 Formatting for Mac using Drobo Dashboard ........14 Formatting with DroboShare using Drobo Dashboard ......15 Drobo Lights .....................
- Page 9 What to do when not using your Drobo ..........19 V. DroboShare ..................21 Connect 1 or 2 Generation (only) Drobo to DroboShare ....21 Formatting with DroboShare using Drobo Dashboard ......21 DroboShare Lights ..................23 DroboShare settings ................24 VI.
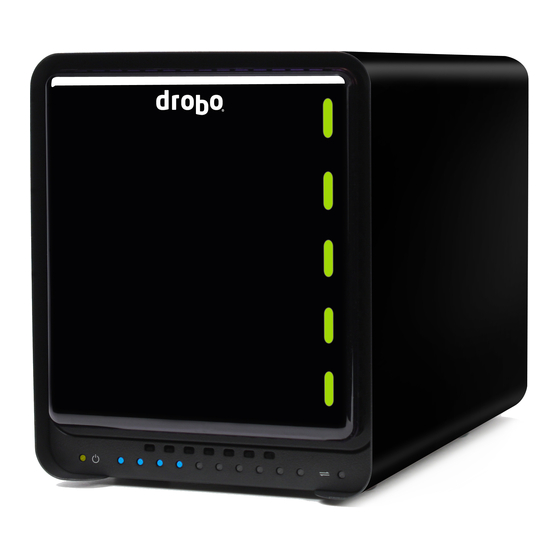
- Page 10 After a drive is installed into an empty bay, the new drive capacity is immediately available and protected. Drobo can act as one large drive, making it easier to find what you’ve stored on it. Drobo’s Data Bay indicator lights tell you everything you need to know! Upgrading capacity is as simple as adding ink to a printer.
- Page 11 Unlike outdated technologies that emerged twenty plus years ago and the frustrating products on the market today, Drobo is an industry-changing product line that combines the advanced concepts of storage virtualization and cybernetics, to take the pain out of storage management.
- Page 12 Before you set up your Drobo, you should determine if you will need to share your Drobo with additional computers. If so, see “Sharing Drobo between computers” on page 25 for further information. To set your Drobo up, you will need to do the following: 1.
- Page 13 750GB drive will have approximately 700GB worth of capacity. This discrepancy has nothing to do with Drobo. During your initial setup, Drobo Dashboard asks you if you want to check for updates automatically. We highly recommend you select the “Yes”...
- Page 14 Drobo Dashboard is used to set up, configure, and interact with your Drobo or DroboShare. You will find further detail on each one in the section specific to that product. Drobo Dashboard is the recommended companion application that keeps you informed of Drobo’s status and allows you to customize Drobo to best fit your storage needs.
- Page 15 The Data tab in Advanced Controls gives you in-depth details on the status of your Drobo. You should go to this screen if Drobo is in the process of protecting your data and you would like to know when it will finish.
- Page 16 To start using DroboCopy on a PC, launch Drobo Dashboard and right- click the Drobo Dashboard icon (pie chart) in the System Tray (Notification Area) and select “DroboCopy Settings…” On a Mac, launch Drobo Dashboard and go to the Drobo Dashboard menu and select “DroboCopy Settings…”...
- Page 17 Once you’ve chosen the number and capacities of drives to install, all you have to do is remove your Drobo’s face plate by simply pulling it off and then slide the drives into the Data Bays. It doesn’t matter which drive goes into which Data Bay.
- Page 18 Connection Drobo S Generation Generation Type Drobo Drobo USB 2.0 FireWire 800 eSATA Note: eSATA is faster than FireWire 800, which is faster than USB 2.0. Note: Firewire 800 is on the 2nd Generation Drobo only.
- Page 19 Drobo and to your power source. If you are setting up a Drobo S, there is a toggle power switch on the back of the unit. You will need to toggle this switch to turn your Drobo on.
- Page 20 If you are going use your Drobo on a network, you will need to use the companion product, DroboShare. Your Drobo connects to DroboShare, which connects to the network. Please see page 20 for further detail on setting up this connection. Return to this point to complete your Drobo setup.
- Page 21 Click “Yes.” Note: Newer versions of Windows (including Vista and Windows 7) will also offer to format your Drobo. We recommend that you click “Cancel” and use Drobo Dashboard to format. 2. You will be shown the message to the right, asking you to select Drobo’s file...
- Page 22 Drobo to restart. When formatting is complete, your Drobo is ready to be used. You will be able to access it like any other drive connected to your computer. Tip: You can determine actual disk space usage by opening Drobo Dashboard.
- Page 23 Click “Yes.” Note: Mac OS X will also offer to format the Drobo storage. We recommend that you click “Ignore” and use Drobo Dashboard to format. 2. You will be shown the...
- Page 24 Drobo to restart. When formatting is complete, Drobo is ready to be used. You will be able to access it like any other drive connected to your computer. Tip: You can determine actual disk space usage by opening Drobo Dashboard.
- Page 25 Capacity Gauge Blue: Displays the percentage of your Drobo that is full, in 10% increments. The Drobo Dashboard application allows you to easily check the status, change settings, etc., on your Drobo. See page 5 for an overview of Drobo Dashboard.
- Page 26 The Data tab in Advanced Controls gives you in-depth details on the status of your Drobo. You should go to this screen if Drobo is in the process of protecting your data and you would like to know when it will finish.
- Page 27 By default, Drobo S automatically spins down the hard disks after 15 minutes of inactivity. This helps save electricity and can prolong the life of the drives. However, it will take the Drobo a few moments to spin the...
- Page 28 Note: It will take a brief time for your Drobo to enter standby mode. The power light will change from green to orange and the drive bay lights will go off, indicating it is safe to disconnect the data cable and/or power cord.
- Page 29 (standby) mode (spins down the hard drives) when it has not been accessed for 15 minutes or when you turn off your computer. Note: Drobo S allows you to modify the time intervals for disk drive spin down. See page 18.
- Page 30 Drobo connects directly to one computer at a time via the provided USB 2.0 or FireWire 800 cable. However, you may have a need to share your Drobo across your network. Using Drobo with DroboShare, computers will show Drobo in their list of network devices, which allows for centralized storage or easy file sharing between computers.
- Page 31 2. You will be shown the message to the right, asking you to select Drobo’s file system format. If you are only planning to use Drobo on DroboShare, we recommend selecting EXT3. Click “Continue/Next.” 3. You will be shown the...
- Page 32 Drobo to restart. When formatting is complete, Drobo is formatted and ready to be used. The Drobo volume(s) will automatically connect to your computer. Each volume will appear as a Volume on your Mac or as a Network Drive on your PC.
- Page 33 “Setup” button in the DroboShare section. Tip: If you have an existing 1 Generation Drobo, place it in Standby (see “What to do when not using Drobo” on page 19) and then follow the steps to connect Drobo to DroboShare (page 20).
- Page 34 Only the FAT32 format option in the Drobo Dashboard ensures that Macs, PCs, and Linux machines will be able to read and write data on Drobo. FAT32 is an older file system format that is generally less protective of your data than modern (journaled) file systems such as HFS+ or NTFS.
- Page 35 A. Either add a standard 3.5” SATA hard drive to an empty Data Bay, or remove the smallest capacity drive and replace with a larger capacity drive. It’s okay to do this while Drobo is running; you do not need to put Drobo into Standby.
- Page 36 Q. How can I wipe all the data from my drives and reset my Drobo? A. WARNING: THIS PROCEDURE WILL CLEAR ALL THE DATA STORED ON DROBO. There are two ways to reset your Drobo. First, in Advance Controls > Tools tab, click the “Reset…” button. The on-screen instructions will walk you through the process.
- Page 37 Q. Is there a foolproof way to protect my data on the Drobo? A. If the Drobo is the only source of your data, then that would be considered your “primary” storage. The only way to fully protect your data is to maintain a true backup.
- Page 38 The one drawback is that the computer which is sharing the Drobo must be turned on, in order for others to get access to the Drobo. To find out more about using your computer’s file sharing capabilities, consult your operating system documentation.
- Page 39 A. Yes, you can purchase additional hardware and phone support by purchasing DroboCare. To learn more about DroboCare visit: www.drobo.com/drobocare. Q. How do I get support for Drobo? A. If you did not register your Drobo during setup, first go to www.drobo.com/registration to register your Drobo. Then go to www.drobo.com/support for details on how to contact support.
- Page 40 Generation have two FireWire ports? Can I connect it to two computers at the same time via FireWire? A. No. You cannot connect the Drobo to two computers at the same time. The two FireWire ports are for daisy chaining devices only. If...
- Page 41 Drobo S Q. Why does the Drobo S have two FireWire ports? Can I connect it to two computers at the same time via FireWire? A. No. You cannot connect the Drobo S to two computers at the same time. The two FireWire ports are for daisy chaining devices only. If...
- Page 42 Q. I’m using my Drobo with DroboShare. Why does Drobo Dashboard not see my Drobo? A. First, check to make sure you have the latest Drobo Dashboard and Drobo firmware (version 1.1.0 or greater). Next, check to make sure DroboShare has been assigned an IP address on your network. This is required to share DroboShare on your network.
- Page 43 DroboShare. How do I use the native Windows Vista backup tool with Drobo/DroboShare? A. When you use the native Vista backup tool to back up to the Drobo, Windows will ask you for a username and password. If you have not...
- Page 44 Copyright 2009-2010 Data Robotics, Inc. Data Robotics, Drobo, DroboShare, DroboPro, DroboElite, Drobo S, and BeyondRAID are trademarks of Data Robotics, Inc., which may be registered in some jurisdictions. All other trademarks used are the property of their respective owners.
- Page 48 Einsetzen von Laufwerken in Drobo ............9 Anschließen von Drobo an Ihren Computer ..........10 USB 2.0 ....................11 FireWire 800 (Drobo der zweiten Generation und Drobo S) ....11 eSATA (Drobo S) ..................11 Stromanschluss ..................11 Anschließen Ihres Drobos der 1. und 2. Generation über DroboShare an ein Netzwerk ..............
- Page 49 V. DroboShare ..................23 Anschließen von Drobos der ersten und zweiten Generation an DroboShare ..................23 Formatieren von DroboShare mit Drobo Dashboard ......23 DroboShare-Anzeigen ................25 DroboShare-Einstellungen ............... 26 VI. Gemeinsame Verwendung des Drobos durch mehrere Computer ..27 Verwenden von DroboShare zum Verbinden Ihres Drobos mit einem Netzwerk (nur Drobos der ersten/zweiten Generation) ....
- Page 50 Aufgabe zu machen. Die Drobo-Produktfamilie bietet mühelose, sichere und erweiterbare Speicherung. Es gibt viele verschiedene Möglichkeiten, digitale Inhalte zu speichern und zu schützen. Aber Drobo ist das einzige vollautomatische Speichergerät, das viele Datenverwaltungsaufgaben ohne Benutzereingriff übernimmt. Hier sehen Sie, was Sie erwartet: ...
- Page 51 Gegensatz zu den vor mehr als 20 Jahren entwickelten und inzwischen veralteten Technologien und den heutzutage auf dem Markt erhältlichen, meist wenig zufrieden stellenden Produkten stellt Drobo eine für die Branche revolutionäre Produktlinie dar, die die fortschrittlichen Konzepte der Speichervirtualisierung und Kybernetik kombiniert.
- Page 52 Bevor Sie Ihren Drobo einrichten, sollten Sie überprüfen, ob Sie diesen gemeinsam mit weiteren Computern verwenden werden. Ist dies der Fall, finden Sie weitere Informationen unter „Gemeinsame Verwendung des Drobos durch mehrere Computer“ auf Seite 27. Um Ihren Drobo einzurichten, müssen Sie wie folgt vorgehen: 1.
- Page 53 750-GB-Laufwerk eine Kapazität von ungefähr 700 GB. Diese Diskrepanz wird nicht von Drobo verursacht. Während der Erstinstallation werden Sie in Drobo Dashboard gefragt, ob automatisch nach Updates gesucht werden soll. Sie sollten unbedingt die Option „Ja“ wählen, um eine optimale Leistung Ihres Drobos sicherzustellen.
- Page 54 Drobo Dashboard ist die empfohlene Begleitanwendung, die Sie über den Drobo-Status informiert und Ihnen ermöglicht, Drobo an Ihre Speicheranforderungen anzupassen. Hinweis: Um Drobo Dashboard installieren zu können, müssen Sie auf Ihrem Computer über Administratorrechte verfügen. Wenn Sie Drobo Dashboard öffnen, wird die Hauptseite angezeigt. Auf dieser Seite erhalten Sie eine kurze Übersicht über Drobo-Status und -...
- Page 55 Kapazitätsrechner namens Drobolator (www.drobo.com/drobolator) testen. Die Registerkarte „Daten“ in den erweiterten Steuerungen stellt genaue Details zum Status von Drobo zur Verfügung. Sie sollten auf diesen Bildschirm wechseln, wenn Drobo gerade Daten schützt und Sie wissen möchten, wann dieser Vorgang beendet wird. Der Status wird im Abschnitt „Schutz vor Datenverlust“...
- Page 56 DroboCopy bietet eine einfache Möglichkeit an, Sicherungskopien Ihrer Dateien auf Ihrem Drobo zu erstellen. Wählen Sie den zu sichernden Ordner, den Speicherplatz für die Sicherungskopien und den Zeitpunkt zum Ausführen des Sicherungsvorgangs aus. Und schon haben Sie alles erledigt. Ihr ausgewählter Sicherungsordner und alle darin enthaltenen Elemente werden beim ersten Ausführen von DroboCopy kopiert.
- Page 57 Warnstufe, die für alle an den Computer angeschlossenen Drobo-Geräte (einschließlich DroboShares im Netzwerk) ausgewählt ist. Um auf einem PC auf diese Option zuzugreifen, starten Sie Drobo Dashboard und rechtsklicken Sie auf das Drobo Dashboard-Symbol in der Taskleiste und wählen Sie „E-Mail-Einstellungen...“. Auf einem Mac-Computer starten Sie Drobo Dashboard und wählen im Drobo...
- Page 58 Daten werden gelöscht. Stellen Sie sicher, dass Sie nach dem Auspacken keine der offen liegenden Laufwerksplatinen berühren. Achten Sie darauf, dass die Anschlüsse des Laufwerks zum Drobo und nach unten auf dem Laufwerk zeigen (siehe Abbildung). Öffnen Sie die Laufwerkssperre, indem Sie sie nach links drücken, und schieben Sie das...
- Page 59 Drobo kann auf unterschiedliche Weise an Ihren Computer angeschlossen werden. Sie sollten die schnellste verfügbare Verbindungsmethode auswählen. Es kann nur jeweils ein Anschlusstyp verwendet werden. Verfügbare Anschlüsse: Drobo der zweiten Drobo der ersten Anschlusstyp Drobo S Generation Generation USB 2.0...
- Page 60 Bei Drobo haben Sie die Möglichkeit, USB 2.0 zum Anschließen an Ihren Computer zu verwenden. USB 2.0 ist zwar nicht so schnell wie FireWire 800 oder eSATA, ist jedoch auf jedem in den letzten Jahren hergestellten Computer zu finden. FireWire 800 sorgt für eine herausragende Leistung bei Ihrem Drobo.
- Page 61 Begleitprodukt DroboShare verwenden. Ihr Drobo verbindet sich mit DroboShare, das wiederum eine Verbindung zum Netzwerk herstellt. Weitere Einzelheiten zum Einrichten dieser Verbindung finden Sie auf Seite 22. Kehren Sie zu diesem Punkt zurück, um das Drobo- Setup abzuschließen. Hinweis: Drobo S funktioniert mit DroboShare NICHT.
- Page 62 Meldung angezeigt. Klicken Sie auf „Ja“. Hinweis: Mit neueren Versionen von Windows (einschließlich Vista und Windows 7) ist es ebenfalls möglich, Drobo zu formatieren. Wir empfehlen, auf „Abbrechen“ zu klicken und Drobo Dashboard zum Formatieren zu verwenden.
- Page 63 2. Die rechts stehende Meldung wird angezeigt, über die Sie aufgefordert werden, das Dateisystemformat für Drobo auszuwählen. Sie haben die Wahl zwischen NTFS (XP-kompatibel), NTFS und FAT32. Für die meisten Benutzer ist einer der NTFS- Versionen am besten geeignet. Wenn Sie Ihre Wahl getroffen haben, klicken Sie auf „Weiter“.
- Page 64 Dashboard automatisch erkannt und es wird die rechts stehende Meldung angezeigt. Klicken Sie auf „Ja“. Hinweis: Mit Mac OS X ist es ebenfalls möglich, den Drobo-Speicher zu formatieren. Wir empfehlen, auf „Ignorieren“ zu klicken und Drobo Dashboard zum Formatieren zu verwenden.
- Page 65 Minuten dauern und könnte zu einem Drobo- Neustart führen. Nach dem Formatieren ist Drobo betriebsbereit. Sie können auf Drobo wie auf jedes andere mit Ihren Computer verbundene Laufwerk zugreifen. Tipp: Sie können die tatsächliche Speicherplatznutzung bestimmen, indem Sie Drobo Dashboard öffnen. Die blauen Kapazitätsanzeigen bieten einen...
- Page 66 Sie Drobo mit Drobo Dashboard formatieren. Detaillierte Information finden Sie auf Seite 23. Zu den vielen Vorteilen von Drobo gehören die Anzeigen, die Ihnen alles Wesentliche miteilen, ohne dazu eine Anwendungssoftware auf Ihrem Computer starten zu müssen. Zur Erinnerung: Drobo ist so konzipiert, dass zu allen Zeiten eine aktive Überwachung und ein aktiver Schutz...
- Page 67 Drobo Dashboard finden Sie auf Seite 5. Die Registerkarte „Daten“ in den erweiterten Steuerungen stellt genaue Details zum Status von Drobo zur Verfügung. Sie sollten auf diesen Bildschirm wechseln, wenn Drobo gerade Daten schützt und Sie wissen möchten, wann dieser Vorgang beendet wird. Der Status wird im...
- Page 68 Ihren Drobo zurücksetzen, Volumes neu formatieren oder Einstellungen für DroboShare und Drobo ändern (Einzelheiten zu den DroboShare- Einstellungen finden Sie auf der 26). Wenn Sie einen Drobo S haben, können Sie durch Klicken auf die Schaltfläche „Einstellungen“ auch die Helligkeit der Anzeigeleuchten verringern, den Zeitraum bis zum...
- Page 69 Datenträgerredundanz aktivieren. Außerdem werden auf dieser Seite nützliche Informationen zu Ihrem Drobo angezeigt und Sie können hier auf einfache Weise nach Updates von Drobo Dashboard und der Produkt-Firmware suchen. Die zweifache Datenträgerredundanz ist eine Einstellung, mit der Ihre gespeicherten Daten bei zwei gleichzeitigen Laufwerksausfällen geschützt werden.
- Page 70 Betriebsanzeige wird orange, wenn das Daten- und/oder Stromversorgungskabel sicher getrennt werden kann. Hinweis: Es dauert einen kurzen Moment, bis Ihr Drobo in den Standby-Modus versetzt ist. Die Betriebsanzeige ändert sich von grün zu orange und die Anzeigen der Laufwerksschächte erlöschen. Hierdurch wird angegeben, dass es sicher ist, das Datenkabel und/oder Stromversorgungskabel zu trennen.
- Page 71 Drobo wechselt automatisch in den Stromspar-/Standby-Modus (Herunterfahren der Festplatten), wenn in den letzten 15 Minuten kein Zugriff erfolgt ist oder der Computer ausgeschaltet wird. Hinweis: Drobo S ermöglicht es Ihnen, das Zeitintervall bis zum Herunterfahren der Laufwerke zu ändern. Siehe Seite 20.
- Page 72 über mehrere Computer in Ihrem Netzwerk gemeinsam verwenden. Durch die Verwendung von Drobo mit DroboShare wird auf den Computern der Drobo in der Liste der Geräte im Netzwerk angezeigt. Dadurch wird die zentrale Verwaltung oder einfache gemeinsame Verwendung von Dateien auf verschiedenen Computern ermöglicht.
- Page 73 2. Die rechts stehende Meldung wird angezeigt, über die Sie aufgefordert werden, das Dateisystemformat für Drobo auszuwählen. Wenn Sie Drobo auf DroboShare verwenden möchten, sollten Sie EXT3 auswählen. Klicken Sie auf „Weiter“. 3. Die rechts stehende Meldung wird angezeigt, über die Sie aufgefordert werden, eine Volume- Größe auszuwählen.
- Page 74 Minuten dauern und könnte zu einem Drobo-Neustart führen. Nach dem Abschluss des Vorgangs ist Drobo formatiert und betriebsbereit. Die Drobo-Volumes werden automatisch mit Ihrem Computer verbunden. Jedes Volume wird als ein Volume auf Ihrem Mac-Computer oder als Netzlaufwerk auf Ihrem PC angezeigt.
- Page 75 Extras. Klicken Sie dann auf die Schaltfläche „Einrichtung“ im DroboShare-Abschnitt. Tipp: Wenn Sie über einen Drobo der ersten oder zweiten Generation verfügen, versetzen Sie ihn in den Standby-Modus (siehe „Vorgehensweise bei Nichtverwendung von Drobo“ auf Seite 21) und befolgen Sie die Schritte zum...
- Page 76 Es gibt verschiedene Wege, Ihren Drobo durch verschiedene Computer gemeinsam verwenden zu können. Wenn Ihr Drobo an ein Netzwerk angeschlossen werden soll, müssen Sie hierzu DroboShare, die optimale Begleitkomponente von Drobo, verwenden. Wird Drobo zusammen mit DroboShare eingesetzt, wird Drobo in der Liste der Netzwerkgeräte des Computers angezeigt.
- Page 77 Volume erstellt, was zu einer zusätzlichen „virtuellen“ Festplatte führt. Beide virtuelle Festplatten teilen sich die Gesamtkapazität, die auf Ihrem Drobo verfügbar ist. F. Woran kann ich erkennen, wie viel Kapazität auf dem Drobo noch übrig ist? A. Die Hauptseite von Drobo Dashboard bietet die genauesten Informationen an.
- Page 78 Sie hinzugefügte Laufwerke solange nicht formatieren, bis ein neuer Speicherpool erstellt wird. Drobo führt Sie zu gegebener Zeit durch diesen Prozess. F. Was passiert, wenn ich meinen Drobo initial als Volume mit 2 TB formatiert habe und dann mehr als 2 TB geschützte Kapazität hinzufüge? A.
- Page 79 F. Gibt es eine narrensichere Möglichkeit, meine Daten auf dem Drobo zu schützen? A. Wenn der Drobo Ihre einzige Datenquelle ist, wird er als Ihr „primärer“ Speicherort angesehen. Die einzige Möglichkeit, Ihre Daten vollständig zu schützen, besteht in einer echten Sicherung.
- Page 80 Dateien. Sie können sie verwenden, um den Drobo durch verschiedene Computer in Ihrem Netzwerk gemeinsam zu verwenden. Der einzige Nachteil dabei ist, dass der Computer, an den der Drobo angeschlossen ist, eingeschaltet sein muss, um auf den Drobo zugreifen zu können. Um weitere Einzelheiten zu den Fähigkeiten zum gemeinsamen Verwenden von Dateien Ihres Computers zu erfahren, lesen Sie die Dokumentation Ihres Betriebssystems.
- Page 81 Möglicherweise müssen Sie die Dateien auch aus dem Papierkorb löschen, um Sie tatsächlich von Ihrem Drobo zu entfernen. F. Warum befinden sich bereits Daten auf dem Drobo noch bevor ich dort Daten ablege? A. Ihr Betriebssystem und die Drobo-Firmware speichern einige Formatierungsinformationen auf den Drobo-Laufwerken, und zwar noch vor eine Datenübertragung.
- Page 82 DroboCare finden Sie unter: www.drobo.com/drobocare. F. Wie bekomme ich Support für Drobo? A. Wenn Sie Ihren Drobo bei der Einrichtung nicht registriert haben, öffnen Sie zunächst die Website www.drobo.com/registration, um Ihren Drobo zu registrieren. Suchen Sie dann auf der Website www.drobo.com/support...
- Page 83 A. Nein. Zu einem bestimmten Zeitpunkt können Sie nur einen Drobo- Schnittstellenanschluss an Ihrem Computer verwenden. Wenn Sie z. B. sowohl USB 2.0- als auch FireWire 800-Kabel von Ihrem Drobo in Ihren Computer einstecken, wählt Drobo standardmäßig USB 2.0 aus.
- Page 84 Wenn Sie zu einer anderen Schnittstelle wechseln müssen, schalten Sie Ihren Drobo S aus. Ändern Sie die Schnittstellenkabel am Drobo S und fahren Sie den Drobo S dann hoch. Wenn Ihr Drobo S von mehreren Computern aus gemeinsam verwendet wird, müssen Sie an allen Computern dieselbe Schnittstelle verwenden.
- Page 85 F. Ich verwende meinen Drobo mit DroboShare. Warum erkennt Drobo Dashboard nicht meinen Drobo? A. Überprüfen Sie zuerst, ob Sie über die aktuelle Drobo Dashboard- und Drobo-Firmware verfügen (Version 1.1.0 oder höher). Stellen Sie dann sicher, dass DroboShare eine IP-Adresse in Ihrem Netzwerk zugewiesen wurde.
- Page 86 Problem kann nur verhindert werden, indem bei Verwendung von DroboShare auf nicht unterstützte Zeichen in Datei- und Ordnernamen verzichtet wird. F. Mein Drobo ist über DroboShare an einen Windows Vista- Computer angeschlossen. Wie verwende ich das native Windows Vista-Sicherungstool bei Drobo/DroboShare? A.
- Page 87 Verwendung seiner Produkte für Zwecke, die das Urheberrecht verletzen. Copyright 2009-2010 Data Robotics, Inc. Data Robotics, Drobo, DroboShare, DroboPro, DroboElite, Drobo S, und BeyondRAID sind Marken von Data Robotics, Inc., die in einigen Rechtsgebieten eingetragen sein können. Alle anderen Marken gehören Ihren jeweiligen Eigentümern.
- Page 92 Initialiser votre Drobo ................12 Choix d'un système de fichiers et d'une taille de volume ..... 12 Formatage pour PC à l'aide de Drobo Dashboard ......... 13 Formatage pour Mac à l'aide de Drobo Dashboard ......15 Formatage avec DroboShare à l'aide de Drobo Dashboard ....16 Voyants de Drobo ..................
- Page 93 Que faire quand vous n'utilisez pas votre Drobo ........20 V. DroboShare ..................22 ère ème Connecter les Drobos 1 ou 2 génération (seulement) au DroboShare ....................22 Formatage avec DroboShare à l'aide de Drobo Dashboard ..... 22 Voyants de DroboShare ................24 Paramètres DroboShare ................
- Page 94 Drobo peut fonctionner comme un grand disque, facilitant ainsi les éléments stockés à l'intérieur. Les voyants de baie de données de Drobo indiquent tout ce que vous devez savoir ! La mise à niveau de la capacité est aussi simple que l'ajout de l'encre à...
- Page 95 Data Robotics a été créé en 2004 dans la Silicon Valley (Californie) dans l'optique de simplifier la gestion du stockage. Data Robotics a développé la technologie à la base de Drobo pour les personnes qui doivent protéger leur capital numérique de valeur, mais qui détestent avoir à le faire car il s'agit d'une tâche complexe et qui prend énormément de temps.
- Page 96 Vous pouvez économiser des centaines d'euros avec le temps. Drobo est insensible au fabricant, à la capacité ou à la vitesse du disque dur que vous installez. Il accepte des disques durs SATA1 ou SATA2 (aussi appelés SATA/150 ou SATA/300) internes 3,5 po standard.
- Page 97 Par exemple, un disque de 750 Go possède environ une capacité valant 700 Go. Cet écart n'a rien à voir avec la manière dont fonctionne Drobo. Lors de la configuration initiale, Drobo Dashboard demande si vous souhaitez rechercher automatiquement les mises à...
- Page 98 élément dans la section spécifique à ce produit. Drobo Dashboard est l'application compagnon recommandée qui vous tient informé de l'état de Drobo et permet de personnaliser Drobo pour mieux répondre à vos besoins de stockage. Remarque : pour installer Drobo Dashboard, vous devrez posséder les droits d'administration sur votre ordinateur.
- Page 99 Web Capacity Calculator à www.drobo.com/drobolator. L'onglet Données de Contrôles avancés contient des informations détaillées sur l'état de votre Drobo. Vous devez accéder à cet écran si Drobo est en cours de protection de vos données et que vous souhaitez savoir quand cette opération se terminera.
- Page 100 Pour commencer à utiliser DroboCopy sur un PC, démarrez Drobo Dashboard et cliquez avec le bouton droit sur l'icône Drobo Dashboard (graphique à secteurs) dans la barre d'état système (zone de notification) et sélectionnez "Paramètres DroboCopy…". Sur un Mac, démarrer Drobo Dashboard, allez au menu Drobo Dashboard et sélectionnez "Paramètres...
- Page 101 Drobo connectés à votre ordinateur (y compris des DroboShares sur votre réseau). Pour accéder à cette option sur un PC, démarrez Drobo Dashboard et cliquez avec le bouton droit sur l'icône de la barre d'état système Drobo Dashboard et sélectionnez "Paramètres des e-mail".
- Page 102 Une fois que vous avez choisi le nombre et les capacités de disques à installer, il ne vous reste plus qu'à retirer la façade de Drobo en tirant simplement dessus puis qu'à faire glisser les disques dans les baies de données.
- Page 103 Drobo Type de Drobo S connexion génération génération USB 2.0 FireWire 800 eSATA Remarque : eSATA est plus rapide que FireWire 800, qui est plus rapide que USB 2.0. Remarque : Firewire 800 figure sur le Drobo 2ème génération uniquement.
- Page 104 FireWire sous Windows (recherche par mot-clé “Performance FireWire”). Avec Drobo S, vous pouvez transférer vos données à des vitesses encore supérieures. eSATA est quasiment deux fois plus rapide que FireWire 800. Vous pouvez utiliser une interface eSATA sur votre ordinateur pour profiter de la technologie eSATA.
- Page 105 DroboShare. Votre Drobo se connecte à un DroboShare, qui se connecte au réseau. Pour plus d'informations sur la configuration de cette connexion, voir la page 21. Revenez à ce stade pour effectuer la configuration de Drobo. Remarque : Drobo S ne peut PAS fonctionner avec DroboShare.
- Page 106 Drobo Dashboard vous informe lorsque ceci se produit et vous demande de formater et de nommer le ou les nouveaux volumes. Format du système Taille maximale Compatible avec de fichiers de volume Mac OS X HFS+ 16 To...
- Page 107 Drobo. Une fois le formatage terminé, votre Drobo est prêt à l'emploi. Vous pourrez y accéder comme à tout autre disque connecté à votre ordinateur. Conseil : Vous pouvez déterminer l'utilisation réelle de l'espace disque en ouvrant Drobo Dashboard.
- Page 108 Cliquez sur "Oui". Remarque : Mac OS X permet également de formater le stockage de Drobo. Il est recommandé de cliquer sur "Ignorer" et d'utiliser Drobo Dashboard pour le formatage. 2. Le message s'affiche sur la droite et vous demande de sélectionner...
- Page 109 Drobo. Une fois le formatage terminé, Drobo est prêt à l'emploi. Vous pourrez y accéder comme à tout autre disque connecté à votre ordinateur. Conseil : Vous pouvez déterminer l'utilisation réelle de l'espace disque en ouvrant Drobo Dashboard.
- Page 110 Rouge fixe : ajoutez un disque ou remplacez immédiatement celui existant par un disque plus grand. Drobo a atteint un seuil critique bas au niveau de l'espace. Rouge clignotant : remplacez immédiatement ce disque. Ce disque est tombé en panne et doit être remplacé.
- Page 111 L'onglet Données de Contrôles avancés contient des informations détaillées sur l'état de votre Drobo. Vous devez accéder à cet écran si Drobo est en cours de protection de vos données et que vous souhaitez savoir quand cette opération se terminera. La progression est indiquée dans la section "Protection des données".
- Page 112 à DroboShare (voir page 25 pour plus de détails sur les paramètres DroboShare). Si vous avez un Drobo S, un clic sur le bouton "Paramètres" permet aussi de réduire la luminosité des voyants, de définir le délai d'arrêt du disque et d'activer la redondance à...
- Page 113 Remarque : il faut un court instant à votre Drobo pour passer en mode veille. Le voyant d'alimentation passe de vert à orange et les voyants de baie de disque s'éteignent, indiquant ainsi que débrancher le câble de données et/ou le cordon...
- Page 114 économie d'énergie (veille) (arrête les disques durs) lorsque vous n'y avez pas accédé pendant 15 minutes ou lors de l'arrêt de l'ordinateur. Remarque : Drobo S permet de modifier les délais d'arrêt du disque. Voir page 20.
- Page 115 Drobo se connecte directement à un seul ordinateur à la fois par le câble USB 2.0 ou FireWire 800 fourni. Mais vous devrez peut-être partager Drobo sur votre réseau. En utilisant Drobo avec DroboShare, les ordinateurs affichent Drobo dans leur liste de périphériques réseau, ce qui permet un stockage centralisé...
- Page 116 2. Le message s'affiche sur la droite et vous demande de sélectionner le format de système de fichiers de Drobo. Si vous prévoyez d'utiliser Drobo avec DroboShare, il est recommandé de sélectionner EXT3. Cliquez sur "Continuer/Suivant". 3. Le message s'affiche sur la droite et vous demande de sélectionner une taille de...
- Page 117 Drobo. Une fois le formatage terminé, Drobo est formaté et prêt à l'emploi. Le ou les volumes Drobo se connecteront automatiquement à votre ordinateur. Chaque volume s'affiche comme tel sur votre Mac ou comme un disque réseau sur votre PC.
- Page 118 Outils. Puis cliquez sur le bouton "Configuration" dans la section DroboShare. ère ème Conseil : si vous possédez un Drobo 1 génération, mettez-le en veille (voir “Que faire quand vous n'utilisez pas votre Drobo” page 20) puis suivez les étapes pour connecter Drobo à DroboShare (page 21).
- Page 119 Seule l'option de format FAT32 du Drobo Dashboard permet aux Mac, aux PC et aux ordinateurs Linux de pouvoir lire et écrire des données sur Drobo. FAT32 est un format plus ancien de système de fichiers qui offre généralement une protection moins efficace des données que les systèmes de fichiers...
- Page 120 "virtuel". Les deux disques virtuels partagent la capacité totale disponible sur votre Drobo. Q. Comment puis-je dire combien de capacité il reste à Drobo ? R. La page principale de Drobo Dashboard fournit les informations les plus précises.
- Page 121 à clignoter en vert. Cette opération prendra environ 30 secondes. Q. Ai-je besoin de formater les nouveaux disques que j'ajoute à Drobo ? R. Lorsque vous ajoutez un disque à une baie de disque vide ou remplacez un disque existant après le formatage initial, vous accédez immédiatement à...
- Page 122 Meilleures pratiques à http://www.drobo.com/support/. Q. Y-a-t-il un moyen infaillible de protéger mes données sur le Drobo ? R. Si le Drobo est la seule source de vos données, il sera considéré comme système de stockage principal. Le seul moyen de protéger entièrement vos données est de conserver une sauvegarde réelle.
- Page 123 Drobo entre différents ordinateurs est à travers le réseau par l'intermédiaire de DroboShare. Ceci évite à chaque ordinateur de reconnaître le format de Drobo et offre la souplesse de partager Drobo lorsque vous le désirez ou de le connecter directement à...
- Page 124 Q. Pourquoi y a-t-il des données sur Drobo avant que je n'en copie dessus ? R. Votre système d'exploitation et le microprogramme de Drobo placent l'un et l'autre une petite quantité d'informations de formatage sur les disques de Drobo préalablement à tout transfert de données.
- Page 125 FireWire ? Puis-je le connecter à deux ordinateurs à la fois par FireWire ? R. Non. Vous ne pouvez pas connecter Drobo à deux ordinateurs à la fois. Les deux ports FireWire ne sont applicables qu'à des périphériques montés en cascade.
- Page 126 Q. Pourquoi Drobo S possède-t-il deux ports FireWire ? Puis-je le connecter à deux ordinateurs à la fois par FireWire ? R. Non. Vous ne pouvez pas connecter Drobo S à deux ordinateurs à la fois. Les deux ports FireWire ne sont applicables qu'à des périphériques montés en cascade.
- Page 127 Mais, vous devez arrêter l'appareil avant de permuter les interfaces. Q. Comment puis-je arrêter en toute sécurité Drobo S de façon prolongée ? R. Cliquez sur la commande "Arrêter" dans Contrôles avancés -> onglet Outils de Drobo Dashboard. Le témoin d'alimentation s'éteint après l'arrêt en toute sécurité.
- Page 128 IP sur cet ordinateur pour se trouver dans le même sous-réseau que votre DroboShare. Drobo Dashboard doit détecter votre Drobo et DroboShare, et vous pourrez attribuer votre adresse IP statique souhaitée pour DroboShare dans les paramètres DroboShare de Drobo Dashboard.
- Page 129 Q. Mon Drobo est connecté à un ordinateur Windows Vista par DroboShare. Comment dois-je utiliser l'outil de sauvegarde natif de Windows Vista avec Drobo/DroboShare ? R. Lorsque vous utilisez cet outil pour effectuer une sauvegarde sur le Drobo, Windows vous demande un nom d'utilisateur et mot de passe.
- Page 130 Copyright 2009-2010 Data Robotics, Inc. Data Robotics, Drobo, DroboShare, DroboPro, DroboElite, Drobo S et BeyondRAID sont des marques de Data Robotics, Inc. qui peuvent être déposées dans certaines juridictions.
-
Page 134: Table Of Contents
ドライブを Drobo に挿入 ................ 9 Drobo をコンピュータに接続 ............... 10 USB 2.0 ....................11 FireWire 800 (第 2 世代 Drobo および Drobo S) ......... 11 eSATA (Drobo S) ..................11 電源を接続 ..................... 11 第 1 世代および第 2 世代 (のみ) Drobo を DroboShare を使用し... - Page 135 DroboShare のランプ ................24 DroboShare 設定 ..................25 VI. 複数のコンピュータで Drobo を共有 .......... 26 DroboShare を使用して Drobo をネットワークに接続 (第 1 世代/第 2 世代 Drobo のみ) ............26 Drobo を複数のコンピュータ間で移動 ..........26 コンピュータの使用 ................26 VII. ヒントとトラブルシューティング ..........27 VIII. 索引 ....................37...
-
Page 136: はじめに
Drobo は、ユーザーの手を煩わすことなく、自動的にデータ 保護の設定を行います。 ドライブが故障した場合もデータは安全です (どんなドラ イブでも最終的には故障します)。 Drobo は壊れたデータがあれば検出し、壊れていないデータ にのみアクセスするようにガイドします。 容量を追加する場合のダウンタイムがありません。空のデ ータベイにドライブを追加するだけ、あるいはドライブを 大容量に交換するだけで操作は終わりです。容量、速度、 製造元は問いません。 ドライブが空のベイに取り付けられると、新規ドライブ容 量はただちに使用可能になり、保護された状態になります。 Drobo は 1 台の大きなドライブとして動作し、格納したも のを検索するのも簡単です。 Drobo のデータベイインジケータランプにより、必要な情報 がわかります。 無制限拡張 容量のアップグレードは、プリンタにトナーを入れるのと 同じぐらい簡単です。 あらゆる 3.5 インチ (SATA) ハードドライブを組み合わせで きます。Drobo の既存ドライブの型式、モデル、または容 量について心配する必要はありません。 絶えずアップグレード - Drobo の最も小さいドライブをよ り大容量のドライブと交換するだけです。データ移行や再 設定は不要です。... - Page 137 かミラーリングか ? 2 デスクか 4 デスク RAID セットか ? BeyondRAID は、高度なバーチャル化プラットフォームをベースに作られてい るので、こうした問題をすべて解決できます。RAID 0、1、5、また は 6 の動作について理解していれば、BeyondRAID の基礎となるア ルゴリズムは同じなので、BeyondRAID の基本は分かるはずです。 世界最高のストレージにようこそ。 について Data Robotics, Inc. は、ストレージ管理の苦労をなくそうというビ ジョンを持って、2004 年、カルフォルニア州シリコンバレーにて 創立されました。Data Robotics, Inc. は、貴重なデジタル資産を保 護する「必要がある」ものの、複雑で時間のかかる仕事であるた め「嫌がる」人々のために、Drobo の内部に収まるテクノロジー を開発しました。こういった人々のために、世界で最初のストレ ージロボットである Drobo を製造したのです。Drobo は完全に自 動化されたデータストレージシステムであり、作業がまったく不 要で、安全で拡張可能な唯一のストレージソリューションです。 20 年以上も前に登場した時代遅れのテクノロジーや今も市販され ている面倒な製品と異なり、Drobo は、業界を変貌させる製品ライ ンです。ストレージバーチャル化とサイバネティックスのコンセ プトを結合し、ストレージ管理の苦労をなくしたものです。...
-
Page 138: はじめに
実行したままにします。 2. ドライブを挿入 – 3.5 インチ SATA ドライブを使用します。 貴重なデータを保護するために、最初に少なくとも 2 台の ドライブを挿入します (ドライブに保存されているデータ はすべて消去されます)。 3. ケーブルを接続 – Drobo をコンピュータまたは DroboShare (第 1 世代/第 2 世代 Drobo のみ) に接続してから、電源に接 続します。 Drobo Dashboard が自動的に実行され Drobo を検出します。Drobo が検出されたら、Drobo Dashboard の画面の指示に従ってください。 貴重なデータの保護は順調に進んでいます。 これらのステップの詳細については、『ユーザーガイド』のこの セクションを読み、お持ちの製品に該当する箇所を参照してくだ... -
Page 139: 容量の選択
750 GB + 250 BG + 250 GB + 500 GB = 1,000 GB ドライブ容量についての注意 数年前に、コンピュータ製造元とハードドライブ製造元が、容量測 定に異なるシステムを使い始めました。その結果、ドライブの見積 もり容量のすべてが、ご使用のコンピュータに利用できるわけでは ないことになりました。 たとえば、750 GB ドライブで利用できる容 量はおおよそ 700 GB です。この食い違いは Drobo には無関係です。 製品を最新なものに保つ 初期設定の間に、Drobo Dashboard は、更新を自動的にチェックす るかどうか問い合わせしてきます。Drobo のパフォーマンスを最適 にするために、[はい] を選択することを強く推奨します。この機能 によって、Drobo Dashboard と製品ファームウェアの両方を最新の ものにできます。その後、より新しいバージョンが入手可能にな... -
Page 140: メインページ
の概要 Drobo Dashboard を使用して、Drobo または DroboShare をセット アップ、設定、および操作できます。製品に固有のセクションに、 各々についての詳細が表示されています。 の基本 Drobo Dashboard は、Drobo のステータスを知ることができる推奨 併用アプリケーションです。これによってストレージのニーズに 最も適切に Drobo をカスタマイズできます。 注意 をインストールするためには、コンピュータの管 : Drobo Dashboard 理権限が必要です。 メインページ Drobo Dashboard を起動すると、メインページが表示されます。こ のページで、Drobo のステータスとストレージ使用状況がただちに 分かります。複数台の Drobo がある場合、それら複数の Drobo の 間で切り替えをするには、ウィンドウ上部の該当するタブをクリッ クします。 円グラフに、使用中のストレージ容量、空き容量が示されます。円 グラフの上にマウスを移動すると、Drobo の稼働状態のサマリーが... -
Page 141: 高度な制御 データ タブ
か、それがいつ完了するか知りたい場合は、この画面を参照して ください。進行状況は「データ保護」セクションに表示されます。 詳細については、18 ページを参照してください。 高度な制御 ツール タブ [ツール] タブによって、Drobo をカスタマイズする制御にアクセス できます。このウィンドウで、Drobo をリセットし、ボリュームを 再フォーマットし、または DroboShare と Drobo に特定の設定を変 更できます。さらに、このページには Drobo の便利な情報が表示さ れます。このページで Drobo Dashboard とユニットファームウェ アが最新かどうか簡単にチェックできます。詳細については、18 ペ ージ (Drobo) または 25 ページ (DroboShare) を参照してください。 追加機能 Drobo Dashboard には、Drobo の以下の追加機能が備わっています。 これらを使用すると、カスタムバックアップができ、電子メール 通知を受信できます。... - Page 142 バックアップフォルダ、およびその中の項目をすべて選択すると、 最初に DroboCopy を実行したときにこれらがコピーされます。そ の後は、新規ファイルおよび更新されるファイルのみがバックアッ プ先フォルダにコピーされます (更新されるファイルは古いファイ ルを置き換えます)。 PC で DroboCopy を使用開始するには、Drobo Dashboard を起動し、 システムトレイ (通知領域) の Drobo Dashboard アイコン (円グラ フ) を右クリックし、[DroboCopy 設定…] を選択します。Mac で は、Drobo Dashboard を起動し、Drobo Dashboard メニューに進み、 [DroboCopy 設定…] を選択します。DroboCopy ウインドウで [新規 DroboCopy] をクリックし、DroboCopy に使用するフォルダを選択 します。...
- Page 143 が実行中でなけれ Drobo Dashboard ばなりません。 を最新に保つ Drobo Dashboard は、製品付属の Drobo リソース CD に収納されてい ます。インストールすると、新規バージョンが入手可能になったと きに通知があります (ただし、[更新を自動的にチェックしますか] を オ フ に す る と 通 知 は あ り ま せ ん ) 。 詳 細 に つ い て は 、...
- Page 144 の設定 ドライブを に挿入 取り付けるドライブの数と容量を選択したら、Drobo のフェイス プレートを引き出し、ドライブをデータベイ内にスライドして入 れてください。どのドライブをどのドライブベイに入れるかは問 題ではありません。ドライブの既存データが消去されることに注 意してください。開梱した後、露出しているハードドライブ回路 基板のボードには決して触らないでください。 まず、ドライブコネクタを Drobo の方に向け、ドライブの下部に くるようにします。ドライブロックを左に押して開け、Drobo の背 部でコネクタが「きちんと」とおさまるまで、ドライブをデータベ イにスライドします。コネクタが適切にはまると、ドライブロッ クがドライブの後ろでパチンと音をたて、ドライブは所定の位置 に固定されます。 ヒント ドライブは上部の銀のプレートが上向きになるように挿入します 回路基板は下向きになります 。...
-
Page 145: Drobo をコンピュータに接続
をコンピュータに接続 Drobo をコンピュータに接続する方法はいくつかあります。利用で きる最も高速な接続を選択してください。ある特定の時点では、 1 つの接続タイプしか使用できないことに注意してください。接続 タイプは次のとおりです。 接続タイプ 第 2 世代 Drobo 第 1 世代 Drobo Drobo S USB 2.0 FireWire 800 eSATA 注意 は、 より高速です。 は、 より : eSATA FireWire 800 FireWire 800 USB 2.0 高速です。 第 世代および第 世代... -
Page 146: 電源を接続
Drobo では、コンピュータへの接続に USB 2.0 を使用できます。 FireWire 800 または eSATA ほど高速ではありませんが、過去数年間 に製造されたどのコンピュータにも接続できます。 第 世代 および FireWire 800 は、Drobo で素晴らしいパフォーマンスを示します。 コンピュータに FireWire 800 ポートがない場合は、コンピュータ製 造元に連絡して、互換性のあるアドオンカードを要求してください (すべての FireWire カードが最適なパフォーマンスを提供するわけ ではないので、必ず、自分のコンピュータとオペレーティングシ ステムを完全にサポートするカードを選択してください)。コンピ ュータに FireWire 400 コネクタしかない場合は、FireWire 800 から FireWire 400 へのケーブルを購入する必要があります。 注意 コンピュータの場合、標準 ドライバでは... -
Page 147: 第 1 世代および第 2 世代 (のみ) Drobo を Droboshare を使用し
DroboShare を初期化 他のハードドライブと同様に、コンピュータのオペレーティング システムで使用できるようにするために Drobo をフォーマットす る必要があります。Drobo Dashboard に備わっているフォーマット ツールを使用します。これは Drobo リソース CD にあります。 から Drobo Dashboard をダウンロ www.drobo.com/support/updates ードすることもできます。 Drobo 付属の Drobo リソース CD をコンピュータに挿入します。画 面のメニューで [インストール] を選択します。Drobo Dashboard は、 インストールすると自動的に起動します。 ファイルシステムとボリュームサイズの選択 コンピュータのオペレーティングシステムに従って、Drobo のファ イルシステムフォーマットとボリュームサイズにはいくつかの選 択肢があります。Drobo に予定している使用法に最も適切な組み合 わせを選択する必要があります。ほとんどの場合、選択したファ イルシステムに利用可能な最大ボリュームサイズを選択すること... -
Page 148: Drobo で Drobo Dashboard を使用
2 TB および DroboShare EXT3 DroboShare 2 TB は古いファイルシステムフォーマットです。一般に、新 * FAT32 規 ジャーナリング ファイルシステムほどデータが保護されま せん。パフォーマンスは低速で、ファイルサイズに制限があり ます。 を使用した 用のフォーマット 1. Drobo が起動を完了すると、 Drobo Dashboard はそれを自 動的に検出し、右側にメッセ ージを表示します。[はい] を クリックします。 注意 新しいバージョンの および を含む で Windows (Vista Windows 7 も をフォーマットできます。 キャンセル... - Page 149 3. 右側にメッセージが表示 され、ボリュームサイズ を選択するよう指示して きます。利用可能なサイ ズは、選択したファイル システムタイプおよびオ ペレーティングシステム の機能に基づきます。予 想可能な将来のために、 ファイルをすべて格納で きるボリュームサイズを 選択することを推奨しま す。[次へ] をクリックします。 4. 次に、ボリュームのカス タム名とドライブ文字を 選択できます。[次へ] を クリックします。 5. 最後に、選択肢のサマリー が表示されます。[フォー マット] をクリックしま す。この処理には数分か かるはずです。このため に Drobo が再起動するこ ともあります。 フォーマットが完了すると、Drobo は使用できるようになります。 この Drobo には、コンピュータに接続された他のドライブと同じ ようにアクセスできます。...
- Page 150 ヒント を開くと、使用されている実際のディスク容量が : Drobo Dashboard 分かります。ブルーの容量ランプが 単位でおよその使用容量を表示 します。 を使用した 用のフォーマット 1. Drobo が起動を完了すると、 Drobo Dashboard はそれを自動 的に検出し、右側にメッセージ を表示します。[はい] をクリッ クします。 注意 でも ストレージをフォーマットできます。 無視 : Mac OS X Drobo をクリックし、 を使用してフォーマットすることを推 Drobo Dashboard 奨します。 2. 右側にメッセージが表 示され、Drobo のファ イルシステムフォーマ ットを選択するよう指...
- Page 151 す。 フォーマットが完了すると、Drobo は使用できるようになります。 この Drobo には、コンピュータに接続された他のドライブと同じ ようにアクセスできます。 ヒント を開くと、使用されている実際のディスク容量が : Drobo Dashboard 分かります。ブルーの容量ランプが 単位でおよその使用容量を表示 します。 を使用して 経由でフォーマット DroboShare 経由で Drobo をネットワークに接続する場合でも、Drobo Dashboard を使用して Drobo をフォーマットできます。 詳細につい ては、22 ページを参照してください。 のランプ 数多い Drobo の長所の 1 つは、ユーザーが知る必要のあることを すべて通知する一連のランプです。コンピュータでアプリケーショ ンソフトウェアを実行する必要はありません。Drobo は常に能動的 にデータを監視および保護し続けるよう設計してあります。Drobo は、必要な操作を自動的に行い、ランプを使用してそれを表示し ます。...
- Page 152 レッドが点滅: ただちにこのドライブを交換して ください。このドライブに障害が発生してお り、交換する必要があります。 電源ランプ グリーン: 電源はオンで、Drobo は準備完了です。 オレンジ: Drobo はスタンバイモードです。 レッド: Drobo が過熱しています。データケーブ ルを取り外してから、電源ケーブルを取り外し ます。冷やしてから再起動します。 アクティビティ 点滅するグリーン: データは、コンピュータと ランプ Drobo の間で能動的に転送中です。 容量ゲージ ブルー: Drobo の使用率を 10% ごとの増分で表示 します。 で を使用 Drobo Dashboard アプリケーションによって、簡単に Drobo のステ ータスをチェックしたり、設定を変更したりできます。 Drobo Dashboard の概要については、5 ページを参照してください。...
-
Page 153: 高度な制御 データ タブ
高度な制御 データ タブ [高度な制御] の [データ] タブで、Drobo のステータスの詳細がわか ります。Drobo がデータの保護プロセスを実行中であるかどうか、 それがいつ完了するか知りたい場合は、この画面を参照してくだ さい。進行状況は「データ保護」セクションに表示されます。 高度な制御 ツール タブ 第 1 世代およ び第 2 世代 注意 を使用しない場合、このセクションはグレイアウトされ : DroboShare ます。... - Page 154 Drobo S [ツール] タブによって、Drobo をカスタマイズする制御にアクセス できます。このウィンドウで、Drobo をリセットし、ボリュームを 再フォーマットし、または DroboShare に特定の設定を変更できま す(DroboShare 設定の詳細については 25 ページを参照してくださ い)。Drobo S をご使用の場合は、[設定] ボタンのクリックによっ て、インジケーターライトを暗くすることができます。ディスク ドライブのスピンダウンの時間を設定してデュアルディスク冗長 化を有効にできます。さらに、このページには Drobo の便利な情 報が表示されます。このページで Drobo Dashboard とユニットファ ームウェアが最新かどうか簡単にチェックできます。 デュアルディスク冗長化 のみ デュアルディスク冗長化は、ディスクドライブ障害が 2 つ同時に 発生した場合も、格納されているデータを保護するための設定で す。この追加の予防対策を有効にすると、この保護を実行するた めに、利用できる容量が減少します。デュアルディスク保護を使 用するためには、Drobo に少なくとも 3 台のハードディスクと十...
- Page 155 長期間 Drobo を使用しない場合、または Drobo を別のコンピュータ に移動する場合は、シャットダウンするのが良いでしょう。アク ティビティランプをチェックし、コンピュータのアプリケーショ ンが Drobo を使用していないことを確認します。アプリケーショ ンが Drobo を使用していると、Drobo を適切に取り外せないこと があります。 第 1 世代および第 2 世代 Drobo が直接 Windows または Mac に接続され ている場合は、次の何れかを操作します: 1. Drobo Dashboard を開き、[高度な制御] -> [ツール] ボタンを クリックします。コマンドセクションの [スタンバイ] ボタ ンをクリックし、電源ランプがオレンジになるのを待ちま す。その後データケーブルを取り外したり、電源ケーブル あるいは...
- Page 156 第 1 世代および第 2 世代 Drobo が DroboShare を経由してネットワ ークに接続されている場合は、次の操作をします: Drobo Dashboard を開き、[高度な制御] -> [ツール] をクリックしま す。次に、「スタンバイ」ボタンをクリックします。コマンドセク ションの [スタンバイ] ボタンは、特定の第 1 世代/第 2 世代 Drobo に適用されます。DroboShare セクションの [スタンバイ] ボタン は、その DroboShare に接続されているすべての第 1 世代/第 2 世 代 Drobo に適用されます。電源ランプがオレンジであることを確 認してから、電源コードを取り外してください。...
-
Page 157: Drobo を使用しないときは
共有したいという場合もあるでしょう。Drobo を DroboShare で使 用すると、コンピュータのネットワークデバイスリストに Drobo が 「表示」されます。これにより、集中化ストレージが可能になり、 またはコンピュータ間のファイル共有が簡単になります。 まず、供給された Ethernet ケーブルを DroboShare とネットワーク ルーターまたはスイッチの間に接続します。次に、供給された短 い (およそ 1 フィート) USB 2.0 ケーブルを Drobo と DroboShare に 接続します。 次に、Y ケーブルの両端を Drobo と DroboShare に挿 入します。最後に、Drobo の電力供給装置を Y ケーブルの一端に差 し込みます。 注意 は... - Page 158 2. 右側にメッセージが表示 され、Drobo のファイル システムフォーマットを 選択するよう指示されま す。DroboShare 上で Drobo のみを使用する場 合は、EXT3 を選択する ことを推奨します。[続 行/次へ] をクリックし ます。 3. 右側にメッセージが表示 され、ボリュームサイズ を選択するよう指示され ます。利用可能なサイズ は、選択したファイルシ ステムタイプに基づきま す。予想可能な将来のた めに、ファイルをすべて 格納できるボリュームサ イズを選択することを推 奨します。[続行/次へ] をクリックします。 4. 次に、ボリュームのカス タム名を選択できます。 [続行/次へ] をクリックし ます。...
- Page 159 5. 最後に、選択肢のサマリ ーが表示されます。[フォ ーマット] をクリックしま す。この処理には数分か かるはずです。このため に Drobo が再起動するこ ともあります。 フォーマットが完了すると、Drobo はフォーマット済みで、使用で きるようになります。Drobo ボリュームはコンピュータに自動的に 接続されます。各ボリュームは、Mac ではボリュームとして表示さ れ、PC ではネットワークドライブとして表示されます。 ヒント を開くと、使用されている実際のディスク容量が : Drobo Dashboard 分かります。ブルーの容量ランプが 単位でおよその使用容量を表示 します。 のランプ 電源ランプ グリーン: 電源はオンであり、DroboShare は準備 完了です。 アクティビティ 点滅するグリーン: データは、コンピュータと ランプ DroboShare の間で能動的に転送中です。...
-
Page 160: Droboshare
設定を変更できます。ネットワークで DroboShare に静的 IP アドレ スが必要な場合、静的 IP アドレスは [ネットワーク] タブで変更で きます。[セキュリティ] タブで、DroboShare で共有される全ボリュ ームを保護するユーザー名とパスワードを設定できます。 [DroboApps] タブで、DroboShare 上で他社のアプリケーションを実 行するオプションを選択できます。DroboApps の詳細については、 を参照してください。 www.drobo.com/droboapps 独自のネットワーク設計に適合するように DroboShare を設定する には、Drobo Dashboard を起動し、[高度な制御] > [ツール] をクリッ クします。DroboShare セクションで、[セットアップ] ボタンをク リックします。 ヒント : 第 世代 第 世代 がすでにある場合は、それをスタンバイにし... -
Page 161: 複数のコンピュータで Drobo を共有
: Drobo S DroboShare を複数のコンピュータ間で移動 Drobo を複数のコンピュータに移動するとき、コンピュータのオペ レーティングシステムが異なる場合は、セットアップの間に選択 するファイルシステムフォーマットが各オペレーティングシステ ムをサポートすることを確認する必要があります。Drobo Dashboard の [FAT32] フォーマットオプションを選択したときのみ、Mac、PC、 および Linux のマシンが Drobo でデータを読み取り/書き込みでき ます。FAT32 は、旧バージョンのファイルシステムフォーマットで あり、HFS+ や NTFS などの新しい (ジャーナリング) ファイルシス テムと比較すると、保護機能は強力ではありません。パフォーマ ンス、およびファイルサイズの点でも制限があります。 コンピュータの使用 Mac OS X と Windows ベースのコンピュータは、いずれもファイル共 有機能を内蔵しています。こうした機能を利用して、Drobo をネッ トワーク上の他のコンピュータと共有できます。Drobo と共有する... -
Page 162: ヒントとトラブルシューティング
Q. どのようにしたら自分の Drobo に容量を追加できますか ? A. 標準 3.5” SATA ハードドライブを空のデータベイに追加するか、 または容量が最小のドライブを取り外し容量の大きいドライブと 交換します。Drobo の実行中にこれを行って構いません。Drobo をスタンバイにする必要はありません。 Q. 実際より大きい容量がコンピュータにあるように表示されるの はなぜですか ? A. Drobo のフォーマットのためにユーザーが選択したボリュームサ イズによって、オペレーティングシステムが表示する内容が変 わります。デフォルトでは、Drobo は 2 テラバイト (TB) のドラ イブとして表示されます。このように設計したのは、容量を簡 単に拡張できるようにするためです。セットアップの時に選択 したボリュームサイズを超えるハードドライブを追加すると、 新規ボリュームが作成され、その結果「バーチャル」ドライブ が追加されます。両方のバーチャルドライブが Drobo で利用で きる合計容量を共有します。 Q. Drobo に残っている容量はどうすれば分かりますか ? A. 最も正確な情報は、Drobo Dashboard のメインページにありま... - Page 163 マットの後で既存のドライブをアップサイズすると、追加され た容量にただちにアクセスできます。Drobo に追加した各ドライ ブをフォーマットする必要はありません。初期フォーマットの 後、ストレージの追加プールが作成されるまで、ユーザーは追 加ドライブをフォーマットする必要はありません。適切なとき に Drobo に従ってプロセスを行います。 Q. 最初に Drobo を 2 TB ボリュームとしてフォーマットしてから、 2 TB を超える保護された容量を追加した場合、どうなりますか ? A. Drobo を特定のボリュームサイズ (つまり、初期フォーマットの 間に 2 TB ボリューム) にフォーマットし、そのボリュームに入り きらない大きさのストレージ容量 (たとえば、1 個以上の 1.5 TB ドライブ) を追加した場合、Drobo Dashboard は、その新しい容 量に 2 番目のボリュームを作成するよう指示します。...
- Page 164 2 TB ます。この場合、 のボリュームサイズを超える追加ストレージ向 2 TB けに新規ボリュームを作成する必要があります。 Q. フェイスプレートを保持する磁石によってデータが危険にさら されることがありますか ? A. いいえ、ハードドライブ内部の磁石は Drobo のフェイスプレー トよりはるかに強力で、ハードドライブ媒体のはるかに近くに あります。 Q. どうしたら自分の Drobo のデータをバックアップできますか ? A. Drobo のデータはもともと「バックアップ」されています。しか し、もちろん火災、盗難、または不注意によるファイルの削除 からは保護されません。コンピュータ経由で Drobo からどの他 の媒体にでもデータを複写できます。また、もう 1 つのの Drobo をコンピュータに接続し、データを複写し、別の安全な場所 (オフィスや家庭など) に移動することもできます。詳細につい ては、http://www.drobo.com/support/ にあるベストプラクティ スのサイトをご覧ください。 Q. Drobo のデータを保護する絶対確実な方法はありますか ? A.
- Page 165 の企業は、データをバックアップするとき、データの 2 番目の コピー (3 番目のコピーさえ) を別の場所に格納します。このよ うに、企業はオフィスまたはデータセンターに何かが発生した 場合、きわめて迅速にビジネスを再開する準備をしています。 詳細については、http://www.drobo.com/support/ にあるベスト プラクティスのサイトをご覧ください。 Q. Drobo を Mac と PC のような異なるコンピュータ間で共有でき ますか ? A. 異なるオペレーティングシステムのコンピュータ間で Drobo を 共有する方法には次の 2 つがあります。異なるコンピュータ間 で Drobo を共有する最も便利な方法は DroboShare 経由でネット ワークを使用するものです。この方法なら、各コンピュータは Drobo のフォーマットを理解する必要がなく、Drobo をコンピュ ータに直接接続するときに柔軟に Drobo を共有できます。...
- Page 166 A. 少し待ってください。Drobo はこの機会を利用して、新しく作成 された「空の」容量を取り戻しながら、データのレイアウトを 最適化しています。しかし、データが不注意で削除されないよ う保護するオプションのあるユーティリティ (たとえば、Norton® ユーティリティ) もあります。Drobo からデータを削除する場合 は、この機能を必ず無効にしてください。また、Drobo からファ イルを完全に削除するためには、ごみ箱からファイルを削除す る必要があるでしょう。 Q. Drobo にデータをコピーする前に、なぜ Drobo にデータがある のですか ? A. オペレーティングシステムと Drobo ファームウェアが両方とも、 データ転送の前に Drobo のドライブにフォーマット情報を少量 だけ保存するからです。 Q. Drobo はほとんど一杯になったとき、ひどく低速になるように 思えますが、どうしてですか ? A. Drobo は、容量がほとんど一杯(95 % 超)になってもファイル のコピーを拒絶せず、「スローダウン」モードになり、ブルー...
- Page 167 Q. Drobo は RAID を使用していますか ? A. いいえ、Drobo 内部の特許申請中のテクノロジー (BeyondRAID™) は RAID ではなく、ユーザーの関与なしにデータ管理と設定タス クが自動的に行われるように特に開発したものです。Drobo で は、バーチャル化のような高度なストレージの概念が活用されて いますが、RAID から派生したものではありません。BeyondRAID の詳細については、2 ページを参照してください。 Q. Drobo 内部のドライブを定期的にデフラグする必要があります か ? A. いいえ、このタイプの最適化は Drobo が自動的に行います。 Q. 電力供給が停止した場合、データはどうなりますか ? A. Drobo は、電力障害を自動的に管理します。内部充電電池がある ので、障害の間にもデータは書き込み可能です。しかし、さま ざまなファイルシステムの予想しない電力障害に対する処理は 異なるので、予想しない電力障害があったときはいつでもファ イルシステムユーティリティを実行することを推奨します。 他の電子装置と同じように、Drobo を電子装置用に設計されたサ...
- Page 168 第 1 世代および第 2 世代 Drobo Q. 第 2 世代 Drobo にはなぜ 2 つの FireWire ポートがあるのです か ? Drobo を FireWire 経由で 2 台のコンピュータに同時に接続 できますか ? A. いいえ。Drobo を 2 台のコンピュータに同時に接続することはで きません。2 つの FireWire ポートはデイジーチェインデバイス 専用です。FireWire を使って Drobo を Windows/Mac/Linux コン...
- Page 169 Drobo S Q. 第 2 世代 Drobo S にはなぜ 2 つの FireWire ポートがあるのです か ? Drobo を FireWire 経由で 2 台のコンピュータに同時に接続 できますか ? A. いいえ。Drobo S を 2 台のコンピュータに同時に接続することは できません。2 つの FireWire ポートはデイジーチェインデバイス 専用です。FireWire を使って Drobo S を Windows/Mac/Linux コン...
- Page 170 A. いいえ、DroboShare は第 1 世代および第 2 世代の Drobo と一緒 にしか使用できません。DroboShare は、Drobo S と互換性があり ません。 Q. Drobo を DroboShare と一緒に使用しています。Drobo Dashboard が Drobo を認識しないのはなぜですか ? A. まず、最新 (バージョン 1.1.0 以降) の Drobo Dashboard と Drobo ファームウェアであることを確認します。次に、DroboShare に ネットワークの IP アドレスが割り当てられていることを確認し ます。これはネットワークで DroboShare を共有するための必要 条件です。 最初に DroboShare の電源を投入したときに DHCP が...
- Page 171 ます。SMB サーバーに接続しているときにこの問題が発生した 場合は、共有名に不正な文字が含まれているのが原因である可 能性があります。共有、フォルダ、またはドライブの名前に、 不正な文字を使用しないようにしてください。 さらに、SMB プロトコルでは、ウムラウト、キリル文字、日本 語の文字、ドイツ語の文字、または中国語の文字はサポートさ れていません。これが発生するのを防止する唯一の方法は、 DroboShare を使用するときに、ファイル名とフォルダ名にサポ ートされていない文字を使用しないことです。 Q. Drobo を DroboShare 経由で Windows Vista コンピュータに接続し ています。Drobo/DroboShare では、Windows Vista のネイティブ のバックアップツールをどのように使用したら良いでしょうか ? A. Vista のネイティブなバックアップツールを使用して Drobo を バックアップするとき、Windows はユーザー名とパスワードを 問い合わせしてきます。DroboShare または Drobo のユーザー名 とパスワードを以前にセットアップしていない場合は、ユーザ ー名とパスワードに以下を使用してください。 ユーザー名: droboshare\everyone パスワード: Drobo...
-
Page 172: 索引
PC, 13 電子メールアラート, 8, 31 SATA, 3 USB, 11 Data Robotics, Inc. は、法を遵守したテクノロジーの使用をサポートし、著作権法で許可された以外の 目的のために製品を使用することを承認または奨励しません。 Copyright 2009-2010 Data Robotics, Inc.。Data Robotics、Drobo、DroboShare、DroboPro、DroboElite、Drobo S、 および BeyondRAID は Data Robotics, Inc. の商標であり、法令の管轄区域によっては登録されていること があります。使用されている他の商標はすべてそれぞれの所有者の資産です。 Data Robotics, Inc. の供給する情報は印刷の時点で正確であり信頼できると信じられていますが、Data Robotics, Inc. はこの資料にある可能性のある間違いについて責任を負いません。Data Robotics, Inc. は、 製品設計または使用における変更を通知なしに行う権利を保持します。情報は通知なしに変更される... - Page 173 注意...
- Page 176 7. Provide Adequate Ventilation: Drobo, DroboPro, DroboElite, and DroboShare should each be situated so that its location or position does not interfere with its proper ventilation. For example, Drobo should not be situated against a surface that may block the ventilation openings or placed in a built-in installation such as a bookcase or cabinet that may impede the flow of air through the ventilation openings.
- Page 177 Electrostatic Discharge - The components inside your Drobo and disk drives are sensitive to static electricity, also known as electrostatic discharge. Before you install any disk drive, we recommend that you do the following: 1) Avoid static- causing surfaces such as carpeted floors, plastic, and packing foam; 2) Discharge yourself by touching an unpainted metal surface such as a desk or rack mount;...
- Page 178 Battery Disposal Your Drobo, DroboPro, DroboElite, and DroboShare have internal batteries that preserve settings when the unit is off. Do not attempt to change the battery. Only a Data Robotics, Inc. certified technician can change the battery. When the product has reached the end of its useful life, please dispose of it according to your local environmental laws and guidelines.
- Page 179 LIMITED WARRANTY – NORTH AMERICA COVERAGE Data Robotics' warranty obligations are limited to the terms set forth herein. This Limited Warranty applies only to Product manufactured by or for Data Robotics that can be identified by the "Data Robotics" trademark, trade name, or logo affixed to them ("Product") and is provided only to the original end-user purchaser of the Product ("You").
- Page 180 CONSUMER PROTECTION LAWS IF YOU ARE COVERED BY CONSUMER PROTECTION LAWS OR REGULATIONS IN YOUR COUNTRY OR REGION OF PURCHASE, THE BENEFITS CONFERRED BY THIS WARRANTY ARE IN ADDITION TO ALL RIGHTS AND REMEDIES CONVEYED BY SUCH CONSUMER PROTECTION LAWS AND REGULATIONS. Some countries, states and provinces do not allow the exclusion or limitation of incidental or consequential damages or exclusions or limitations on the duration of implied warranties or conditions, so the above limitations or exclusions may not apply to You.
- Page 181 Authorization ("RMA") number. Telephone numbers and details how to submit a request online are at http://www.drobo.com/support/contact-support.php. You must pack the Product in appropriate protective packaging and return the unit at your own cost. The returned Product will become our property.
- Page 182 In no event does this limited warranty apply: (a) to damage caused by use with equipment or hardware that is not a Product (see “What this document is about” above); (b) to damage caused by accident, abuse, misuse, flood, fire, earthquake or other external causes;...
- Page 183 RMA number. You can contact us to request an RMA number by contacting technical support. Telephone numbers and details how to submit a request online are at http://www.drobo.com/support/contact-support.php. If it is determined that the Product may be defective, You will be given an RMA number and instructions to return the Product.
- Page 184 NOTES...
- Page 185 NOTES 070-00022-002 Rev 03...
Need help?
Do you have a question about the Roboticsl and is the answer not in the manual?
Questions and answers