Table of Contents
Advertisement
Quick Links
- 1 Operating Systems Supported for Drobo Model B800I
- 2 Installing Drobo Dashboard
- 3 Connecting the Cables with Usb and Turning on Your Drobo Device
- 4 Setting up Your Drobo B800I for Iscsi
- 5 Adding the Drobo to Your Virtual Environment
- 6 Troubleshooting Your Setup
- Download this manual
See also:
Manual
Advertisement
Table of Contents

Related Manuals for Drobo B800i


Summary of Contents for Drobo B800i
- Page 1 Getting Started Guide Drobo Model B800i...
- Page 2 Data Robotics, Inc. supports lawful use of technology and does not endorse or encourage the use of its products for purposes other than those permitted by copyright law. Copyright 2011 Data Robotics, Inc. Data Robotics, Drobo, DroboShare, DroboPro, DroboElite and BeyondRAID are trademarks of Data Robotics, Inc., which may be registered in some jurisdictions.
-
Page 3: Table Of Contents
Installing Drobo Dashboard from the Resource CD Installing Drobo Dashboard from the Website Inserting the Hard Drives Connecting the Cables with USB and Turning On Your Drobo Device Connecting to Your Computer Connecting to a Power Source Turning On Your Drobo Device... -
Page 4: Before You Begin
Before You Begin Congratulations on your new Drobo! This Getting Started Guide will help you get your Drobo set up in just a few steps. Before you begin, it’s a good idea to check your system and hardware requirements. In this chapter, you will: Checking Box Contents Check your product’s box to ensure it contains all the components listed below. -
Page 5: Cable Interfaces Supported
With two iSCSI ports on the Drobo B800i, you can maximize performance. You can configure each port to a different network so that both networks have access to the Drobo B800i. You can also connect one port directly to the host computer and the other to a network via a router. -
Page 6: Checking The Hardware You Need
Checking the Hardware You Need To use your Drobo B800i, you’ll need at least two hard drives. If you plan to use Dual Disk Redundancy, which protects your data against two hard drive failures, you will need at least three hard drives. -
Page 7: Determining How Much Hard Drive Space You Need
Using a Router or Switch If you are connecting a Drobo B800i to a router or switch, your router or switch needs to support gigabit Ethernet connections (1000 Mbit/s) for optimal performance. Although your Drobo B800i will auto-negotiate the highest connection speed available to your router or switch, iSCSI does not perform well at slower speeds. -
Page 8: Setting Up In Just A Few Steps
Setting Up in Just a Few Steps! Once you have unpacked your Drobo device from its box and ensured you meet all system and hardware requirements, it’s time to set up your Drobo B800i for use. This can be done in just a few steps. -
Page 9: Installing Drobo Dashboard
Drobo Dashboard is the software companion to your Drobo device, enabling you to easily set up and manage your Drobo B800i. You install Drobo Dashboard from the Resource CD that came with your product. During the installation process, you can set Drobo Dashboard to automatically install version updates, which we highly recommend. - Page 10 When finished, you are returned to the InstallShield Wizard to continue installation. 5. Follow the directions of the Installation Wizard, clicking the Next or Continue button after each page, as appropriate. drobo.com | Getting Started Guide for Your Drobo B800i |...
- Page 11 7. If you are on a Macintosh, you will be prompted to restart your computer in order to complete installation. Do this. 8. After installation is complete, leave the Launch Drobo Dashboard check box selected and click the Finish button.
-
Page 12: Installing Drobo Dashboard From The Website
2. Locate the link for the latest Drobo Dashboard software and click on it. 3. If you’re given a choice to install (or run) Drobo Dashboard or save the installation file to your computer, choose to save the file to your computer. Locate the file and double-click on it to begin installation. - Page 13 1. Remove the face plate from the front of your Drobo B800i by pulling it off. 2. With one hand, hold the hard drive so that its connectors are positioned at the device and toward the left. Connectors Warning: For optimal performance, keep the Drobo B800i in its normal horizontal position.
-
Page 14: Connecting The Cables With Usb And Turning On Your Drobo Device
USB connection for the initial, administrative setup only—regardless of how you plan to use your Drobo B800i. After the initial setup, you can use your Drobo B800i with iSCSI, and also implement its use in a multi-host, virtual environment if desired. -
Page 15: Turning On Your Drobo Device
Drobo device once. Your Drobo device powers on and displays in Drobo Dashboard, as follows. The next step is to set the administrator username and password for your Drobo B800i. Tip: If you would like to see how your drive space is being used, double-click... -
Page 16: Setting The Administrator Username And Password
7. Click the OK button. You are returned to the previous page and a Login link displays at the top. 8. Click the Login link to log in to this Drobo device with the username and password you just created. -
Page 17: Setting Up Your Drobo B800I For Iscsi
MTU settings, from the Drobo B800i to your switch or router to your host computer. With two iSCSI ports on the Drobo B800i, you can configure each port to a different network so that both networks have access to the Drobo B800i. You can also connect one port directly to the host computer and the other to a network via a router. -
Page 18: Configuration Options
Configuration Options What iSCSI settings you configure depend on how you plan to set up your Drobo B800i. With iSCSI, you have the option to set up your Drobo B800i in one of three general configurations. 1. Directly connect your Drobo B800i via one of its iSCSI (Ethernet) ports to your computer’s Ethernet port for optimal performance. - Page 19 For this configuration, after reading this section, see the following steps in “Configuring iSCSI Settings” on page 19. 3. Connect your Drobo B800i via one of its iSCSI (Ethernet) ports to a switch (or router) in which another Ethernet port on the switch (or router) is connected to your network.
-
Page 20: Configuring Iscsi Settings
Configuring iSCSI Settings 1. Once the connection between your Drobo B800i and host computer has been established via your USB connection, your Drobo B800i appears in Drobo Dashboard on the All Devices page as follows. 2. To manually assign IP addresses and modify other iSCSI settings, first click the Settings option on the Navigation menu, and click Network. -
Page 21: Connecting Cables With Iscsi
Connecting Cables with iSCSI You are now ready to safely power down your Drobo B800i, disconnect the USB cable, connect the iSCSI cable and then power on your Drobo B800i again. Refer to the image below as you follow the steps. - Page 22 (Ethernet) port on the Drobo B800i, and the other end into a computer, router or switch. 5. Turn on your Drobo B800i by pressing the power toggle button on the back of your Drobo device once.
-
Page 23: Formatting The Drives Into Volumes
What file system formats are available to you depend on your operating system. (See Figure You will also be formatting your Drobo B800i into at least one volume, and you will need to choose a size for that volume. In Windows, volumes are sometimes called “logical drives”... - Page 24 On the Drobo B800i, you can create up to 255 volumes of up to 16TB each. - If you are using your Drobo B800i in a virtual environment, you can create up to 128 volumes of up to 2TB each.
-
Page 25: Creating Volumes
Creating Volumes Now that your Drobo B800i is connected via iSCSI (Ethernet), you are ready to format the drives into volumes. 1. In Drobo Dashboard, select your Drobo B800i from the All Devices page, then click the Volumes option on the Navigation menu. - Page 26 4. Select the appropriate file format for your operating system. Important Note: If you plan to use your Drobo B800i in a virtual environment, you must select the Multi-Host option. Otherwise, only one server in that environment will be able to see the volumes (or LUNs).
- Page 27 8. In the Name text box, modify the default name for the volume as you like, and then click the Finish button. Tip: We recommend including the word “volume” in the name so as not to confuse the volume name with your Drobo device’s name. drobo.com | Getting Started Guide for Your Drobo B800i |...
- Page 28 10. When finished, click the Apply button. The Confirm dialog box appears, asking if you want to apply volume changes. 11. Click the Yes button. The volume(s) are formatted. drobo.com | Getting Started Guide for Your Drobo B800i |...
-
Page 29: Adding The Drobo To Your Virtual Environment
Adding the Drobo B800i to Your Virtual Environment If you plan to use your Drobo B800i in a multi-host, virtual environment you have one last step: to add Drobo B800i as a storage device to your iSCSI VLAN using your virtualization software. -
Page 30: Where To Go From Here
Where to Go from Here After you’ve set up your Drobo B800i, you’re ready to store and back up data onto your Drobo device. Next steps include: your Drobo device’s firmware) up to date safely shut down your Drobo device... -
Page 31: Keeping Your Software Up To Date
Keeping Your Software Up to Date To ensure optimal performance, we highly recommend that you set your Drobo device to automatically check for software updates. (You may have already done this during the initial setup.) This feature keeps both Drobo Dashboard and your product’s firmware current. -
Page 32: Safely Shutting Down Your Drobo
Safely Shutting Down Your Drobo B800i If you plan to shut down your Drobo device for any reason, it is very important that you always do so safely. Improper Drobo device shutdowns may cause file corruption and/or data loss. It is a good idea to shut down your Drobo device before any of the following... -
Page 33: Safely Shutting Down Your Drobo Device Manually
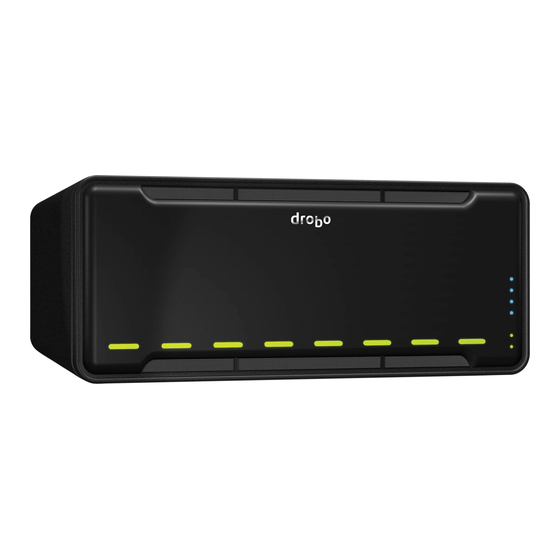
Although Drobo Dashboard allows for a “cleaner” shut down, you can safely shut down your Drobo device manually. 1. Check that the activity light on your Drobo device is off, indicating that no data is actively being transferred to or from your Drobo device. Refer to Figure 2 in the previous steps. -
Page 34: Using The Online User Guide
Using the Online User Guide After you’ve set up your Drobo device, you’re ready to use it to store and back up data. To learn how to manage and use your Drobo device, refer to the Online User Guide for your product, which can be found within your Drobo Dashboard software by clicking the Help option on the Navigation menu. -
Page 35: Troubleshooting Your Setup
If… you try to connect to your Drobo B800i… Then… Click the Ignore button and use Drobo Dashboard to manage your volumes. This is a harmless warning message and will not cause any issues with your Drobo B800i or Macintosh. - Page 36 1. Ensure that you are using a1 Gbit/s network adapter card and that the drivers for your card are up-to-date. 2. In Drobo Dashboard, be sure you are logged in to your Drobo B800i as the administrator, and then: All Devices page.
- Page 37 Drobo B800i to be power-cycled… Then… Be sure to upgrade your Drobo B800i to the latest firmware, which can be found at www.drobo.com/support/updates.php. Also ensure that you have upgraded all Drobo Dashboard software to the latest version, available at the same link.
- Page 38 Macintosh and Windows-based computers will be able to read and write data on the Drobo device. Note, however, that FAT32 is an older file system format that is generally less protective of your data than modern (journaled) file systems. It also has slower performance and file size limitations.
-
Page 39: Index
- adding Drobo B800i to, 28 - selecting, 5 VMFS, 22 increasing capacity, 6 VMware, 3, 22 installing Drobo Dashboard, 8 volume, 22 installing software updates, 29 - creating, 22, 24 drobo.com | Getting Started Guide for Your Drobo B800i |... - Page 41 Cleaning – Unplug Drobo, DroboPro, DroboElite, Drobo FS, Pro FS, B800i, or B800fs from the wall outlet before cleaning. Do not use liquid or aerosol cleaners; use a damp cloth. If Drobo, DroboPro, DroboElite, Drobo FS, Pro FS, B800i, or B800fs comes in contact with any liquid, unplug the power adaptor and let Drobo dry thoroughly before plugging back in.
- Page 42 Operating Humidity: 5% - 80%; Dimensions: 6.0” wide x 6.3” tall x 10.7” long (152.4mm wide x 160mm tall x 271.8mm long); Weight: 6 lbs. 11.3 ozs. (without power supply); Storage: Accepts up to four 3.5” SATA I or II internal desktop hard drives; Interfaces: USB 2.0 and FireWire 800 (2nd Generation Only); Drobo Dashboard Application (optional): Microsoft®...
- Page 43 Battery Disposal Your Drobo, DroboPro, DroboElite, DroboShare, Drobo FS, DroboPro FS, B800i and B800fs have internal batteries that preserve settings when the unit is off. Do not attempt to change the battery. Only a Data Robotics, Inc. certified technician can change the battery. When the product has reached the end of its useful life, please dispose of it according to your local environmental laws and guidelines.
- Page 44 RMA within such seven (7) days, Your credit card will be charged the manufacturer's suggested retail price of the replacement Product. "Advance Ship" means if Your credit card information is received: (i) before 1 pm local time, ship the same day; or (ii) after 1 pm local time, ship the next business day. drobo.com | Safety and Warranty |...
- Page 45 GPL LICENSE CODE Drobo model B800i, Drobo model B800fs, DroboPro FS, Drobo FS, DroboPro, DroboElite, and DroboShare utilize some GPL licensed Linux code. To obtain a copy of the Linux source code used in our product, please e-mail your request with your name and company affiliation to gplrequest@drobo.com.
- Page 46 Product to us. Contact support to obtain a Return Material Authorization ("RMA") number. Telephone numbers and details how to submit a request online are at http://www.drobo.com/support/contact-support.php. You must pack the Product in appropriate protective packaging and return the unit at your own cost.
- Page 47 GPL LICENSE CODE Drobo model B800i, Drobo model B800fs, DroboPro FS, Drobo FS, DroboPro, DroboElite, and DroboShare utilize some GPL licensed Linux code. To obtain a copy of the Linux source code used in our product, please e-mail your request with your name and company affiliation to gplrequest@drobo.com.
- Page 48 NOTES drobo.com | Safety and Warranty | viii...
Need help?
Do you have a question about the B800i and is the answer not in the manual?
Questions and answers