
Subscribe to Our Youtube Channel
Related Manuals for Drobo Robotics


Summary of Contents for Drobo Robotics
- Page 2 Drobo guia de usuario en su idioma. www.drobo.com/support/intl Veuillez voir le site Web ci-dessous pour le manuel d’utilisateur de Drobo dans votre langue. www.drobo.com/support/intl Si prega di consultare il sito web sotto per la Drobo Guida utente nella vostre lingua. www.drobo.com/support/intl...
- Page 4 Inserting drives into Drobo ............. 8 Connect Drobo to your computer ........... 8 Connect power ................9 Connect your Drobo to a network using DroboShare ....10 Initialize your Drobo ..............10 Drobo Lights .................. 14 Using Drobo Dashboard with your Drobo ........15 What to do when not using your Drobo ........
- Page 5 What to do when not using your DroboPro ........33 VII. Sharing Drobo/DroboPro between computers ........ 34 VIII. Tips and Troubleshooting ..............35 IX. Safety and Warranty ................. 44 X. Index ....................49...
- Page 6 After a drive is installed into an empty bay, the new drive capacity is immediately available and protected. Drobo can act as one large drive, making it easier to find what you’ve stored on it. Drobo’s Data Bay indicator lights tell you everything you need to know! Upgrading capacity is as simple as adding ink to a printer.
- Page 7 Welcome to the world’s best storage experience. Data Robotics, Inc. was formed in 2004 in California’s Silicon Valley with a vision to take the pain out of storage management. Data Robotics, Inc. developed the technology inside Drobo for people who “have to”...
- Page 8 Before you set up your Drobo, you should determine if you will need to share your Drobo with additional computers. If so, see “Sharing Drobo between computers” on page 34 for further information. To set your Drobo up, you will need to do the following: 1.
- Page 9 750GB drive will have approximately 700GB worth of capacity. This discrepancy has nothing to do with Drobo. During your initial setup, Drobo Dashboard asks you if you want to check for updates automatically. We highly recommend you select the “Yes”...
- Page 10 Note: To install Drobo Dashboard, you will need to have administrative rights on your computer. Open Drobo Dashboard and you will see the main page. This page gives you a quick overview of your Drobo’s status and storage usage. If you have more than one Drobo, you can switch between Drobos by clicking on the appropriate tab at the top of the window.
- Page 11 The Data tab in Advanced Controls gives you in-depth details on the status of your Drobo or DroboPro. You should go to this screen if Drobo is in the process of protecting your data and you would like to know when it will finish.
- Page 12 (Updated files will replace older files.) To start using DroboCopy on a PC, launch Drobo Dashboard and right- click the Drobo Dashboard icon (pie chart) in the System Tray and select “DroboCopy Settings…”. On a Mac, launch Drobo Dashboard and go to the Drobo Dashboard menu and select “DroboCopy Settings…”...
- Page 13 Once you’ve chosen the number of drives and which capacities to install, all you have to do is remove your Drobo’s face plate by simply pulling it off and then slide the drives into the Data Bays. It doesn’t matter which drive goes into which Data Bay. You should note that any pre-existing data on the drives will be erased.
- Page 14 Note: Firewire 800 is on the 2nd Generation Drobo only. Drobo gives you the option to use USB 2.0 to connect to your computer. While not as fast as FireWire 800, it is found on every computer made in the past few years.
- Page 15 If you are going use your Drobo on a network, you will need to use the companion product, DroboShare. Your Drobo connects to DroboShare, which connects to the network. Please see page 18 for further detail on setting up this connection. Return to this point to complete your Drobo setup.
- Page 16 Click “Yes”. Note: Newer versions of Windows (including Vista) will also offer to format your Drobo. We recommend that you click “Cancel” and use Drobo Dashboard to format. 2. You will be shown the message to the right asking you to select Drobo’s file...
- Page 17 Drobo to restart. When formatting is complete, your Drobo is ready to be used. You will be able to access it like any other drive connected to your computer. Tip: You can determine actual disk space usage by opening Drobo Dashboard or...
- Page 18 Click “Yes”. Note: Mac OS X will also offer to format the Drobo storage. We recommend that you click “Ignore” and use Drobo Dashboard to format. 2. You will be shown the...
- Page 19 Drobo to restart. When formatting is complete, Drobo is ready to be used. You will be able to access it like any other drive connected to your computer. Tip: You can determine actual disk space usage by opening Drobo Dashboard or checking Drobo’s blue capacity lights.
- Page 20 Capacity Gauge Blue: Displays the percentage of your Drobo that is full, in 10% increments. The Drobo Dashboard application allows you to easily check the status, change settings, etc., on your Drobo. See page 5 for an overview of Drobo Dashboard.
- Page 21 The Data tab in Advanced Controls gives you in-depth details on the status of your Drobo. You should go to this screen if Drobo is in the process of protecting your data and you would like to know when it will finish.
- Page 22 On a PC only, select your Drobo from the “Safely Remove Hardware” menu. The power light will turn yellow. Note: It will take a brief time for your Drobo to enter standby mode. The power light will change from green to yellow and the drive bay lights will go off, indicating it is safe to disconnect the power cord.
- Page 23 Drobo connects directly to one computer at a time via the provided USB 2.0 or FireWire 800 cable. However, you may have a need to share your Drobo across your network. Using Drobo with DroboShare, computers will show Drobo in their list of network devices, which allows for centralized storage or easy file sharing between computers.
- Page 24 Click “Continue/Next”. 4. Depending on your volume selection and the total capacity of the drives in your Drobo, you will be presented with the opportunity to select a custom name for your volume(s). Click “Continue/Next”.
- Page 25 The Drobo volume(s) will automatically connect to your computer. Each volume will appear as a Volume on your Mac or as a Network Drive on your PC. Tip: You can determine actual disk space usage by opening Drobo Dashboard or checking Drobo’s blue capacity lights. Power Light Green: The power is on and DroboShare is ready.
- Page 26 “Tools” tab and click the “Setup” button in the DroboShare section. Tip: If you have an existing 1 Generation Drobo, place it in Standby (see “What to do when not using Drobo” on page 17) and then follow the steps to connect Drobo to DroboShare (page 18).
- Page 27 Open the Drive Lock by pressing it down and slide the drive into the Data Bay until you feel the connector “mate” at the rear of Drobo. If the connectors seat properly, the Drive Lock will snap behind the drive, securing it into place.
- Page 28 FireWire 800 to FireWire 400 cable. Note: Windows based computers will not get optimal performance with the standard Microsoft FireWire drivers. Visit our support knowledgebase at www.drobo.com/support for details on how to optimize performance with FireWire on Windows (search keywords “FireWire performance”).
- Page 29 Just as with any hard drive, you must format DroboPro for use with your computer’s operating system. Use the formatting tools provided in Drobo Dashboard, which is included on the Drobo Resource CD. You can also download Drobo Dashboard by visiting www.drobo.com/support.
-
Page 30: Storage Virtualization
DroboPro), then DroboPro will automatically create a new volume (or volumes) of the same size as the original volume. Drobo Dashboard will notify you when this occurs and ask you to format and name the new volume(s). - Page 31 You will be shown the message to the right asking you to select DroboPro’s file system format. You have the choice between NTFS (XP Compatible), NTFS, and FAT32. For most, either version of NTFS is the best choice. Choose and click “Next”.
- Page 32 When formatting is complete, your DroboPro is ready to be used. You will be able to access it like any other drive connected to your computer. Tip: You can determine actual disk space usage by opening Drobo Dashboard or checking DroboPro’s blue capacity lights. Once the DroboPro has finished...
- Page 33 When formatting is complete, DroboPro is ready to be used. You will be able to access it like any other drive connected to your computer. Tip: You can determine actual disk space usage by opening Drobo Dashboard or checking DroboPro’s blue capacity lights.
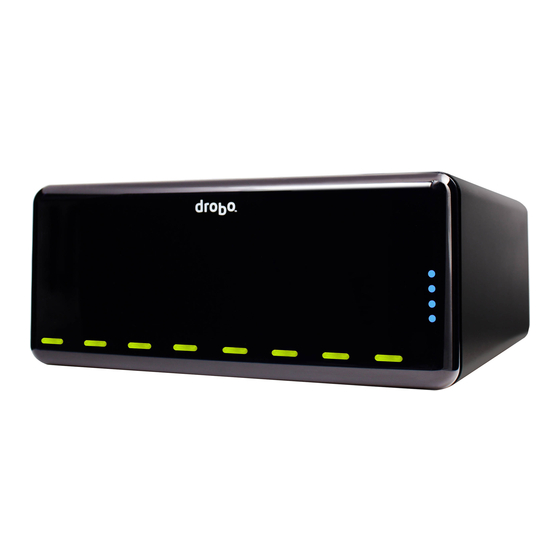
- Page 34 One of DroboPro’s many benefits is a series of lights that tell you everything you need to know, without your having to launch any application software on your computer. Remember, DroboPro is designed to actively monitor and protect your data at all times. DroboPro will automatically take any necessary actions and display them using the following lights: Drive Lights...
- Page 35 DroboPro to best suit your needs. In this window you can reset your DroboPro, reformat the volumes on the DroboPro, or change a variety of settings. Additionally, this page displays useful information about your Drobo and provides an easy way to check for updates of Drobo Dashboard and your unit’s firmware.
- Page 36 If you would like to change this setting, go to the Advanced Controls > Tools tab and click the Settings button in the DroboPro settings section. The iSCSI window allows you to configure your iSCSI connection on your DroboPro. “Automatically configure” (default) allows Drobo Dashboard...
- Page 37 On a Mac, volumes are simply volumes. To access Volume Management, go to the Advanced Controls > Tools tab of Drobo Dashboard. You can create up to 16 volumes on your DroboPro. The maximum size of each volume is determined by the operating system and file system format you choose.
- Page 38 Make sure that no applications on your computer are using the Drobo by checking the activity light. If applications are using your DroboPro, they may prevent it from properly disconnecting.
- Page 39 There are several ways to share your Drobo or DroboPro between multiple computers. If you need to connect your Drobo to a network, you must use DroboShare, a unique companion to Drobo. Using Drobo with DroboShare, computers will show Drobo in their list of network devices.
- Page 40 A. Either add a standard 3.5” SATA hard drive to an empty Data Bay, or remove the smallest capacity drive and replace with a larger capacity drive. It’s okay to do this while Drobo is running; you do not need to put Drobo into Standby.
- Page 41 Q. How can I wipe all the data from my drives and reset my Drobo? A. WARNING: THIS PROCEDURE WILL CLEAR ALL THE DATA STORED ON DROBO. There are two ways to reset your Drobo. First, in Advance Controls > Tools tab, click the “Reset…” button. The on-screen instructions will walk you through the process.
- Page 42 Q. Is there a foolproof way to protect my data on the Drobo? A. If the Drobo is the only source of your data, then that would be considered your “primary” storage. The only way to fully protect your data is to maintain a true backup.
- Page 43 The one drawback is that the computer which is sharing the Drobo must be turned on, in order for others to get access to the Drobo. To find out more about using your computer’s file sharing capabilities, consult your operating system documentation.
- Page 44 A. Yes, you can purchase additional hardware and phone support by purchasing DroboCare. To learn more about DroboCare visit: www.drobo.com/drobocare. Q. How do I get support for Drobo? A. If you did not register your Drobo during setup, first go to www.drobo.com/registration to register your Drobo. Then go to www.drobo.com/support...
- Page 45 Drobo. and 2 Generation Drobo Q. Why does the Drobo 2nd Gen have two FireWire ports? Can I connect it to two computers at the same time via FireWire? No. You cannot connect the Drobo to two computers at the same time.
- Page 46 Q. How can I shut down DroboPro safely for a prolonged period? A. Click the “Shutdown” command from the Advanced Controls > Tools tab of Drobo Dashboard or by clicking the power button on the rear of the DroboPro. The front and rear power lights will turn off once the DroboPro has safely shut down.
- Page 47 IP address on that computer to be in the same subnet as your DroboShare. Drobo Dashboard should discover your Drobo and DroboShare and you will be able to assign your desired static IP address for DroboShare in the DroboShare settings of Drobo Dashboard.
- Page 48 DroboShare. How do I use the native Windows Vista backup tool with Drobo/DroboShare? A. When you use the native Vista backup tool to back up to the Drobo, Windows will ask you for a username and password. If you have not...
- Page 49 Incorrect reassembly can cause electric shock when Drobo or DroboShare is used. Moving – Avoid moving Drobo, DroboPro, or DroboShare while it is plugged in to avoid shock and vibration damage to the installed hard disk drives.
- Page 50 Electrostatic Discharge - The components inside your Drobo and disk drives are sensitive to static electricity, also known as electrostatic discharge. Before you install any disk drive, we recommend that you do the following: 1) Avoid static- causing surfaces such as carpeted floors, plastic, and packing foam; 2) Discharge yourself by touching an unpainted metal surface such as a desk or rack mount;...
- Page 51 (3) refund the purchase price of the product. When a refund is given, the product for which the refund is provided must be returned to Data Robotics, Inc. and becomes Data Robotics’...
- Page 52 Inc. representative or Data Robotics, Inc. Authorized Reseller will help determine whether your product requires service and, if it does, will inform you how Data Robotics, Inc. will provide it. Data Robotics, Inc. or its Data Robotics, Inc. Authorized Resellers will provide warranty service on products that are tendered or presented for service during the Warranty Period, as permitted by law.
- Page 53 Authorized Resellers are not liable for any damage to or loss of any programs, data, or other information stored on any media, or any non-Data Robotics, Inc. product or part not covered by this warranty. Recovery and reinstallation of system, application software, and user data are not covered under this Limited Warranty.
-
Page 54: File Format
Information supplied by Data Robotics, Inc. is believed to be accurate and reliable at the time of printing, but Data Robotics, Inc. assumes no responsibility for any errors that may appear in this document. Data Robotics, Inc. - Page 57 070-00014-001 Rev 03...
Need help?
Do you have a question about the Robotics and is the answer not in the manual?
Questions and answers