Frymaster OCF30 Series Installation & Operation Manual
Oil conserving gas fryer
Hide thumbs
Also See for OCF30 Series:
- Service & parts manual (102 pages) ,
- Installation & operation manual (46 pages) ,
- Service & parts manual (68 pages)
Table of Contents
Troubleshooting

Related Manuals for Frymaster OCF30 Series


Summary of Contents for Frymaster OCF30 Series
- Page 1 Frymaster, a member of the Commercial Food Equipment Service Association, recommends using CFESA Certified Technicians. 24-Hour Service Hotline 1-800-551-8633 JUNE 2011 *8196687* www.frymaster.com E-mail: service@frymaster.com...
- Page 2 DIRECTLY OR INDIRECTLY, IN WHOLE OR IN PART, DUE TO THE INSTALLATION OF ANY MODIFIED PART AND/OR PART RECEIVED FROM AN UNAUTHORIZED SERVICE CENTER. This appliance is intended for professional use only and is to be operated by qualified personnel only. A Frymaster DEAN Factory Authorized Servicer (FAS) or other qualified professional should perform installation, maintenance, and repairs.
- Page 3 The front ledge of the fryer is not a step! Do not stand on the fryer. Serious injury can result from slips or contact with the hot oil.
-
Page 4: Table Of Contents
4.1.2 Preparing for Use with Magnasol Filter ... 4-2 Filtration ... 4-3 4.2.1 Operation of the Filter ... 4-3 Disassembly and Reassembly of the Magnasol Filter ... 4-5 Draining and Disposing of Waste Oil ... 4-6 ™ OCF30 Series Gas Fryers TABLE OF CONTENTS... - Page 5 Daily Checks and Service ... 5-1 5.2.1 Inspect Fryer for Damage ... 5-1 5.2.2 Clean Fryer Cabinet Inside and Out ... 5-1 5.2.3 Clean the Built-in Filtration System Daily ... 5-1 5.2.4 Clean Filter Pan, Detachable Parts and Accessories Daily ... 5-2 Weekly Checks and Service ...
-
Page 6: Chapter 1: General Information
Union for sale and installation in the following EU countries: AT, BE, DE, DK, ES, FI, FR, GB, IE, IT, LU, NL, NO, PT and SE. This manual is applicable to and valid for all OCF30 speaking countries, including those in the European Union. Where conflicts exist between in- structions and information in this manual and local or national codes of the country in which the equipment is installed, installation and operation shall comply with those codes. -
Page 7: Fcc Compliance
Computer Information FCC COMPLIANCE This equipment has been tested and found to comply with the limits for a Class A digital device, pursuant to Part 15 of the FCC rules. While this device is a verified Class A device, it has been shown to meet the Class B limits. -
Page 8: Equipment Description
Installation, Operating, and Service Personnel Operating information for Frymaster equipment has been prepared for use by qualified and/or authorized personnel only, as defined in Section 1.7. All installation and service on Frymaster equipment must be performed by qualified, certified, licensed, and/or authorized installation or service personnel, as defined in Section 1.7. -
Page 9: Qualified Service Personnel
Service and Parts Manual. Parts orders may be placed directly with your local ASA or distributor. Included with fryers when shipped from the factory is a list of Frymaster FAS’s. If you do not have access to this list, contact the Frymaster Service Department at 1-800-551-8633 or 1- 318-865-1711 or by e-mail: service@frymaster.com. - Page 10 Quantity Needed: Service information may be obtained by contacting your local FAS/Distributor. Service may also be obtained by calling the Frymaster Service Department at 1-800-551-8633 or 1-318-865-1711 or by e-mail: service@frymaster.com. When requesting service, please have the following information ready:...
-
Page 11: Chapter 2: Installation Instructions
Failure to use qualified, licensed, and/or authorized installation or service personnel (as de- fined in Section 1.7 of this manual) to install, convert to another gas type or otherwise service this equipment will void the Frymaster warranty and may result in damage to the equipment or injury to personnel. -
Page 12: National Code Requirements
(450 mm) should be maintained between the flue outlet and the lower edge of the grease filter.” Frymaster recommends that the minimum distance be 24 in. (600 mm) from the flue outlet to the bottom edge of the filter when the appliance consumes more than 120,000 BTU per hour. -
Page 13: Electrical Grounding Requirements
A wiring diagram is located on the inside of the fryer door. Refer to the rating plate on the inside of the fryer door for proper voltages. This appliance is equipped with a special (grounding) plug for your protection against electrical shock, and must be plugged directly into a properly grounded re- ceptacle. - Page 14 2. Level fryers equipped with legs by screwing out the legs approximately 1 inch then adjusting them so that the fryer is level and at the proper height in the exhaust hood. Frymaster recommends that the minimum distance from the flue outlet to the bottom edge of the hood be 24 in.
-
Page 15: Connection To Gas Line
The appliance and its individual shutoff valve must be disconnected from the gas supply piping system during any pressure testing of the system at test pressures in excess of ½ PSI (3.45 kPa, 13.84 inches W.C.) to avoid damage to the fryer’s gas tubes and gas valve(s). - Page 16 SPAIN (ES) SWEDEN (SE) UNITED KINGDOM (UK) Required airflow for the combustion air supply is 2m 1. Connect the quick-disconnect hose to the fryer quick-disconnect under the fryer and to the building gas line. NOTICE- Australia Only CATEGORIES PRESSURE (MBAR)
- Page 17 3. Close the fryer drain valve and fill the frypot with water or oil to the bottom OIL LEVEL line at the rear of the frypot. Light the fryer described in the “Lighting Instructions” topics found in Chapter 3 of this manual.
-
Page 18: Converting To Another Gas Type
Section 1.7 of this manual. ™ OCF30 Series gas fryers manufactured for non-CE countries use different burners for each type gas. The burners in fryers built for Propane gas have a special gray-colored coating on the burner tiles to enable them to withstand the higher caloric value of the Propane gas. -
Page 19: Positioning The Fryer
Change the orifices. b. Adjust the manifold pressure. 3. Remove the old rating plate and return to Frymaster. Affix the new rating plate included with the conversion kit in place of the old rating plate stating the gas has been converted. - Page 20 2. Close fryer drain-valve(s). 3. Clean and fill frypot(s) to the bottom oil level line with cooking oil. (See Equipment Setup and Shutdown Procedures in Chapter 3.) 2-10...
-
Page 21: Chapter 3: Operating Instructions
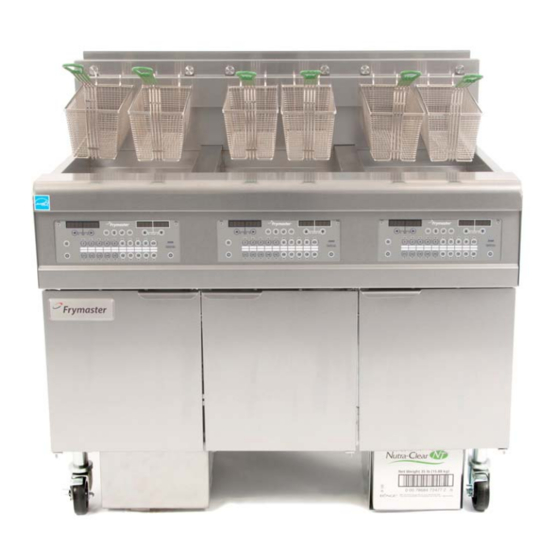
OCF30 CHAPTER 3: OPERATING INSTRUCTIONS FINDING YOU WAY AROUND THE OCF30 Basket Hanger Control Panel (3000 Controller shown) Drain Handle Filter Pan FootPrint Pro Built-in TYPICAL CONFIGURATION (FPGL230 SHOWN) NOTE: The appearance of your fryer may differ slightly from that shown depending upon the configuration and date of manufacture. -
Page 22: Controller Operation And Programming
3000 Controller Manual 819-6872 for the controller programming and operat- ing procedure. For CM3.5 controllers r efer to the separate Frymaster Fryer Controllers User’s Ma- nual furnished with your fryer for the specific controller operating instructions. -
Page 23: Lighting The Fryer
3. If the burners fail to light, press the ON/OFF switch to the OFF position and wait 60 seconds. Repeat step 2. The fryer will automatically enter the melt cycle mode if the frypot temperature is below 180ºF (82ºC). (NOTE: During the melt cycle, the burners will repeatedly fire for a few seconds, then go out for a longer period.) When the frypot temperature reaches 180ºF (82ºC), the unit will au-... -
Page 24: Shutting The Fryer Down
For short-term shut down during the workday, place the controller ON/OFF switch in the OFF position and put the frypot covers in place (if the fryer is so equipped). When shutting the fryers down at closing time, filter the oil and clean the fryers. Place the controller ON/OFF switch in the OFF position. -
Page 25: Oil Attendant™ Automatic Topoff
Place the oil container inside the cabinet and slide it into place (as shown on the following page). Avoid catching the suction hardware on the cabinet interior as the container is placed in the fryer. The system is now ready for operation. As the fryer heats to preprogrammed temperatures, the system will energize and then slowly add oil to the frypot as needed, until the oil reaches an optimal level. -
Page 26: Bulk Oil Systems
4. Put the tube in the new full container (see Figure 6). Figure 6 5. Slide the JIB onto the shelf inside the fryer cabinet (as seen in Figure 3). 6. Press and hold the orange JIB reset switch three (3) seconds to reset the top off system. -
Page 27: Chapter 4: Filtration Instructions
OCF30 CHAPTER 4: FILTRATION INSTRUCTIONS The on-site supervisor is responsible for ensuring that operators are made aware of the inherent hazards of operating a hot oil filtering system, particularly the aspects of oil filtration, draining and cleaning procedures. Preparing the Built-In Filtration System for Use The FootPrint Pro filtration system allows the oil in one frypot to be safely and efficiently filtered while the other frypots in a battery remain in operation. - Page 28 (See Figure 4) 6. Replace the crumb tray in the filter pan, then push the filter pan back into the fryer, positioning it under the drain. 4.1.2 Preparation for Use with the Magnasol Filter Assembly 1.
-
Page 29: Filtration
4.2 Filtration A 3000 controller prompts the user when to filter on the OCF30™ fryer. After a preset number of cook cycles the controller displays filter now? alternating with YES NO. Follow the instructions on page 1-12 in the controller manual 819-6872. If NO is selected or a cook cycle is started, the controller will prompt again soon to filter the oil. - Page 30 6. After the oil is filtered, close the drain valve when prompted and allow the fryer to refill. Let the filter pump run 10 to 12 seconds after the oil begins to bubble. Turn the filter off.
-
Page 31: Disassembly And Reassembly Of The Magnasol Filter
Do not bang fry baskets or other utensils on the fryer’s joiner strip. The strip is present to seal the joint between the fry vessels. Banging fry baskets on the strip to dislodge shortening will distort the strip, adversely affecting its fit. -
Page 32: Draining And Disposing Of Waste Oil
3000(see page 1-13 in the controller manual) and follow the prompts and instructions for disposing oil to the bulk oil system. (For safe, convenient draining and disposal of used oil, Frymaster recommends the use of the Frymaster Shortening Disposal Unit (SDU) for JIB systems. The SDU is available through your local distributor.) NOTE: If using an SDU built before January 2004 the... - Page 33 DO NOT hammer on the drain valve with the cleanout rod or other objects. Damage to the ball inside will result in leaks and will void the Frymaster warranty. 4. After draining the oil, clean all food particles and residual oil from the frypot. BE CAREFUL, this material may still cause severe burns if it comes in contact with bare skin.
-
Page 34: Chapter 5: Preventive Maintenance
5.2.2 Clean Fryer Cabinet Inside and Out Clean inside the fryer cabinet with dry, clean cloth. Wipe all accessible metal surfaces and compo- nents to remove accumulations of oil and dust. -
Page 35: Clean Filter Pan, Detachable Parts And Accessories Daily
After the fryer has been in use for a period of time, a hard film of caramelized oil will form on the inside of the frypot. This deposit must be periodically removed to maintain your fryer’s efficiency. - Page 36 2. For fryers equipped with 3000 controllers, program the controller for boil-out as described on page 1-14 in the controller manual 819-6872. For fryers equipped with CM 3.5 controllers, pro- gram the controller for boil-out as described in the separate Frymaster Fryer Controllers User’s Manual.
-
Page 37: Monthly Checks And Service
5.4.1 Check 3000 Set Point Accuracy (This check applies only to units equipped with 3000 or CM3.5 Controllers.) 1. Insert a good-grade thermometer or pyrometer probe into the oil, with the end touching the fryer temperature-sensing probe. 2. When the 3000 controller display shows “DROP” or the CM3.5 displays a product or dashed lines (indicating that the frypot contents are within the cooking range), press the to display the temperature and setpoint of the cooking oil as sensed by the temperature probe. - Page 38 5. Reinstall the blower shield or shield assembly. 6. Light the fryer in accordance with the procedure described in Chapter 3, Section 3.2.2. 7. After the burners have been lit for at least 90 seconds, observe the flames through the burner viewing ports located on each side of the combustion air blower (see Figure 4 on the following page).
-
Page 39: Semi-Annual Checks And Service
This procedure is not required for fryers configured for export to CE countries. 1. Set the fryer power switch and the gas valve to the OFF position. 2. Carefully unscrew the vent tube from the gas valve. NOTE: The vent tube may be straightened for ease in removal. -
Page 40: Check Burner Manifold Pressure
Annual/Periodic System Inspection This appliance should be inspected and adjusted periodically by qualified service personnel as part of a regular kitchen maintenance program. Frymaster recommends that an Factory Authorized Servicer inspect this appliance at least annually as follows: 5.7.1 Fryer •... -
Page 41: Built-In Filtration System
5.7.2 Built-In Filtration System • Inspect all oil-return and drain lines for leaks and verify that all connections are tight. • Inspect the filter pan for leaks and cleanliness. If there is a large accumulation of crumbs in the crumb basket, advise the owner/operator that the crumb basket should be emptied into a fireproof container and cleaned daily. -
Page 42: Series Gas Fryers
If you are in doubt as to the proper action to take, do not hesitate to call the Frymaster Technical Service Department or your local Frymaster Factory Authorized Servicer for assistance. -
Page 43: Troubleshooting
CORRECTIVE ACTION A. Press the ON/OFF switch to turn the controller on. B. Verify that the fryer is plugged in and that the circuit breaker is not tripped. C. Call your FAS for assistance. A. Press (YES) if the vat is full, otherwise press (NO). -
Page 44: Error Message And Display Problems
This display is normal for a short while if a large batch of frozen product is added to the frypot or if the fryer is not heating properly. If the issue persists call your FAS for assistance. Shut the fryer down immediately and call your FAS for assistance. -
Page 45: Basket Lift Problems
Apply a light coating of Lubriplate lightweight white grease to the rod and bushings. CORRECTIVE ACTION Change the filter prompt setting. Ensure fryer is at setpoint before starting; ensure the controller is ON. Wait until the previous function ends to start another filtration cycle. -
Page 46: Error Log Codes
The high-limit test mode is used to test the high limit circuit. The high-limit test will destroy the oil. It should only be performed with old oil. Shut the fryer off and call for service immediately if the temperature reaches 460°F (238°C) without the high-limit tripping and the computer displays high A. -
Page 47: Disconnect Power
LIMIT FAILURE alternating with DISCONNECT POWER with an alert tone during testing. The test is cancelled at any time by turning the fryer off. When the fryer is turned back on, it returns to the operating mode and displays the product. -
Page 48: Appendix A: Jib Preparation With Solid Shortening Option
OCF30 APPENDIX A: JIB Preparation with Solid Shortening Option 1. Open right door of fryer and remove brace in JIB cabinet. 2. Position melter in front of cabinet. Loosen bracket on left side of melter, if necessary, to ease placement in the cabinet. -
Page 49: Appendix B: Solid Shortening Melter Use
OCF30 APPENDIX B: Solid Shortening Melter Use Reset oil reservoir system • Ensure shortening melter is on. • Fill melter with shortening. • Allow 2-3 hours for solid shortening to melt. DO NOT attempt to use the top off system with unmelted oil in the top off system. -
Page 50: Appendix C: Bulk Oil Instructions
(see Figure 1). The 4-pin wire harness allows connection to various bulk oil systems (see Figure 2). - Page 51 Pull to dispose of oil in filter pan. Fryer must be in Bulk Mode. NOTE: The appearance of your fryer may differ slightly from that shown depending upon the configuration, fryer type and date of manufacture. C.1.2 Filling the JIB “TOPOFF OIL EMPTY”...
- Page 52 5. Pull the oil disposal valve and the pump will engage and empty the filter pan to the waste oil tank. The Waste Full light on the rocker panel will illuminate if the tank is full. 6. Filling with fresh oil? See Fill Vat from Bulk below. If not, switch to Normal Mode at rocker panel C.1.4 Fill Vat from Bulk Tank 1.
- Page 53 THIS PAGE INTENTIONALLY LEFT BLANK...
-
Page 54: Service Hotline
Frymaster, L.L.C., 8700 Line Avenue, Shreveport, Louisiana 71106 TEL 1-318-865-1711 FAX (Parts) 1-318-219-7140 FAX (Tech Support) 1-318-219-7135 SERVICE HOTLINE 819-6687 PRINTED IN THE UNITED STATES 1-800-551-8633 JUNE 2011...
Need help?
Do you have a question about the OCF30 Series and is the answer not in the manual?
Questions and answers