Table of Contents
Troubleshooting

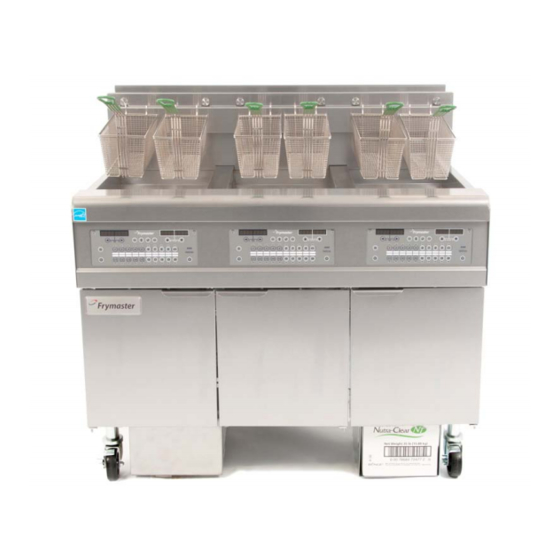
Related Manuals for Frymaster FootPrint OCF30G


Summary of Contents for Frymaster FootPrint OCF30G
- Page 1 Frymaster, a member of the Commercial Food Equipment Service Association, recommends using CFESA Certified Technicians. 24-Hour Service Hotline 1-800-551-8633 05/2017 *8196688* www.frymaster.com E-mail: fryservice@welbilt.com...
- Page 2 NOTICE IF, DURING THE WARRANTY PERIOD, THE CUSTOMER USES A PART FOR THIS FRYMASTER EQUIPMENT OTHER THAN AN UNMODIFIED NEW OR RECYCLED PART PURCHASED DIRECTLY FROM FRYMASTER DEAN, OR ANY OF ITS FACTORY AUTHORIZED SERVICERS, AND/OR THE PART BEING USED IS MODIFIED FROM ITS ORIGINAL CONFIGURATION, THIS WARRANTY WILL BE VOID.
- Page 3 DANGER No structural material on the fryer should be altered or removed to accommodate placement of the fryer under a hood. Questions? Call the Frymaster Dean Service Hotline at 1-800-551-8633. DANGER Adequate means must be provided to limit the movement of this appliance without depending upon the gas line connection.
-
Page 4: Table Of Contents
™ OCF30 SERIES GAS FRYERS TABLE OF CONTENTS CAUTIONARY STATEMENTS ........................i CHAPTER 1: Service Procedures Functional Description ........................1-1 The Electronic Ignition System ...................... 1-1 Interface Board ..........................1-2 Thermostats ............................ 1-4 Accessing Fryers for Servicing ....................... 1-4 Cleaning the Gas Valve Vent Tube ....................1-5 Checking the Burner Manifold Gas Pressure ................. - Page 5 ™ OCF30 SERIES GAS FRYERS TABLE OF CONTENTS cont. 1.14.3 Service required Errors ....................1-36 1.14.4 Error Log Codes ......................1-37 1.14.5 3000 Menu Summary Tree ................... 1-38 1.14.6 3000 Controller Pin Positions and Harnesses............... 1-39 1.15 Loading and Updating Software Procedures ................1-40 1.16 Principal Wiring Connections ......................
- Page 6 2.10 Filter Pump, Motor and Associated Components ................. 2-22 2.11 Frypot Assemblies and Associated Components ................2-23 2.12 Oil Return System Components ....................2-24 2.13 ATO (Auto Top-Off) Components ....................2-25 2.13.1 ATO Box Assembly ....................2-25 2.13.2 JIB (Jug In Box) Cradle, JIB Cap and Pick Up Assembly .......... 2-25 2.13.3 ATO (Automatic Top-Off) Pump Assembly ...............
-
Page 7: Chapter 1: Service Procedures
OCF30™ SERIES GAS FRYER CHAPTER 1: SERVICE PROCEDURES Functional Description OCF30™ series gas fryers contain a welded stainless steel frypot that is directly heated by a high efficiency infrared burner system, requiring approximately 43% less energy than conventional burners to cook the same volume. -
Page 8: Interface Board
Interface Board All fryers in this series have an interface board located in the component box behind the control panel. The interface board provides a link between the controller and the fryer’s individual components without requiring excessive wiring, and allows the controller to execute commands from one central point. K2 and K3 are double-pole-double throw (DPDT) relays that supply 24VAC to the ignition and gas valve circuits, as well as 120VAC to the blower motor. -
Page 10: Thermostats
FREQUENTLY USED TEST POINTS FOR INTERFACE BOARD 106-6706 METER TEST PINS RESULTS SETTING 12VAC Power to Controller 50VAC Scale 1 and 3 on J3 or J2 12-18 24VAC Power to Right Module 50VAC Scale 8 on J3 and GROUND 22-28 120 VAC Power 250VAC Scale 11 on J3 and GROUND... -
Page 11: Cleaning The Gas Valve Vent Tube
Cleaning the Gas Valve Vent Tube 1. Set the fryer power switch and the gas valve to the OFF position. 2. Carefully unscrew the vent tube from the gas valve. NOTE: The vent tube may be straightened for ease of removal. -
Page 12: Measuring Flame Current
CE Standard Burner Manifold Gas Pressures Pressure (mbar) Single Natural Gas Lacq (G20) under 20 mbar Natural Gas Gronique * (G25) under 25 mbar Natural Gas Gronique (G25) under 20 mbar Butane/Propane (G30) at 28/30 or 50 mbar Propane (G31) under 37 or 50 mbar * Belgian G25 = 7,0 mbar Non-CE Standard Burner Manifold Gas Pressures... -
Page 13: Replacing Fryer Components
Setup the 3000 controller following the instructions on page 4-3 in the Installation and Operation manual. Setup MUST be performed after replacement. See Frymaster Controller Manual 819-5871 for CM3.5 setup. Once setup is complete on all replaced controllers, reset all control power following the instructions in section 1.13.6 on page 1-33 to readdress the new 3000 controller. -
Page 14: Replacing The Interface Board
10. If working on the left frypot, cut the wire tie on the wiring bundle and disconnect the main wiring harness 15-pin connector. 11. Remove the component box mounting screws. 12. Rotate the top of the component box out of the frame and carefully pull it out enough to disconnect the wiring harness plug from the back of the box. -
Page 15: Replacing Or Cleaning A Combustion Air Blower
2. Disconnect the flame sensor wire by carefully pulling its push-on terminal from the terminal strip on the ignitor. Disconnect the gas enrichment tube at the ignitor-end compression fitting. Disconnect the ignition cable from the ignitor by grasping its boot and gently pulling toward you. (See photo below) Flame Sensor Wire Gas Enrichment Tube Ignition Cable... -
Page 16: Adjusting The Air/Gas Mixture
Wrap the motor and wires with plastic wrap or a plastic bag. Blower Housing Blower Wheel 4. Remove the plastic wrap from the blower motor assembly. Reassemble the blower motor assembly and blower housing. Reinstall the blower shield. 5. Reinstall the blower assembly in the fryer and reconnect the wiring disconnected in Step 1. 6. -
Page 17: Replacing A Gas Valve
non-CE blowers loosen this nut and rotate shutter to open or close air intake. On CE blowers loosen both wing nuts and slide the shutter to adjust the air intake. 1.9.8 Replacing a Gas Valve 1. Disconnect fryer from electrical and gas supplies. 2. -
Page 18: Replacing A Burner Assembly
1.9.9 Replacing a Burner Assembly 1. Disconnect the unit from the electrical and gas supplies. 2. Remove the gas line and enrichment tube using a 7/16” and 5/8” wrench from the front of the burner. 3. Remove the elbow and tee off the bottom of the burner to ensure easier removal of the burner. -
Page 19: Replacing The Filter Motor, Filter Pump, Or Filter Pump Solenoid Valve
1.9.10 Replacing the Filter Motor, Filter Pump, or Filter Pump Solenoid Valve 1. Disconnect the unit from the electrical power supply. 2. Remove the filter pan from the unit. 3. Position a container beneath the oil return fitting at the front of the cabinet. Disconnect the flexible oil lines from the fittings, allowing any residual oil to drain into the container. -
Page 20: Replacing Frypot Insulation And/Or Upper Burner Rails
16. Disconnect the gas lines from the burner orifices and ignitor assemblies. 17. Remove the frypot hold down bracket. 18. Remove the screws in the back panel and inside the flue cap at each end that secure the flue cap to the fryer and lift it clear of the fryer. - Page 21 Spacer Spacer Disassembling A Frypot (Full Vat Illustrated) See page 1-17 for reassembly illustration. 11. Remove the upper burner rails (11). NOTE: For the following steps, refer to the frypot exploded view on page 1- 16 for component identification. 12. Remove any residual insulation, sealant, and/or oil from the exterior of the frypot. 13.
- Page 22 21. Insert the burners (9) into the rails to ensure the rail spacing and alignments are correct. The burner should slide freely into and out of the rails. The upper rail can be bent slightly to increase or decrease tension on the burner and the edges of the slot can be closed or opened slightly to best fit the burner frame.
-
Page 23: Troubleshooting And Problem Isolation
Re-assembling A Frypot (Full-Vat Illustrated) 1.10 Troubleshooting and Problem Isolation Because it is not feasible to attempt to include in this manual every conceivable problem or trouble condition that might be encountered, this section is intended to provide technicians with a general knowledge of the broad problem categories associated with this equipment, and the probable causes of each. - Page 24 1.10.1 Heating (Ignition) Failure Heating (ignition) failure occurs when the ignition module fails to sense a flame within the 4-second time delay period and locks out. When this happens, the module sends 24 VAC through the interface board alarm circuit to the controller.
- Page 25 If popping occurs only during peak operating hours, the problem may be incorrect or fluctuating gas pressure. Verify that the incoming gas pressure (pressure to the gas valve) is in accordance with the appropriate CE or Non-CE Standard found in Section 2.3 page 2-4 of the OCF30™ Series Gas Fryer Installation and Operation Manual (PN 819-6687), and that the pressure remains constant throughout all hours of usage.
- Page 26 1.10.3 Improper Temperature Control Temperature control, including the melt cycle, is a function of several interrelated components, each of which must operate correctly. The principle component is the temperature probe. Other components include the interface board, the controller itself, and the ignition module. Improper temperature control problems can be categorized into melt cycle problems and failure to control at setpoint problems.
-
Page 27: Leakage
The operator attempted to filter oil that was not heated. Cold oil is thicker and causes the pump motor to work harder and overheat. If the motor hums but the pump does not rotate, there is a blockage in the pump. Incorrectly sized or installed paper will allow food particles and sediment to pass through the filter pan and into the pump. - Page 28 has elapsed, power is again supplied to the motor. The motor raises the basket from the frypot until the rod loses contact with the upper microswitch, cutting power to the motor and again reversing the direction of current flow. Problems with the basket lift can be grouped into three categories: ...
-
Page 29: Troubleshooting Guides
Troubleshooting the electronics of the basket lift is the process of verifying current flow through the individual components up to and including the motor. Using a multimeter set to the 250 VAC range, check the connections on both sides of the component for the presence of the applied line voltage. The wiring diagram on the pages 1-44 and 45 identifies the components and wiring connection points. - Page 30 ii. If 24 VAC is present, the probable cause is a failed interface board. 24 VAC is present on interface board J3 pin 9 (LED 5 (GV)) and, on dual units, on J1 pin 9 (LED 1 (GV)). 1. If 24 VAC is not present across the gas valve main coil (MV terminals), probable causes are an open high-limit thermostat or a failed wire between the interface board and gas valve.
-
Page 31: Troubleshooting The Gas Valve
24 VOLT CIRCUIT With Interface Board 106-6706 and Two 807-3365 (DV) Ignition Modules TRANSFORMER Optional J3 PIN 8 PRESSURE SWITCH FUSE LED 3 (24V) Heat Relay Heat Relay (K2 Replaceable) (K3 Replaceable) 2 (PWR) LED 4 (PWR) High Voltage IGNITION IGNITION High Voltage Flame Sensor... -
Page 32: Troubleshooting The Temperature Probe
If 24 VAC is present across gas valve main coil, check the incoming gas pressure and compare to the tables on page 2-4 of the Installation and Operation manual. 1. If incoming gas pressure is not correct, the probable cause is a problem with the gas supply to fryer. 2. -
Page 33: Probe Resistance Chart
1.12 Probe Resistance Chart Probe Resistance Chart For use with OCF30™ Series fryers manufactured with Minco Thermistor probes only. OHMS OHMS OHMS OHMS OHMS 1059 1204 1350 1493 1634 1070 1216 1361 1503 1644 1080 1226 1371 1514 1654 1091 1237 1381 1524... - Page 34 Problem Probable Causes Corrective Action A. Ensure the JIB is not out of oil and supply line is in the JIB. Replace JIB press button when prompted to reset top off system. B. Remove supply line from pump and blow air through line towards JIB.
- Page 35 Problem Probable Causes Corrective Action A. Ensure fuse on right side of ATO box is secure and good. If the controller above the ATO box is missing power, check the fuse below the component box. B. With the controller OFF, press TEMP button and ensure the ATO software 3000 displays version...
-
Page 36: Ato (Automatic Top-Off) Board Positions And Harnesses
1.13.2 ATO (Automatic Top-Off) Board Pin Positions and Harnesses Wire Connector From/To Harness # Function Voltage Color Green Output DV - Vat #1 Output FV - Vat #1 8075161 Green Output DV - Vat #2 Solenoids Ground 8075162- Output FV - Vat #2 (4 or 5 battery) Green Output DV - Vat #3... -
Page 37: Replacing The Ato Board, Pump Relay Or Transformer
1.13.3 Replacing the ATO Board, ATO Pump Relay or Transformer Disconnect the fryer from the electrical power supply. Locate the ATO box (see Figure 1 on page 1-28), behind the JIB (Jug In Box). Remove the cover to expose the transformer and ATO board (see Figure Mark and unplug any wires or harnesses. -
Page 38: Control Power Reset
1.13.6 Control Power Reset Switch The control power reset switch, is a momentary rocker switch located below the left control box (see Figures 6), that resets all power to all the controllers and boards in the fryer. It is necessary to reset all power after replacing any controller or board. - Page 39 Problem Probable Causes Corrective Action Typically shown during software update. Controller displays Press the FILTER button to bypass and Also may be that parameter data has been CALL TECH continue. corrupted or lost. Silence the alarm by pressing the Controller displays Recovery time exceeded maximum time button.
- Page 40 Problem Probable Causes Corrective Action Controller displays Ensure all drain valves are completely Drain valve is open or switch is out of CLOSE DRAIN closed and that microswitches are adjustment or failed. VALVE. adjusted and working. Controller displays Defective SD Card Replace card with another card.
-
Page 41: Service Required Errors
1.14.2 3000 Controller Useful Codes To enter any of the following codes: Press and hold the button until Main Menu changing to Product setup is displayed. Press to scroll to Tech Mode and press TECH MODE ENTER CODE is displayed. Press the button. Enter a code number below: ... -
Page 42: Error Log Codes
1.14.4 Error Log Codes Code ERROR MESSAGE EXPLANATION ERROR TEMP PROBE FAILURE TEMP Probe reading out of range HI 2 BAD High limit reading is out of range. HOT HI 1 High limit temperature is past 410°F (210°C), or in CE countries, 395°F (202°C) HEATING FAILURE A component has failed in the high limit circuit such as controller, interface board, contactor or... -
Page 43: 3000 Menu Summary Tree
1.14.5 3000 Controller Menu Summary Tree Reflected below are the major programming sections in the 3000 and the order in which submenu headings will be found under the sections in the 3000 Operation Manual (819-6985). Adding New Product Menu Items See section 4.6-4.8 Filter Menu ...………………..………………………………………………………………………………….. -
Page 44: 3000 Controller Pin Positions And Harnesses
1.14.6 3000 Controller Pin Positions and Harnesses Connector From/To Harness PN Function Voltage Wire Color 12VAC In 12VAC Ground 12VAC In 12VAC FV Heat Demand V Relay 12VDC DV Heat Demand R/H B/L 12VDC Orange Analog Ground L/H B/L 12VDC 8075165 Interface ALARM... -
Page 45: Loading And Updating Software Procedures
ENSURE THE SWITCH IS HELD FOR 10 SECONDS. BOARD ID Zero or a number Press the IO (Power) button. from 1-4 Press the or to choose correct fryer type. OCF30 (Frymaster) System OCF30 type Press . Ensure correct fryer type is displayed. -
Page 46: Principal Wiring Connections
1.16 Principal Wiring Connections 1-40... -
Page 47: Wiring Diagrams
1.17 Wiring Diagrams 1.17.1 FPGL230/430 Wiring 120V, CE and Export 1-41... -
Page 48: Fpgl230/430 Wiring 250V Australia
1.17.1.2 FPGL230/430 Wiring 250V Australia 1-42... -
Page 49: Fpgl330 Wiring120V, Ce And Export
1.17.2 FPGL330 Wiring 120V, CE and Export 1-43... - Page 50 1.17.2.2 FPGL330 Wiring 250V Australia 1-44...
- Page 51 1.17.3 FPGL430 Extra Transformer Box Wiring 1-45...
-
Page 52: Modular Basket Lift (100/120V)
1.17.4 Modular Basket Lift (100/120V) 1-46... -
Page 53: Modular Basket Lift (208/250V)
1.17.5 Modular Basket Lift (208/250V) 1-47... - Page 54 1.17.6 Basket Lift Interface Harness 1-48...
-
Page 55: Simplified Wiring Diagrams
1.18 Simplified Wiring Diagrams 1.18.1 FPGL30 Series Full Vat with Dual Spark Module 1-49... - Page 56 1.18.2 FPGL30 Series Full Vat Single Spark Module excluding Australia 1-50...
- Page 57 1.18.3 FPGL30 Series Dual Vat Single Spark Module excluding Australia ‘ 1-51...
-
Page 58: Fpgl30 Series Simplified Wiring
1.18.4 FPGL30 Series Simplified Wiring with 3000 Controller 1-52... -
Page 59: Fpgl30 Series Data Network Flowchart
1.18.5 FPGL30 Series Data Network Flowchart 1-53... -
Page 60: Shortening Melting Unit Wiring Diagram Prior To Mar 2012
1.18.6 Shortening Melting Unit Wiring Diagram prior to Mar 2012 1-54... -
Page 61: Shortening Melting Unit Wiring Diagram After To Mar 2012
1.18.6.2 Shortening Melting Unit Wiring Diagram after Mar 2012 1-55... -
Page 62: Fpgl230/430 Wiring 120V, Ce And Export Bulk Oil
1.18.7 Bulk Oil Wiring 1.18.7.1 FPGL230/430 Wiring 120V, CE and Export Bulk Oil 1-56... -
Page 63: Fpgl230/430 Wiring 250V Australia Bulk Oil
1.18.7.2 FPGL230/430 Wiring 250V Australia Bulk Oil 1-57... -
Page 64: Fpgl330 Wiring 120V, Ce And Export Bulk Oil
1.18.7.3 FPGL330 Wiring 120V, CE and Export Bulk Oil 1-58... -
Page 65: Fpgl330 Wiring 250V Australia Bulk Oil
1.18.7.4 FPGL330 Wiring 250V Australia Bulk Oil 1-59... -
Page 66: Bulk Oil Box Wiring Diagram
1.18.8 Bulk Oil Box Wiring 1-60... -
Page 67: Capable Controls Ignition Module Wiring Diagrams
1.19 Capable Controls Ignition Module Wiring Diagrams 1-61... -
Page 68: Chapter 2: Parts List
OCF™ SERIES GAS FRYERS CHAPTER 2: PARTS LIST Accessories ITEM PART # COMPONENT 230-8165 Hanger, Basket Single 230-7495 Hanger, Basket Two Station (use two for a Four Station fryer) 230-7497 Hanger, Basket Three Station 803-0197 Cleanout Rod, 27-inch 803-0398 Brush, Frypot 230-2975 Connecting Strip, Frypot (230-4677 Spreader Connecting Strip) prior to 07/2014 108-6156... - Page 69 2.2 Basket Lift Assy and Associated Parts...
- Page 70 2.2 Basket Lift Assy and Associated Parts cont. ITEM PART # COMPONENT Basket Lift Assemblies (see Note 1 in illustration) 106-1808SP Basket Lift Assy, 100-120VAC w/Relay (Items 1-20) shown 106-1805SP Basket Lift Assy, 200-220VAC w/Relay (Items 1-20) shown 106-1806SP Basket Lift Assy, 230-250VAC w/Relay (Items 1-20) not shown 810-1012 Rod, Basket Lift 813-0035...
-
Page 71: Doors, Sides, Flue Caps, Top Caps And Casters
2.3 Doors, Sides, Flue Caps, Top Caps and Casters ITEM PART # COMPONENT 231-7908 Side, Standard Cabinet Left SS 232-7908 Side, Standard Cabinet Right SS 810-1105 Magnet, Door (vertical) (use 810-2346 for horizontal over filter pan) 106-4397 Door, Left or Right (Left shown – move handle to bottom for right) 230-4960 Handle, Eurolook Door 106-4067... -
Page 72: Drain System Components
Drain System Components 2.4.1 Drain Valves and Associated Parts ITEM PART # COMPONENT 108-2509 Valve, Assy Drain FV/DV Left with Filter and Auto Top Off (use 108-2510 for Right) 108-2507 Valve, Assy Drain DV Left with Filter ( No Top Off) (use 108-2508 for Right) 108-2593 Valve, Assy Drain FV Single with Filter (No Top Off) 108-2449... -
Page 73: Drain Tube Sections And Associated Parts
2.4.2 Drain Tube Sections and Associated Parts See Section 2.4.1 for Drain Valves... -
Page 74: Electronics And Electrical Components
2.4.2 Drain Tube Sections and Associated Parts cont. ITEM PART# COMPONENT 823-8135 Drain Tube, Dump Full-Vat Left Closed/Right End Open 823-8136 Drain Tube, Dump Dual-Vat Left Closed/Right End Open 823-8137 Drain Tube, Dump Full-Vat Left Closed Both Ends 823-7959 Drain Tube, Dump Single Full-Vat Left Closed Both Ends 823-8138 Drain Tube, Dump Dual-Vat Left Closed Both Ends 823-7946... -
Page 75: Component Boxes
2.5.2 Component Boxes... - Page 76 2.5.2 Component Boxes cont. ITEM PART # COMPONENT 810-1164 Block, One-Piece Screwless Terminal 816-0217 Insulation, Terminal Block Paper √ 3 807-3843 Fuse 3A 250V Domestic √ * 826-1157 Kit, Fuse and Fuse Puller (2 Fuses) 807-3293 Fuse 5A 125V International Only 106-0531SP Fuse Assy, Inline √...
-
Page 77: Transformer Boxes
2.5.3 Transformer Boxes ITEM PART # COMPONENT Box Assembly, Transformer 106-9021 GL230 and 430 (430 has added cordset 108-1769) 106-9022SP GL330 108-1765 GL230 and 430 CE and Export (430 has added cordset 108-1770) 108-1764 GL330 CE and Export 108-1768 GL430 CE and Export √... - Page 78 2.5.3 Transformer Boxes cont. ITEM PART # COMPONENT √ 6 807-4346 Relay, DPDT 20A 120VAC (Control Reset Button) (used for control power reset in domestic units) √ 807-4770 Relay, DPDT 20A 240V (used for control power reset in international units) √...
-
Page 79: Wiring
Wiring 2.6.1 Main Wiring Harnesses 2-PIN FEMALE CONNECTOR 12-PIN MALE 9-PIN MALE CONNECTOR CONNECTOR 807-1978 12-PIN MALE CONNECTOR 2-PIN FEMALE CONNECTOR 12-PIN MALE 6-PIN MALE CONNECTOR CONNECTOR 807-4014 12-PIN MALE CONNECTOR ITEM PART # COMPONENT 807-1978 Main Wiring Harness 250/450 807-4014 Main Wiring Harness 350 2-12... -
Page 80: 3000 And Ato Wiring Harnesses
2.6.2 3000 and ATO Wiring Harnesses (Refer to wiring diagram on page 1-50.) ITEM PART # COMPONENT 807-4546 Controller Communication (used from controller to controller) 807-4646 Controller Communication (used from right controller to ATO box) 807-4655 Harness RTD Medium (used from ATO RTD to ATO Board) 826-2569 FV/DV ATO/RTD Probe Kit 807-4553... -
Page 81: Frypots And Associated Components
Frypots and Associated Components 2.7.1 Full-Vat Frypot Components 2-14... - Page 82 2.7.1 Full-Vat Frypot Components cont. ITEM PART # COMPONENT 108-2222SP Frypot Assy Full-Vat OCF with filter (NAT) 108-2224 Frypot Assy Full-Vat OCF with filter (PRO) 108-2849 Frypot Assy Full-Vat OCF non-filter (NAT) 108-2848 Frypot Assy Full-Vat OCF non-filter (PRO) 826-2595 Insulation Kit, Complete Full-Vat 826-2592 Insulation Kit, Burner Full-Vat...
-
Page 83: Dual-Vat Frypot Components
2.7.2 Dual-Vat Frypot Components 2-16... - Page 84 2.7.2 Dual-Vat Frypot Components cont. ITEM PART # COMPONENT 108-2223SP Frypot Assy Dual-Vat OCF with filter (NAT) 108-2225 Frypot Assy Dual-Vat OCF with filter (PRO) 108-2845 Frypot Assy Dual-Vat OCF non-filter (NAT) 108-2844 Frypot Assy Dual-Vat OCF non-filter (PRO) 826-2596 Insulation Kit, Complete Dual-Vat 826-2593 Insulation Kit, Burner Dual-Vat...
-
Page 85: Frypot Probes And Thermostats
2.7.3 Frypot Probes and Thermostats See page 2-5 for Drain Valve As- semblies and page 2-14 through 2-17 for Frypot Assemblies ITEM PART # COMPONENT 826-2706 Probe, RTD ATO Kit 807-4817 Probe, Temperature Cooking 826-1177 Thermostat, High-Limit 425F/218C * Not illustrated. 2-18... -
Page 86: Gas Valves, Supply And Combustion System Components
Gas Valves, Supply and Combustion System Components See pages 2-13 through 2-15 for burners and burner insula- tion part numbers. ITEM PART # COMPONENT √ 1 Ignitor 826-3053 Natural Gas (G20, G25) 826-2994 Propane (G30, G31) √ 2 Blower Assembly, Combustion Air (includes harness and Item 3) 106-2997SP 115V 50/60 Hz (Right) 108-3307... - Page 87 Gas Valves, Supply and Combustion System Components cont. ITEM PART # COMPONENT Orifice, Burner 810-3977 1.88mm 75% Butane/25% Butane (Standard Elevation) 810-3865 1.95mm Propane/Butane (G30, G31) Australia Only 810-3860 2.05 mm Propane/Butane (G30, G31) (0-4999 Ft, 0-1524 M) 810-3863 2.10 mm Propane/Butane (G30, G31) (5000-6999 Ft, 1525-2133 M) 810-3867 2.84mm Natural Gas (G20, G25) Australia Only DV 810-3866...
-
Page 88: Filtration System Components
Filtration System Components ITEM PART # COMPONENT 823-8028 Lid, Filter Pan (use 823-7976 for Single Fryer Lid) 810-3288 Crumb Tray 810-3289 Hold-Down Ring 11.20 x 19.10, 812-2025 SanaGrid Filter Screen 108-2880SP Pan, Filter with casters 108-6976SP Pan, Filter with casters (Only for use with Filter Leaf 810-4492) 106-8211SP Pan, Filter without casters prior to May 2012 806-9255... -
Page 89: Filter Pump, Motor And Associated Components
2.10 Filter Pump, Motor and Associated Components ITEM PART # COMPONENT Motor and Gasket Kit 826-1785 100V 50/60 Hz √ 826-1712 115V 50/60 Hz √ 826-1756 208V 50/60 Hz 826-1270 220-240V 50/60 Hz 826-1755 250V 50/60 Hz 826-3191 Pump and Gasket Kit, Viking 4 GPM (includes gasket and cap screws below) 816-0093 Gasket, Pump/Motor 809-1062... - Page 90 2.11 Frypot Assemblies and Associated Parts See Page 2-5 for Drain Valve Assemblies. ITEM PART # COMPONENT 823-7824 Frypot, Full-Vat OCF with filter (use 823-8022 for frypot with no filter) prior to 07/2014 823-8975 Frypot, Full-Vat OCF with filter (use 823-8976 for frypot with no filter) after 06/2014 823-7862 Frypot, Dual-Vat OCF with filter (use 823-8020 for frypot with no filter) prior to 07/2014 823-8973...
-
Page 91: Oil Return System Components
2.12 Oil Return System Components ITEM PART # COMPONENT 809-0601 Clip, Clevis 816-0643 Grip, Oil Return Valve Handle 813-0907 Cap, 15/16-inch Valve Safety 811-1071 Tube, ¼-inch OD Teflon Manifold Vent 108-2555SP Valve, ¼-inch NPT Solenoid 810-2493 Elbow, 90° ⅛-inch NPT x ¼-inch Quick Connect 813-0807 Bushing, ¼-inch NPT x ⅛-inch 813-0700... -
Page 92: Ato (Auto Top-Off) Components
2.13 Auto Top-Off Components 2.13.1 Automatic Top-Off Box Assembly 108-2558SP 108-2557SP 208-240V 120V Assy Assy ITEM PART # COMPONENT 108-2556 Box, Assembly Auto Top Off Board 220-5679 Cover, Top Off Board Box √ 3 108-2805 PCB Board, Automatic Top Off OCF √... -
Page 93: Ato (Automatic Top-Off) Pump Assembly
2.13.3 ATO Pump Assembly Liquid Shortening Semi/Solid Shortening JIB hose connects here. INSTALL O-RINGS HERE See page 2-28 for inlet plumbing ITEM PART # COMPONENT √ 108-0639 Pump, Shurflo 24VAC 810-3265 Flexline, ½” OD x 24-inch (Out to top off manifold) 811-1139 Hose, Silicone Braided (sold by the foot) 810-3578... -
Page 94: Ato Top Off Manifolds And Components
2.13.4 ATO Top-Off Manifolds and Components Connects to item #10 on page 2-23 Connects to item #2 on the preceding page ITEM PART # COMPONENT 810-3812 Manifold, Top-Off Two Station Fryer 810-3813 Manifold, Top-Off Three Station Fryer 810-3814 Manifold, Top-Off Four Station Fryer √... -
Page 95: Shortening Melting Unit
2.13.5 Shortening Melting Unit ITEM PART # COMPONENT 108-3406 Assembly, Heated Shortening 108-2983 Box Assembly, Heated Shortening 108-3001 Assembly, Heated Shortening Lid 810-3957 Pan, Heated Shortening 108-3372 Cover, Shortening Box Front 810-0180 Handle √ 6 826-1392 O-Ring (Pkg. of 5) 813-0568 Plug, ⅛-inch Socket Head Pipe 823-8079... -
Page 96: Bulk Oil Relay Box And Switch
2.13.6 Bulk Oil Relay Box and Switch ITEM PART # COMPONENT 108-3409 Harness, Bulk Oil Power 108-3410 Harness, Bulk Oil Control 108-3412 Harness, Bulk Oil Switches 108-3413 Harness, Bulk Oil Communication 220-8665 Box, Bulk Oil Relay 220-8666 Cover, Bulk Oil Relay Box 807-1068 Connector, 2-pin √... -
Page 97: Bulk Oil Plumbing
2.13.7 Bulk Oil Plumbing To Bulk Oil Waste To Oil Return Connection Manifold To Bulk Oil Fresh Connection To Drain To JIB ITEM PART # COMPONENT √ 106-6830 Solenoid Assy 108-3368 Valve, Assy Waste Dispose (see next page for valve assembly) 220-8661 Brace, Front Bulk Plumbing 813-0838... -
Page 98: Bulk Oil Dispose Waste Valve
2.13.8 Bulk Oil Dispose Waste Valve ITEM PART # COMPONENT 108-3368 Valve, Dispose Waste Assembly 108-0445 Bracket, Waste Valve 220-5615 Handle, Waste Valve √ 3 807-2103 Microswitch 810-0278 Valve, ½” Ball 900-2935 Retainer, Nut Return Valve 901-2348 Cover, DV Safety Switch 902-2348 Cover, DV Safety Switch √... -
Page 99: Wiring Connectors, Pin Terminals And Tools
2.14 Wiring Connectors, Pin Terminals and Tools ITEM PART # COMPONENT 807-1068 2-Pin Female 807-0158 6-Pin Female 807-0156 9-Pin Female 807-0159 12-Pin Female 807-0875 15-Pin Female 807-1067 2-Pin Male 807-0157 6-Pin Male 807-0155 9-Pin Male 807-0160 12-Pin Male 807-0804 15-Pin Male 826-1341 Terminal, Female Split Pin (Pkg of 25) 826-1342... -
Page 100: Fasteners
2.15 Fasteners ITEM PART # COMPONENT 809-0429 Bolt, ¼-inch – 20 x 2.00-inch Hex Head ZP Tap 809-0131 Bolt, ¼-inch -20 x ¾-inch Hex 809-0953 Bolt, ¼-20 x ¾-inch Hex Head 807-1926 Bushing, .875-inch Split 809-0514 Capscrew, 5/16-inch-18 NC Hex 809-0448 Clip, Tinnerman 826-1351... - Page 101 2.15 Fasteners cont. ITEM PART # COMPONENT 809-0500 Screw, 10 x ½-inch Hex Washer Head 410 SS 809-0434 Screw, 10 x ⅜-inch Hex Washer Head NP 809-0123 Screw, 10 x ¾-inch Slot Head 826-1389 Screw, ¼-20 x ¾-inch Hex Head ZP (Pkg. of 10) (809-0131) 826-1346 Spacer, Ignition Module (Pkg.
- Page 102 Frymaster, L.L.C., 8700 Line Avenue, Shreveport, Louisiana 71106 TEL 1-318-865-1711 FAX (Tech Support) 1-318-219-7135 SERVICE HOTLINE 8196688 PRINTED IN THE UNITED STATES 1-800-551-8633 05/2017...
Need help?
Do you have a question about the FootPrint OCF30G and is the answer not in the manual?
Questions and answers