Tascam DM-4800 Owner's Manual
Digital mixing console
Hide thumbs
Also See for DM-4800:
- Manual (32 pages) ,
- Technical documentation (5 pages) ,
- Specification sheet (2 pages)
Table of Contents
Advertisement
Quick Links
Advertisement
Table of Contents

Related Manuals for Tascam DM-4800


Summary of Contents for Tascam DM-4800
- Page 1 » D00936910B DM-4800 Digital Mixing Console OWNER’S MANUAL...
- Page 2 This appliance has a serial number located on the rear panel. Please record HAZARD, DO NOT EXPOSE THIS the model number and serial number and retain them for your records. APPLIANCE TO RAIN OR MOISTURE. Model number Serial number TASCAM DM-4800 User’s Manual...
-
Page 3: Important Safety Instructions
An apparatus with Class I construction shall be connected to an AC outlet with a protective grounding connection. • Batteries (battery pack or batteries installed) should not be exposed to excessive heat such as sunshine, fire or the like. TASCAM DM-4800 User’s Manual... -
Page 4: Table Of Contents
Shutting down the DM-4800 Special notes for touch-sensitive faders ......33 IMPORTANT CAUTION!!! ........33 Copyright, etc............14 How to shut down the DM-4800......33 The features of the DM-4800 ....... 15 Starting up the DM-4800 ........33 Control section ............16 About projects and libraries ...... - Page 5 Digital input selection .......... 60 ASSIGNABLE RETURNS...........49 Output routing ............61 Analog outputs ............50 Slot card outputs ..........61 STEREO OUT............50 Insert patching ............61 ASSIGNABLE SENDS ..........50 Send/return linking..........62 Monitoring (LARGE (BAL) & SMALL (BAL)) ..50 TASCAM DM-4800 User’s Manual...
- Page 6 Linked dynamics ............86 Gates (input channels 1–48) ........76 Mute groups .............86 GATE ..............76 Clearing groups .............87 Threshold ( THRESH )..........76 Grouping groups ...........87 Range ( RANGE )............76 Linking fader groups to mute groups....87 TASCAM DM-4800 User’s Manual...
- Page 7 ..............92 Record Command Type ........110 Snapshot library management ......92 Locate Preroll ............110 Storing snapshots ............93 MIDI Control by the DM-4800 ....111 Information about a snapshot ......93 MIDI controllers ............. 111 MIDI faders ............. 112 6 : Effects MIDI Mixer ..............
-
Page 8: Introduction
Fig. 1.1: Basic logical components of the Fig. 2.35: Library selection pull-up menu ...38 DM-4800 ............11 Fig. 2.36: Library utility screen ......40 Fig. 1.2: Overview of the DM-4800 ....15 Fig. 2.37: Setting and editing titles and 2 : Basic operational concepts memos ...............41 Fig. - Page 9 Table 5.8: Buss assignments in surround mode .88 Table 9.1: Popup messages ....... 121 Fig. 5.26: Surround assignment ......89 Fig. 9.2: Block diagram ........136 Fig. 5.27: Surround overview ......89 Fig. 9.3: Level diagram ........137 Fig. 5.28: Module surround panning ....90 TASCAM DM-4800 User’s Manual...
-
Page 10: Computer (Daw) Integration
1 – Introduction This section provides an overview of the features and facilities provided by the DM-4800. It also includes an overview of the operational procedures involved when using the unit. It is important to read this section to gain a basic understanding of the way that the DM-4800 works before proceeding with setting up and using the unit. -
Page 11: About The Dm-4800
AD AT inputs Busses Cascade (x 8) (x 24) 16 “simple” Option slots Stereo outs channels (analog & digital) Stereo buss Cascade CR outs Studio outs 2-track in Figure 1.1: Basic logical components of the DM-4800 TASCAM DM-4800 User’s Manual... -
Page 12: Channel Destinations
• A CD-ROM containing the utility software and Lifting properly—When lifting, be sure of your footing documentation for the DM-4800 (Windows and and grip. Bend your legs to get close to the DM-4800, Mac compatible). keeping your back straight, and then lift by straighten- •... -
Page 13: About The Manual
Guide: these cover the automation features of “building blocks” of the DM-4800. Most of the mix- the DM-4800 and the TMCompanion software, ing work you do on the DM-4800 will use the func- which are provided as electronic publications in PDF tions described here. -
Page 14: Before You Start
Create a project before you first start work with the dynamics processing and EQ settings, as well as DM-4800, so that you can make full use of the library automation data, and are stored on the CF card. and automation functions. -
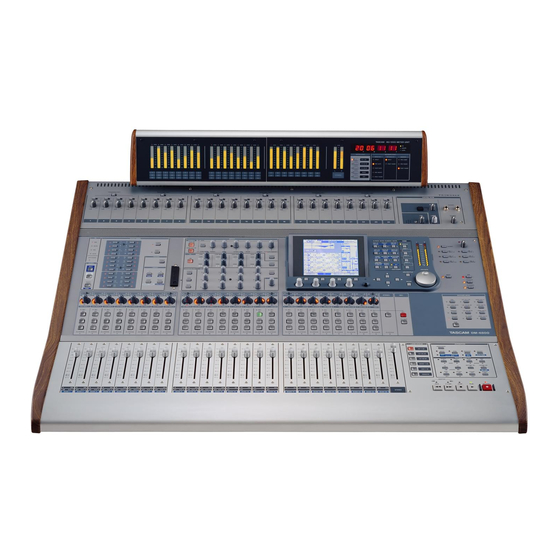
Page 15: The Features Of The Dm-4800
The features of the DM-4800 This section describes the different areas of the DM- The front surface of the DM-4800 may seem a little 4800 as well as providing a guide to hooking up intimidating at first, but it is actually remarkably sim- other equipment for use in your studio setup. -
Page 16: Control Section
1 – Introduction : The features of the DM-4800 Control section This section contains the screen, the dedicated func- The operation of this section is described in more tion keys, and the PODs, as well as the cursor keys detail in “Basic operational concepts” on page 17, and the data wheel. - Page 17 2 – Basic operational concepts This section introduces the basic ways in which you should use the controls of the DM-4800 to achieve your desired goals. Many screens accessed with these keys include sub- NOTE screens or “pages”. These sub-screens can be Please take the time to read and understand this sec- accessed using the POD keys (“The PODs”...
-
Page 18: 2 - Basic Operational Concepts : What's On The Screen
The module parameters shown are glance. those of the module selected using keys. The three USER keys are used to set up three commonly-used shortcuts to screens used frequently within a project. TASCAM DM-4800 User’s Manual... -
Page 19: Setting A User Screen
These keys are located to the right of the master fader. When these Smart keys The DM-4800 features five “smart keys”: the If the status of the key is off, and the key is pressed key and four “talkback” keys ( MONO and held down, the status is only changed as long as ). -
Page 20: Other Global Modifier Keys
Figure 2.4: Global modifier keys Special controls The DM-4800 incorporates a few controls that are These are the PODs, which are located immediately not found on every digital mixer and which therefore below the display, and the 24 encoders, located above may be a little unfamiliar. - Page 21 POD knobs can be used for fine adjustment. This behavior can be changed (see “Encoder behavior (fine and coarse)” on page 26 below). Figure 2.8: POD keys 2 through 4 used as soft keys TASCAM DM-4800 User’s Manual...
-
Page 22: Encoders
(on the encoders). When this key is pressed, the faders automatically move to reflect the new values assigned to them. TASCAM DM-4800 User’s Manual... -
Page 23: Encoder Mappings
The following table provides a reference to the use of are different options available depending on whether the encoders in the different modes (note that there the DM-4800 is in stereo or surround mode): Display Uses encoders Scope of mode... -
Page 24: Reading The Encoder Indicators
EQ mode show the frequency of the band in the following way: Lowest frequency Middle of the A little higher A little higher range than middle again Figure 2.16: Encoders in EQ frequency selection mode TASCAM DM-4800 User’s Manual... -
Page 25: Module Levels And Aux Sends
EQ gain encoder. Other settings Aux levels from busses (including the stereo buss), delay time, and surround LFE levels are also “rotary” settings, with higher levels lighting more segments. TASCAM DM-4800 User’s Manual... -
Page 26: Encoder Behavior (Fine And Coarse)
However, there is an option allowing this behavior to be changed so that the unshifted behavior makes fine Figure 2.19: ENCODER OPERATION menu item adjustments while the shifted behavior makes coarse adjustments. Press ENTER to select one of these options. TASCAM DM-4800 User’s Manual... -
Page 27: Fat Channel
NOTE using these controls. Some modules do not have dynamics processors, or equalization, or aux sends (see “About the DM-4800” These controls also allow you to copy and paste set- on page 11). These controls described here are, of tings between channels. -
Page 28: Eq Controls
Aux send controls In surround modes, it controls the L/R balance of the may be used as a pan/balance control for a selected surround matrix. module or pair of linked modules. TASCAM DM-4800 User’s Manual... -
Page 29: Copy And Paste Of Parameters
(see “UTILITY copying” on page 30 below). Figure 2.24: Pasting channel parameters Press to paste the parameters (including pan, ENTER buss assignment, etc.) into the destination channel, or any cursor key to cancel the operation. TASCAM DM-4800 User’s Manual... -
Page 30: Utility Copying
AUX -> CH cursor key to cancel. 3 Select the source and the destination parame- If neither of the checkboxes is checked when you ters as explained here. press the button, an error message is displayed. COPY TASCAM DM-4800 User’s Manual... -
Page 31: Copying Between Modules
• Faders and mutes modules 1 through 48). • Buss assignments, pan/balance and surround SAFE checkbox to the left is also for information settings only, and cannot be edited or changed. • Aux levels and pan/balance TASCAM DM-4800 User’s Manual... -
Page 32: Cf Cards
FORMAT screens (see “Library management” on page 38). button. • The DM-4800 system date and time can be set here 3 A popup appears asking if you are sure you (see “Setting the date and time” on page 35). want to format the card. Press... -
Page 33: Shutting Down The Dm-4800
2 – Basic operational concepts : Shutting down the DM-4800 Shutting down the DM-4800 IMPORTANT CAUTION!!! 2 While holding down the key, press the Data associated with of the number keypad. projects (automation, library entries, etc.) is not auto- matically stored on the card. If you turn off the DM-... -
Page 34: About Projects And Libraries
(numbered from larger facility, for example. In addition, the preset bank, stored in the DM-4800’s Projects are date-stamped automatically (the DM- memory, is available for recall of presets to be used 4800 contains a battery-backed clock) which helps as starting points for user settings. -
Page 35: Setting The Date And Time
2 – Basic operational concepts : About projects and libraries Setting the date and time To set the date on the DM-4800, follow the steps 3 Use the cursor and wheel to set the date and below: time. 1 Enter the... -
Page 36: To Set Up A New Project From Scratch
) or the preset settings, ( USE CURRENT USE PRESET up the DM-4800 with known parameters and to or from the project selected at the right of the maintain consistency between projects. screen that can be used a a template ( TEMPLATE ) for different aspects of a project. -
Page 37: Renaming A Project
As... on many computer programs), allowing differ- • Press to store the current project set- ENTER ent versions of a project to be available. tings. Appropriate popup messages appear, finishing with “ Completed ” when all save opera- tions are complete. TASCAM DM-4800 User’s Manual... -
Page 38: Library Management
2 – Basic operational concepts : Library management Library management Each project on the DM-4800 contains the following To enter the library management screen, insert a for- libraries for storing and recalling commonly-used matted CF card (or insert a blank card and format settings: it—see “Formatting a new card”... -
Page 39: Viewing Library Entries
An error message pops up if you try to delete a read- only library entry. Storing library entries The current settings can be stored as a library entry to the currently-selected Library utilities These utilities allow batch operations, etc. to manage library data and the CF cards. TASCAM DM-4800 User’s Manual... -
Page 40: Target Parameters
99 entries, but the source bank from which the Use the POD 2 encoder to scroll through the list of copy is made contains only one, after the copy the tar- entries in the selected bank. get bank will contain one entry only. TASCAM DM-4800 User’s Manual... -
Page 41: Naming Library Entries
(or • Use the wheel to navigate around the charac- project). POD 3 ( CANCEL ) cancels the naming ter palette, and press to enter the high- ENTER process. lighted character at the title’s cursor position. TASCAM DM-4800 User’s Manual... -
Page 42: Options
ENCODER MODE screen has been described in SETUP PREFERENCES screens set general param- “Encoder mappings” on page 23. eters relating to the operation of the DM-4800, while SETUP screen Press the key until the SETUP screen appears. as a separate popup display on the screen (... -
Page 43: Fader Sensitivity
fingers will illuminate the The DM-4800 fader touch sensing capabilities are indicator for as long as the fader is STATUS/OL dependent on the ambient humidity and environment. -
Page 44: Automation Fader Off
(see “Encoders” on page 22) when a relevant screen (e.g. an aux send global screen) is selected. SOLO The solo modes on the DM-4800 can be set up in a selecting a group master module solos or unsolos the number of different ways using this screen: whole of the group. -
Page 45: Utilities
GPI settings The DM-4800 allows you to send 8 output signals You can choose the trigger source to be one of the from the GPI port (‘D’ sub 9-pin connector) on the... -
Page 46: Making Connections
TIME EVENT : The GPI port is controlled by the Table 2.5: GPI fader event types timecode value on the right event list. TASCAM DM-4800 User’s Manual... -
Page 47: On/Off Setting
The wheel icon at the upper right corner of 1 Select GPI ports in the column of the the list turns solid while you do this. PORT EVENT LIST by using either the cursor key or the TASCAM DM-4800 User’s Manual... - Page 48 This section describes how the DM-4800 connects to other equipment in your studio. Since the DM-4800 is extremely “soft” in terms of the internal routing and patching, it is unlikely that you will need to spend a lot of time connecting and disconnecting equipment once you have your setup in place.
-
Page 49: 3 - Connections : Analog Connections
4800, do not connect or disconnect condenser micro- jacks are tip hot, sleeve ground, ring cold (this phones to and from the DM-4800 with the phantom applies to all balanced 1/4" jacks on the DM-4800). power to that input switched on. Always switch the phantom power off before connecting or disconnecting Both the XLR mic connection and the 1/4"... -
Page 50: Analog Outputs
DM-4800. ers, etc. as well as other devices whose digital I/O WARNING conforms to the TDIF-1 standard. Only use the special TASCAM cascade cable here. Use of WARNING any other type of cable may result in damage to the equipment. -
Page 51: Digital I/O Setup
In the event of bad digi- tal audio data being received (out of range, or cor- rupt, etc.), the DM-4800 will usually mute the input to prevent possible damage to monitoring equipment. However, this automatic muting can be turned off with this checkbox. -
Page 52: Slot Card Configuration
Slot card configuration As mentioned, you can expand the capabilities of the The current status of the input and output channels is DM-4800 with the optional slot cards available. also shown on the screen. These cards are as follows: IF-AN/DM providing eight channels each of A/D and D/A conversion. -
Page 53: Cascade Configuration
The cascade facility allows the connection of two • An audio clock source is selected from the clocks DM-4800 units. This effectively gives you one dou- fed to the cascade master. You cannot select the audio ble-sized DM-4800 mixing console. The following clock source on the cascade slave. -
Page 54: Using The Cascade
Interlocked operations The following opera- Interlocked settings The following settings are tions are interlocked while two DM-4800 units are interlocked between the two DM-4800 units while a connected together as a cascade. cascade connection is established. Whenever any of the operations below is executed... -
Page 55: Other Connections
(such as the equipment. one provided with the DM-4800). The DM-4800 can act as a word sync master or slave (set up in software—see “Clock setting” on page 56). TASCAM DM-4800 User’s Manual... -
Page 56: Clock Setting
Remember that the DM-4800 can act as a clock source or clock master, but there must be only one master clock source in your studio setup. -
Page 57: Changing The Clock
WORD SYNC OUT on the action selected when the clock is changed either the high-speed (88.2/96) clock or the corre- (“Clock change action” on page 56) is shown). sponding normal speed (44.1/48) clock. TASCAM DM-4800 User’s Manual... -
Page 58: Routing & Assignment
The DM-4800 is equipped with two types of mixer Note also that there are two modes for the first 48 channel modules, with the first 48 fully equipped... -
Page 59: Routing
The eight analog assignable returns (see “Analog from a list composed of (mainly) the physical inputs inputs” on page 33). of the DM-4800, and route them to input destinations EFF RTN The internal effect returns (see “Insert patching” (channels and dynamics triggers). -
Page 60: Batch Routing
) for nels at a time. each of the stereo digital inputs can be selected. This is done from this screen using the INPUT BATCH SETUP at the bottom of the screen. Of course this can TASCAM DM-4800 User’s Manual... -
Page 61: Output Routing
Although these insert loops may It is important to note the difference between the hardware exit from the DM-4800 in either the analog or digital inserts and the software inserts described here on the DM- domain, they may also remain completely within the 4800. -
Page 62: Send/Return Linking
The optional cards fitted in the put pairs to be defined as inserts at definable points in slots (note that a card such as the surround the DM-4800 signal path. monitor card only has outputs and can there- fore only act as a send group) -
Page 63: Channel-To-Buss Assignment
) allow you to assign ASSIGN lier in “Output routing” on page 61). channels to the busses, and the busses and the aux It is also possible to assign a module to the stereo buss using the dedicated key. STEREO TASCAM DM-4800 User’s Manual... -
Page 64: Pan Switch
49 through 64). As you make other channel 2 to the buss. and break these assignments, the indicators by the control surface keys mirror the screen settings (and the other way round). TASCAM DM-4800 User’s Manual... -
Page 65: Surround Assignments
“BUSS PAN Follows ST PAN” on page 44 for round matrix output channels with the pan switch details of how buss and stereo panning are linked. off. TASCAM DM-4800 User’s Manual... -
Page 66: Monitoring
4 – Routing & assignment : Monitoring Monitoring The DM-4800 provides comprehensive monitoring This section describes the monitoring procedures and and metering facilities allowing both control room setup when working in stereo. When working with (for both large and small speaker sets) and studio cue surround mixes, there are obviously some important mixes to be produced. -
Page 67: Studio Cue Source
• The stereo buss • The linked pairs of aux sends The volume of the studio cue is adjusted from this screen using the POD 4 encoder. • The linked buss pairs • The two digital stereo inputs TASCAM DM-4800 User’s Manual... -
Page 68: Talkback, Etc
POD 4 sets the level from –36dBFS 0dBFS in 0.5dB SPLs, etc., the DM-4800 provides an internal tone/ steps. Remember that –16dBFS is the nominal level, noise generator. so you can use this setting when setting up SPLs, etc. for your monitoring system. -
Page 69: Meters
AUX 1-12 The 12 aux sends apply to the meter displays on the meter bridge, as well as to Table 4.4: Meter selection the on-screen meter displays. The TASCAM Mixer Companion software provides a software “meter bridge”. TASCAM DM-4800 User’s Manual... -
Page 70: Soloing
SOLO cancels all solos on the current fader layer. SOLO indicator in the MONITOR section flashes Pressing and holding CTRL and pressing any lit SOLO key cancels all solos on all fader layers. TASCAM DM-4800 User’s Manual... -
Page 71: General Principles
5 – Channel modules The channel modules are the “heart” of the DM-4800, corresponding to the channel strips on an analog con- sole. Because they are used so often, and settings have to be made frequently, there are a number of ways of viewing and making the settings for these modules, as explained in this section. -
Page 72: Global Module Settings
When this is highlighted, it can be vides a graphical display of the EQ settings. It cannot controlled using the POD 4 encoder. be changed. However, the button allows the EQ of TASCAM DM-4800 User’s Manual... -
Page 73: Mute Button
(you can also use works in a similar way. The top of the screen shows the channel keys or auto to jump around the the buss, aux send and stereo meters (metering points TASCAM DM-4800 User’s Manual... - Page 74 POD 3 to set the level, and POD 4 to select the target, with the key used to confirm the setting. ENTER Figure 5.5: Master fader screen TASCAM DM-4800 User’s Manual...
-
Page 75: Dynamics Processors
5 – Channel modules : Dynamics processors Dynamics processors LINK This section covers the use of the DM-4800’s built-in This and the two trigger settings following, compressor/expanders and gates. apply both to compressor/expanders and to gates (where available). The link features means that both Compressor/expander dynamics processors are avail- processors are linked by a common trigger signal. -
Page 76: Gates (Input Channels 1–48)
1.11:1 1.18:1 have resulted in gain reduction. Not shown if the pro- 1.25:1 1.33:1 1.43:1 1.54:1 1.67:1 1.82:1 2.00:1 2.22:1 cessor is being used as an expander. 2.50:1 2.86:1 3.33:1 4.00:1 5.00:1 6.67:1 10.0:1 20.0:1 ∞:1 TASCAM DM-4800 User’s Manual... -
Page 77: Output Gain
Useful in post-production environments Narration For the spoken word Expander1 Expander setting Expander2 Another expander setting Slow Attack An expander with a slow attack E Guitar Clean1 Expander setting suitable for electric guitar Table 5.4: Compressor/Expander preset library entries TASCAM DM-4800 User’s Manual... -
Page 78: Gate Library Entries
E Gt Heavy Dist. Suitable for heavily distorted guitars Table 5.5: Gate/Expander preset library entries Trigger settings As mentioned earlier, the DM-4800 can have sources inputs ( ), the eight assignable returns ( assigned to triggers (up to eight), allowing dynamics... -
Page 79: Encoders And Eq
The four-band EQ provided on the first 48 channel Turn the EQ on and off using the key in the “fat modules of the DM-4800 allows precise sound shap- channel”, or by using the on-screen button (cir- ing, combined with flexibility, and repeatability, cled in Figure 5.9, Module EQ screen) -
Page 80: Eq Library
You can recall and use preset EQ settings from the Use the POD 4 encoder or wheel to scroll through DM-4800 library, as well as storing your own set- the library entries in the selected preset or CF card tings to user areas of the library for further use (see bank, and POD 3 switch to recall the entry. -
Page 81: Aux And Buss Setup
When you move the cursor to the in-screen recorder returns to be used as a cue feed to the studio, SET button, and press ENTER , a popup appears to con- etc. firm this setting ( ENTER to confirm, cursor keys to cancel). TASCAM DM-4800 User’s Manual... -
Page 82: Source Selection
SCREEN levels to the linked aux sends and the screen control- for the selected channel. ling the sources to the linked aux sends, there is a third screen, which provides the ability to view and TASCAM DM-4800 User’s Manual... -
Page 83: Module Setup
, a popup message asking ENTER Move the cursor to the pre-post field and choose you to press once more to confirm the flip ENTER either pre- or post-module delay. operation (or a cursor key to cancel). TASCAM DM-4800 User’s Manual... -
Page 84: Digital Trim
ASSIGN PARAMETERS screen (“Global module The phase of an input signal, as explained settings” on page 72) to view and set the phase for all above, can be set either to normal or reversed. input at once. TASCAM DM-4800 User’s Manual... -
Page 85: Delay
(where these are available) on one of the • Fader level paired modules echoes the settings on the other mod- • Assignment ule of the pair: • Delay time • Digital trim • Solo settings • Gate settings • Grouping TASCAM DM-4800 User’s Manual... -
Page 86: Balance
Slave channels can change their status independently of the rest of the group. A slave channel can belong to only one group at a time. Figure 5.21: Mute grouping TASCAM DM-4800 User’s Manual... -
Page 87: Clearing Groups
Either fader or mute groups can also be used as the source for “solo groups”, where pressing the SOLO key of the master channel will solo all slave channels. See “SOLO” on page 44. Figure 5.24: Fader grouping TASCAM DM-4800 User’s Manual... -
Page 88: Surround Operations
first SHIFT ASSIGN 1 way to the pan mode in stereo setting (“Pan switch” matrix, through for the sec- SHIFT ASSIGN 9 on page 64). Note especially: ond, and through for the SHIFT ASSIGN 17 third). TASCAM DM-4800 User’s Manual... -
Page 89: Surround Panning
In this screen, and the module surround screen, settings Figure 5.27: Surround overview are made independently for each channel, regardless of the current channel link status. • Use the POD 3 encoder to select surround matrix 1, 2 or 3 ( SRND SET TASCAM DM-4800 User’s Manual... -
Page 90: Module Screen
SCREEN MODE nal to the appropriate point in the sound stage ( front left, is front center, is front right, etc.). TASCAM DM-4800 User’s Manual... -
Page 91: Pan Mode Off
POD 3 encoder allows a batch LFE level to be set, and POD 4 sets the scope of the level setting ( , or groups of eight channels) for the cur- EVEN rently selected surround matrix. to make the batch setting. ENTER Figure 5.31: LFE level TASCAM DM-4800 User’s Manual... -
Page 92: Snapshots
If the snapshot library is not shown, use the POD 1 on-screen button to recall the currently encoder and key to select the snapshot library, as RECALL selected library entry. A popup message shown in Figure 2.35, Library selection pull-up menu. appears briefly. TASCAM DM-4800 User’s Manual... -
Page 93: Storing Snapshots
• Creation date and time (card bank data only). right-hand list. • Project with which the snapshot is associated, together with the sampling frequency used (card bank data only). TASCAM DM-4800 User’s Manual... -
Page 94: Effects
6 – Effects The DM-4800 incorporates two internal effectors: TASCAM FX2.0 and a TC Works reverb. This section dis- cusses the setup and use of these effects. Routing the effects As explained in “Routing” on page 59, internal effect In the... -
Page 95: Effect Libraries
See “Library management” on page 38 for details of banks. how libraries are operated. Refer to the TASCAM FX2.0/TC Reverb preset list posted on our website. TASCAM DM-4800 User’s Manual... -
Page 96: Midi
7 – MIDI As well as the MIDI ports, the DM-4800 can pass MIDI to and from a PC connected using the USB connec- tion. This section explains some of the ways in which the card is used. MIDI port switching and filtering... -
Page 97: Program Change Messages And The Dm-4800
7 – MIDI : Program Change messages and the DM-4800 Program Change messages and the DM-4800 The DM-4800 can receive Program Change mes- NOTE sages to recall snapshot settings, or settings from The effect libraries have two preset banks - these are either of the two effect libraries. -
Page 98: Midi In And Out Ports
:Reset Notes This implementation chart is for MIDI messages, below. * Outgoing MIDI Messges from physical MIDI OUT port by operating DM-4800 * Incoming MIDI messages from physical MIDI IN port that affects DM-4800 operation. (except the messages via USB-MIDI Inferface Port) *1: User’s choice, memorized. -
Page 99: Mtc Out Port
:Tune System :Clock Real Time :Commnads :Local ON/OFF Messages :All Notes OFF :Active Sense :Reset Notes *1: User’s choice, memorized. Mode 1:OMNI ON, POLY Mode 2:OMNI ON, MONO o:Yes Mode 3:OMNI OFF,POLY Mode 4:OMNI OFF,MONO x:No TASCAM DM-4800 User’s Manual... -
Page 100: Usb Midi Control Port (1)
Real Time :Commnads :Local ON/OFF Messages :All Notes OFF :Active Sense :Reset Notes *1: TEAC Syx,MTC Full Message and Device Inquiry. Mode 1:OMNI ON, POLY Mode 2:OMNI ON, MONO o:Yes Mode 3:OMNI OFF,POLY Mode 4:OMNI OFF,MONO x:No TASCAM DM-4800 User’s Manual... -
Page 101: Usb Midi Interface Port (2)
* Incoming MIDI messages from USB MIDI Interface port are transmitted to phys- ical MIDI OUT port through the MIDI filter. *1: Ignore if greater than 513 bytes. Mode 1:OMNI ON, POLY Mode 2:OMNI ON, MONO o:Yes Mode 3:OMNI OFF,POLY Mode 4:OMNI OFF,MONO x:No TASCAM DM-4800 User’s Manual... -
Page 102: Usb Midi Control Port (3)
:Tune System :Clock Real Time :Commnads :Local ON/OFF Messages :All Notes OFF :Active Sense :Reset Notes *1: User’s choice, memorized. Mode 1:OMNI ON, POLY Mode 2:OMNI ON, MONO o:Yes Mode 3:OMNI OFF,POLY Mode 4:OMNI OFF,MONO x:No TASCAM DM-4800 User’s Manual... -
Page 103: Usb Midi Program Change Port (4)
:Local ON/OFF Messages :All Notes OFF :Active Sense :Reset Notes *1: User’s choice, memorized. *2: For Snapshot, Effect1and Effect2 Library Recalls. Mode 1:OMNI ON, POLY Mode 2:OMNI ON, MONO o:Yes Mode 3:OMNI OFF,POLY Mode 4:OMNI OFF,MONO x:No TASCAM DM-4800 User’s Manual... -
Page 104: Usb Midi Remote Port (5, 6, 7)
*1: For Active sensing in HUI Emulator mode. *2: User’s choice, memorized. *3: HUI Protocol,Mackie Control Protocol *4: For Display only Mode 1:OMNI ON, POLY Mode 2:OMNI ON, MONO o:Yes Mode 3:OMNI OFF,POLY Mode 4:OMNI OFF,MONO x:No TASCAM DM-4800 User’s Manual... -
Page 105: Remote Operation Selecting Devices For Transport Control
8 – Remote operation The DM-4800 is capable of acting as a remote control unit for a wide variety of external devices. The exact functionality of the machine control depends, of course, on the device to be controlled. The device control is carried out through the MIDI... -
Page 106: Deleting Devices From The List
4800 to the device, but no information is transmitted DEVICE The name of the device being controlled, back from the device to the DM-4800 along the same together with its control type. These list items cannot channel—information is transmitted from the other be changed or edited. -
Page 107: Chase
DM-4800 to control the transport of the selected key above the stereo fader + the channel device ( keys) on the DM-4800 which arm the tracks on the remote external device. Only one device at a time can be selected for trans- port control, as shown by the circled symbol. -
Page 108: To Use A Transport Mapping
To use a transport mapping Of course, at least one transport mapping must exist The DM-4800’s transport control keys will now con- before this operation can be carried out. trol the device selected in that map and the other mapping features will also be enabled. -
Page 109: Machine Control Setup
Use this option to make the play commands from the There are two options: True (02h) Deferred (03h) DM-4800’s MIDI Machine Control compatible with Consult the documentation of your other equipment the unit being controlled. for details of compatibility. TASCAM DM-4800 User’s Manual... -
Page 110: Record Command Type
Use this option to make the record commands from There are two options: True (40h) Masked (41h) the DM-4800’s MIDI Machine Control compatible Consult the documentation of your other equipment with the unit being controlled. for details of compatibility. Locate Preroll Move the cursor to the numeric field, which shows... -
Page 111: Midi Control By The Dm-4800
You can either create a looped MIDI system by con- DM-4800 (see “Remote operation” on page 105), it necting INs and OUTs, or simply connect the DM- is also possible for the DM-4800 to act as a remote 4800’s to the MIDI IN of the remote MIDI OUT MIDI controller for MIDI devices. -
Page 112: Midi Faders
8 – Remote operation : MIDI Control by the DM-4800 MIDI faders In this mode, the first 16 faders are used to transmit a MIDI Faders setup screen) or in the field of defined Control Change message when the REMOTE EXT. -
Page 113: Daw Controllers
8 – Remote operation : MIDI Control by the DM-4800 2 Use the mixer using the MIDI CTRL.CHANGE setup Only one control can only be assigned to a screen (below at Figure 8.7, MIDI control given MIDI channel/controller combination. change screen): •... -
Page 114: Hui
8 – Remote operation : MIDI Control by the DM-4800 Digital Performer This provides an emulation of the Mackie HUI This Mackie Control emula- control surface: tion is used with the MOTU Digital Performer DAW: Figure 8.9: HUI emulation Figure 8.11: DP control... -
Page 115: Location Memories
8 – Remote operation : Location memories Location memories The DM-4800 allows the storage and recall of up to ten location memories, allowing easy location of the controlled devices to predetermined cue points. Selecting the location point display As explained in “LOCATE DISPLAY mode” on When this section mentions “the display”... -
Page 116: Location To A Location Memory
The repeat is always between points 8 and 9, regard- in the section. MACHINE CONTROL less of their order. These points must be more than 5 While the repeat loop is in progress, the indicator seconds apart. flashes while the playback position is outside the TASCAM DM-4800 User’s Manual... -
Page 117: Auto Punch Operations
RECORD DM-4800 punches out. Repeat until you’re It is a good idea to start this process with at least one happy with the take. track armed for recording:... -
Page 118: Specifications
9 – Specifications This section provides technical and reference information about the DM-4800, together with a list of messages you may see on the display of the DM-4800 and instructions about how to respond to them. Analog audio I/O All specifications are given with the factory refer- ence level of –16dBFS. -
Page 119: Digital Audio I/O
9-pin female D-sub connector (non-metric lock screws) wired for GPI control GPI (for Machine start) Pin 1=GPI 1, Pin 2=GPI 2, Pin 3=GPI 3, Pin 4=GPI 4, Pin 5=GND, Pin 6=GPI 5, Pin 7=GPI 6, Pin 8=GPI 7, Pin 9=GPI 8 TASCAM DM-4800 User’s Manual... -
Page 120: Equalization
933 x 824 x 230 (mm) 36.75 x 32.4 x 9.1 (in) Weight 35kg (71lbs) Voltage requirements 120VAC, 60Hz 230VAC, 50Hz 240VAC, 50Hz Power consumption Supplied accessories Power cord, Quick Start guide, CF memory card, USB cable, TM Companion CD- ROM, warranty card TASCAM DM-4800 User’s Manual... -
Page 121: Dimensional Drawing
Figure 9.1: Dimensional drawing (including optional MU-1000 meter bridge) Messages and troubleshooting This provides an alphabetical list of the messages “Confirm” messages, where a response may be nec- that you may see on the DM-4800, which provide essary (usually confirm with the key or can- ENTER ✔... - Page 122 The internal battery is defective, or has lost charge, so data can’t be stored. Contact Battery is defective Can’t save system data. TASCAM service or your distributor for a replacement battery. Please contact TASCAM service. Press ENTER to continue An attempt has been made to copy a project on a full CF card.
- Page 123 An attempt has been made to delete protected automation data. Can't DELETE Automation data ✔ An attempt to delete a library entry has failed. Can't delete xxxx Bank N-n. Press ENTER to continue. Table 9.1: Popup messages (continued) TASCAM DM-4800 User’s Manual...
- Page 124 Can’t store automation data on CF card. Press ENTER to continue. ✔ An attempt to shut down the DM-4800 has failed, because a CF card is not available. CF card is not available. Can’t store current project. Reinsert the card or retry with another card.
- Page 125 ✔ Shown when the currently selected fader grouping is to be cleared. Clear this fader grouping? Press ENTER to confirm, or a cursor key to cancel. Table 9.1: Popup messages (continued) TASCAM DM-4800 User’s Manual...
- Page 126 A library preset entry has been recalled (compressor/expander). COMP/EXP Library Preset 1-bbb recalled. ● The selected operation (e.g. format or creation of project) has been completed Completed. successfully. ● An automation operation has been successfully completed. Completed. Table 9.1: Popup messages (continued) TASCAM DM-4800 User’s Manual...
- Page 127 Mixer will reboot. Press ENTER to confirm, or a cursor key to cancel. An attempt has been made to shut down the DM-4800 while the current project’s Current project is protected. ✔ Can't STORE current project. version on card is protected (meaning that it cannot be saved).
- Page 128 External Control List Full Press ENTER to continue. ✔ The DM-4800 is still connected via FireWire to a computer, and an attempt has been Firewire connection is active, are you sure? Press ENTER to confirm, or a cursor to made to change the clock source.
- Page 129 Warning not to remove power while card is being formatted. Formatting now. Please do not turn off power while formatting. ✖ Notice to restart the DM-4800 following a change of sampling frequency. Fs has changed. Mixer will reboot. Press ENTER to confirm or a cursor key to cancel.
- Page 130 A major component of the DM-4800has failed. Make a note of the device name, which Mixer Device Boot Failed (device-name) will be one of the following, and contact your TASCAM service center: ✖ DSP-A/B, DSP-A, DSP-B, DSP-A/B SRAM, DSP-A SRAM, DSP-B SRAM, FPGA, PLL, DDMP, RTC, Slot (slot card).
- Page 131 Confirmation before overwriting effect library item from x (either effect 1 or effect 2). OK to Overwrite Effect Bank a-bbb from Effectx Press ENTER to confirm, or a cursor key to cancel. Table 9.1: Popup messages (continued) TASCAM DM-4800 User’s Manual...
- Page 132 The recall of stored automation data will overwrite the data currently in memory. Recall Automation data? ✖ Current data will be erased. Press ENTER to confirm, or a cursor key to cancel. Table 9.1: Popup messages (continued) TASCAM DM-4800 User’s Manual...
- Page 133 Not audio signal Press ENTER to continue. ✖ Digital audio data error from AES card (loss of word sync). Slot AES3 Card INPUT LINE1 Error Source Fs unlocked Press ENTER to continue. Table 9.1: Popup messages (continued) TASCAM DM-4800 User’s Manual...
- Page 134 ✔ is not selected. Press ENTER to continue. ✖ A serious hardware error has occurred within the audio portion of the DM-4800. The audio device is not operating normally. Contact your TASCAM service agent or dealer for repair. All sound stopped Please contact TASCAM service.
- Page 135 Store current project? ENTER key : Store and Create CURSOR key : Create An attempts has been made to shut down the DM-4800 with no project stored on the The current project is not on the CF card. Store the current project?\ card.
-
Page 136: Block Diagram
BUSS10 BUSS11 BUSS12 BUSS13 BUSS14 BUSS15 BUSS16 BUSS17 BUSS18 BUSS19 BUSS20 BUSS21 BUSS22 BUSS23 BUSS24 AUX01 AUX02 AUX03 AUX04 AUX05 AUX06 AUX07 AUX08 AUX09 AUX10 AUX11 AUX12 ST L ST R SOLO Figure 9.2: Block diagram TASCAM DM-4800 User’s Manual... -
Page 137: Level Diagram
9 – Specifications : Level diagram Level diagram Figure 9.3: Level diagram TASCAM DM-4800 User’s Manual... - Page 138 » DM-4800 TEAC CORPORATION Phone: +81-422-52-5082 www.tascam.com 3-7-3, Nakacho, Musashino-shi, Tokyo 180-8550, Japan TEAC AMERICA, INC. Phone: +1-323-726-0303 www.tascam.com 7733 Telegraph Road, Montebello, California 90640 TEAC CANADA LTD. Phone: +1905-890-8008 Facsimile: +1905-890-9888 www.tascam.com 5939 Wallace Street, Mississauga, Ontario L4Z 1Z8, Canada TEAC MEXICO, S.A.
Need help?
Do you have a question about the DM-4800 and is the answer not in the manual?
Questions and answers