
Subscribe to Our Youtube Channel
Related Manuals for ATCOM AT-640


Summary of Contents for ATCOM AT-640
- Page 1 AT-640 User Manual AT-640 AT-640 User User Manual Manual AT-640 AT-640 User User Manual Manual ISSUE 1.0 2011-07-28 ATCOM TECHNOLOGY CO., LIMITED...
-
Page 2: Table Of Contents
AT-640 User Manual 1st、 AT-640’s Network Features................4 The View.........................4 1、 Interfaces........................5 2、 Hardware........................5 3、 Software......................... 5 4、 Network.......................... 6 5、 Management and Maintenance................6 6、 Protocol...........................6 7、 Compliant Standard....................7 8、 Operating Requirement.................... 7 9、 Packing List........................7 10、 Installation........................7 11、... - Page 3 AT-640 User Manual 2.1. Wan Config....................27 2.2. LAN Config....................29 VoIP..........................30 3、 3.1. SIP1/SIP2/SIP3/SIP4................30 3.2. Iax2 Config....................33 Advanced........................34 4、 4.1. DHCP Server....................34 4.2. NAT........................ 35 4.3. Net Service....................38 4.4. Firewall......................38 4.5. Qos.........................39 4.6. Digital Map....................41 4.7.
-
Page 4: 1St、 At-640'S Network Features
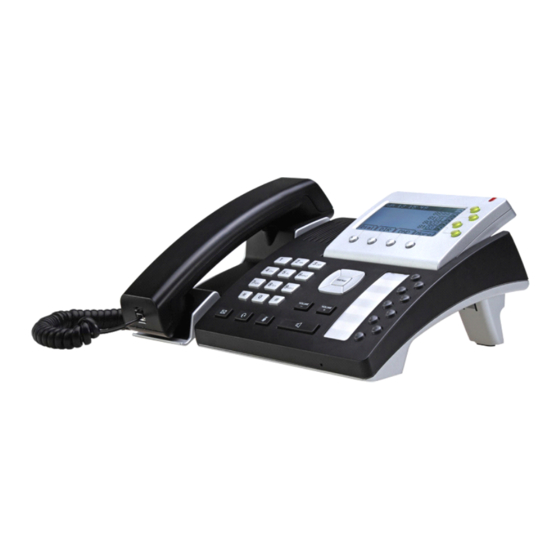
AT-640 User Manual 1st、 AT-640 AT-640 AT-640 AT-640’ ’ ’ ’ s s s s Network Network Network Network Features Features Features Features 1 1 1 1 、 View View The View View AT640 AT640 with expander board ATCOM TECHNOLOGY CO., LIMITED... -
Page 5: Interfaces
AT-640 User Manual 2 2 2 2 、 Interfaces Interfaces Interfaces Interfaces � Power: Output Power: 12VDC, 500mA DC � WAN: RJ45 port � LAN: RJ45 port � Extended interface for BLF module: 2 � Headset jack : RJ9 port �... -
Page 6: Network
AT-640 User Manual � Support multi language ( LCD support Latin language system, web support all languages) � soft button: soft button * 4 � Support BLF/BLA � Support SMS � Support auto provision (option 66) for config file upgrade 5 5 5 5 、... -
Page 7: Compliant Standard
Use Ethernet cable to connect AT-640’s LAN port and your computer. Set computer’s IP to the network 192.168.10.x or using dynamic obtain IP. Open web browser and key in 192.168.10.1. Then user will see the login page of AT-640, the default ATCOM TECHNOLOGY CO., LIMITED... -
Page 8: 2Nd、 Feet Installation Instruction
AT-640 User Manual username and password is admin/admin for administrator and guest/guest for guest. Set up up page page page page for for VoIP VoIP VoIP VoIP user user user user only: only: only: only: AT640 WAN default to use DHCP, and after connect WAN to Switch, it will obtain IP automatically. - Page 9 AT-640 User Manual B、Press the other plate into the slot in accordance with the direction of the arrow C、Repeat A and B. It is the right picture of putting on desk after fixing the two feet below: D、 Disassemble the feet: Press the plate with word “PUSH”...
- Page 10 AT-640 User Manual C、Repeat A and B. It is the picture of wall mounting after fixing the two feet below: Attention: Please rotate the hook to the position as in picture with a coin or other tools D、 Disassemble the feet way: Press the plate with word “PUSH”...
-
Page 11: 3Rd、 Keypad Of Ip Phone
AT-640 User Manual 3rd、 Keypad Keypad Keypad Keypad of of IP IP Phone Phone Phone Phone Describe of the buttons and Screen: Soft buttons Press to select an feature shown in the soft button features Soft button Shows available choices based on current phone function... -
Page 12: 4Th、 Blf Indicator Status
AT-640 User Manual extension numbers and the soft button features. Lines Shows extension number and status. There are three colors for LED, red,yellow and orange. � If the line is registered, the LED shows yellow � If the line is enable registered but register to server failed, the LED shows orange �... -
Page 13: 5Th、 Menu Operation
AT-640 User Manual � When boot up,all the light blink for once. � When phone is stand by,all the light are off. � When there is a coming call,the corresponding line key and status light will blink. Menu Operation 5th、... - Page 14 AT-640 User Manual Save Exit EDia(edit number before dial) Dial Exit Exit Quit DND(Do not disturb) -Dnd (Cancel DND) More (call forward) SIP1 FWD to: SIP2 FWD to: SIP3 FWD to: SIP4 FWD to: 123/ALL/ABC/abc (input mode) Quit SMS(Message) Send...
- Page 15 AT-640 User Manual Ans(Answer the call) Deny(refuse to answer the call) Call state Conf(Conference) Clog Retr Xfer(Call transfer) Xfer Bxfr (Blind Transfer) Exit Hold(hold the call) Resu (Resume the call) Have missed call LCR(Call back) Miss (Enter missed call) Press "Menu"...
- Page 16 AT-640 User Manual 03 Call history Next Exit 01 Outgoing Call Dial Exit 02 Incoming Call Dial Exit 03 Missed call Dial Exit 04 Preferences 01 Do Not Disturb Edit Exit 02 Call Forward Mode Number 03 Call Waiting 04 Hotline...
- Page 17 AT-640 User Manual PPPoE 02 Static Set 01 IP 02 Netmask 03 Gateway 04 DNS 03 PPPoE Set 01 Account 02 Password 04 VLAN 06 SIP Set 01 SIP1 01 SIP Name 02 SIP Server 03 SIP Server Port 04 SIP Number...
-
Page 18: 6Th、 Basic Functions And Operations
AT-640 User Manual 04 SIP Number 05 SIP Account 06 SIP Password 07 SIP Register 07 Phone Set 01 Screen Set 01 Contrast 02 Brightness 02 Ringer Set 01 Ringer Volume 02 Ringer Type 03 Volume Control 01 Voice Volume... -
Page 19: Make Call
AT-640 User Manual button again. C、Answer by earphone Keep your earphone connected with the RJ9 earphone jack, when there is an incoming call, press the earphone button on the IP phone and talk with the caller. If you want to hang up, please press the earphone button again. -
Page 20: Multiple Line Dial-Up
、line or line 4 to switch dial-up, System default Sip1 when dial-up. IP Phone be called: AT-640 maximum supports one incoming call when it is called, when the second line calling, the LCD will show the incoming telephone number. The User can press the “corresponding line key”... -
Page 21: Call Hold
Notice: SIP lines are not available for choosing when call transfer. � Attended Transfer User A.B.C, assume B is AT-640 Ip phone 1) When A Calls B and B receives 2) B presses soft button “Xfer” . 3) B dials C’s number and C receives to talk with B. -
Page 22: 3-Way Conference Calls
Call History History AT-640 supports 100 missed calls, incoming calls and dialed calls record. When the storage is full, the latest call will update the history. When the phone reboots or be out of power, all the call history will be cleared. -
Page 23: Call Pickup
AT-640 User Manual “OK” 3) Select “Outgoing call” through “up” or “down” key, and press soft button “OK” 4) Press up or down navigation button and check the received calls, LCD will show “List is Empty”, if there is no received incoming call. -
Page 24: Hang Up The Phone
AT-640 User Manual the call as usual. When B is busy, A could hang up the phone while A's phone keep checking B’s situation every 60s.When B is available, A's phone will ring. It would call B automatically once A picking up handset. -
Page 25: Click To Dial
AT-640 User Manual 14 14 14 14、 Click Click Click Click to to dial dial dial dial When User A accesses web interface and calls User B via clicking a link which is direct to B, IP Phone of User A would ring and calls B automatically once A picking up handset(need server support). -
Page 26: Default Password
7th、 Web settings settings settings settings Enter AT-640 IP addresses in the web browser to go to the log on page, and key in the username and password to access AT-640 setting page. Default username and password is: Administrator: Administrator:... -
Page 27: Current State
AT-640 User Manual 1 1 1 1 、 Current Current Current Current state state state state This page shows the IP phone working status. The network part shows the connection status of WAN and LAN. Phone Number part shows the phone number and register status for Line1、Line2 and IAX2. - Page 28 AT-640 User Manual Parameters Parameters Parameters Parameters: � Active IP: IP phone’s address. � Current Net mask:network net mask. � MAC Address:MAC of IP phone. � Current Gateway:the IP address of the router. B、If your ISP provide you with the fixed IP address, please choose static and fill in the correct information of IP Address、...
-
Page 29: Lan Config
AT-640 User Manual C、 when you use PPPoE to get IP address, please select “PPPoE”, and input ADSL account information as below picture: Parameters: PPPoE Server: sever name, if the ITSP have no special requirements, please keep "ANY" as default. -
Page 30: Voip
AT-640 User Manual � Net mask: LAN net mask. � DHCP Service: enable LAN DHCP Server , need to reboot to make it available. � NAT: Network Address Translation. � Bridge Mode: Select Bridge Mode or not: If you select Bridge Mode, the phone will no longer set IP address for LAN physical port,LAN and WAN will join in the... - Page 31 SIP setting setting setting � Register Expire Time: register expire time, default is 60 seconds. AT-640 will auto configure this expire time to the server recommended setting if it is different from the SIP server. � Auto Detect Server Interval: Set examining interval of the server, default is 60 seconds.
- Page 32 AT-640 User Manual the request packet. It will decrease the server’s repeat authorization work, if it is enable. � Auto Detect Server: Enable/Disable keeps NAT of SIP alive. If some server refuse to register with too short interval time, and has no packets sending to device in private network to keep NAT alive, user could set this function ON.
-
Page 33: Iax2 Config
AT-640 User Manual � Enable Session Timer: enable rfc4028 to refresh the SIP sessions. � Answer With Single Codec: only answer the call with a certain Codec. � Auto TCP: enable TCP transmission protocol when the length of message exceed 1300 byte. -
Page 34: Advanced
AT-640 User Manual voice mail is letters which you cannot input with the ATA , then you use the number to stand for your username. � Voice mail text: if IAX support voice mail, config the domain name of your mail box here. -
Page 35: Nat
AT-640 User Manual � DNS: default DNS server of lease table. � Press “add” to apply, will added DHCP lease table. � Lease Table Name: Select name of lease table, click the Delete Delete Delete Delete button will delete the selected lease table from DHCP lease table. - Page 36 AT-640 User Manual The setting page as below: � IPSec ALG: It is an encryption technology. Select it to enable IPSec ALG, the default is enable. ATCOM TECHNOLOGY CO., LIMITED...
- Page 37 AT-640 User Manual � FTP ALG: FTP is a service of connection layer which can transform intranet IP into extranet IP when intranet IP is sending out packet. Select it to enable FTP ALG, the default is enabling. � PPTP ALG: Select it enable PPTP ALG, the default is enable.
-
Page 38: Net Service
AT-640 User Manual 4.3. 4.3. 4.3. 4.3. Net Service Service Service Service � HTTP Port: set web browser port, the default is 80 port,if you want to enhance system safety,you'd better change it into non-80 standard port; Example: The IP address is 192.168.10.88. and the port value is 6090, the accessing address is http://192.168.10.88:6090... -
Page 39: Qos
AT-640 User Manual � out_access enable: Select it to Enable out_ access rule. � Firewall Input Rule Table: Firewall input rule, as the picture config is deny 192.168.1.2 ping 192.168.10.2, ping 192.168.10.0/24 beside 192.168.10.3 is ok. � Firewall Output Rule Table: Firewall output rule, as the picture config is the phone ping 192.168.1.70 was deny. - Page 40 AT-640 User Manual � VLAN Enable:Before select it to enable VLAN, you need enable Bridge mode in LAN config. � VLAN ID Check Enable:Enable VLAN ID check by selecting it. After enable VLAN ID check, if VLAN ID of a data package is not the same with the phone’s or a data package do not have VLAN ID, the data package will be discarded.
-
Page 41: Digital Map
AT-640 User Manual 4.6. 4.6. 4.6. 4.6. Digital Digital Digital Digital Map Digit map is a set of rules to determine when the user has finished dialing. AT640 support below digital map: � End With “#”: Use # as the end of dialing. -
Page 42: Stun
AT-640 User Manual 4.7. 4.7. 4.7. 4.7. Stun Stun Stun Stun � STUN NAT Transverse:STUN NAT Transverse status true or false. � STUN Server Addr: configure stun server address. � STUN Server Port: configure stun server port default 3478. �... -
Page 43: Call Service
AT-640 User Manual 4.8. 4.8. 4.8. 4.8. Call Call Call Call Service Service Service Service � No Answer Time: no answer call forward time setting. � No Disturb: DND, do not disturb, when there is an incoming call , the caller will get the message that this line is not available , but you it has no affection when you make outgoing call. -
Page 44: Mmi Filter
AT-640 User Manual the number(s) to the list as the white list rule. the configuration rule is –number, for the settings as below. -7049 means any incoming number is forbidden except 7049 Notice: Notice: Notice: Notice: End with DOT (.) when set up the white list �... -
Page 45: Audio Settings
AT-640 User Manual 4.10. 4.10. 4.10. 4.10. Audio Audio Audio Audio Settings Settings Settings Settings First Codec:The fist preferential DSP codec:G.711A/u, G722, G.723, G.726-32, � G.729. Second Codec : The second preferential DSP codec:G.711A/u, G722, G.723, � G.726-32, G.729. Third Codec : The third preferential DSP codec:G.711A/u, G722, G.723, �... -
Page 46: Vpn
AT-640 User Manual 4.11. 4.11. 4.11. 4.11. this page is VPN setting page , the IP phone support the VPN with UDP and L2TP protocol .The parameters is as below. VPN IP: After VPN registered successfully, VPN server will give an IP aggress to �... -
Page 47: Dial Peer
AT-640 User Manual 5 5 5 5 、 Dial Dial Dial Dial Peer Peer Peer Peer This functionality offers you more flexible dial rule, you can refer to the following content to know how to use this dial rule. When you want to dial an IP address, the entry of IP addresses is very cumbersome, but by this functionality, you can set number 179 to replace 192.168.1.179 here. - Page 48 AT-640 User Manual � Phone Number: The Number suit for this dial rule, can be set as full match or prefix match. Full match means that if the number user dialed is completely the same as this number, the call will use this dial-rule. Prefix match means that if prefix of the number that the user dials is the same as the prefix, the call will use this dial-rule, to distinguish from the full match case, you need to add “T”...
-
Page 49: Config Manage
AT-640 User Manual 6 6 6 6 、 Config Config Config Config Manage Manage Manage Manage � Save Config: you can save all changes of configurations. Click the Save button, all changes of configuration will be saved, and be effective immediately. -
Page 50: Ftp/Tftp Update
AT-640 User Manual also update downloaded update file, logo picture, ring, mmiset file by web. 7.2. 7.2. 7.2. 7.2. FTP/TFTP Update FTP/TFTP FTP/TFTP FTP/TFTP Update Update Update � Server: FTP/TFTP server address. It can be the format of IP address such as 192.168.1.1 or domain such as ftp.domain.com Meanwhile , it support sub... -
Page 51: Auto Provisioning
AT-640 User Manual 7.3. 7.3. 7.3. 7.3. Auto Auto Auto Auto Provisioning Provisioning Provisioning Provisioning � Current Version: the system will display the current version number. need to modify the version number in config file bigger than this number before auto provision update. -
Page 52: System Manage
AT-640 User Manual 8 8 8 8 、 System System System System Manage Manage Manage Manage 8.1. 8.1. 8.1. 8.1. Account Account Manage Manage Account Account Manage Manage Users can add new account or delete and change existing account Set Menu Password: Set menu of keypad password, default is “123”... - Page 53 AT-640 User Manual Set Backlight Timeout: Set backlight time out, if IP Phone has not press any operation to active within the settings value, the backlight will off. Set Greeting Message: set the Greeting message on the LCD, default is VOIP PHONE.
-
Page 54: Phone Book
AT-640 User Manual 8.2. 8.2. 8.2. 8.2. Phone Phone Phone Phone Book Book Book Book � Phonebook Table: shows phonebook detailed information � Add Phone Book: add a new record in phonebook Name: nick name of a number ,when the call of this number comes in the LCD �... -
Page 55: Multi Line Set
AT-640 User Manual Multi line function is one of SIP line is busying, but other lines can get the call when have new calls with the line. The settings as below: 1, go to System Manage Multi Line set page,... - Page 56 AT-640 User Manual 2.Memory Key: set Number@Line/Subtype for the key,the number will be send out if you press the key. � Number@Line/b: BLF (need server support). You can see the status of the blf number you set.When the key is green,means the number is free now. When the key turns red and blink,means the number is ringing.
-
Page 57: Syslog Config
AT-640 User Manual 8.5. 8.5. 8.5. 8.5. Syslog Syslog Syslog Syslog Config Config Config Config Syslog is a protocol which is used to record the log messages with client/server mechanism. Syslog server receives the messages from clients, and classifies them based on priority and type. -
Page 58: Time Set
AT-640 User Manual 8.6. 8.6. 8.6. 8.6. Time Time Time Time Set � Server: type the IP address of time server � Timezone: select correct time zone in list box � Timeout: longest response time for SNTP � Daylight Timeset: daylight setting through manual �... -
Page 59: Call Log
AT-640 User Manual 8.7. 8.7. 8.7. 8.7. Call Call Call Call Log � Start Time:Display starts time of the outgoing record. � Last Time:Display conversation time of the outgoing record. � Called Number:Display the account/protocol/line of the outgoing record. Notice: It will cover existing automatically if the call log table has the new record.Call log will... -
Page 60: Logout
AT-640 User Manual Logout Logout 8.9. Logout Logout 8.9. 8.9. 8.9. Log out the configuration mode. If you want to re-configuration the phone, need to input the user and password to login again. Reboot Reboot Reboot 8.10. 8.10. 8.10. 8.10.Reboot Reboot IP phone, some settings need reboot to make it works.
Need help?
Do you have a question about the AT-640 and is the answer not in the manual?
Questions and answers