Intergraph TDZ 2000 GL2 System Reference Manual
Hide thumbs
Also See for TDZ 2000 GL2:
- Setup manual (102 pages) ,
- Manual (6 pages) ,
- Systems setup manual (104 pages)
Table of Contents
Advertisement
Advertisement
Table of Contents

Related Manuals for Intergraph TDZ 2000 GL2


Summary of Contents for Intergraph TDZ 2000 GL2
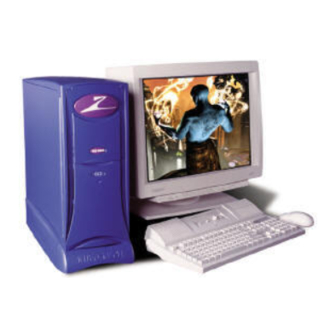
- Page 1 TDZ 2000 GL2/ExtremeZ GL2 System Reference July 1998 DHA028510...
- Page 2 Notice Information in this document is subject to change without notice and should not be considered a commitment by Intergraph Computer Systems. Intergraph Computer Systems shall not be liable for technical or editorial errors in, or omissions from, this document. Intergraph Computer Systems shall not be liable for incidental or consequential damages resulting from the furnishing or use of this document.
- Page 3 To comply with FCC Class B limits, you must use shielded cables with this device. Notes Read all safety and operating instructions before using the equipment. Keep these instructions for future reference. Follow all warnings on the equipment or in the operating instructions. This device is designed and manufactured to comply with approved safety standards for information processing and business equipment.
-
Page 5: Table Of Contents
Document Conventions....................... ix Customer Support ........................ x Hardware and Software Support Services ............... x World Wide Web ....................x Intergraph Bulletin Board Service ................x FAXLink....................... xi Telephone ......................xi More Support Options ................... xi 1 Accessing the System...................... 1 Tools ........................... - Page 6 Adding Expansion Cards ....................33 Slot Locations ...................... 33 Installing Expansion Cards .................. 34 Assigning System Resources ................35 Adding Drives and Devices....................35 Device Locations....................36 Adding External SCSI Drives .................... 37 SCSI Cable Length Guidelines ................37 SCSI Cable Quality Guidelines................38 SCSI ID Guidelines....................
- Page 7 7 Power Supply and Cooling Fans................... 71 Power Supply........................72 Power Supply Cable Routing................73 P1 Pinout ......................73 P2 - P5 Pinouts..................... 73 P6 Pinout ......................73 Cooling Fans ........................74 Index..........................75...
- Page 8 viii...
-
Page 9: Introduction
This System Reference provides information necessary to service and upgrade a TDZ 2000 GL2 or ExtremeZ GL2 system. For information on how to set up the system for use, refer to the TDZ 2000 GL2/ExtremeZ GL2 System Setup guide. About This Document This document is organized as follows: Chapter 1, “Accessing the System,”... -
Page 10: Customer Support
On these pages, you can get news and product information, technical support information, software updates and fixes, and more. Intergraph Bulletin Board Service On the Intergraph Bulletin Board Service (IBBS), you can get technical support information, software updates and fixes, and more. To connect to the IBBS: 1. -
Page 11: Faxlink
In the United States, call 1-800-633-7248 between the hours of 7:00 a.m. and 7:00 p.m. Central Time, Monday through Friday (except holidays). Outside the United States, contact your local Intergraph Computer Systems subsidiary or distributor. Have the following information available when you call: Your service number, which identifies your site to Intergraph Computer Systems. - Page 12 For software support questions in the United States, call 1-800-345-4856. Outside the United States, contact your local Intergraph Computer Systems subsidiary or distributor.
-
Page 13: Accessing The System
Accessing the System This chapter lists hand tools and describes servicing restrictions, methods for avoiding electrostatic discharge, and how to remove and attach cover panels from a TDZ 2000 GL2 or ExtremeZ GL2 workstation. This system features a chassis architecture designed to make upgrades and expansion simple. -
Page 14: Tools
No. 1 and No. 2 Phillips screwdrivers Small or medium flat-blade standard screwdriver You do not need any tools to open the TDZ 2000 GL2/ExtremeZ GL2 case. Protecting Against Electrostatic Discharge Electrostatic discharge (ESD) can damage sensitive components inside the unit. Take the... - Page 15 NOTE Removing the right side panel is necessary only for servicing internal bay disk drives, the plastic cowling on the right panel, or the face panel. To open the case: 1. Ensure the system is shut down and that you have disconnected the system and any attached external devices from AC power.
-
Page 16: System Illustrations
System Illustrations The front, left view below shows major parts of the system without covers, cables, system board and option cards. - Page 17 The back, left view below shows the chassis with all major components removed.
-
Page 19: Servicing The System
Servicing the System This chapter describes how to replace the standard parts within a TDZ 2000 GL2 or ExtremeZ GL2 system. Obey all warning and caution labels while replacing parts. Note that internal parts servicing procedures assume you have removed the left side panel from the system. -
Page 20: Case Components
Case Components Ordinarily you will not need to replace any of the external case components unless they are broken or cosmetically damaged. All case components are designed for durability, but the door and hinge assembly may require replacement before other items. To replace the hinge or door, you must first remove the top cover. - Page 21 7. Do both of the following on the underside of the door: Spread the release tabs on the large emblem and remove it Squeeze the release tabs on the small emblem and remove it 8. Slide the hinge toward the front of the chassis until it stops. 9.
- Page 22 7. Orient the new hinge rail the same way as the one you removed, place the tabs in the slots, and press outward until the rail snaps into place. 8. From the front of the chassis, slide the hinge into the rails. To replace the face panel: 1.
-
Page 23: Peripheral Drives
8. Turn the face panel downward until the switch button drops out. 9. Place the left side of the new face panel near the left, front of the chassis and orient the switch so that the black and green wires are at the bottom. 10. -
Page 24: Cd-Rom Drive
CD-ROM mounting screws Floppy drive mounting screws 3. From inside the chassis, push the back of the floppy drive until the bezel clears the chassis, and slide the device out. 4. Slide the new floppy drive into the chassis and align the mounting holes. 5. -
Page 25: External Bay Disk Drives
Mounting guide 5. Note the jumper settings on the rear of the CD-ROM. 6. Set the master/slave jumper to the same position as the old drive. 7. Install the mounting guide on the right side of the new CD-ROM. 8. Slide the new CD-ROM drive into the chassis and align the mounting holes. 9. - Page 26 External bay mounting screws 3. From inside the chassis, push the tray out of the external bay, grasp the front of the tray, and then slide it out of the bay. 4. Remove the screws that secure the disk drive to the tray and remove the drive. 5.
-
Page 27: Internal Bay Disk Drives
Mounting guide Drive tray Access hole (2) 7. Slide the tray assembly into the chassis and align the mounting holes. 8. Install the screws that secure the tray to the chassis. 9. Connect the data cable and the power cable to the disk drive. Internal Bay Disk Drives To replace an internal bay disk drive: 1. - Page 28 6. Do one of the following: If installing an EIDE drive, set the master/slave jumper setting on the new drive to match that of the old drive. If installing a SCSI drive, set the SCSI ID on the new drive to match that of the old drive.
-
Page 29: Power Supply
Screw holes for front mounting tabs 9. Install the two screws that secure the drive bracket assembly front mounting tabs to the chassis. 10. Install the screw that secures the drive bracket assembly to the right side of the chassis. 11. - Page 30 Power supply Screws Air duct 4. Remove the four outer screws from the rear of the power supply, as shown in the following figure. NOTE Support the power supply as you remove the screws. Do not to let the power supply fall as you remove the fourth screw.
-
Page 31: Bus Terminator
4. Press down firmly until the card is seated. Processor Modules TDZ 2000 GL2 and ExtremeZ GL2 systems are compatible with 266, 300, 333, 350, and 400 MHz Pentium II processors. See the system board diagram in Chapter 5, “System Board,”... - Page 32 Processor Retension module Heat sink mounting bracket Heat sink lock 5. Press the processor module down until it seats. 6. Press the processor module locking tabs outward until they click into the locked position. 7. Install the heat-sink lock between the heat-sink fins, if necessary, by sliding the lock between the fins and pressing it onto the heat-sink lock mounting posts.
-
Page 33: Heat-Sink Mounting Brackets
Heat-Sink Mounting Brackets Pentium II processors equipped with heat-sink fins use heat-sink locks fastened to mounting brackets to secure them to the system board, providing additional stability to the processor module. See the system board diagram in Chapter 5, “System Board,” for connector and socket locations. -
Page 34: Dimms
Whenever you change your memory type, either from ECC to non-ECC or the reverse, you should check that the DRAM Type BIOS parameter is set correctly. For more information, see Chapter 4, “Configuring the BIOS,” in the TDZ 2000 GL2/ExtremeZ GL2 System Setup . -
Page 35: System Board
System Board You must swap the DIMMs and processor module(s) from the old system board to the new one if you replace the system board. See the system board diagram in Chapter 5, “System Board,” for connector and socket locations. Note that a number of Fastex fasteners are mounted in the right side of the chassis to secure the system board and support for the processor retention modules. -
Page 36: Expansion Cards
To install a new system board: 1. Place the new system board into the chassis, align all mounting holes, and install the jackscrews on the external port connectors. 2. Loosely install the remaining screws on the system board, except those for the processor retension module(s). -
Page 37: Fans
Fans See Chapter 7, “Power Supply and Cooling Fans,” for details on cooling fans. NOTE Arrows on the fan indicate airflow direction and rotation. Ensure system fans are installed with the airflow direction arrow pointing in the correct direction. NOTE The entire power supply must be replaced to replace the power supply fan. -
Page 38: Lithium (Cmos/Clock) Battery
After you install the new battery, you must reset the date and time and reconfigure the BIOS. See the TDZ 2000 GL2/ExtremeZ GL2 System Setup for details on updating and configuring the BIOS. WARNING There is a danger of explosion if the battery is incorrectly replaced. -
Page 39: Leds, Light Pipe, And Power Switch
LEDs, Light Pipe, and Power Switch See the system board diagram in Chapter 5, “System Board,” for connector and socket locations. See also the “Cable Routing and Pinouts” section in Chapter 5 for LED and power switch cable and connector details. To replace an LED: 1. - Page 40 5. From inside the chassis, remove the light pipe. 6. Orient the new light pipe so that the Power LED mounts face up, and press the light pipe through its mounting hole until it snaps into place. 7. Push each of the LEDs into its respective mount on the new light pipe. 8.
-
Page 41: Upgrading The System
Upgrading the System This chapter describes upgrading memory and processors, as well as installing expansion cards, and internal and external SCSI drives in your TDZ 2000 GL2 or ExtremeZ GL2 system. NOTE See Chapter 1, “Accessing the System,” for instructions on opening the system and protecting against electrostatic discharge. -
Page 42: Adding Memory
Whenever you change your memory type, either from ECC to non-ECC or the reverse, you should check that the DRAM Type BIOS parameter is set correctly. For more information, see Chapter 4, “Configuring the BIOS,” in the TDZ 2000 GL2/ExtremeZ GL2 System Setup . -
Page 43: Adding A Processor
After completing the hardware upgrade, you must also upgrade to a multi-processor version of Windows NT. You can upgrade the operating system in the following ways: You can purchase the Intergraph upgrade kit mentioned previously. The kit contains all the hardware, software, and documentation required to perform the upgrade. - Page 44 UPTOMP UPTOMP UPTOMP While not recommended by Intergraph Computer Systems, you can back up all critical system data, install the second processor, and reinstall Windows NT 4.0 to load the required multi-processor Hardware Abstraction Layer (HAL). To install a single-to-dual processor upgrade: 1.
-
Page 45: Adding Expansion Cards
NOTE All PCI expansion cards sold by Intergraph fully comply with the Peripheral Component Interconnect Specification, 2.1. Non-compliant PCI cards mechanically comply with the Peripheral Component Interconnect Specification 2.1 , but do not contain configuration registers that allow the system to automatically assign the necessary resources. -
Page 46: Installing Expansion Cards
AGP slot PCI slot PCI slot PCI slot PCI slot PCI slot (shared) ISA slot (shared) Installing Expansion Cards If you are installing double card sets, such as a graphics card and a geometry accelerator, repeat the following procedure for the second card. See the documentation that came with the card for details on connecting the two cards. -
Page 47: Assigning System Resources
Other expansion cards do not include a diskette, but require that you manually program the BIOS with the configuration information. See Chapter 4, “Configuring the BIOS,” in the TDZ 2000 GL2/ExtremeZ GL2 System Setup for details on assigning system resources and configuring the BIOS for expansion cards. -
Page 48: Device Locations
See the following chapters for related information and important details: Chapter 5, “System Board,” for details on SCSI connector locations and pinouts. Chapter 6, “Peripherals,” for details on drive locations, jumpers, and cables. Chapter 7, “Power Supply and Cooling Fans,” for details on power supply cable connectors and pinouts. -
Page 49: Adding External Scsi Drives
CD-ROM drive—Location 7 Floppy disk drive—Location 6 Add-on drive—Location 5 Add-on drive—Location 4 Add-on drive—Location 3 Add-on drive—Location 2 System drive—Location 1 See Chapter 2, “Servicing the System,” to install a memory upgrade. Adding External SCSI Drives You can add single-ended external SCSI drives to the system by connecting them to an optional SCSI adapter. -
Page 50: Scsi Cable Quality Guidelines
SCSI Cable Quality Guidelines To ensure data integrity and optimum performance, do the following: Use only Intergraph SCSI cables. Cables from other vendors may not provide adequate shielding. Use the shortest cables possible to connect SCSI devices to the system and to each other. -
Page 51: Connecting The Device
Connecting the Device If your system has an optional SCSI adapter card installed, you can connect external SCSI devices to the adapter’s external SCSI port. NOTE The system BIOS will attempt to start the system using a hard disk drive connected to the SCSI adapter in the lowest PCI slot. -
Page 53: System Hardware Overview And Specifications
System Hardware Overview and Specifications This chapter contains general, technical information about the hardware in a TDZ 2000 GL2 or ExtremeZ GL2 system. Hardware Overview ......................42 Functional Diagram ......................43 System Board........................44 System Configuration Summary..................44 System Model Number....................... 45 Specifications........................ -
Page 54: Hardware Overview
Hardware Overview The following figure shows the major parts and assemblies inside the server. Power Supply with Fan CD-ROM Drive Floppy Disk Drive Chassis Disk Drives (5.25 inch) Disk Drives System Board... -
Page 55: Functional Diagram
Functional Diagram The following diagram shows the power and data signals of the base unit components. Power AC In Data Power and Data Power Supply System Board Speaker Floppy Disk Drive Keyboard Mouse Monitor AC In CD-ROM Drive Serial Ports Parallel Port Disk Drives... -
Page 56: System Board
System Board The following table lists the main chip components on the system board. Component Description Form Factor System BIOS Phoenix BIOS Processor(s) Intel Pentium II; 266, 300, 333, 350, or 400 MHz, all SEC (Single Edge Connector) Chipset Intel 440 BX series Combo Controller National PC87309 Super I/O PCI-to-ISA Bridge... -
Page 57: System Model Number
Audio Ports: Microphone, Line In, Line Out, MIDI Power Supply 250 Watts, manual-ranging System Model Number The model number on the unit identifies the system hardware and software configuration. The following table defines the individual digits. Digit Meaning 1: Series TDZ 2000 GL2/ExtremeZ GL2... - Page 58 RealiZm II VX113A RealiZm II ZX25 4: Chassis ExtremeZ GL2 TDZ 2000 GL2 TDZ 2000 GL2 with network card TDZ 2000 GL2 with network card and ZIP drive 5: Memory No memory 32 MB 64 MB 128 MB 256 MB...
-
Page 59: Specifications
Specifications The following specifications apply to the TDZ 2000 GL2 and ExtremeZ GL2. Item Specifications Dimensions 25.8 x 7.9 x 20.2 inches (65.4 x 20.0 x 50.8 cm) Maintenance 36 inches (91.4 cm) front and back clearance AC line voltage (US) -
Page 60: Temperature Sensors
InterSite Hardware Monitor software. The temperature sensors are part of the system board and are not field replaceable. See the TDZ 2000 GL2/ExtremeZ GL2 System Setup for details on InterSite Hardware Monitor, and for information about using the Automatic Shutdown Utility. -
Page 61: System Board
System Board This chapter provides cable and jumper connector information, major component descriptions, memory subsystem details and addresses, and external port pinouts for the system board. Major Features........................50 Connectors, Slots, and Sockets................... 51 Connectors......................... 52 Jumper Functions....................... 54 External Ports ........................55 Sound Controller ....................... -
Page 62: Major Features
Major Features The following figure shows the location of major features on the system board. Primary Secondary Power DIMM processor processor connector slots slot Floppy disk drive connector Primary/Secondary IDE connectors AGP slot Lithium PCI slots battery ISA slot... -
Page 63: Connectors, Slots, And Sockets
Connectors, Slots, and Sockets The following figure shows the location of connectors, slots, sockets, and other features on the system board. Mouse/Keyboard Secondary Primary processor fan processor fan USB J12 Parallel Floppy J9 Secondary Primary processor processor slot U2 slot U1 MIDI/ joystick Banks 0-3... -
Page 64: Connectors
Connectors The following tables lists important connector information. Jumper Cable Description AGP slot J2-J5 168-pin DIMM slots J7-J8 MCBL121A Primary/Secondary IDE connectors MCBL106A Floppy disk drive connector Not included Secondary hard disk drive activity LED connector Keyboard/mouse connectors USB ports; both available when pins 1-2 on W5- W7 are jumpered J13-J14 Not included... - Page 65 Jumper Cable Description Not included Joystick/MIDI (do not connect cable to J40) Not included Audio line-in (do not connect cable to J39) Primary processor Secondary processor (or secondary processor bus terminator) J9 - MCBL106A, Floppy Drive (Data) Cable Pinout Signal Signal Signal DRV0-...
-
Page 66: Jumper Functions
J28 (1, 2) - MCBL250AB, Power Switch Cable Pinout Signal Signal +5V trickle PWRBTN J28 (13-16) - MCBL247AA, Disk Activity LED Cable Pinout Signal Signal Anode Cathode J28 (18, 20) - MCBL347A0, Power LED Cable Pinout Signal Signal Signal Anode Cathode J28 (24-27) - MCBL373A0, Speaker Cable Pinout Signal... -
Page 67: External Ports
External Ports The following figure shows the external ports on the back of the unit. AC power connector AC voltage switch 115/230 V Mouse Keyboard Parallel Line out Line in Mic in MIDI/game Video out... - Page 68 Keyboard, Mouse The keyboard and mouse ports are PS/2 style, 6-pin ports. They are not interchangeable. Signal KDATA (keyboard) MDATA (mouse) Spare Ground KCLK Spare Serial The serial ports (also referred to as RS-232 asynchronous communications ports, or COM ports) connect modems, printers, peripherals, and other computers to the system.
- Page 69 Parallel The parallel port is used almost exclusively for printers, but is compatible with any peripheral device designed to interface with a standard Centronics-type parallel port. Use only shielded cables with the parallel port (DB25). Signal Signal -Strobe -ACK - Acknowledge Data 0 Busy Data 1...
- Page 70 Audio Line In The Audio Line In port connects audio input devices, such as a tape deck or a CD player, to the computer. Signal Ground Left Channel In Right Channel In Microphone The Microphone port connects the microphone jack of the NMB multimedia keyboard to the computer.
- Page 71 Game/MIDI The Game/MIDI port connects a game joystick or a MIDI device, such as a musical keyboard or synthesizer, to the system. Signal Signal Fire button 0 Fire button 2 X-axis, X-axis, joystick 2 joystick 1 Ground MIDI out Ground Y-axis, joystick 2 Y-axis, Fire button 3...
-
Page 72: Sound Controller
Sound Controller The sound controller is the ESS Maestro-2. Integrated onto the system board, the controller is a complete, fully-featured PC 98 compliant sound implementation. It has the following specifications: Feature Specification Audio Resolution 16-bit MIDI/UART Mode Roland MPU401 Compatibility Bus Interface CODEC Audio Codec ‘97... -
Page 73: Pci To Isa Bus Interrupt Mapping
PCI to ISA Bus Interrupt Mapping The ISA bridge provides the sixteen conventional ISA interrupts, plus four interrupt request pins for PCI peripheral interrupts (PIRQ0 through PIRQ3). For PC-AT architecture compatibility reasons, the PCI interrupts are routed to the ISA interrupts within the ISA bridge. -
Page 75: Peripherals
Peripherals This chapter provides information on the cabling and configuration of common peripherals within a TDZ 2000 GL2/ExtremeZ GL2 system. Peripheral Cables ....................... 64 EIDE Cable Connection Locations ............... 64 Internal Wide Ultra SCSI Cable Connection Locations ......... 64 Internal Ultra SCSI Cable Connection Locations ..........65 Floppy Cable Connection Locations .............. -
Page 76: Peripheral Cables
Peripheral Cables This section provides information on peripheral cables and associated connections. See the section, “Connectors and Pinouts,” in Chapter 5 for additional details. Cable illustrations are not to scale. You can identify the cables and connectors using their spacing as reference. EIDE Cable Connection Locations The following illustration and table show the cable connectors and the locations to which they attach. -
Page 77: Internal Ultra Scsi Cable Connection Locations
Connector Connects To Device at Location 4 (external bay) Device at Location 5 (external bay) Active terminator See “Device Locations” in Chapter 3 for details on standard peripheral locations. Internal Ultra SCSI Cable Connection Locations The following illustration and table show the cable connectors and the locations to which they attach. -
Page 78: Peripheral Configuration
Peripheral Configuration This section provides illustrations and information on configuring common peripherals for the system. See the following for related information: Chapter 5, “System Board,” for cable connector locations and pinouts. Chapter 7, “Power Supply and Cooling Fans,” for power cable information and pinouts. Vendor documentation provided with the peripheral device. -
Page 79: Scsi Cd-Recorder
SCSI CD-Recorder The following figure shows the back of the CD-recorder. Audio connector SCSI connector Term Power jumper Power Termination jumper connector Parity Enable jumper Device Connector Connects to Audio (analog) Audio cable connector on sound card Power Power supply SCSI SCSI connector on SCSI adapter To disable SCSI termination, remove the Termination jumper and the Term Power jumper. -
Page 80: Iomega Jaz 1 Gb Internal Scsi Drive
Iomega JAZ 1 GB Internal SCSI Drive The following figure shows the jumpers on the bottom of the drive. Front Power connector SCSI connector Device Connector Connects to Power Power supply SCSI SCSI connector on SCSI adapter The drive is not terminated and requires external termination only if installed as the last device on the SCSI chain. -
Page 81: Floppy Disk Drive
Floppy Disk Drive The following figure shows the cable connectors on the back of the floppy disk drive. Data cable Power connector connector Device Connector Connects to Power Power supply Data Floppy disk drive controller on system board 4.3 GB and 9.1 GB Disk Drives You can use either of the following Wide Ultra SCSI disk drives in the system: Vendor Capacity... - Page 82 oooooooo oooooooo SCSI connector Pin 1 Power connector Device Connector Connects to Power Power supply SCSI SCSI connector on SCSI adapter To disable SCSI termination, remove the TE jumper from connector J2. To enable parity, remove the PD jumper from connector J2. For optimum performance, remove all jumpers from J2.
-
Page 83: Power Supply And Cooling Fans
Power Supply and Cooling Fans This chapter describes the 250-watt power supply, power-related pinouts, cooling fans, and hardware monitoring devices. Power Supply........................72 Power Supply Cable Routing................73 P1 Pinout ......................73 P2 - P5 Pinouts..................... 73 P6 Pinout ......................73 Cooling Fans ........................ -
Page 84: Power Supply
Power Supply The TDZ 2000 GL2 and ExtremeZ GL2 power supply is a 250-watt manual-ranging supply. It switches between 90-132 VAC or 180-264 VAC, depending on the range setting. The input frequency is 47-63 Hz, single phase. At full load, the power supply has a minimum efficiency of 65 percent. -
Page 85: Power Supply Cable Routing
Power Supply Cable Routing The following table lists the cable connectors from the power supply that connect to the system board and other devices. Connector Device Notes J27 on System board P2, P3, P5 Disk Drive/CD-ROM MCBL172A Chassis Fan Via cable MCBL173A Floppy Disk Drive P1 Pinout Signal... -
Page 86: Cooling Fans
Cooling Fans The TDZ 2000 GL2/ExtremeZ GL2 has two cooling fans. One is inside the power supply; the other is mounted in the chassis. Both fans are 12 VDC. The fans pressurize the chassis and force warm air out from the vents. Hardware controls the dynamic speed of each four- wire fan. -
Page 87: Index
Index Conventions document, ix 250W power supply, 72 DC output specifications power supply, 72 Airflow direction and fan rotation, Diagram of external ports, 55 Diagram of system board, 50, 51 Assigning resources for option DIMMs cards, 35 installation rules, 30 Audio Line In port replacing, 22 pinout, 58... - Page 88 Mouse changing settings, 39 port pinout, 56 ID guidelines for SCSI devices, 38 Non-compliant PCI option cards, Installing an option card, 34 Intergraph BBS, x Internal bay disk drives Opening case for service, 3 replacing, 15 Option cards Internal SCSI drives...
- Page 89 power supply connector, 73 P6 pinout Replacing power supply connector, 73 face panel, 10 Parallel port hinge rails, 9 pinout, 57 Replacing PCI option cards, 33 CD-ROM drive, 12 PCI to ISA bus interrupt mapping, DIMMs, 22 door assembly, 8 PCI-to-ISA bridge, 44 external bay disk drives, 13 Peripheral configuration...
- Page 90 features, 60 external ports (diagram), 55 Specifications, 41, 47 replacing, 23 Standby switch sound controller replacing, 27 specifications, 60 system System fans, 74 BIOS, 44 System resources configuration summary, 44 assigning, 35 funtional diagram, 43 hardware overview, 42 hardware overview and termination guidelines for SCSI specifications, 41 devices, 38...
Need help?
Do you have a question about the TDZ 2000 GL2 and is the answer not in the manual?
Questions and answers