Table of Contents
Advertisement
Quick Links
Advertisement
Table of Contents
Troubleshooting

Related Manuals for Epson TM-FX2180


Summary of Contents for Epson TM-FX2180
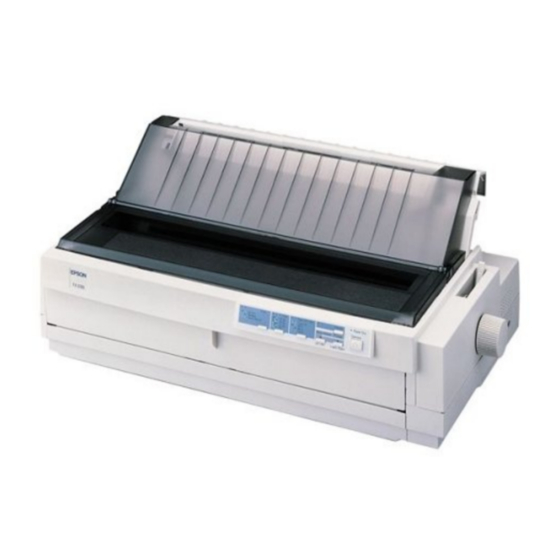
- Page 1 9 Pin Impact Dot Printer EPSON FX-2180 ® TM-FX2180...
- Page 2 Neither Epson America, Inc., nor its affiliates shall be liable to the purchaser of this product or third parties for damages, losses, costs, or expenses incurred by purchaser or third parties as a result of: accident, misuse, or abuse of this product or unauthorized modifications, repairs, or alterations to this product.
- Page 3 ESC/P are registered trademarks of Seiko Epson Corporation. General Notice: Other product names used herein are for identification purposes only and may be trademarks of their respective companies. EPSON disclaims any and all rights in those marks. Copyright © 1998 Epson America, Inc.
- Page 4 1. Repairs on EPSON products should be performed only by an EPSON-certified repair technician. 2. Make certain that the source voltage is the same as the rated voltage listed on the serial number/rating plate. If the EPSON product has a primary AC rating different from the available power source, do not connect it to the power source.
- Page 5 EPSON FX-2180 Service Manual This manual describes the basic functions, theory of electrical and mechanical operations, and maintenance and repair procedures of the EPSON FX-2180. The instructions and procedures included herein are intended for the experienced repair technicians, and attention should be given to the precautions on the preceding page.
-
Page 6: Table Of Contents
EPSON FX-2180 Service Manual 1. Product Description ...1-1 1.1 Specifications...1-1 1.2 Operation ...1-10 1.3 Special Functions ...1-13 1.4 Consumables and Options...1-15 1.1.1 Printing Specifications ...1-1 1.1.2 Print Speed and Printable Columns ...1-1 1.1.3 Resolution ...1-2 1.1.4 Printable Area ...1-2 1.1.5 Paper Feed Specifications ...1-5 1.1.6 Paper Specifications ...1-5... - Page 7 EPSON FX-2180 Service Manual 2. Operating Principles ...2-1 2.1 Overview...2-1 3. Troubleshooting...3-1 3.1 Overview...3-1 3.2 Troubleshooting Information ...3-1 3.3 Unit Level Troubleshooting ...3-4 3.4 Repairing the Power Supply Board...3-7 3.5 Repairing the Main Board Assembly...3-9 3.6 Repairing the Printer Mechanism...3-11 4.
- Page 8 EPSON FX-2180 Service Manual 5. Adjustments...5-1 5.1 Adjustment Overview ...5-1 5.2 Adjusting and Resetting the Printer ...5-2 6. Maintenance...6-1 6.1 Preventive Maintenance ...6-1 6.2 Lubrication ...6-1 Appendix ... A-1 A.1 Connector Summary... A-1 A.2 Circuit Board Component Layout Diagrams ... A-5 A.3 Circuit Board and Exploded Diagrams...
-
Page 9: Product Description
& + $ 3 7 ( 5 PRODUCT DESCRIPTION... -
Page 10: Specifications
Paper thickness lever set to 3. ** Paper thickness lever set to 4 or more. Note: ‰ When the power supply voltage drops to the lower limit, the printer stops printing, and then starts printing again on the same line at a slower speed. -
Page 11: Resolution
EPSON FX-2180 Service Manual 1.1.3 Resolution Table 1-2. Resolution Printing Mode Horizontal Density (dpi) Density (dpi) High speed draft Draft Draft condensed Draft emphasized Bit image 60, 72, 80, 90, or 120 120 or 240 1.1.4 Printable Area ‰ Single sheets printable area Figure 1-2. - Page 12 EPSON FX-2180 Service Manual ‰ Continuous paper printable area Figure 1-3. Printable Area for Continuous Paper Table 1-4. Printable Area for Continuous Paper PW (width) PL (length) LM (left margin) 0.12 in. (3 mm) or more RM (right margin) 0.12 in. (3 mm) or more TM (top margin) 0.17 in.
- Page 13 EPSON FX-2180 Service Manual ‰ Postcards printable area Figure 1-5. Printable Area for Postcards Table 1-6. Printable Area for Postcards PW (width) PL (length) LM (left margin) 0.12 in. (3 mm) or more RM (right margin) 0.12 in. (3 mm) or more TM (top margin) 0.17 in.
-
Page 14: Paper Feed Specifications
EPSON FX-2180 Service Manual 1.1.5 Paper Feed Specifications Standard feeding Friction methods: Push tractor Pull tractor Push and pull tractor Optional feeding Cut-sheet feeder (CSF), methods: bin 1 or bin 2 Roll paper holder Paper paths: Manual insertion Tractor Feed speed:... - Page 15 ‰ Load envelopes using the rear (top) slot only; do not load envelopes in the front slot. ‰ Insert the envelope into the printer with the flap side on top and the printable side down. ‰ Before printing on envelopes, set the paper thickness lever to a minimum of position 4 or 5 and turn on the card mode by pressing the Tear Off/Bin button until both Tear Off/Bin lights are on.
- Page 16 EPSON FX-2180 Service Manual ‰ Postcards Table 1-11. Specifications for Postcards Front Entry Minimum Maximum Width (inches) 5.83 (mm) Length (inches) 5.83 5.83 (mm) Thickness (inches) (mm) Weight (lb) (g/m2) Note: ‰ Before printing on postcards, set the paper thickness lever to position 3 or higher and turn on the card mode by pressing the Tear Off/Bin button until both Tear Off/Bin lights are on.
-
Page 17: Interface Specifications
EPSON FX-2180 Service Manual ‰ Continuous paper with labels Table 1-13. Specifications for Continuous Paper with Labels Front Entry Minimum Maximum Minimum Label size (inches) 15/16 (mm) 23.8 63.5 Width (inches) (mm) 101.6 406.4 Length (inches) (mm) 101.6 558.8 Backing sheet... -
Page 18: Environmental Conditions
EPSON FX-2180 Service Manual 1.1.9 Environmental Conditions Temperature Operating: 41 to 95 F (5 to 35 C) When using recycled paper, envelopes, labels, or roll paper: 59 to 77 F (15 to 25 C) Non-operating (storage): 22 to 140 F ( 30 to 60 C) -
Page 19: Safety Approvals
EPSON FX-2180 Service Manual 1.1.13 Safety Approvals 120 V model Safety standards: UL1950 CSA C22.2 No. 950 EMI: FCC part 15 subpart B class B CSA C108.8 class B 220 to 240 V model Safety standards: EN 60950 (TÜV, NEMKO) EMI: EN 55022 (CISPR pub. -
Page 20: Leds
Table 1-15. Button Functions Button Function Operate Turns the printer on and off. The printer is off when the top of this button is even with the button protectors. Pause Stops printing temporarily, and resumes printing when pressed again. (Selects on line or off line status.) When held down for three seconds when the printer is in the standby state, enters the micro adjust mode. -
Page 21: Beeper
100 ms. 1.2.2 Paper Release Lever Positions Use the paper release lever to select which paper path you want the printer to load paper from. The table below shows the corresponding paper path(s) for each paper release lever position. -
Page 22: Paper Thickness Lever Positions
Make sure paper is loaded and the printer is turned off. To run the t using the draft font, hold down the LF/FF button while you press the Operate button to turn on the printer. To run the test using printer’s near letter-quality fonts, hold down the Load/Eject button while you turn on the printer. -
Page 23: Using The Bidirectional Adjustment Mode
You can change the printer’s default settings using the default-setting mode. To enter the default-setting mode, hold down the Pitch button and press the Operate button to turn on the printer. The printer prints the language selection instructions. Select the language you want, and then press the Font button to print the default-setting mode instructions. -
Page 24: Printing A Hex Dump
To clear the EEPROM, hold down the Font and Tear Off/ Bin buttons while you press the Operate button to turn on the printer. The settings in EEPROM area 1 are reset to the factory defaults, with the exception of the counters that provide the following information: ‰... -
Page 25: Operating Principles
& + $ 3 7 ( 5 OPERATING PRINCIPLES... -
Page 26: Overview
The main components of the ribbon advance mechanism are the ribbon feed roller and the driven pulley. The ribbon advance mechanism winds the ink ribbon in one direction. This allows the printer to use a fresh ribbon surface for printing. -
Page 27: Power Supply Circuit
EPSON FX-2180 Service Manual 2.1.2 Power Supply Circuit The printer can be powered by one of the following three power supply boards: C166 PSB (120 V), C166 PSE (220 – 240 V), or C244 PSH (120 V / 220 – 240 V). The boards function in the same way, except each board has a different primary circuit. -
Page 28: Control Circuit
Figure 2-2. Power Supply Circuit Block Diagram 2.1.3 Control Circuit The printer’s control circuit consists of the C244 MAIN control board and the control panel board. 2.1.3.1 Control Circuit Operation The control circuit includes a TMP96C141BF CPU that runs at 17.20 MHz,... - Page 29 EPSON FX-2180 Service Manual The table below identifies and describes the main components of the control circuit on the C244 MAIN board. Table 2-3. Main Components of the Control Circuit Component Gate array System control (E05B50**) Peripheral device control Receives data from the host...
-
Page 30: Troubleshooting
& + $ 3 7 ( 5 TROUBLESHOOTING... -
Page 31: Overview
The flowcharts tell you which printer unit or part to replace based on the printer’s symptoms. The checkpoint tables list the correct values and ranges for printer part characteristics, such as resistance and continuity. You can compare the characteristics of a printer part to the checkpoint values to identify defective parts. -
Page 32: Sensors
EPSON FX-2180 Service Manual 3.2.2 Sensors Table 3-2. Sensor Test Points Sensor Test Pin Test Method Connector Numbers (Set the meter to DC voltage.) 1: HP Place one lead on pin 1 and (HP sensor) 2: GND the other lead on pin 2. -
Page 33: Motors
EPSON FX-2180 Service Manual 3.2.3 Motors Table 3-3. Motor Test Points PF Motor Motor connector CN10 Common pin number Test pin numbers 1, 2, 3, and 4 Test method Turn off the printer and disconnect the PF motor from the control board. Set the meter to ohms, and place one lead on pin 1 and the other lead on pin 3. -
Page 34: Unit Level Troubleshooting
EPSON FX-2180 Service Manual 3.3 Unit Level Troubleshooting You may be able to identify a defective printer unit simply by observing the printer’s symptoms. The table below lists the symptoms for several printer problems. After you determine the type of printer problem you have, see the corresponding flowchart to isolate the cause of the problem and repair the printer. -
Page 35: Abnormal Paper Feeding
EPSON FX-2180 Service Manual 1. Abnormal Carriage Operation START When you turn on Is CN11 connected the printer, does the CR properly? motor rotate? Check the CR motor coil resistance. Does the CR motor See Table 3-3. stop during or after... - Page 36 EPSON FX-2180 Service Manual 2-2. Abnormal Paper Feeding START Does the printer load When paper is single sheets properly, but loaded, is it ejected not load continuous automatically? Is CN7 connected Connect CN7. properly? Is the problem solved? Is the FFC...
-
Page 37: Repairing The Power Supply Board
The OPERATE button on the control panel only turns the secondary power circuit on or off, so the primary circuit is live as long as the printer is connected to an AC power outlet. Before you touch the power supply board or repair it, disconnect the printer from the AC power outlet. - Page 38 EPSON FX-2180 Service Manual Table 3-6. Repairing the Power Supply Board (Continued) Problem Cause Checkpoint The +35 V and Switching Check that the resistance +5 V lines are FET Q1 is between the source and the not output dead. drain is infinite.
-
Page 39: Repairing The Main Board Assembly
EPSON FX-2180 Service Manual 3.5 Repairing the Main Board Assembly The table below provides instructions on how to repair the main board assembly. It lists various main board problems and provides likely causes, checkpoints, and solutions. To determine whether a component is defective, compare its readings with the correct waveforms, resistances, and other values listed in the table below. - Page 40 EPSON FX-2180 Service Manual Table 3-7. Repairing the Main Board Assembly (Continued) Problem Cause Checkpoint Carriage The CPU or Check the input signal operation is IC9 is waveforms (CH 1) at abnormal. defective. pins 5, 6, 16, and 17 of IC9.
-
Page 41: Repairing The Printer Mechanism
Figure 3-18. Waveform 11 3.6 Repairing the Printer Mechanism The table below describes how to repair the printer mechanism. It lists various printer mechanism problems and symptoms, and provides likely causes, checkpoints, and solutions. The checkpoint column lists what to check and indicates how the printer mechanism works when it is operating properly. - Page 42 EPSON FX-2180 Service Manual Table 3-8. Repairing the Printer Mechanism (Continued) Problem Symptom Cause Carriage The carriage There is a lack operation is moves slightly of lubrication, abnormal. and then stops. or foreign material is stuck on the CR shaft or oil pad.
- Page 43 EPSON FX-2180 Service Manual Table 3-8. Repairing the Printer Mechanism (Continued) Problem Symptom Cause Printing is Platen uneven (lighter parallelism is or darker on the not adjusted left side of the properly. page than on the right side). Printing is too The platen gap light.
- Page 44 EPSON FX-2180 Service Manual Table 3-8. Repairing the Printer Mechanism (Continued) Problem Symptom Cause Paper When you turn Foreign feeding is on the printer, it material is abnormal. ejects the lodged paper auto- between the matically and a front or rear PE...
-
Page 45: Disassembly And Assembly
& + $ 3 7 ( 5 DISASSEMBLY AND ASSEMBLY... -
Page 46: Overview
4.1 Overview This section provides warnings and cautions about disassembling and assembling the printer, and information about tools and screws. It also describes how to check the printer after you repair it to make sure it is operating properly. 4.1.1 Precautions Follow the precautions below when disassembling or assembling the printer. -
Page 47: Specifications For Screws
EPSON FX-2180 Service Manual 4.1.3 Specifications for Screws Table 4-3 lists the abbreviations used in this chapter for small parts, such as screws and washers. Table 4-3. Screw Types and Abbreviations Abbreviation Part Name Cross-recessed pan head S-tight screw Cross-recessed bind head B-tight screw... -
Page 48: Service Check After Repair
EPSON FX-2180 Service Manual 4.1.4 Service Check After Repair After you repair the printer and before you return it, use the checklist in Table 4-5 to make sure the printer is operating properly. Table 4-5. Inspection Checklist for the Repaired Printer... -
Page 49: Disassembly And Assembly
Chapter 4 Disassembly and Assembly The flowchart below shows the order in which to disassemble the printer. START Disconnect the printer's power cord and interface cable Prepare for disassembly... -
Page 50: Preparing To Disassemble The Printer
EPSON FX-2180 Service Manual 4.2.1 Preparing to Disassemble the Printer Before you disassemble the printer, disconnect the printer’s power cord and interface cable, and remove any paper loaded in the printer. Then remove the following parts from the printer: front edge guide assembly... -
Page 51: Removing The Panel Board Assembly
EPSON FX-2180 Service Manual 4.2.2 Removing the Panel Board Assembly Remove the printer cover and ribbon cartridge. (See section 4.2.1.) Release the left clips for the panel board assembly by pushing them from the cutout located on the inside front of the upper housing assembly. -
Page 52: Removing The Print Head
EPSON FX-2180 Service Manual 4.2.3 Removing the Print Head Remove the printer cover and ribbon cartridge. (See section 4.2.1.) Remove the two CBS screws (3 10) securing the print head to the CR assembly. Remove the print head from the CR assembly. -
Page 53: Removing The Hp Sensor
EPSON FX-2180 Service Manual 4.2.4 Removing the HP Sensor Remove the printer cover, ribbon cartridge, front edge guide, and front cover. (See section 4.2.1.) Disconnect the connector cable for the HP sensor. IMPORTANT Note the orientation of the HP sensor so you can reinstall it the same way. -
Page 54: Removing The Ribbon Mask
After you replace the PW sensor assembly, reset the TPE level. (See Chapter 5.) 4.2.6 Removing the Ribbon Mask Remove the printer cover, ribbon cartridge, and print head. (See sections 4.2.1 and 4.2.3.) Using tweezers, remove the ribbon mask from the ribbon mask holder, as shown in Figure 4-11. -
Page 55: Removing The Upper Housing Assembly
EPSON FX-2180 Service Manual 4.2.7 Removing the Upper Housing Assembly Remove the printer cover, rear edge guide assembly, paper eject assembly, and rear tractor unit. (See section 4.2.1.) Remove the panel board assembly. (See section 4.2.2.) Remove the four CBB screws (4 4) securing the upper housing assembly. -
Page 56: Removing The Platen Assembly
EPSON FX-2180 Service Manual 4.2.8 Removing the Platen Assembly Remove the printer cover, ribbon cartridge, and platen knob. (See section 4.2.1.) Remove the print head, ribbon mask, and upper housing assembly. (See sections 4.2.3, 4.2.6, and 4.2.7.) Move the paper release lever to the pull tractor position. -
Page 57: Removing The Platen Gear
EPSON FX-2180 Service Manual 4.2.9 Removing the Platen Gear Remove the printer cover, ribbon cartridge, and platen knob. (See section 4.2.1.) Remove the print head, ribbon mask, and upper housing assembly. (See sections 4.2.3, 4.2.6, and 4.2.7.) Remove the platen assembly. (See section 4.2.8.) Remove the retaining ring (C clip) by pushing both sides of it using needle-nose pliers. -
Page 58: Removing The Printer Mechanism
Chapter 4 Disassembly and Assembly 4.2.11 Removing the Printer Mechanism Remove the printer cover, front and rear edge guide assemblies, front cover, paper eject assembly, and rear tractor unit. (See section 4.2.1.) Remove the panel board assembly. (See section 4.2.2.) Remove the upper housing assembly. - Page 59 CN13 Note: To disconnect the cables from CN10 and CN11, pull up the connector locks. As shown in Figure 4-20, remove the four printer mechanism mounting screws securing the printer mechanism. Remove the printer mechanism. IMPORTANT When you connect the cables to CN10 and CN11, align the red line in the cable with pin 1 of the connector.
-
Page 60: Removing The Cr Motor Assembly
EPSON FX-2180 Service Manual 4.2.11.1 Removing the CR Motor Assembly Remove the printer cover, rear edge guide assembly, paper eject assembly, and rear tractor unit. (See section 4.2.1.) Remove the panel board assembly. (See section 4.2.2.) Remove the upper housing assembly. (See section 4.2.7.) Remove the printer mechanism. -
Page 61: Removing The Pf Motor Assembly
EPSON FX-2180 Service Manual 4.2.11.2 Removing the PF Motor Assembly Remove the printer cover, front and rear edge guide assemblies, front cover, paper eject assembly, and front and rear tractor units. (See section 4.2.1.) Remove the panel board assembly. (See section 4.2.2.) Remove the upper housing assembly. -
Page 62: Removing The Pg Sensor Assembly
EPSON FX-2180 Service Manual 4.2.11.3 Removing the PG Sensor Assembly Remove the printer cover, front and rear edge guide assemblies, front cover, paper eject assembly, and front and rear tractor units. (See section 4.2.1.) Remove the panel board assembly. (See section 4.2.2.) Remove the upper housing assembly. -
Page 63: Removing The Right Sub Frame Assembly
EPSON FX-2180 Service Manual 4.2.11.4 Removing the Right Sub Frame Assembly Remove the printer cover, front and rear edge guide assemblies, front cover, paper eject assembly, and front and rear tractor units. (See section 4.2.1.) Remove the panel board assembly. (See section 4.2.2.) Remove the upper housing assembly. -
Page 64: Disassembling The Right Frame Assembly
(See Chapter 5.) Chapter 4 Disassembly and Assembly 4.2.11.6 Disassembling the Right Frame Assembly Remove the printer cover, front and rear edge guide assemblies, front cover, paper eject assembly, and front and rear tractor units. (See section 4.2.1.) Remove the panel board assembly. (See section 4.2.2.) Remove the upper housing assembly. - Page 65 EPSON FX-2180 Service Manual Figure 4-27. Engaging the Right Frame Assembly Gears (1 of 2) Chapter 4 Disassembly and Assembly IMPORTANT Engage the intermittent gear, release lever, and release lever transmission as shown in Figure 4-28. Engage the release lever and release lever transmission with the tractor clutch cam.
-
Page 66: Removing The Left Frame Assembly
Adjust the bidirectional print alignment. (See Chapter 5.) 4.2.11.7 Removing the Left Frame Assembly Remove the printer cover, front and rear edge guide assemblies, front cover, paper eject assembly, and front and rear tractor units. (See section 4.2.1.) Remove the panel board assembly. (See section 4.2.2.) Remove the upper housing assembly. -
Page 67: Removing The Ribbon Drive Assembly
Figure 4-30. Removing the Left Frame Assembly 4.2.11.8 Removing the Ribbon Drive (RD) Assembly Remove the printer cover, front and rear edge guide assemblies, front cover, paper eject assembly, and front and rear tractor units. (See section 4.2.1.) Remove the panel board assembly. -
Page 68: Removing The Cr Assembly
(See Chapter 5.) Chapter 4 Disassembly and Assembly 4.2.11.9 Removing the CR Assembly Remove the printer cover, front and rear edge guide assemblies, front cover, paper eject assembly, and front and rear tractor units. (See section 4.2.1.) Remove the panel board assembly. (See section 4.2.2.) Remove the upper housing assembly. - Page 69 EPSON FX-2180 Service Manual IMPORTANT When installing the CR assembly, insert the timing belt securely into the two holding slots at the bottom of the CR assembly. Make sure you take up all the slack in the timing belt between the two slots, as shown below.
-
Page 70: Removing The Rear Pe Sensor Assembly
Remove the upper housing assembly. (See section 4.2.7.) Remove the printer mechanism. (See section 4.2.11.) Turn the printer over, and insert a standard screwdriver or other prying tool into the hole in the rear frame. Release the two clips while pushing up the rear PE sensor with the screwdriver or other prying tool. -
Page 71: Removing The Front Pe Sensor Assembly
Remove the upper housing assembly. (See section 4.2.7.) Remove the printer mechanism. (See section 4.2.11.) Turn the printer over, and insert a standard screwdriver or other prying tool into the hole in the rear frame. Release the two clips while pushing up the front PE sensor with the screwdriver or other prying tool. - Page 72 EPSON FX-2180 Service Manual Remove the three CBS screws (3 4) securing the upper shield plate to the printer mechanism and remove the upper shield plate. Then remove the upper I/F grounding plate from the main board assembly. upper shield...
-
Page 73: Removing The Power Supply Board Assembly
EPSON FX-2180 Service Manual 4.2.11.13 Removing the Power Supply Board Assembly Remove the printer cover, front and rear edge guide assemblies, front cover, paper eject assembly, and front and rear tractor units. (See section 4.2.1.) Remove the panel board assembly. (See section 4.2.2.) Remove the upper housing assembly. -
Page 74: Adjustments
& + $ 3 7 ( 5 ADJUSTMENTS... -
Page 75: Adjustment Overview
5.1 Adjustment Overview 5.1.1 Required Adjustments This chapter describes the adjustments you need to perform after you remove or replace certain printer parts. The table below indicates which adjustments are required for each repair procedure. Table 5-1. Required Adjustments Repair Procedure/... -
Page 76: Adjusting And Resetting The Printer
EPSON FX-2180 Service Manual 5.2 Adjusting and Resetting the Printer 5.2.1 Platen Gap/Parallelism Adjustment If you have rotated or reassembled the rear carriage guide shaft or parallelism adjustment bushing, or if printing is too light or too dark even when the PG lever is in the proper position, perform the platen gap/parallelism adjustment. - Page 77 EPSON FX-2180 Service Manual Attach the print head to the carriage assembly again and tighten the two CBS screws (3 10). Move the print head to the left end column position. Set the paper release lever to the single-sheet position.
-
Page 78: Bidirectional Print Alignment (Bi-D) Adjustment
5.2.2 Bidirectional Print Alignment (Bi-d) Adjustment This section describes how to adjust the bidirectional print alignment. This adjustment is required after you remove or replace the printer mechanism. It is also necessary after you replace the main board assembly or the EEPROM, because the adjustment values are written to the EEPROM on the main board. -
Page 79: Performing The Bi-D Adjustment Using The Settings Diskette
EPSON FX-2180 Service Manual 5.2.2.1 Performing the Bi-d Adjustment Using the Settings Diskette Make sure the PC is turned off. Insert the Settings diskette into drive A of the PC and turn on the PC. Exit Windows and go to the DOS prompt. -
Page 80: Performing The Bi-D Adjustment From The Control Panel
[ RET ] [ HOME ] Make sure that continuous paper is loaded and the printer is turned off. Turn on the printer while holding down the Pause button to enter bidirectional print alignment adjustment mode. The printer prints an instruction sheet that contains 25 Super Draft mode alignment patterns. -
Page 81: Factory Settings
Figure 5-11. Pitch Lights Press the Font button to save your selection. The printer then prints 25 Draft mode alignment patterns. Repeat steps 3 through 5 for the Draft and NLQ modes. After you perform the NLQ mode bi-d adjustment, turn off the printer to save the bi-d values you selected in the EEPROM on the main board. -
Page 82: Tpe Level Reset
Figure 5-14. Main Menu Select one of the Check programs (selections 2 through 6) depending on the paper loaded in the printer. Run the Check program to write the selected factory settings to the EEPROM and print several check patterns. - Page 83 Use the key to highlight TPE Adjust and press Enter. Insert an A4-size sheet of paper into the printer’s rear paper guide. Make sure the paper is positioned in the portrait orientation. The TPE check pattern and the current TPE position value is printed, as shown in Figure 5-19.
- Page 84 To exit the program, press Esc until you return to the DOS prompt. IMPORTANT The adjusted TPE value is stored in the EEPROM only when you turn off the printer. Turn the printer off and then on again after you perform the TPE level reset adjustment.
-
Page 85: Maintenance
& + $ 3 7 ( 5 MAINTENANCE... -
Page 86: Preventive Maintenance
6.2 Lubrication Table 6-1 provides information about the recommended lubricants. These lubricants are EPSON G-26 and O-2, which have been tested extensively and found to comply with the needs of the printer. EPSON recommends the printer be lubricated at the points illustrated in Figures 6-1 and 6-2. - Page 87 The side of the RD ratchet shaft 10 contact points between the paper guide and the release shaft Note: Apply lubricants when you are reassembling the printer. For lubrication points, see the following figures. Quantity Lubricant 2 mm width, G-26...
- Page 88 EPSON FX-2180 Service Manual Chapter 6 Maintenance 34.5 mm spur gear platen gap adjustment lever 34.5 mm spur gear platen gap adjustment slots RD ratchet Figure 6-1. Lubrication Points (1 of 2) rear frame Figure 6-2. Lubrication Points (2 of 2)
-
Page 89: Appendix
APPENDIX... -
Page 90: Connector Summary
EPSON FX-2180 Service Manual A.1 Connector Summary The figure below shows how the primary components of the printer are connected. Table A-1 summarizes the functions and sizes of the connectors. printer mechanism PF motor CR motor PG sensor release lever position sensor... - Page 91 EPSON FX-2180 Service Manual Table A-3. Connector Pin Assignments Signal Name CR home position signal Signal ground +5 VDC Table A-4. Connector Pin Assignments Signal Name +5 VDC Rear paper end signal Signal ground Table A-5. Connector Pin Assignments Signal Name...
- Page 92 EPSON FX-2180 Service Manual Table A-8. Connector Pin Assignments Signal Name HD15 +35V +35V HD16 HD11 +35V HD17 +35V HD14 Table A-9. Connector Pin Assignments Signal Name PF A PF motor phase A signal PF B PF motor phase B signal...
- Page 93 EPSON FX-2180 Service Manual Table A-13. Connector Pin Assignments Signal Name CSF motor phase A signal CSF motor phase B signal CSF motor phase /A signal CSF motor phase /B signal HOLD CSF motor hold signal +5 VDC line Signal ground...
-
Page 94: Circuit Board Component Layout Diagrams
EPSON FX-2180 Service Manual Appendix A.2 Circuit Board Component Layout Diagrams Figure A-3. C244 MAIN Board Component Layout Diagram (2 of 2) Figure A-2. C244 MAIN Board Component Layout Diagram (1 of 2) - Page 95 EPSON FX-2180 Service Manual Appendix Figure A-5. C166 PSE Board Component Layout Diagram Figure A-4. C166 PSB Board Component Layout Diagram...
-
Page 96: Circuit Board And Exploded Diagrams
EPSON FX-2180 Service Manual Appendix A.3 Circuit Board and Exploded Diagrams This section provides the following diagrams: ‰ C244 MAIN circuit board diagram ‰ C166 PSB circuit board diagram ‰ C166 PSE circuit board diagram ‰ C244 PSH circuit board diagram ‰... - Page 98 D3SBA60 10ohm/25C 820u/200V 150K/0.5W 1500p/1.2kV 2200p * Q1 K2126 1.2M K1725 0.5W 2200p 0.1u 1.2M ERA82-004 0.5W 2.4K 4.7K 2200p 4700p 4700p 0.39/2W ELF-18D450D 0.22u 1M/0.5W 3.15A/125V B2P3-VH B2P3-VH * : Heat sink (Q1,D51) : CN3 is not mounted. PT-75 ERB43-02 ZD54 HZS6A-2...
- Page 101 EXPLODED DIAGRAM FOR FX-2180(1) 113 127...
- Page 102 EXPLODED DIAGRAM FOR FX-2180(2) 637 595...
- Page 103 EXPLODED DIAGRAM FOR FX-2180(3)
Need help?
Do you have a question about the TM-FX2180 and is the answer not in the manual?
Questions and answers