
Related Manuals for D-Link DVG-5112S


Summary of Contents for D-Link DVG-5112S
- Page 1 DVG-5112S VoIP TA User’s Manual Version 1.0 (31 Aug 2007)
- Page 2 D-Link Corporation disclaims any proprietary interest in trademarks and trade names other than its own. Warranty: please contact your D-Link Authorized Reseller or the D-Link Branch Office nearest your place of purchase for information about the warranty offered on your D-Link product.
-
Page 3: Table Of Contents
Contents 1. Introduction....................4 1-1 Product Overview............................ 4 1-2 Hardware Connections and Description ....................5 2. Installation and Applications ................7 2-1 Network Interface ............................ 7 3. Setting a DVG-5112S with WEB Browser ..........10 3-1 Current Status ............................11 3-2 RTP Packet Summary........................... 11 3-3 System Information .......................... -
Page 4: Introduction
The gateway can be assigned a fixed IP address or it can have one dynamically assigned by DHCP over PPPoE. It adopts either the G.711, G.726, G.729A or G.723.1 voice compression format to save network bandwidth while providing real-time, toll quality voice transmission and reception. D-Link Systems, Inc. -
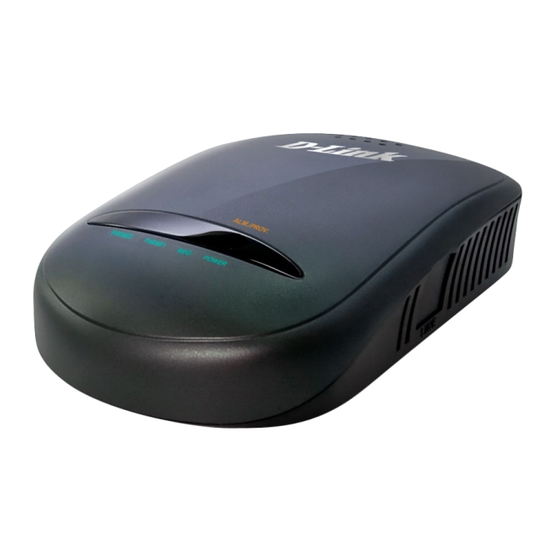
Page 5: Hardware Connections And Description
(1) Disconnect the power plug. (2) Press and hold the reset button for 6 seconds. (3) Reconnect the power plug while pressing down on the reset button. (4) Release the reset button after 6 seconds. Factory settings will be restored. D-Link Systems, Inc. - Page 6 1. DC+12V: Connect to the bundled power adaptor. Plug power adapter to a proper power source. 2. Phone: Connect to your analog telephone. These are FXS (Foreign Exchange Station) ports. 3. LAN: Connect to a PC for later DVG-5112S configuration. 4. WAN: Connect to your broadband device with RJ-45 cable. D-Link Systems, Inc.
-
Page 7: Installation And Applications
DHCP (using a Cable Modem), or PPPoE (Dialup / ADSL). Need to be set up as static IP, DVG-5112S IP Settings DHCP, or PPPoE NAT/STUN Settings Unnecessary (Disabled) DDNS Settings Unnecessary (Disabled) (VoIP Service Provider) Leased Line/ ADSL /Cable Modem D-Link Systems, Inc. - Page 8 The WAN of the IP Enabled: enter the registered URL (Uniform information on DDNS settings.) sharing device has a Resource Locator) into the network settings dynamic IP address. under NAT Router/ IP Sharing Leased Line/ ADSL /Cable Modem D-Link Systems, Inc.
- Page 9 PCs should use a static IP address in the PC IP Address Settings following range : 192.168.8.1-192.168.8.253 (for IP sharing through the Subnet Mask : 255.255.255.0 gateway) Default Gateway : 192.168.8.254 Leased Line/ ADSL /Cable Modem 61.23.45.67 61.23.45.69 D-Link Systems, Inc.
-
Page 10: Setting A Dvg-5112S With Web Browser
Password are blank (i.e., no login ID, no password).) DVG-5112S does not allow multiple people to configure the gateway simultaneously. Please remember to logout or restart the system if you are not using the web configuration function. D-Link Systems, Inc. -
Page 11: Current Status
Server Registration Status: It shows the registration status of DDNS, Phone Book Manager, STUN and UPnP. 3-2 RTP Packet Summary Display the information of the final call. Press Refresh button to get the latest RTP Packet Summary. D-Link Systems, Inc. -
Page 12: System Information
PPPoE to obtain IP, you can know if the IP is obtained through this. If IP address, subnet mask, default gateway is blank, it means that DVG-5112S does not obtain IP. LAN Port Information: It shows LAN port IP, subnet mask, and the status of DHCP server. Hardware: It shows the hardware platform. D-Link Systems, Inc. -
Page 13: Wan
DVG-5112S User’s Manual 3-4 WAN WAN Configuration includes the method of obtaining IP, the setting of DNS (Domain Name Server), etc. Current WAN IP Address: The IP address of the WAN port. D-Link Systems, Inc. - Page 14 Select “PPPoE” and enter the Account Number, Password and Reenter Password to confirm. Then click the “Accept” button at the bottom of the screen. Save the settings, and then restart the system. The system will take about 49 seconds to restart. D-Link Systems, Inc.
- Page 15 Auto: the gateway learns primary and secondary addresses from the ISP’s DHCP server or PPPoE server. Manual: enter the primary and secondary addresses manually. Please be sure that the IP addresses are correct otherwise the gateway will not be able to access hosts using hostnames instead of IPs. D-Link Systems, Inc.
- Page 16 "Clone" button to type in a MAC address which will be recognized by your ISP. It is only necessary to fill in the field if it is required by your ISP. The “Your MAC Address” field will be blank as you log-in via the WAN port. D-Link Systems, Inc.
-
Page 17: Lan
Auto: the gateway learns primary and secondary addresses from the ISP’s DHCP server or PPPoE server. Manual: enter the primary and secondary addresses manually. Please be sure that the IP addresses are correct otherwise the gateway will not be able to access hosts using hostnames instead of IPs. D-Link Systems, Inc. -
Page 18: Sip
DNS SRV Auto Prefix: This option tells the gateway to send packet with service type when using DNS SRV. Proxy Fallback Interval: Set the preferred Proxy Fallback Interval. After the time expires, the gateway gets back for registration with the primary server. D-Link Systems, Inc. - Page 19 Otherwise the VoIP Gateway will register to a Proxy with the IP it resolves. If you fail to make a call, please contact your VoIP service provider. D-Link Systems, Inc.
-
Page 20: Outbound Proxy
E.164 Numbering: This variable invites the proxy to follow the E.164 rule, but it depends on the proxy. If you fail to make a call, please contact your ITSP. NOTE: All settings in this section are specific to your VoIP network. Please ask your VoIP service provider whether or not they require these settings. D-Link Systems, Inc. -
Page 21: Sip Advanced
Resend will stop and restart when the total resend time has reached 20 seconds. Max. Response Time for Invite: If the destination does not reply in the set time, the call is failed. D-Link Systems, Inc. - Page 22 NOTE: If you register the gateway to a Proxy and you check this option, you may be unable to make a call. This is due to the fact that the VoIP gateway doesn’t send the number for authorization. D-Link Systems, Inc.
- Page 23 Support URI Percent-Encoding(RFC 3986): It follows RFC 3986 to encode/decode the letters of the basic Latin alphabet, digits, and a few special characters. Enable SIP ‘Allow’ Header: The system will put ‘Allow’ in the sip header if selected. D-Link Systems, Inc.
-
Page 24: Phone Book
Gateway Name: Enter another gateway’s code or an easy-to-remember name. Gateway Number: Enter the desired number of another gateway. IP / Domain Name: Enter the IP address or URL (Uniform Resource Locator) of another gateway. Port: Enter another gateway’s listen port setting. D-Link Systems, Inc. -
Page 25: Caller Id
Hot Line No.: Enter the hot line number for an automatic dialing function. Warm Line: When the Warm Line function is in use, user can dial a number. Otherwise the system will divert incoming calls from an outside line to the Hot Line Number after a set wait time. D-Link Systems, Inc. -
Page 26: Calling Features
4. Phone1 dials to Phone2, Phone2 answers the call. 5. Phone3 dials to Phone1 (Call Waiting), Phone1 presses Flash to pick up the second call and talk to Phone3. 6. Phone1 dials *61 and then presses Flash to start the conference call. D-Link Systems, Inc. -
Page 27: Virtual Server
Server Port Range: Input the port used by the LAN host. 3-13 DMZ DMZ allows the server on the LAN site to be directly exposed to the Internet for accessing data. Either this function or virtual server can be selected for use in accessing external services. D-Link Systems, Inc. -
Page 28: Nat Traversal
Enable UPnP Control Point: This variable will enable the gateway’s IP traffic to pass through an Internet sharing device. This function only works when the Internet sharing device supports UPnP and has it enabled. NOTE: The “Status Current Status” page will show the status of UPnP. D-Link Systems, Inc. -
Page 29: Ddns
Choose a DDNS Server: The current system allows users to choose either DynDNS、TZO、3322.org、PeanutHull or a private server. You will need to apply for an account with DynDNS、TZO、3322.org、PeanutHull or a private server before you type in the following information. D-Link Systems, Inc. - Page 30 Behind NAT: Select this only when the system is set up behind a NAT device. NOTE: If the gateway is set up under NAT, then enter the hostname in the NAT IP/Domain that is the same as the Hostname of the DDNS. Example: DDNS D-Link Systems, Inc.
-
Page 31: Fax Settings
NOTE: When you send fax over an IP network it needs your network to support fax over IP functionality (either T.38 or T.30). Please consult your VoIP service provider for this setting. D-Link Systems, Inc. -
Page 32: Codec Settings
Packet Time: Defines how long the gateway sends a RTP packet or voice packet to the receiving side. The smaller the value, the greater the bandwidth usage, but larger values increase voice delay. Approximate Bandwidth Required: The bandwidth required varies with codec format and packet time. D-Link Systems, Inc. -
Page 33: Line Settings
Loop Current Drop Trigger Time: It is to set the trigger time for dropping loop current by FXS port. A setting of zero is to disable this function. It is used to avoid the line engaged if FXS port is connected to PBX. Loop Current Drop Duration: It is to set the drop duration. D-Link Systems, Inc. - Page 34 Voice Menu Options Enable: Untick the check box to disable IVR function. Enable Call Feature Code: Untick the check box to disable Call Feature Code. NOTE: When disabled, call pickup, Automatic Redial and unattend transfer will be disabled. D-Link Systems, Inc.
-
Page 35: Digit Map
User Dial Length: Defines total number of digits that user dialed. A setting of zero tells the gateway scans digits only and disregards the total digit count. Route: Determine the interface calls should go through if above conditions satisfied. D-Link Systems, Inc. - Page 36 Method 2- Multi mapping: Fill the prefix code into the Scan Code column and the format to transfer into the VoIP Dial-out or PSTN Dial-out column. For example, Scan Code: 2??? PSTN Dial-out: 35106??? User Dial Length: 4 Route: Auto Pick up the handset and dial 2301. The system will dial 351006301 and go through Internet D-Link Systems, Inc.
- Page 37 VoIP Dial-out: test User Dial Length: 2 Route: Auto Pick up the handset and dial 11. The system will dial “test” and go through Internet. You also can use Digit Map Testing to know the dialing result. D-Link Systems, Inc.
-
Page 38: Port Filtering
IP: Input the IP address that you want to filter. The listed IP address will be unable to transmit data to and from the Internet. TCP/UDP: Choose to filter TCP, UDP, or both. Remark: This field allows you to enter comments. D-Link Systems, Inc. -
Page 39: Dtmf & Pulse
Disable: Not to send Hook Flash event. Auto: To send Hook Flash event followed the type of Out-of-Band DTMF. SIP_INFO: To send Hook Flash event by SIP_INFO even Out-of-Band DTMF is RFC 2833. RFC_2833: To send Hook Flash event by RFC 2833. D-Link Systems, Inc. -
Page 40: Cpt/Cadence Settings
DVG-5112S User’s Manual 3-23 CPT/Cadence Settings The CPT has 2 sets of parameter tables. Please adjust the parameters based on local PSTN. D-Link Systems, Inc. -
Page 41: Provision Settings
Fill in the parameters needed by the Provision Server from your service provider. NOTE: The availability of the above features also depends on your VoIP network. Please check with your service provider about the availability of these services. D-Link Systems, Inc. -
Page 42: Caller Filter
CDR Server IP: Enter the IP address of the CDR server. Port: Enter the listen port of the CDR server. Support RADIUS: Enable RADIUS for CDR database. RADIUS Server Secrect: Enter the secret. RADIUS User ID/Password: Enter the User ID and password. D-Link Systems, Inc. -
Page 43: Snmp
Use “Ping” to verify if a remote peer is reachable. Enter a remote IP address and click “Test” to ping the remote host. 3-29 STUN Inquiry Use “STUN Inquiry” to detect your IP sharing device’s NAT type and communication between a STUN server and client (built-in to the DVG-5112S gateway). D-Link Systems, Inc. -
Page 44: Ntp (Network Time Protocol)
Administrator’s Name and Password: Enter the administrator name and password, which has the highest level of control of the gateway. Web UI Login ID and Web UI/IVR Password: Enter log-in ID and password when you log-in to the Web interface/IVR of the gateway as a normal user. D-Link Systems, Inc. -
Page 45: Backup/Restore
Configuration File: Backup all settings. Configuration Template File: Backup the settings as a template file for editing. Upload Configuration File: Upload the configuration file from somewhere to the device. Restore Default Configurations: Reset the device back to the factory default settings. D-Link Systems, Inc. -
Page 46: System Operations
Software Upgrade Server Port: Enter the port that the server uses. TFTP is 69, and FTP is 21. User Name/ Password: The account information to access an FTP server. Directory: The directory path of the upgrade files for TFTP or FTP. D-Link Systems, Inc. -
Page 47: Logout
The gateway only allows one user at a time to log-in, so whenever a change is made, please save the settings and restart the system, or logout to avoid a situation where other users cannot log-in to change settings. D-Link Systems, Inc. -
Page 48: Setting The Dvg-5112S Through Ivr
Example: enter “**#” (you are now in IVR mode) enter 101 (to query about the current IP address) system responds with an IP address you can continue with more settings or queries: enter 111 (to set a new IP address) enter 192*168*1*2 (new IP address). D-Link Systems, Inc. -
Page 49: Ivr Functions Table
A static IP address for WAN Port IP:192.168.1.2 Restore factory default IP address configuration Mask:255.255.255.0 Gateway:192.168.1.254 Restore factory default settings Save settings Set the IVR and the language used on the Web GUI (1: English, 2: Traditional Chinese, 3: Simplified Chinese) Software Upgrade D-Link Systems, Inc. -
Page 50: Ip Configuration Settings-Setting Ip Configuration Of Wan Port
DHCP server. Please check your DHCP server or ISP. ADSL PPPoE Settings NOTE: Complete PPPoE settings should include: Select PPPoE (option 3 of 114), PPPoE account (121) and PPPoE password (122). Please contact your local Internet Service Provider (ISP) if you have any questions. D-Link Systems, Inc. - Page 51 Wait for about 40 seconds for the system to restart, then enter 101 to check whether or not the IP address was retained. If the IP address is not repeated, this indicates that the gateway is not properly connected. Please check to be certain that the cable connection, account, and password are all correct. D-Link Systems, Inc.
- Page 52 The second column in each pair (“Input Key”) tells you what code to enter for the corresponding number, letter or symbol. For example, to enter “D-Link” using the codes below, enter: 148322495451...
-
Page 53: Appendix
• E.164 Numbering and ENUM support • Hot-Line, Warm-Line support • Call features: Call Hold, Call Waiting, Call Pickup Call Forward - Unconditional, Busy, No Answer Call Transfer - Unattended, Attended Three Way Calling (Media Server required) D-Link Systems, Inc. - Page 54 Firmware Upgrade through TFTP, FTP and HTTP • Configuration Backup/Restore • Reset button (with restore factory default function) • Front Panel LED: voice ports, VoIP, Power / Alarm • Optional Auto Provisioning Server (APS) for mass deployment D-Link Systems, Inc.
- Page 55 Any acts taken that are inconsistent with ordinary use of the product, including improper testing, etc., and those not expressly approved by D-Link may result in the loss of product warranty. Unless expressly approved by an authorized representative of D-Link in writing, you may not and may not permit others to: •...
- Page 56 • When connecting or disconnecting power to hot-pluggable power supplies, if offered with your device, observe the following guidelines: • Install the power supply before connecting the power cable to the power supply. • Unplug the power cable before removing the power supply. •...
- Page 57 Ninety (90) days D-Link’s sole obligation shall be to repair or replace the defective Hardware at no charge to the original owner. Such repair or replacement will be rendered by D-Link at an Authorized D-Link Service Office. The replacement Hardware need not be new or of an identical make, model or part;...
- Page 58 Trademarks Copyright .2002 D-Link Corporation. Contents subject to change without prior notice. D-Link is a registered trademark of D-Link Corporation/D-Link Systems, Inc. All other trademarks belong to their respective proprietors.
- Page 59 FAX: 61-2-8899-1868 URL: www.dlinktw.com.tw URL: www.dlink.dk URL: www.dlink.com.au Norway India Karihaugveien 89 D-Link House, Kurla Bandra Complex Road N-1086 Oslo Off CST Road, Santacruz (East) Norway Mumbai - 400098 TEL: +47 99 300 100 India FAX: +47 22 30 95 80 TEL: 91-022-26526696/56902210 URL: www.dlink.no...
- Page 60 Notes...
- Page 61 8. What category best describes your company? Aerospace Engineering Education Finance Hospital Legal Insurance/Real Estate Manufacturing Retail/Chain store/Wholesale Government Transportation/Utilities/Communication System house/company Other________________________________ 9. Would you recommend your D-Link product to a friend? Don't know yet 10.Your comments on this product? __________________________________________________________________________________________ __________________________________________________________________________________________...
- Page 62 DI Wired ClassB Warranty Guide_v11...
Need help?
Do you have a question about the DVG-5112S and is the answer not in the manual?
Questions and answers