Table of Contents
Advertisement
Available languages
Available languages
Quick Links
Quick Installation Guide
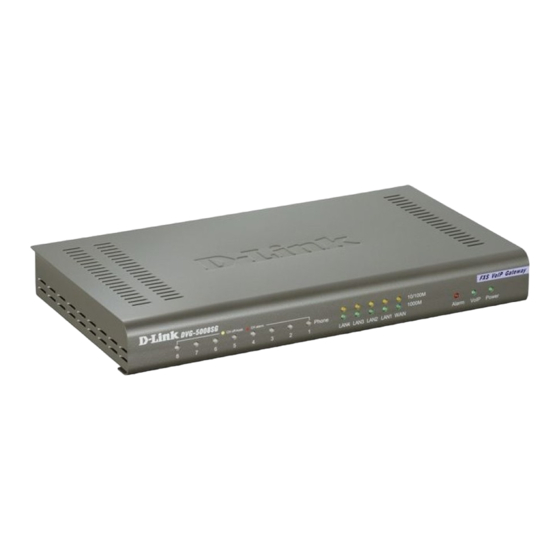
DVG-5008SG
VoIP Gateway
©2010 D-Link Systems, Inc. All rights reserved. Trademarks or registered trademarks are the property of
their respective holders. Software and specifications subject to change without notice.
DVG-5008SG
CD-ROM
which includes
the User Manual
Phone Cord X8
Ethernet
Power
(CAT5 UTP)
Adaptor
Cable
Using a power
supply with a
different
voltage rating
will damage
this product
and void the
warranty
Advertisement
Table of Contents

Related Manuals for D-Link DVG-5008SG


Summary of Contents for D-Link DVG-5008SG
- Page 1 ©2010 D-Link Systems, Inc. All rights reserved. Trademarks or registered trademarks are the property of their respective holders. Software and specifications subject to change without notice.
-
Page 2: Hardware Overview
DVG-5008SG FXS VoIP Gateway Hardware Overview Power LED. A steady light indicates a proper connection Power to a power source. The VoIP LED will turn on when the VoIP Gateway is VoIP connected to a VoIP service provider. The LED will blink if not connected to a service provider. - Page 3 DVG-5008SG FXS VoIP Gateway Rear Panel WAN: Connect to your broadband modem using an Ethernet cable. LAN: Connect to your Ethernet enabled computers using Ethernet cabling. Phone Port (1-8): Connect to your phones using standard phone cabling (RJ-11). Ground: A conducting connection with the earth. Connect with the ground so as to make the earth a part of an electrical circuit using metal wire.
-
Page 4: Installing The Hardware
Installing the Hardware A. Insert one end of the Ethernet cable into the Ethernet (LAN) port on the back panel of the DVG-5008SG and the other end of the cable to an Ethernet Adapter or available Ethernet port on your computer. - Page 5 Installing the Hardware (continued) D. Connect the power adapter to the power input at the back panel of the DVG-5008SG and then plug the other end of the power adapter to a wall outlet or power strip. Then press down Power Switch. On the front of the device, the Power LED will turn on to indicate proper operation.
- Page 6 DVG-5008SG FXS VoIP Gateway After the installations are completed, your network should look similar to the diagram below. Hardware configuration is complete! If your VoIP service is already activated, you can make phone calls now.
- Page 7 DVG-5008SG FXS VoIP Gateway Configuration To access the web-based configuration utility, open a web browser such as Internet Explorer and enter the IP address of the DVG-5008SG. Open your Web browser and type http://192.168.8.254 into the URL address box. Press the Enter or Return Key.
- Page 8 DVG-5008SG FXS VoIP Gateway Configuration (continued) It is highly recommended to create a login ID and password to keep your gateway secure. Click Next. Enter a NTP server or use the default server. Click Next.
- Page 9 DVG-5008SG FXS VoIP Gateway Configuration (continued) Select your Internet connection type: DHCP – Most Cable ISPs or if you are connecting the DVG- 5008SG behind a router. Static IP – Select if your ISP supplied you with your IP settings.
- Page 10 DVG-5008SG FXS VoIP Gateway Configuration (continued) Register to the SIP Proxy Server by clicking Enable support of SIP Proxy Server. Enter Proxy Server IP/Domain and Port. The Outbound Proxy Support is optional. To register, please click on the Outbound Proxy...
-
Page 11: Technical Support
DVG-5008SG FXS VoIP Gateway Technical Support You can find software updates and user documentation on the D-Link website. Tech Support for customers within United States: D-Link Technical Support over the Telephone: (800)326-1688 D-Link Technical Support over the Internet: http://support.dlink.com email:support@dlink.com... -
Page 12: Краткое Руководство По Установке
значением максимально допустимого напряжения приведет к повреждению устройства и аннулированию гарантии на данный продукт ©2010 D-Link Systems, Inc. Все права защищены. Торговые марки или зарегистрированные товарные знаки являются собственностью их владельцев. Программное обеспечение и характеристики могут быть изменены без уведомления. - Page 13 Обзор аппаратной части Индикатор питания. Постоянно горящий сигнал Power означает, что подключение к источнику питания выполнено надлежащим образом. Индикатор VoIP загорится тогда, когда голосовой VoIP шлюз подключится к провайдеру VoIP. Индикатор будет мигать, если подключение к провайдеру VoIP не выполнено. Мигающий...
- Page 14 Задняя панель 1. WAN: Подключите устройство к широкополосному модему, используя Ethernet-кабель. 2. LAN: Подключите устройство к компьютеру, оснащенному интерфейсом Ethernet, используя Ethernet-кабель. 3. Телефонные порты (1-8): Подключите устройство к телефону, используя стандартный телефонный кабель (RJ-11). 4. Заземление: Электропроводное соединение с землей. Соедините...
- Page 15 Аппаратная установка А. Подключите Ethernet-кабель к порту Ethernet (LAN) на задней панели DVG-5008SG и к Ethernet-адаптеру или доступному порту Ethernet на компьютере. Б. Подключите Ethernet-кабель к порту WAN на задней панели DVG- 5008SG и к кабельному/DSL модему или порту LAN маршрутизатора.
- Page 16 Аппаратная установка (продолжение) Г. Подключите адаптер питания к разъему питания на задней панели DVG-5008SG и к сетевой розетке или разветвителю питания. Затем нажмите на выключатель питания. Индикатор питания на передней панели устройства загорится, что означает успешное выполнение операции. Д. Проверьте состояние индикаторов на передней панели голосового...
- Page 17 После того как установка завершена, сеть будет выглядеть подобно ниже приведенной схеме. Аппаратная установка завершена! Если VoIP-сервис уже активирован, можно совершать телефонные звонки сейчас.
- Page 18 Настройка Чтобы получить доступ к Web-интерфейсу настройки, откройте Web- браузер, например, Internet Explorer, и введите IP-адрес DVG-5008SG.
- Page 19 Настройка (продолжение)
- Page 20 Настройка (продолжение)
- Page 21 Настройка (продолжение)
-
Page 22: Техническая Поддержка
Техническая поддержка Обновления программного обеспечения и документация доступны на Web-сайте D-Link. D-Link предоставляет бесплатную поддержку для клиентов в течение гарантийного срока. Техническая поддержка D-Link: (495) 744-00-99 Web-сайт D-Link: http://www.dlink.ru...
Need help?
Do you have a question about the DVG-5008SG and is the answer not in the manual?
Questions and answers