Table of Contents

Related Manuals for Casablanca Holliston C31UxxZ


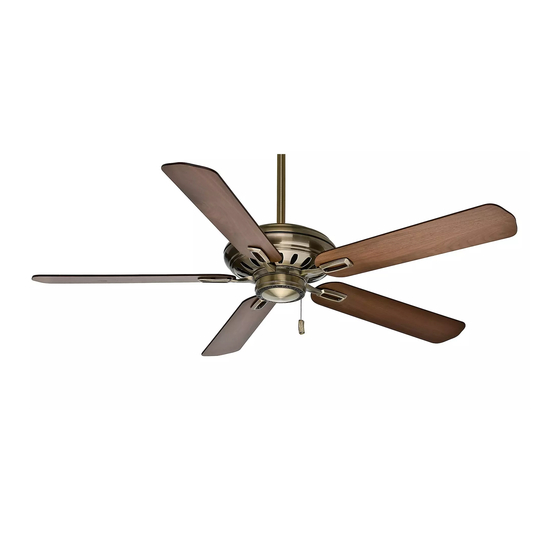
Summary of Contents for Casablanca Holliston C31UxxZ
- Page 1 olliston ® F O R M O D E L : 7 61 C o r p o r a t e C e n t e r D r i v e C31UxxZ P o m o n a , C a l i f o r n i a 9 1 7 6 8 1 .
-
Page 2: Limited Warranty
Authorized Service Centers list included with this Owner’s Manual� Do not return your fan without approval from Casablanca Fan Company� Should it become necessary to return your fan to an Authorized Service Center, make sure it is packaged properly to avoid in-transit damage, which is not covered by this warranty�... -
Page 3: Table Of Contents
™ olliston owner’s Manual ™ olliston Read and Save theSe inStRuCtionS! Safety and the proper operation of your Casablanca fan both require a thorough knowledge of the product and proper installation; therefore, before attempting to install and operate your Casablanca fan, read this owner’s manual completely and carefully. -
Page 4: Please Inspect
PLEASE INSPECT ALL PACKAGING PRIOR TO DISCARDING! Your Casablanca fan was crafted with pride and care and inspected thoroughly prior to shipment. Before you begin to assemble and install your Casablanca fan, remove all parts from the carton and check them against the Parts Guide in this manual. -
Page 5: Parts Guide
™ olliston Parts Guide Item # description Picture (not to scale) Quantity Motor Housing Ceiling plate Phillips Screwdriver Screw Pack (A): 2 EA " x 8-32" Roundhead screws and washers , Screw Pack: 1 EA lag Screw and washer (1) Screw Pack (A): wire Nuts (4), Canopy and Canopy Hatch... - Page 6 Item # description Picture (not to scale) Quantity Blades Blade Irons Screw Pack (C): Blade iron Screws (pre-installed, see pg 13, step 9a) Screw Pack (d): 16 EA Blade Screws and washers light Kit Adaptor Assembly Screw Plug Switch Housing Cap Screw Pack (E): Switch Housing Cap Screws 8-32 x 3/8 w-84 Control and Mounting Hardware...
-
Page 7: Introduction
• Never install a fan over a pool or spa. • Never operate a fan that has been damaged in any 84" way. Contact Casablanca Fan Company by calling 1-888-227-2178, or contact your local authorized Casablanca dealer for assistance in obtaining service. -
Page 8: Mounting Recommendations
MoUntInG recoMMendatIonS General GUIdelIneS Before mounting your Casablanca fan, read the following helpful recommendations. the location of the fan, air circulation, and fan size are all important factors to consider before installation. Location Ceiling fans have practical uses in almost every room in your home. we suggest you follow these mounting recommendations as you decide where to install your Casablanca fan. -
Page 9: Fan Installation
™ olliston fan InStallatIon GettInG Started using existing Ceiling Fixture outlet Box installing a new Ceiling Fixture outlet Box After turning the power oFF at its source (either the If you do not have an existing fixture located where circuit breaker or fuse box), lower the old fixture and you wish to place your Casablanca fan, an approved disconnect the wiring. -
Page 10: Lag Screw Installation (Required)
laG Screw InStallatIon note: this step is required only under two conditions: If the fan weighs 36 lbs. or more or if the existing ceiling fixture outlet box needs to be modified for a ceiling fan application (for example, if the house is not new construction and you are replacing an existing light fixture). -
Page 11: Perma•Lock™ Downrod And Ball Assembly
™ olliston fan preparatIon Perma•LoCk™ Hardware (not to scale) Canopy Cover Ring Perma•Lock™ downrod allen Wrench (6) 7-Watt hanging adapter Cover and Ball assembly uplight Bulbs iMPoRtant SaFetY inFoRMation: PaPeR MotoR Before starting the installation of your ShieLd ceiling fan, install the threaded downrod into the motor coupling and lock the assembly. -
Page 12: Hanging Adapter Cover
fan preparatIon - contInUed MOTOR WIRES (LEAVE AT LEAST Step 4c. Slide both the hanging adapter cover and 6" LONG) canopy cover ring on to the pole, then route the CANOPY COVER wires through the 3.5" Perma•Lock downrod and ball RING PERMA•LOCK™... -
Page 13: Fan Preparation
™ olliston fan preparatIon - contInUed Step 4e. Slide the hanging adapter cover down over the motor coupling as shown in Figure #6, making sure that the adapter cover is covering the motor coupling as in shown Figure #7. HANGING HANGING ADAPTER ADAPTER COVER... -
Page 14: Canopy Electrical Connections
canopY electrIcal connectIonS Step 7. Attach the fan wires to the ceiling fixture outlet box wiring by placing the bare ends of the wires side by side and then securing with a wire nut. test that the connection is secure by pulling on the wire nut. Connect in this order: WIRE NUT •... -
Page 15: Blade Installation
™ olliston Blade InStallatIon Blade Hardware (not to scale) Blade iron Phillips Blade irons (5) Blade Screws (16) Blades (5) Washers (16) Screws Screwdriver Step 9a. Remove the five shipping blocks, and screws as shown in Figure #2. do Not discard the ten (10) screws;... -
Page 16: Light Fixture Installation
Blade installation Continued Step 10b. Attach a blade/blade iron assembly to the flywheel by using two blade iron screws provided. Place the end of the blade iron on the flywheel as shown in Figure #5. Insert the screws one by one FLYWheeL using the provided screwdriver. - Page 17 ™ olliston SwItcH HoUSInG and end cap InStallatIon No LIGHT kIT - Installation: SCReW SCReW PLuG #8-32 NOTE: If you are installing your fan without a light kit attached as shown in Figure #1, continue with these BottoM CaP installation instruction SCReW #6-32 Figure #1 LIGHT kIT...
- Page 18 Switch Housing and Light kit CenteR ShaFt adaptor installation: - adaPteR ( No LIGHT kIT) Step 12a. locate and remove the three #8-32 screws from the center shaft adapter located on adaPteR SCReWS the bottom of the fan as shown in Figure #1. do not , #8-32 discard the screws, all three screws will be needed for the next steps with in this document.
- Page 19 ™ olliston Switch Housing and Light kit adaptor installation - Continued ( No LIGHT kIT) Step 12e. locate the bottom cap and screw as shown in Figure #5, using the screw that you earlier removed from the light kit adaptor assembly (see step 11c) and insert cap screw through the hole in the center of the cap and attaching the cap the bottom of the fan as shown in Figure #5 on this page.
- Page 20 SwItcH HoUSInG and end cap InStallatIon LIGHT kIT - Installation: SCReW SCReW PLuG #8-32 NOTE: If you are installing your fan with a light kit attached as below in Figure #1, continue with these installation instruction Step 13a. Also you will need the BottoM CaP SCReW installation instructions that came with your new light...
- Page 21 ™ olliston Switch Housing and Light kit CenteR ShaFt adaptor installation: - Continued adaPteR ( LIGHT kIT) Step 14a. locate and remove the three (3) #8-32 screws from the center shaft adapter located on the adaPteR SCReWS, bottom of the fan as shown in Figure #6. #8-32 (Screws 3) Figure #6...
- Page 22 Switch Housing and Light kit adaptor installation: - Continued ( LIGHT kIT) White Step 14e. Align the four screw holes on the cap with WiRe the holes on the light kit adaptor plate, using the four (4) screws that you earlier removed from the light kit adaptor assembly (see step 11c) and insert the four (4) screws, attaching the cap to the bottom of the fan as shown in Figure #10 on this page.
- Page 23 ™ olliston Switch Housing and Light kit adaptor installation: - Continued ( LIGHT kIT) Step 14g. Connect the wires of the motor to the wires of the light fixture. Connect the BLue wire from the motor to the BLaCk wire of the light fixture and connect the two White wires together, as shown in Figure #15.
-
Page 24: Wall Control Preparation
W-84 WaLL ContRoL inStaLLation (For use on product with Both uP and doWn LiGhtS onLY) ® w-84 wall control preparatIon WaLL ContRoL and haRdWaRe (not to scale) Switch Mounting Screws (2) (4) Wire Cap Wall Plate Screws W-84 Switch Bezels (2) White White Wall almond Wall... - Page 25 ® rUBBer keY Prepare for W-84 Wall Control installation - Continued Step 1d. Before attaching the bezel back on to the front of the switch, make sure that the rubber key LoCatinG aLMond pad is attached to the locating pins on the bezel as PinS BeZeL shown in Figure #4.
- Page 26 ® W-84 ContRoL inStaLLation inStaLLinG the W-84 WaLL ContRoL note: W-84 Wall Control should only be installed on Casablanca's Inteli-Touch 3 fans with uPlIGHtS oNlY ® or both an uPlIGHt and a dowNlIGHt on the fan. the wall control installs in the same manner as an ordinary light switch, using an existing wall box and wiring. this controller is designed to signal the fan microcomputer as well as perform normal switching operations.
- Page 27 ® dual w-84 installation diP SWitCheS to control the fan and lights from two locations (a three-way circuit), use two w-84 wall controls as shown in the wiring diagram in Figure #1. Before installing the two switches into the wall, place both switches side by side, then locate the 4 dip switches on the side of the two switches as shown in Figure #2.
-
Page 28: Operation
® oPeRation PoWeR button is normally left in the on position. Always turn the power off during cleaning or servicing the fan and during thunderstorms. It is also used to exit or enter additional programs. button must be left on to retain a previously set fan speed or light level. -
Page 29: Changing Transmitter Frequency Setting
® oPeRation LiGhtS to dim just the up light: 1. Make sure you have just the downlight on. NotE: Light Operation - 2. turn the light off, then press and hold the button. After one the light varies from “bright” second, the up light will come on at their lowest setting and gradually to “dim”... - Page 30 ® autoMatiC deMonStRation PRoGRaM Programmed into every Inteli-touch Series fan is an ® Automatic demonstration Program. It can be used to A multi-tone signal will verify the start of the test pro- fully demonstrate and test the operation of the fan. gram which proceeds as follows: •...
- Page 31 ® oPeRation hoMe-SaFe PRoGRaM ® the home-Safe Program makes an unoccupied home appear occupied by turning the lights on and off at random times. to enter the Home-Safe Program: 1) to operate the lights and fan for Home Safe Program – Press the But- ton off for a least 5 seconds.
-
Page 32: Bezel Replacement
® In tHe wall Bezel replaceMent WaLL ContRoL and haRdWaRe (not to scale) Switch Mounting Screws (2) (4) Wire Cap Wall Plate Screws W-84 Switch Bezels (2) White White Wall almond Wall Wall Control (1) White (2) almond Plate(1) Plate(1) (1) almond WaRninG! To avoid possible electrical shock, make cer-... - Page 33 ™ olliston White BeZeL W-84 Wall Control Bezel replacement: - Continued Step 1c. locate the rubber key pad attached to the four (4) locating pins and remove rubber key pad from the wHItE bezel, also as shown in Figure LoCatinG PinS (4) LoCatinG PinS...
- Page 34 BeZeL W- 8 4 Wa l l C o n t r o l B e z e l r e p l a c e m e n t : Continued Step 1e. to attach the bezel back on to the front of the switch you will need to align the four (4) tabs on the bezel with the front of the wall control and by gently pressing on both top and bottom of the bezel at the same time, snap...
-
Page 35: Troubleshooting
Consult the dealer or an experienced radio/TV technician for help. Note: Any changes or modifications to the transmitter or receiver not expressly approved by Casablanca Fan Company may void one’s authority to operate this remote control. -
Page 36: Care Recommendations
CaRe ReCoMMendationS Fan Finishes • For cleaning, a soft brush or lint-free cloth should be used to prevent scratching the finish. • A vacuum cleaner brush nozzle can remove heavier dust. • Surface smudges or an accumulation of dirt and dust can be removed easily using a mild detergent and slightly dampened soft cloth. - Page 37 ™ olliston...
Need help?
Do you have a question about the Holliston C31UxxZ and is the answer not in the manual?
Questions and answers