iRobot Roomba 570 Service Manual
Roomba 500 series
Hide thumbs
Also See for Roomba 570:
- Owner's manual (36 pages) ,
- Owner's manual (36 pages) ,
- Owner's manual (36 pages)

Related Manuals for iRobot Roomba 570


Summary of Contents for iRobot Roomba 570
- Page 1 Roomba 500 Series Service Manual Published 10 September 2007 Base Robot 3.0 : Model 510 Base Robot 3.3 : Model 530 Base Robot 3.4 : Model 535, 540 Base Robot 3.5 : Model 550, 560, 565, 570, 580...
-
Page 2: Table Of Contents
13: Test Virtual Wall & Light House (if applicable) ..................9 14: Test Wireless Command Center (if applicable)..................9 15: Replace Faulty Accessories........................9 16: Pack & Record the Serial Numbers......................9 17: Monthly Data Report to iRobot ........................9 Roomba 500 Series Vacuuming Robot....................10 Roomba Terminology.............................10 Roomba Features and Compatibility......................13 Roomba Cleaning Behavior and Technology....................15... - Page 3 Roomba 500 Series Behavioral Issues......................34 Roomba 500 Series Charging Errors......................39 Appendix A : Roomba 500 Series Built-in-Test Procedure..............42 AUTO-ADVANCE MODE ............................44 MANUAL-ADVANCE MODE........................... 44 BUILT-IN-TEST RESULT ............................44 DATA COLLECTION ..............................45 SUMMARY OF ELECTRICAL CONSTANTS ......................46 BUILT-IN-TEST CHART ............................
-
Page 4: Roomba 500 Series Service Process
Roomba 500 Series Service Process... -
Page 5: 01: Customer Call
Roomba issues can be diagnosed over the phone by guiding a user through a troubleshooting process. At a minimum, iRobot recommends that the customer be asked to perform routine Roomba maintenance steps to resolve the Roomba issue. Only if these steps fail to resolve the issue should a customer send the Roomba to a service center. -
Page 6: 02: Roomba Return Procedure
02: Roomba Return Procedure If the initial maintenance steps did not solve the issue, a customer should proceed to return the Roomba, battery and all accessories to a service center. IMPORTANT : Before packing and shipping a robot, clear all schedules by resetting the Roomba : Press down the SPOT and DOCK buttons simultaneously for 10 seconds. -
Page 7: 05: Roomba Software & Charging Reset
Perform BiT steps. Take note of the button & speaker performance. Appendix A 07: Capture Built-in-Test Data Use “iRobot Factory Test Client Version 1.1” to capture the BiT output. Appendix A Use “R3BlackBoxReader” program to capture data in the black box 08: Roomba Diagnostics: Mobility Test Perform the Mobility Test. -
Page 8: 09: Fix Or Replace Roomba
09: Fix or Replace Roomba See “Service Procedure Chapter” Replace parts using Built-in-test Fix and module disassembly procedure. Appendix D Re-test the BiT and MT and continue fixing until 100% pass. Appendix A/B 10: Test Battery Fully charge the returned Battery. Perform Battery test o Battery Voltage should be between 15.5 - 18V. -
Page 9: 12: Test Home Base (If Applicable)
Pack the robot. If a core robot exchange was necessary, record the new serial number in the service process report 17: Monthly Data Report to iRobot The detailed International Service Process Report should be managed monthly and sent Tonia Giesecke at tgiesecke@irobot.com... -
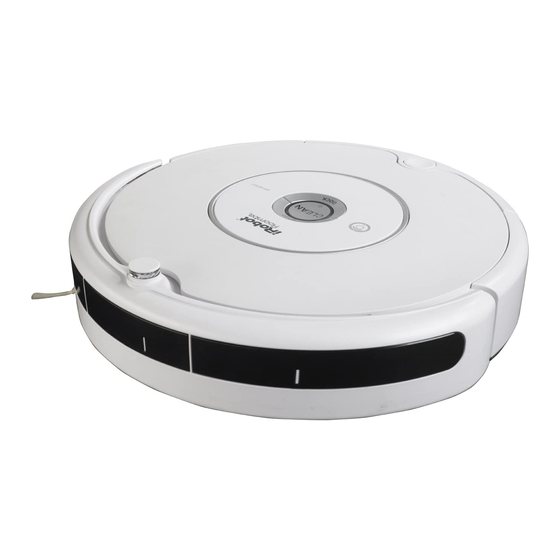
Page 10: Roomba 500 Series Vacuuming Robot
Roomba 500 Series Vacuuming Robot The iRobot Roomba 500 series includes the following improvements: • Better reliability, robustness and product life (R3 core robot has a 500% longer life vs. R2) • Enhanced mobility system improves room coverage • Light Houses guide Roomba to clean more rooms •... - Page 11 Bottom View Front Caster Wheel Electrical Contacts (not all models) Side Brush : 300 rpm* Drive Wheel : 80 rpm when driving straight Flapper : 1600 rpm* Main Brush : 1000 rpm* Brush Guard or Wire Bail Vacuum Bin ( with removable filter and squeegee) * rpm is revolutions per minute.
- Page 12 Top View (front panel removed) Top View (top chassis +user panel removed)
-
Page 13: Roomba Features And Compatibility
Roomba Features and Compatibility Base Robot 3.0 Base Robot 3.3 Base Robot 3.4 Base Robot 3.5 Model 510 Model 530 Model 535, 540 Model 550, 560, 565, 570, 580 Virtual Wall compatible? Home Base compatible? (no contacts) Light House compatible? (no RF) (no RF) compatible? - Page 14 Sensors on all Base Robots 4 optical infrared (IR) Light-touch sensors 4 optical IR cliff sensors 1 optical IR stasis 1 omni directional IR sensor in RCON 2 optical IR bumper switches 2 Hall Effect and magnetic encoder wheel encoders 2 mechanical switch wheel-drop sensors 1 battery-current sensor 2 wheel-current sensors...
-
Page 15: Roomba Cleaning Behavior And Technology
Roomba Cleaning Behavior and Technology The Roomba (500 Series) has three cleaning modes and will clean based on the cleaning mode you select. Clean Mode : Roomba automatically calculates the room size and adjusts its cleaning time appropriately. Spot Mode: Roomba will spiral approximately 3 feet in diameter and then spiral back to where it started, intensely cleaning a localized area. - Page 16 Normal Cleaning Behavior In normal cleaning behavior, Roomba switches between several different behaviors: o Drive – Roomba drives straight o Spiral – Roomba drives in an outward spiral pattern o Bounce – Bumper activation makes Roomba back up, turn in place, and drive straight o Wall follow –...
-
Page 17: Service Procedure (Based On Built-In-Test Failures)
Service Procedure (based on Built-in-Test Failures) Every Roomba that is serviced is required to undergo a Built-in-Test (BiT) which will then dictate how to best service the Roomba. A Roomba needs to pass the BiT before being returned to a customer. The following process is based on failed BiT steps or specific symptoms. - Page 18 Roomba BiT 5 to 7 – LIGHT TOUCH BUMPERS Troubleshooting : Clean front window along bumper. Do not use a black obstacle during test. Roomba Spare Part : Service or Core Robot Replacement Roomba BiT 8 – WHEEL DROP SENSOR Troubleshooting : Toggle wheels.
- Page 19 Roomba BiT 15 – STASIS Trouble shooting : Remove front caster module. Clean optical stasis window in chassis. Clean white/black wheel if dirty. Roomba Spare Part : Front Caster and Wheel Replacement Roomba BiT 16 – MAIN BRUSH Troubleshooting: Redo test with new brush and flapper. Ensure motor and pulley string of module is functioning.
- Page 20 Roomba BiT 19 – SIDE BRUSH Troubleshooting: Remove side brush and clean side brush from hair and dirt. Inspect side brush axle. Roomba Spare Part : Side Brush Module Replacement Roomba BiT 20 to 26 – CHARGING 20-26 Troubleshooting: Clean robot and Home Base contacts is necessary Roomba Spare Part : Service or Core Robot Replacement...
-
Page 21: Charging Accessories
Charging Accessories Battery Power Supply Home Base... -
Page 22: Roomba Battery
Roomba Battery Roomba is powered by a soft pack rechargeable NiMH (nickel metal hydride) battery made up of 12 cells. The battery can only be accessed by removing the bottom plate of the Roomba. A fully charged battery has a voltage between 15.5 and 18 V. The battery also has a thermistor and it relies on the change of resistance to measure battery temperature. -
Page 23: Roomba Power Supply
Roomba Power Supply Roomba’s are charged by either a Universal (100-240V) or Domestic (120V) Power Supply. The Power Supply steps the voltage down to 22.5VDC and 1.25A. A solid green LED light on the Power Supply is an indication that it is plugged in and operating properly. Roomba 500 Series Charging Algorithm Overview High level sequence 1. - Page 24 o Normal Charge Timeout : 9 hours maximum in normal charge mode. o Recovery Charge Timeout : 16 hours maximum in recovery charge mode. o Temperature Max : Battery temperature exceeds 60° C for at least 1 minute. o Voltage Max : Pack voltage exceeds 21.6V for at least 1 minute. o Previous end-of-charge : If a battery has been discharged by less than 150mAH since the last complete charge.
-
Page 25: Roomba Home Base
Roomba Home Base The Roomba Home Base is a self-charging station where the Roomba (through a sophisticated infrared tracking mechanism) can drive back to at the end of a clean cycle or when its battery is low. After docking itself, the Roomba will recharge its battery. The charging sequence takes about 3 hours in a normal charge and 16 hours in a recovery mode. -
Page 26: Manual Docking
Roomba needs to find the infrared signal of the Home Base in order to return so it is necessary to always keep the Home Base plugged in. The Home Base should be placed on a hard level surface and in an area where Roomba has a clear path to return to the Home Base at the end of a cleaning cycle. If Roomba is unable to dock on its first attempt, it will try again until it successfully docks. -
Page 27: Roomba Accessories
Roomba Accessories Virtual Wall Light House Wireless Command Center... -
Page 28: Roomba Virtual Wall
Roomba Virtual Wall The Roomba Virtual Walls create an invisible barrier that Roomba will not cross. The Virtual Walls can be set to block an area ranging from 0 to 2.4 meters long. Light Houses turn off automatically after 2 hours. Force Field Emitter (Avoid collision) Infrared Beam Emitter... - Page 29 Virtual Wall Troubleshooting • If the Virtual Wall is turned on but the battery status light is off or flashing, the batteries are low. Check the batteries and the virtual battery door. When replacing batteries wait 5 seconds between removal and insertion for a full reset. Also, choosing a higher range in Virtual Wall than necessary will drain the battery faster.
-
Page 30: Roomba Virtual Wall Light House
Roomba Virtual Wall Light House Light Houses help Roomba navigate around a home, helps Roomba find the Home Base, and allow Roomba to clean one room before starting the next. There is a mode selector to choose either Virtual Wall or Light House mode. In either mode, the Light House will automatically turn ON when the Roomba is on and within radiofrequency range (~15 meters). - Page 31 Light House Troubleshooting o Complaint : Customer gets a new Service Roomba (models 535 and above) and the old Light Houses stop working properly. Solution : Have the customer remove all the Light House batteries and reinsert them (flushes Light House memory). Background : When a customer first uses their new Roomba, all new Light house within RF range will turn on.
-
Page 32: Roomba Wireless Command Center (Base Robot 3.4 And 3.5 Only)
Roomba Wireless Command Center (Base robot 3.4 and 3.5 only) The Wireless Command Center allows a user to remotely turn the Roomba on or off, be directed and scheduled. To schedule a Roomba to clean, use the buttons on the Wireless Command Center as if they were on the robot user panel itself. -
Page 33: Roomba 500 Series Errors
Roomba 500 Series Errors Roomba 500 Series Pause Errors(‘uh-oh’ + beeps) When a Roomba experiences an error it will stop cleaning and emit an error. A pause error will always have an “uh-oh” followed by beeps and perhaps even a voice message. The beep errors can be replayed by hitting the bumper. -
Page 34: Roomba 500 Series Behavioral Issues
Bumper This might occur in a +11-beeps no-bump Roomba’s bumper is not large room such as a registering obstacles after four gymnasium. Try using a straight runs of 6 meters virtual wall to contain Roomba. +12-beeps cliff-sensors-failed Go to “Cliff Issues” Cliff sensor failure below *NOTE: Error code beeps will not always be accompanied by a voice message. - Page 35 • Replace core robot if all fixes fail. Drive Wheel Module issue “Please inspect and clean Roomba’s wheel” “Uh-Oh” + 1 beep (wheel drop error) Customer observations “Uh-Oh” + 5 beeps (drive stall error) “Uh-Oh” + 7 beeps (wheel drop rate error) Robot spins around in circles –...
- Page 36 Roomba’s front wheel is squeaking or dragging. Frequent panic spins (Roomba abruptly changes course with a rapid spin in either direction). Most common causes: Front wheel is clogged and cannot spin. Troubleshooting: • FRONT WHEEL Module inspection and cleaning (Appendix C). •...
- Page 37 The side brush module has entered anti-tassel behavior. The side brush Most common causes: may spin slowly or briefly spin backwards in order to escape from carpet tassels or wires. The robot may occasionally enter this behavior on thick or high-pile carpets. This is normal. Troubleshooting: •...
- Page 38 Most common causes: • Home Base placement is not appropriate • Electrical contacts on Home Base or Robot are dirty • Make sure Light Houses are set to “Light House” mode rather than “Virtual Wall” mode. Troubleshooting: • Check for proper Home Base and Light House placement as described in the owner’s manual.
-
Page 39: Roomba 500 Series Charging Errors
Roomba 500 Series Charging Errors CLEAN/POWER light flashes orange and blinks every 2 seconds for a number times indicated below. For charging errors that do not produce error codes, see Battery and Runtime issues. # of Robot Robot What it means What to do Robot Display... - Page 40 1. Move charging setup to a cooler Battery overheated. environment and make sure there Charging This occurs when the Err6 is no object on top of robot. blinks Error 6 battery temperature is 2. If problem persists, replace over 75°C for 1 second. Battery and Robot.
- Page 41 Battery and Runtime issues Customer observations Short battery runtime. Robot doesn’t charge on Home Base. Robot does not turn on. Power supply light blinks or goes out. Most common causes: • If charging error blinks, consult charge error table. Troubleshooting: •...
-
Page 42: Appendix A : Roomba 500 Series Built-In-Test Procedure
Appendix A : Roomba 500 Series Built-in-Test Procedure Start with Roomba powered OFF by pressing the CLEAN button for a few seconds. To enter : Perform these Key Sequences: Hold CLEAN and DOCK and pulse SPOT 3 times. Auto-advance Built-in-Test Release buttons Manual-advance Built-in-Test Hold CLEAN and DOCK and pulse SPOT 6 times. - Page 43 o Power Roomba OFF by pressing the CLEAN button for a few seconds. o For AUTO-ADVANCE mode hold down the CLEAN and DOCK buttons and press the SPOT button 3 times. Release buttons. o For MANUAL-ADVANCE mode: hold down the CLEAN and DOCK buttons and press the SPOT button 6 times.
-
Page 44: Auto-Advance Mode
AUTO-ADVANCE MODE This is designed to be used on the assembly line. In this mode, the robot internally decides PASS/FAIL for each test number. The test advances automatically so each sensor or actuator is tested only once. In AUTO-ADVANCE mode: o Activate the sensors for each sub-test in order as described in the chart below. -
Page 45: Data Collection
The robot CANNOT be powered off and will not respond to any buttons until the BATTERY IS REMOVED (do not do this unless the procedure calls for it). DATA COLLECTION In both manual and automatic advance modes, data can be collected by connecting a serial cable under the face plate to the computer. -
Page 46: Summary Of Electrical Constants
SUMMARY: (left-wheel-stall?) PASS SUMMARY: (drive-speed-ok? left forward) PASS SUMMARY: (drive-speed-ok? right stopped) PASS SUMMARY: (left-drive-current-ok?) PASS mA -86 min -150 max -75 mV 16031 degrees-C 37 SUMMARY: (left-drive-stall-current-ok?) PASS mA -804 min -850 max -700 mV 15919 degrees-C 37 SUMMARY: (right-wheel-stall?) PASS SUMMARY: (drive-speed-ok? right forward) PASS SUMMARY: (drive-speed-ok? left stopped) PASS SUMMARY: (right-drive-current-ok?) PASS mA -90 min -150 max -75 mV 16031 degrees-C 37... -
Page 47: Built-In-Test Chart
BUILT-IN-TEST CHART The following chart describes how to use each built-in-test number. To PASS the built-in-test in AUTO-ADVANCE mode, the user must perform the actions EXACTLY AS DESCRIBED. Check Robot Spot Dock Test Name Tester Action Robot Action Check correct flashing of LEDs. - Page 48 Briefly put your hand in front of the center- Center Light- left light touch sensor Center left Center right touch to simulate a well. light-touch light-touch sensors Then do the same for detected detected the center-right light touch sensor. Briefly lift robot to cause a wheel drop Wheel drop Wheel drop...
- Page 49 Stasis signal (caster Stasis Turn the front caster. rotation switch). Make sure brush is unobstructed. Wait until DOCK is on and Main brush solid and brush is turns in Brush Brush current Main Brush turning forward. Then backwards overcurrent briefly stall the main then turns stall.
-
Page 50: Roomba Black Box
Dock / Wall- Dock / Wall- Mount Mount Trickle No user action. Charger charger current OK Trickle available. Bootloader No user action. Black-box No user action. variables RF Post Verify RF No user action. passed Audio flash No user action. check Cliff No user action. - Page 51 Passing values for BIT summary Model 3.5 & 3.4 Model 3.3 Model 3 bit-summary-0-15 65504 64512 64512 bit-summary-16-31 65023 65023 61951 bit-summary-32-47 48111 48111 48111 bit-summary-48-63 65275 65275 16123 bit-summary-64-79 Example Black Box output : run-time-hours run-time-minutes factory-test-passed? bit-summary-0-15 65504 bit-summary-16-31 65023 bit-summary-32-47...
- Page 52 avg-mission-minutes n-incomplete-missions n-complete-missions last-state-0 last-state-1 last-state-2 last-state-3 last-state-4 last-state-5 last-state-6 last-state-7 last-state-8 last-state-9 last-pause-id-0 last-pause-id-1 last-pause-id-2 last-pause-id-3 last-pause-id-4 last-pause-id-5 last-pause-id-6 last-pause-id-7 last-pause-id-8 last-pause-id-9 max-discharge-temp-avg max-charge-temp-avg n-no-current-errors n-app-exceptions charging-bbox-unused-5 charging-bbox-unused-6 charging-bbox-unused-7 charging-bbox-unused-8 charging-bbox-unused-9 charging-bbox-unused-10 last-panic-id-0 last-panic-id-1 last-panic-id-2 last-panic-id-3 last-panic-id-4 mission-runtime-minutes mission-runtime-hours voice-demo-listen-count n-clean-cycles-in-open-loop calib-validation...
-
Page 53: Appendix B : Roomba 500 Series Mobility Test Procedure
Appendix B : Roomba 500 Series Mobility Test Procedure The Mobility Test procedure for tests the robot’s mobility and sensors across 5 different test floors, of which service centers need only conduct Test Floor 3. Tests Performed Floor/Fixture Test Floor # o light-touch-max-distance Test Floor 1 o light-touch-min-distance... -
Page 54: Mobility Test Procedure
For AUTO-ADVANCE mode: o Power Roomba OFF by pressing the CLEAN button for a few seconds. o Hold CLEAN and DOCK and pulse SPOT 9 times Auto-advance Mobility Test (AMT) When the AMT is paused, the numeric display will show “NEXT” (in Scheduler models) When the AMT is prevented from running due to a failed BIT, the numeric display will show “BIT”... -
Page 55: Mobility Table 3 Construction Specifications (In Mm)
MOBILITY TABLE 3 CONSTRUCTION SPECIFICATIONS (IN MM) Metal threshold on long carpet edge only Wrap carpet around the edges of the floor... -
Page 56: Robot Rcon Test
ROBOT RCON TEST The procedures for this test are 1. Build a fixture which can rotate around robot’s RCON lens as shown below 2. Put a Virtual Wall (VW) 1.5 m away from robot’s RCON lens. 3. Put robot into Built-in-Test #9. 4. -
Page 57: Virtual Wall Test
VIRTUAL WALL TEST The procedures for this test are 1. Put the robot in Built-in-Test # 9. 2. Turn Virtual Wall (VW) on (make sure the VW is not pulsing or off). If in doubt you can verify that the VW emitters are on using IR viewer or a digital camera. 3. -
Page 58: Light House Test
LIGHT HOUSE TEST The procedures for this test are 1. Put batteries in the Light House. Make sure for each new robot, the battery should be removed and reinstalled. 2. Start a robot near the Light House and verify that the LED light on top of the Light House will go green. -
Page 59: Home Base And Docking Test
HOME BASE AND DOCKING TEST The procedures for this test are DOCKING / NAVIGATION BEAM TEST : 1. Place the Home Base on the floor, plugged in. 2. Place the robot in front of the Home Base about 1.5 m away, within the expected beams. 3. -
Page 60: Appendix C : Module Inspection And Cleaning
Appendix C : Module Inspection and Cleaning DRIVE WHEEL Module inspection and cleaning Check the wheels for obstructions. Push the wheels up and down several times and shake out any loose debris that may be trapped in the wheel well. Make sure the wheels turn freely. -
Page 61: Cleaning Head Module Inspection And Cleaning
CLEANING HEAD Module inspection and cleaning Check if main brushes are spinning by running the robot with the vacuum bin removed. Remove Brushes and clean them if dirty. Make sure both yellow main brush caps are installed correctly. If not, send replacement brush caps. Make sure the main brush and the flapper brush each have a yellow bearing installed correctly. -
Page 62: Side Brush Module Inspection And Cleaning
SIDE BRUSH Module inspection and cleaning If side brush is going backwards then the side brush module has entered anti-tassel behavior. The side brush may spin slowly or briefly spin backwards in order to escape from carpet tassels or wires. The robot may occasionally enter this behavior on thick or high-pile carpets. This is normal. -
Page 63: Vacuum Bin Module Inspection And Cleaning
VACUUM BIN Module inspection and cleaning Make sure filter is properly installed. Replace if necessary. Make sure rear squeegee is properly installed. Check for wear and tear on both front and rear squeegees. Wipe dust off vacuum bin contacts with finger or pencil eraser. -
Page 64: Appendix D: Roomba Spare Parts Replacement Instructions
Appendix D: Roomba Spare Parts Replacement Instructions Roomba Spare Parts Bottom Cover with 4 screws – (US, EU, Sing, Japan, Korea) Core Robot/Chassis Base Robot 3.0 – (US, EU, Singapore, Japan, Korea) Core Robot/Chassis Base Robot 3.4 – (US, EU, Singapore, Japan, Korea) Core Robot/Chassis Base Robot 3.5 –... -
Page 65: Roomba Spare Parts Replacement (Battery, Side Brush, Cleaning Head And Wheel Modules)
Side Brush Module Side brush with Screw Cleaning Head Module Bristle Brush Flapper Brush Brush end caps Brush Bearings Wire Bale Vacuum Bin Module Filter Frame Filter Removable Squeegee Bin Grill Cover (Green, White, Black) Battery Replaceable rubber dust shield Roomba Accessory Spare Parts WCC Battery Door Virtual Wall Battery Door... - Page 66 2. Remove spinning side brush 3. Loosen 4 screws on the base plate. (The screws are captured in the plastic so do not try to take them out.) 4. Remove Roomba’s base cover and set aside BATTERY MODULE Remove Battery by lifting the pull tabs. Replace with new Battery using pull tabs.
- Page 67 WHEEL BRUSH MODULE Remove the 3 screws that retain Roomba’s wheel module. Remove Roomba’s wheel module. Install Roomba’s new wheel module. Replace the 3 screws that retain the wheel module. CLEANING HEAD MODULE 1. Remove the 4 screws that retain Roomba’s cleaning head module.
- Page 68 5. Replace Roomba’s bottom cover and the 4 screws that retain the bottom cover. 6. Replace spinning side brush and screw...
-
Page 69: Roomba Faceplate Replacement
Roomba Faceplate Replacement 1. Remove Roomba’s vacuum bin. 2. Remove Roomba’s faceplate by pulling up from the bin. The faceplate is secured in several places. Lift the handle to make removal easier. 3. Install Roomba’s faceplate by inserting the tabs into the appropriate slots, and then pushing down firmly on the inside and outside edges of Roomba’s faceplate. -
Page 70: Roomba Filter Replacement
Roomba Filter Replacement 1. Remove Roomba’s vacuum bin. 2. Open Roomba’s filter compartment. 3. Remove Roomba’s old filter by pushing it upward. 4. Install Roomba’s new filter. 5. Close Roomba’s filter compartment. 6. Re-insert Roomba’s vacuum bin. -
Page 71: Roomba Front Wheel Replacement
Roomba Front Wheel Replacement 1. Remove the front wheel module by lifting it out of the bottom chassis. 2. Remove the wheel and axle and clear it of hair and debris Reinsert the wheel and module back into the chassis. Appendix E: Roomba Software &... -
Page 72: Appendix F: Battery Test Procedure
Appendix F: Battery Test Procedure Using Battery Voltage Tester To measure the voltage across a Roomba 500 series battery, to measure voltage across a 5-Ohm resistor, and to measure the Objective : thermistor resistance. Equipment : Battery Voltage Tester, Multimeter, and fully charged battery under test. Method Fully charge battery with Roomba and latest software. -
Page 73: Appendix G: Power Supply Test Procedure
Appendix G: Power Supply Test Procedure For 1.25A Power Supply AC Voltmeter, DC voltmeter, ammeter, variable voltage AC supply, power resistor (18 ohm 50 W for 1.25 A charging Equipment: brick). Method Plug power supply into variable voltage AC supply with AC voltmeter connected across AC supply. Connect resistive load (18 ohm 50 W) across output of power supply, with DC ammeter connected in series to measure current supplied to load. -
Page 74: Appendix I: Roomba Serial Number
Appendix I: Roomba Serial Number Robot Barcode Serial Number Format (barcode sticker on inside chassis – seen when vacuum bin is removed) Manufacturer ID: 'JE' or ‘KY’ or 'PR' Status: 'N' for new, 'R' for remanufactured LLLLL Model number (00000 - 09999) Year (since 2000) this robot was manufactured Month this robot was manufactured Day of the month this robot was manufactured... -
Page 75: Appendix J: User Interface
Appendix J: User Interface CLEAN Light While charging : No Light Green Yellow -Battery depleted. -Solid green when -Pulsing slow when charging -Flashes red if finished charging. in normal mode. battery has failed -Pulsing fast when charging in recovery mode. While cleaning : No Light Green... -
Page 76: Appendix K: Glossary
Appendix K: Glossary o Built in test Black Box o Robot data recorder that tracks information during the robot’s life. Chassis o The plastic structure/frame of the Roomba o The cleaning assembly includes the pivoting self adjusting frame Cleaning frame assembly that supports the brushes, brush guard, brush motor and gearbox.
Need help?
Do you have a question about the Roomba 570 and is the answer not in the manual?
Questions and answers