
Related Manuals for Intel SCB2 - Server Board Motherboard


Summary of Contents for Intel SCB2 - Server Board Motherboard
- Page 1 Intel Server Board SCB2 ® Product Guide ® A Guide for Technically Qualified Assemblers of Intel Identified Subassemblies/Products Order Number: A55880-003...
- Page 2 Disclaimer Information in this document is provided in connection with Intel products. No license, express or implied, by estoppel or otherwise, to any intellectual property rights is granted by this document. Except as provided in Intel’s Terms and Conditions of Sale for such products, Intel assumes no liability whatsoever, and Intel disclaims any express or implied warranty, relating to sale and/or use of Intel products including liability or warranties relating to fitness for a particular purpose, merchantability, or infringement of any patent, copyright or other intellectual property right.
-
Page 3: Table Of Contents
Contents 1 Description Server Board Features ......................7 Server Board Connector and Component Locations ............ 8 Back Panel Connectors ....................9 Processor ........................10 Memory ........................10 PCI Riser Slots ........................10 Video...........................11 SCSI Controller ........................11 ATA-100 Controller......................11 IDE RAID........................11 Network Controller.......................12 Network Teaming Features..................12 Keyboard and Mouse ......................14 RJ-45 Serial Port .........................14 ACPI............................16... - Page 4 Using Platform Event Paging ..................74 Software Updates........................75 Creating a Bootable Diskette ..................75 Software Update Package....................75 Preparation .........................75 Extraction ........................76 Updating ........................76 Individual Updates.......................77 BIOS Upgrade Description..................77 Firmware Update Utility Description ................79 FRU/SDR Load Utility Description ................79 Intel Server Board SCB2 Product Guide...
- Page 5 5 Solving Problems Resetting the System ......................83 Initial System Startup......................83 Checklist ........................83 Running New Application Software..................84 Checklist ........................84 After the System Has Been Running Correctly ..............84 Checklist ........................84 More Problem Solving Procedures ..................85 Preparing the System for Diagnostic Testing ..............85 Monitoring POST ......................85 Verifying Proper Operation of Key System Lights ............85 Confirming Loading of the Operating System..............85...
- Page 6 7. BIOS Setup Menu Navigation ..................44 8. BIOS Setup Menu Display .....................45 9. Command Line Format ....................80 10. Configuration Jumper ....................91 11. Post Codes........................92 12. Power Usage Worksheet 1 ..................102 13. Power Usage Worksheet 2 ..................103 Intel Server Board SCB2 Product Guide...
-
Page 7: Description
The feature set listed in Table 2 only reflects usage with either the ® ® 1U Intel SR1200 or the 2U Intel SR2200 server chassis. Third-party or OEM chassis may not provide all of the features listed below. Table 2. -
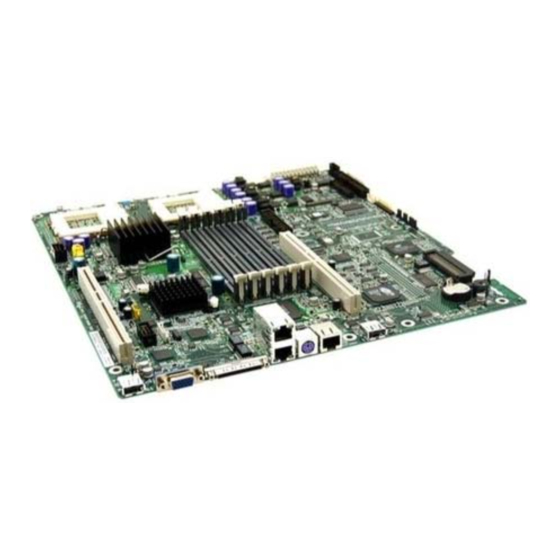
Page 8: Server Board Connector And Component Locations
EE. ATA-100 connectors (ATA version only) O. Secondary processor socket FF. SCSI connector (SCSI version only) Primary processor socket GG. Hard Disk Drive LED header Q. Sys fan 2 connector Figure 1. Server Board Connector and Component Locations Intel Server Board SCB2 Product Guide... -
Page 9: Back Panel Connectors
Back Panel Connectors OM11713 USB 1 connector Video connector C. SCSI connector (SCSI server board only) D. NIC 2 RJ-45 connector Green Status LED Yellow Status LED G. NIC 1 RJ-45 connector H. Green Status LED Yellow Status LED PS/2 keyboard/mouse connector RJ-45 serial port USB 2 connector Figure 2. -
Page 10: Processor
Processor The SCB2 accommodates one or two Intel Pentium III processors with 512k cache in the FC-PGA2 package. This processor uses the .13 micron technology and offers advanced performance. The processor external interface operates at a maximum of 133 MHz. For a complete list of supported processors see: http://support.intel.com/support/motherboards/server/scb2... -
Page 11: Video
Video The SCB2 uses an ATI RAGE XL PCI graphics accelerator with 8 MB of video SDRAM that † supports all standard IBM VGA modes. The embedded SVGA video subsystem supports: Pixel resolutions up to 1600 x 1200 under 2D and 1024 x 768 under 3D CRT and LCD monitors up to 100 Hz vertical refresh rate The server board supports disabling of the onboard video through the BIOS setup menu or when a plug in video card is installed in any of the PCI slots. -
Page 12: Network Controller
Network Controller NOTE To ensure EMC product regulation compliance, the system must be used with a shielded LAN cable. † The server board uses two Intel ® 82550PM Fast Ethernet Controllers and supports two 10Base-T/100Base-TX network subsystems. The 82550 PM controller supports the following features: 32-bit PCI, CardBus master interface †... - Page 13 Also includes AFT. Works with any 10Base-TX or 100Base-TX switch. † ® Fast EtherChannel (FEC) or Intel Link Aggregation - creates a team of up to 8 adapters to increase transmission and reception throughput. Also includes AFT. Requires a FEC-enabled switch.
-
Page 14: Keyboard And Mouse
RJ45 serial port. The 8 pins of the RJ45 connector can be configured to match either of two pin-out standards used by serial port concentrators. To accommodate either standard, the J6A2 jumper block located directly behind the rear RJ45 serial port must be jumpered appropriately according to which standard is desired. Intel Server Board SCB2 Product Guide... -
Page 15: J6A2 Jumper Block For Dcd Signal
NOTE By default, as configured in the factory, the SCB2 baseboard will have the rear RJ45 serial port configured to support a DSR signal. For serial concentrators that require a DCD signal, the J6A2 jumper block must be configured as follows: The DCD jumper in position 2 and 3 and the DSR jumper in position 2 and 3. -
Page 16: Acpi
Soft off: Only the RTC section of the CSB and the BMC are running in this state. No context is saved by the OS or hardware. CAUTION The system is off only when the AC power cord is disconnected. Intel Server Board SCB2 Product Guide... -
Page 17: Security
Security Intrusion Switch Monitoring ® To help prevent unauthorized entry or use of the server, Intel Server Control server management software monitors the chassis intrusion switch if one is installed. Opening an access cover will transmit an alarm signal to the server board, where BMC firmware and server management software process the signal. -
Page 18: Software Security Features
To write protect access to diskette whether the server is in secure mode or not, use the Setup main menu, Floppy Options, and specify Floppy Access as read only. continued Intel Server Board SCB2 Product Guide... - Page 19 Table 4. Software Security Features (continued) Feature Description Set a time out period Specify and enable an inactivity time out period of from 1 to 120 minutes. so that keyboard and If no keyboard or mouse action occurs for the specified period, attempted keyboard mouse input are not and mouse input will not be accepted.
- Page 20 Intel Server Board SCB2 Product Guide...
-
Page 21: Installation Procedures
2 Installation Procedures Install the I/O Shield NOTE An ATX 2.03-compliant I/O shield is provided with the server board. The shield is required by Electromagnetic Interference (EMI) regulations to minimize EMI. If the shield does not fit the chassis, obtain a properly sized shield from the chassis supplier. -
Page 22: Rearrange The Standoffs
Failure to properly rearrange the metal standoffs may cause the server board to malfunction and may permanently damage it. Your chassis may be different from the illustration. OM11716B Figure 6. Rearrange the Standoffs Intel Server Board SCB2 Product Guide... -
Page 23: Server Board Bumpers
Server Board Bumpers If you are installing your server board in a non-Intel chassis, you must provide and install rubber bumpers at the locations shown below. They must be the same height as the existing board mount standoffs. CAUTION ®... -
Page 24: Install The Server Board
I/O openings. 2. Adjust board position to align mounting holes with standoffs. 3. Using the screws that came with your chassis, mount the board to the chassis. OM11716A Figure 8. Installing the Server Board Intel Server Board SCB2 Product Guide... -
Page 25: Installing Processors
Installing Processors 1. Observe the safety and ESD precautions at the beginning of this document. 2. Raise the locking bar on the socket. OM11711 Figure 9. Raising the Locking Bar 3. Aligning the pins of the processor with the socket, insert the processor into the socket. 4. -
Page 26: Installing The Heat Sink
7. Aligning the raised metal surfaces, place the heat sink on top of the processor. 8. Install the heat sink clip with pin (1) inserted into slot (2). OM11708A Figure 11. Installing the Heat Sink Heat sink retention clip Heat sink C. Socket and processor Intel Server Board SCB2 Product Guide... -
Page 27: Closing The Locking Lever
Figure 12. Closing the Locking Lever NOTE When using the boxed Intel Pentium III processor, compatible with the SCB2 server board, it will come with a fan for the processor heat sink. This fan cannot be used in a 1U server chassis. If you are integrating a 2U chassis, proceed to the next step. -
Page 28: Install The Processor Terminator
2. Aligning the two corner marks on the terminator with the handle-side of the socket (C), insert the terminator into the socket. 3. Lower the locking bar completely (D). OM11710 Figure 14. Installing the Processor Terminator Intel Server Board SCB2 Product Guide... -
Page 29: Memory
DIMMs must be installed in pairs and in the following order: 1a and 1b, 2a and 2b, 3a and 3b. Installed DIMMs must be the same speed and must all be registered. For a list of supported memory, call your service representative or visit the Intel Support website: http://support.intel.com/support/motherboards/server OM11715 Figure 15. -
Page 30: Connect Cables
ATA-100 primary/secondary connectors (ATA server board only) C. SSI front panel connector (see the server board diagram label for pin out) D. Front panel connector (For use in a non Intel chassis only) IDE connector (For use in a non Intel chassis only) Main power connector G. -
Page 31: Upgrading
3 Upgrading Tools and Supplies Needed Jumper removal tool or needle nosed pliers † Phillips (cross head) screwdriver (#1 bit and #2 bit) Pen or pencil Antistatic wrist strap and conductive foam pad OM11717A (recommended) Cautions These warnings and cautions apply throughout this chapter. Only a technically qualified person should configure the server board. -
Page 32: Memory
1a and 1b, then 2a and 2b, then 3a and 3b. Installed DIMMs must be the same speed and must all be registered. For a list of supported memory, call your service representative or visit the Intel Customer Support website: http://support.intel.com/support/motherboards/server/scb2... -
Page 33: Processors
Make sure your server can handle a newer, faster processor (thermal and power considerations). For exact information about processor interchangeability, contact your customer service representative or visit the Intel Customer Support website: http://support.intel.com/support/motherboards/server/scb2... -
Page 34: Adding Or Replacing A Processor
(refer to Installing and Removing a Terminator on page 38). The second processor must be compatible with the first processor (within one stepping, same voltage, same speed, see the Intel Customer Support website for specifics). 1. Observe the safety and ESD precautions given at the beginning of this chapter. -
Page 35: Installing The Heat Sink
6. Follow the instructions packaged with your boxed processor for preparing the heat sink and processor for installation. 7. Position the heat sink slot (2) above the socket/processor slot (3). 8. Aligning the raised metal surfaces, place the heat sink on top of the processor. 9. -
Page 36: Attach The Heat Sink
Figure 20. Attach the Heat Sink NOTE When using the boxed Intel Pentium III processor, compatible with the SCB2S server board, it will come with a fan for the processor heat sink. This fan cannot be used in a 1U server chassis. If you are integrating a 2U chassis, proceed to the next step. -
Page 37: Removing A Processor
Removing a Processor 1. Observe the safety and ESD precautions at the beginning of this chapter and the additional cautions given here. 2. If a heat sink fan is present, unplug it from the server board and remove it from the heat sink. 3. -
Page 38: Installing And Removing A Terminator
4. To remove a terminator, pull it out of the socket and then replace the it with another terminator or install a processor. 5. Lower the locking bar (B) completely. OM11710 Figure 22. Installing a Terminator Intel Server Board SCB2 Product Guide... -
Page 39: Replacing The Back Up Battery
Replacing the Back up Battery The lithium battery on the server board powers the real time clock (RTC) for up to 10 years in the absence of power. When the battery starts to weaken, it loses voltage, and the server settings stored in CMOS RAM in the RTC (for example, the date and time) may be wrong. -
Page 40: Replacing The Back Up Battery
9. Push the battery down—the metal retainer locks the battery in the socket. 10. Close the chassis. 11. Run Setup to restore the configuration settings to the RTC. 12. Restore your custom BIOS settings. OM11714A Figure 23. Replacing the Back up Battery Intel Server Board SCB2 Product Guide... -
Page 41: Configuration Software And Utilities
It is highly recommended that you install the service partition before installing an operating system. For more information, see the Service Partition section in the Installation Guide for the Intel Server Control. This document is included on the Resource CD-ROM shipped with your SCB2 server board. -
Page 42: Hot Keys
Abort memory test during POST. <ESC> (Press while BIOS is updating memory size on screen.) Display a menu for selecting the boot device. <ESC> (Press anytime after memory check.) To remove the splash screen. <ESC> Intel Server Board SCB2 Product Guide... -
Page 43: Power-On Self-Test (Post)
Power-On Self-Test (POST) Each time you turn on the system the BIOS begins execution of the Power-On Self-Test (POST). POST discovers, configures, and tests the processors, memory, keyboard, and most installed peripheral devices. The time needed to test memory depends on the amount of memory installed. POST is stored in flash memory. -
Page 44: Record Bios Setup Settings
Change the value of an item + or - Select an item or display a submenu <Enter> Leave a submenu or exit BIOS Setup <Esc> Reset to BIOS Setup defaults <F9> Save and exit BIOS Setup <F10> Intel Server Board SCB2 Product Guide... -
Page 45: Main Menu
Table 8. BIOS Setup Menu Display When you see this: What it means: An option is grayed out and not accessible You cannot change or configure the option in that menu screen for one of the following reasons: The option is auto-configured or auto-detected. The field is informational only. -
Page 46: Advanced Menu
Plug & Play O/S Selecting “No” lets the BIOS configure all the devices in the system. Selecting “Yes” allows the OS configure Plug and Play devices. NumLock Enables or disables the “Numlock” function at power Intel Server Board SCB2 Product Guide... -
Page 47: Pci Configuration Submenu
Onboard Video Press <Enter> Enters Submenu Riser Card This option will only be displayed if a non-Intel chassis is used. Override Enabled If enabled, all six options for PCI slots will be displayed If disabled, only two options for PCI slots will be displayed... -
Page 48: Peripheral Configuration Submenu
#3 Memory Retest Disabled If enabled, BIOS will activate and retest all DIMMs on the next system boot. This option will be automatically Enabled reset to disabled on the next system boot. Intel Server Board SCB2 Product Guide... -
Page 49: Security Menu
Advanced Chipset Control Submenu Feature Option Description Wake on Ring Disabled Legacy wake only: Determines the action of the system when the system power is off and the modem is ringing. Enabled Wake on LAN Disabled Legacy wake only: Determines the action of the system when a LAN wake up event occurs. -
Page 50: Server Menu
POST Error Pause Disabled If enabled, the system will wait for user intervention on critical POST errors. Enabled Platform Event Filtering Disabled Enable/Disable triggers for system sensor events inside the Baseboard Management Controller (BMC). Enabled Intel Server Board SCB2 Product Guide... -
Page 51: System Management Submenu
System Management Submenu Feature Choices Description Board Part Number Information field only Board Serial Number Information field only System Part Number Information field only System Serial Number Information field only Chassis Part Number Information field only Chassis Serial Number Information field only BIOS Revision Information field only BMC Revision... -
Page 52: Boot Menu
For options on this menu, use the up or down arrow keys to select a device. Feature Option Description Lists Bootable Removable devices in Select one of the This list includes legacy 1.44-MB floppy the system. detected devices drives and 120-MB floppy drives. Intel Server Board SCB2 Product Guide... -
Page 53: Exit Menu
ATAPI CDROM Drives Submenu For options on this menu, use the up or down arrow keys to select a device. Feature Option Description Lists Bootable Removable devices in Select one of the This includes any ATAPI CDROM Drive the system. detected devices installed Exit Menu... -
Page 54: Permanently Changing The Boot Device Priority
<<<Press <Ctrl><A> for SCSISelect(TM) Utility!>>> 2. Press <Ctrl+A> to run the utility. When the main menu for the host adapter appears, choose the device that you want to configure—each SCSI bus accepts up to 15 devices. Intel Server Board SCB2 Product Guide... -
Page 55: Configuring The Adaptec Aic-7899 Scsi Adapter
Use the following keys to navigate through the menus and submenus: SCSISelect Navigation Keys Press Exit the utility Enter Select an option Return to a previous option Move to the next option Switch between color and monochrome Reset to host adapter defaults Configuring the Adaptec AIC-7899 SCSI Adapter The Adaptec AIC-7899 SCSI adapter has two busses. -
Page 56: When To Run The Promise Fastbuild Utility
2. Press <Ctrl+F> to run the utility. Direct Platform Control (DPC) Console Direct Platform Control (DPC) Console is part of Intel Server Control. Direct Platform Control is a server management application that supports remote system management via LAN, or an RS-232 serial connection to the server COM2 port over a modem or a direct serial cable. -
Page 57: Dpc Console Modes Of Operation
DPC Console Modes of Operation There are three DPC console modes of operation: EMP mode. Access the DPC console features using the DPC console window menus and/or toolbar. Active when a connection is established through the EMP port. DPC over LAN mode. Access the DPC console features using the DPC console window menus and/or toolbar. -
Page 58: What You Need To Do
Follow the instructions in the menu to start the SSU. 3. When the SSU title appears on the screen, press <Enter> to continue. 4. The mouse driver loads if it is available; press <Enter> to continue. Intel Server Board SCB2 Product Guide... -
Page 59: Customizing The Ssu
5. This message appears: Please wait while the Application Framework loads..6. When the main window of the SSU appears, you can customize your interface before continuing. (See Figure 24.) Figure 24. System Setup Utility Main Window Customizing the SSU The SSU lets you customize your interface according to your preferences. -
Page 60: Launching A Task
To Set your Password 1. Click on your password button. 2. Enter the password in the first field. 3. Confirm the password by entering it again in the second field. Intel Server Board SCB2 Product Guide... - Page 61 To Change or Clear your Password 1. Click on your password button. 2. Enter the old password in the first field. 3. Enter the new password in the second field (or leave blank to clear). 4. Confirm the password by entering it again in the second field (or leave blank to clear). Admin Password Button The ‘Admin Password’...
-
Page 62: Sel Manager Add-In
All Events: Displays the current SEL data from the BMC. Reload: Allows the user to re-load the SEL entries from the server. Help The Help menu has the following option: Help Topics: Displays the SEL Manager version information. Intel Server Board SCB2 Product Guide... -
Page 63: Fru Manager Add-In
FRU Manager Add-in The FRU Manager is an add-in module, which allows users to view the FRU inventory areas on the server machine. The FRU Manager will have the functionality to display the FRU inventory areas in an interpreted, easy-to-understand textual form. The add-in allows users to do the following operations: 1. -
Page 64: Sdr Manager Add-In
Update the BIOS from .bio or .uif files. The System Update Add-in has the following menus: File The File menu has the following options: Load: Select the file to use in the update. Exit: Quits the System Update Add-in. Intel Server Board SCB2 Product Guide... -
Page 65: Configuration Save/Restore Add-In
Area The Area menu has the following options: Update: Use the loaded file to update the system. If a file was not selected, the system will prompt you for one. Verify: Compares the contents of the nonvolatile storage with the selected file. If a file was not selected, the system will prompt you for one. -
Page 66: Platform Event Manager Add-In
BMC LAN-Configuration features. Configure EMP: Opens a new dialog that allows you to configure the Emergency Management Port features. Close: Exits the Platform Event Manager and returns you to the AF. Help: Displays help information. Intel Server Board SCB2 Product Guide... -
Page 67: Platform Event Paging Dialog
Platform Event Paging Dialog This dialog allows you to configure the Platform Event Paging features. (See Figure 26.) Figure 26. Platform Event Paging Dialog File The File menu has the following options: Save: Allows you to save the configuration immediately. Close: Allows you to close the Platform Event Paging dialog without saving changes. -
Page 68: Bmc Lan-Configuration Dialog
Help: Displays help information. BMC LAN-Configuration Dialog This dialog allows you to configure the BMC LAN-Configuration features. (See Figure 27.) Figure 27. BMC LAN-Configuration Dialog Intel Server Board SCB2 Product Guide... - Page 69 File The File menu has the following options: Save: Allows you to save the configuration immediately. Close: Allows you to close the BMC LAN-Configuration dialog without saving changes. If changes have been made, you will be prompted to save changes before closing. Options Menu The Options menu has the following options: Enable LAN Alerts: Allows you to enable or disable the BMC LAN-Alerting features...
- Page 70 Save: Allows you to save the configuration immediately. Close: Allows you to close the BMC LAN-Alert dialog without saving changes. If changes have been made, you will be prompted to save changes before closing. Help: Displays help information. Intel Server Board SCB2 Product Guide...
-
Page 71: Platform Event Action Dialogs
Platform Event Action Dialogs These similar dialogs allow you to configure the Platform Event Action features for PEP and BLA (See Figure 28). If an event is in the enabled listbox, it will generate the appropriate action when it occurs. If an event is in the disabled listbox, it will not generate an action when it occurs. Enable global action for events to generate actions. -
Page 72: Emergency Management Port Dialog
The Options menu has the following options: Clear EMP Password: Allows you to clear the currently saved EMP password. This takes effect immediately. This option is only available if the EMP password is set. Intel Server Board SCB2 Product Guide... - Page 73 Help Topics The Help Topics menu has the following options: Help Topics: Displays help information. Enter New Password Enter an EMP password. The valid range of characters includes ASCII values 32-126. The password must be from 1-16 characters long. Verify New Password Enter the same password as above.
-
Page 74: Exiting The Ssu
Event Actions from the Options menu. This will bring up the Platform Event Action dialog. 7. Save all the changes made by clicking on the Save button. Saving writes your current configuration to nonvolatile storage where it will be available to the system after every reboot. Intel Server Board SCB2 Product Guide... -
Page 75: Software Updates
Software Updates Your system comes with preinstalled system BIOS and BMC firmware. When necessary, updates will be available for download from the Intel support website at: http://support.intel.com/support/motherboards/server/SCB2 The updates are available in two forms: A software update package (SUP) containing all three updates Individual files, one for each update, that are manually executed With either form, bootable diskettes must be created. -
Page 76: Extraction
Serial Number, Part Number, and Asset Tag. Following the update process, the system will automatically reboot. Upon completion, it may be necessary to enter BIOS setup and reconfigure the setting values. Intel Server Board SCB2 Product Guide... -
Page 77: Individual Updates
Before upgrading the BIOS, prepare for the upgrade by recording the current custom BIOS settings, and obtaining the upgrade utility. Obtaining a BIOS Update You can download the most current version of the BIOS from the Intel support website at: http://support.intel.com/support/motherboards/server/scb2 NOTE Print and review the release notes and instructions distributed with the upgrade utility before attempting a BIOS upgrade. -
Page 78: Upgrading The Bios
Changing the BIOS Language You can use the BIOS upgrade utility to change the language BIOS displays. Use a bootable diskette containing the Intel flash utility and language files. See "Using BIOS Setup" on page 43. Intel Server Board SCB2 Product Guide... -
Page 79: Firmware Update Utility Description
7. The program will load the file and then ask if it should upload boot code. Press “N” to continue unless otherwise directed by the release notes or an Intel support professional. 8. The program next asks if it should upload operational code. Press “Y” to continue. The process of uploading operational code takes a few minutes. -
Page 80: Command Line Format
Displaying Utility Title and Version The utility displays its title: FRU & SDR Load Utility, Version Y.Y, Revision X.XX where Y.Y is the version number and X.XX is the revision number for the utility. Intel Server Board SCB2 Product Guide... - Page 81 Configuration File The configuration file is in ASCII text. The utility executes commands formed by the strings present in the configuration file. These commands cause the utility to run tasks needed to load the proper SDRs into the nonvolatile storage of the BMC and possibly generic FRU devices. Some of the commands may be interactive and require you to make a choice.
- Page 82 Intel Server Board SCB2 Product Guide...
-
Page 83: Solving Problems
Is AC power available at the wall outlet? q Are all integrated components from the tested components lists? Check the tested memory, and chassis lists, as well as the supported hardware and operating system list on the Intel Customer Support website. -
Page 84: Running New Application Software
Intel Server Board SCB2 Product Guide... -
Page 85: More Problem Solving Procedures
More Problem Solving Procedures This section provides a more detailed approach to identifying a problem and locating its source. Preparing the System for Diagnostic Testing CAUTION Turn off devices before disconnecting cables: Before disconnecting any peripheral cables from the system, turn off the system and any external peripheral devices. -
Page 86: Specific Problems And Corrective Actions
Are the brightness and contrast controls on the video monitor properly adjusted? q Are the video monitor switch settings correct? q Is the video monitor signal cable properly installed? q Is the onboard video controller enabled? Intel Server Board SCB2 Product Guide... -
Page 87: Characters Are Distorted Or Incorrect
If you are using an add-in video controller board, do the following: 1. Verify that the video controller board is fully seated in the server board connector. 2. Reboot the system for changes to take effect. 3. If there are still no characters on the screen after you reboot the system and POST emits a beep code, write down the beep code you hear. -
Page 88: Diskette Drive Activity Light Does Not Light
If you are directly connecting two servers (no hub), you will need a crossover cable (see your hub documentation for more information on crossover cables). q Check the network controller LEDs that are visible through an opening at the system back panel. Intel Server Board SCB2 Product Guide... -
Page 89: Problems With Network
Problems with Network The server hangs when the drivers are loaded: q Change the PCI BIOS interrupt settings. Try the “PCI Installation Tips” below. Diagnostics pass, but the connection fails: q Make sure the network cable is securely attached. q Make sure you specify the correct frame type in your NET.CFG file. The Activity LED doesn’t light: Make sure the network hub has power. -
Page 90: Problems With Application Software
Is the BIOS set to allow the CD-ROM to be the first bootable device? q Check cable connections. q Verify CD is bootable in another known good CD-ROM drive. (Especially if the CD is a copy.) Intel Server Board SCB2 Product Guide... -
Page 91: Technical Reference
6 Technical Reference Server Board Jumpers CMOS PSWD RCVRY BOOT OM11714 Figure 30. Jumper Locations Table 10. Configuration Jumper Jumper Name Pins What it does at system reset BMC WP BMC boot block is write protected (normal operation). If these pins are not jumpered, BMC boot block is erasable and programmable at next reset. -
Page 92: Diagnostic Leds
Keyboard Init: The keyboard controller command byte is written. Next, issuing the pin 23 and 24 blocking and unblocking commands Disable and initialize 8259 Detect Configuration Mode, such as CMOS clear. Chipset Initialization before CMOS initialization continued Intel Server Board SCB2 Product Guide... - Page 93 Table 11. Post Codes (continued) Diagnostic LED Decoder Post G=Green, R=Red, A=Amber Code Description Init System Timer: The 8254 timer test is over. Starting the memory refresh test next. Check Refresh Toggle: The memory refresh line is toggling. Checking the 15 second on/off time next Setup Interrupt Vectors: Reading the 8042 input port and disabling the MEGAKEY Green PC feature next.
- Page 94 Lock out PS/2 keyboard/mouse if unattended start is enabled. Option ROM Scan Init Boot Devices: The adapter ROM had control and has now returned control to BIOS POST. Performing any required processing after the option ROM returned control. continued Intel Server Board SCB2 Product Guide...
- Page 95 Table 11. Post Codes (continued) Diagnostic LED Decoder Description Post G=Green, R=Red, A=Amber Code Float Processor Initialize: Performing any required initialization before the coprocessor test next. Enable Interrupts 0,1,2: Checking the extended keyboard, keyboard ID, and NUM Lock key next. Issuing the keyboard ID command next Report second set of POST errors To Error messager Prepare And Run Setup: Error manager displays and logs POST errors.
- Page 96 Intel Server Board SCB2 Product Guide...
-
Page 97: Regulatory And Integration Information
(EMC) regulations when installed in a compatible Intel host system. For information on compatible host system(s), contact your local Intel representative. FCC (Class A Verification) – Radiated & Conducted Emissions (USA) ICES-003 (Class A) – Radiated & Conducted Emissions (Canada) CISPR 22 (Class A) –... -
Page 98: Electromagnetic Compatibility Notices
Economic Development emission requirements. BSMI (Taiwan) The BSMI Certification number 3902I904 is silk screened on the component side of the server board; and the following BSMI EMC warning is located on solder side of the server board. Intel Server Board SCB2 Product Guide... -
Page 99: Equipment Log And Power Consumption Worksheets Equipment Log
8 Equipment Log and Power Consumption Worksheets Equipment Log Use the blank equipment log provided here to record information about your system. You will need some of this information when you run the SSU. Manufacturer Name and Item Model Number Serial Number Date Installed System... - Page 100 Equipment Log (continued) Manufacturer Name and Item Model Number Serial Number Date Installed Intel Server Board SCB2 Product Guide...
-
Page 101: Current Usage
Current Usage NOTE Both processors pull power from +12V. This may limit the number of drives and/or add-in cards you may install. The average power usage should not exceed 15 watts per PCI slot. The cooling efficiency varies per slot; therefore, ensure that adequate cooling is available in the target slot—especially in an expansion slot dissipating more than 10 Watts. -
Page 102: Power Usage Worksheet 1
PCI slot 3 Server Board Current SUBTOTALS System Components (see note 2) Total Current Note 1: Number of PCI cards depends on system and riser card configuration. Note 2: List additional system devices and associated currents. Intel Server Board SCB2 Product Guide... -
Page 103: Power Usage Worksheet 2
Worksheet, Total Combined Power Used by the System 1. From the previous worksheet, enter the total current for each column. 2. Multiply the voltage by the total current to get the total wattage for each voltage level. 3. Add the total wattage for each voltage level to arrive at a total combined power usage on the power supply. - Page 104 Intel Server Board SCB2 Product Guide...
-
Page 105: Index
Index Boot Device Priority submenu, configuring in BIOS Setup, 52 Boot menu, configuring, BIOS Setup, 52 Adapter Fault Tolerance, 13 boot sequence Adaptive Load Balancing, 13, 14 booting without keyboard, 19 administrative password, 17 changing permanently, 54 limiting access to SCU, 19 changing priority, 42 AFT. - Page 106 POST, 43, 94, 95 keyboard viewing diagnostic messages, 43 compatibility, 14 power supply lockout timer, seting in SCU, 14 calculating power usage, 101 worksheet, calculating DC power, 102 Power-on Self-Test, See POST, 94, 95 Intel Server Board SCB2 Product Guide...
- Page 107 Primary IDE Master and Slave submenu, secure mode, 18 configuring in BIOS Setup, 45 affects boot sequence, 19 problems enter by setting passwords, 18 after running new application software, 84 no booting from diskette without after system has been running correctly, 84 password, 18 application software, 90 using hot keys to enter, 42...
- Page 108 7 video controller, 7, 22 Warning components may be hot, 33 dispose of lithium battery safely, 39 ESD can damage product, 31 worksheet, calculating DC power usage, 102 write to diskette, disabling, 18 Intel Server Board SCB2 Product Guide...
Need help?
Do you have a question about the SCB2 - Server Board Motherboard and is the answer not in the manual?
Questions and answers