Xerox 4118P - WorkCentre B/W Laser User Manual
User guide
Hide thumbs
Also See for 4118P - WorkCentre B/W Laser:
- Evaluator manual (16 pages) ,
- Quick start manual (2 pages) ,
- Installation manual (1 page)
Table of Contents
Advertisement
Quick Links
Advertisement
Table of Contents

Related Manuals for Xerox 4118P - WorkCentre B/W Laser


Summary of Contents for Xerox 4118P - WorkCentre B/W Laser
- Page 1 WorkCentre 4118 User Guide 32N00467...
- Page 2 ® Xerox and all Xerox products mentioned in this publication are trademarks of Xerox Corporation. Product names and trademarks of other companies are hereby acknowledged. Changes, technical inaccuracies and typographical errors will be corrected in subsequent editions.
-
Page 3: Table Of Contents
Unpacking ....................2-2 CD Contents..................2-3 CD Installation ..................2-5 Machine Overview ..................2-6 Models and Options ................2-6 Component Location ................2-7 Control Panel Overview ................ 2-9 2 in 1 Control panel ................2-9 Xerox WorkCentre 4118 User Guide Page i... - Page 4 Faxing Procedure ..................5-2 Dialing Methods ..................5-6 Basic Fax Features ..................5-8 Feature Description ................5-8 Special Fax Features ................5-10 Feature Description ................5-10 Fax Forwarding ..................5-14 Mailbox Setup ..................5-15 Page ii Xerox WorkCentre 4118 User Guide...
- Page 5 Reports Available .................. 8-2 Printing Reports ..................8-3 ControlCentre..................... 8-4 Installing ControlCentre................. 8-4 Running ControlCentre ................. 8-4 Using ControlCentre................8-4 Passcode Protection ................. 8-7 Enable Passcode Protection ..............8-7 Change the Passcode ................8-8 Xerox WorkCentre 4118 User Guide Page iii...
- Page 6 LCD Error Messages ................10-11 Problem and Solutions Charts ............. 10-14 Copying Problems ................10-14 Printing Problems ................10-15 Faxing Problems Solution Chart ............10-17 11 Specifications ..............11-1 Introduction....................11-2 Printer Specifications................11-3 Page iv Xerox WorkCentre 4118 User Guide...
- Page 7 Fax Specifications ................... 11-4 Scanner and Copier Specifications ............11-5 General Specifications ................11-6 Media Specifications ................11-7 12 Index ..................1-1 Xerox WorkCentre 4118 User Guide Page v...
- Page 8 Page vi Xerox WorkCentre 4118 User Guide...
-
Page 9: Welcome
1 Welcome Thank you for choosing the Xerox WorkCentre 4118. This product have been designed for ease of use, but to use your machine to its fullest potential take some time to read the User Guide. Introduction ......1-2 About This Guide. -
Page 10: Introduction
Network Kit enables network printing including PostScript, Macintosh and Linux print and scan drivers. For instructions on unpacking and setting up the machine ready for use the Quick Install Sheets, or refer to “Getting Started” on page 2-1. Page 1-2 Xerox WorkCentre 4118 User Guide... -
Page 11: About This Guide
Throughout this User Guide some terms are used interchangeably: Paper is synonymous with media. Document is synonymous with original. Xerox WorkCentre 4118 is synonymous with the machine. The following table offers further information about the conventions used within this Guide. CONVENTION... -
Page 12: Related Information Sources
Related Information Sources Information available for the product consists of: - This User Guide - The Quick Use Guide - The Quick Install Sheets - The System Administration Guide - The Xerox website http://www.xerox.com Page 1-4 Xerox WorkCentre 4118 User Guide... -
Page 13: Customer Support
If you require further assistance, call our experts at the Xerox Welcome Center, or contact your local representative. When telephoning please provide the machine serial number. Use the space below to make a note of the machine serial number:... -
Page 14: Safety Notes
Read these safety notes carefully before using this product to ensure you operate the equipment safely. Your Xerox product and supplies have been designed and tested to meet strict safety requirements. These include safety agency approval, and compliance to established environmental standards. -
Page 15: Electrical Safety Information
This equipment is to be operated from the type of electrical supply indicated on the product data plate label. If this machine needs to be moved to a different location, contact a Xerox service representative or your authorized local representative or service support organization. -
Page 16: Operational Safety Information
To remove all electrical power from the equipment, disconnect the power cable from the electrical outlet. Operational Safety Information To ensure the continued safe operation of your Xerox equipment, follow these safety guidelines at all times. Do These: Always connect equipment to a correctly grounded power outlet. -
Page 17: Maintenance Information
This product will produce ozone during normal operation. The ozone produced is heavier than air and is dependent on copy volume. Providing the correct environmental parameters as specified in the Xerox installation procedure will ensure that the concentration levels meet safe limits. -
Page 18: Consumables
Changes and modifications to this equipment not specifically approved by Xerox may void the user's authority to operate this equipment. -
Page 19: Product Safety Certification
This product is certified by the following Agency using the Safety standards listed. AGENCY STANDARD UL60950-1st Edition (USA/Canada) Underwriters Laboratories Inc. ETL SEMKO IEC60950 1strd Edition (2001) This product was manufactured under a registered ISO9001 Quality system. Xerox WorkCentre 4118 User Guide Page 1-11... -
Page 20: Regulatory Information
Regulatory Information CE Mark The CE mark applied to this product symbolizes Xerox's declaration of conformity with the following applicable Directives of the European Union as of the dates indicated: January 1, 1995: Council Directive 72/23/EEC amended by Council directive 93/68/EEC, approximation of the laws of the member states related to low voltage equipment. - Page 21 US: AAAEQ##TXXXX. For earlier products, the REN is separately shown on the label. If this Xerox equipment causes harm to the telephone network, the Telephone Company will notify you in advance that temporary discontinuance of service may be required. But if advance notice isn't practical, the Telephone Company will notify the customer as soon as possible.
- Page 22 Repairs to the machine should be made only by a Xerox representative or an authorized Xerox service agency. This applies at any time during or after the service warranty period. If unauthorized repair is performed, the remainder of the warranty period is null and void. This equipment must not be used on party lines.
- Page 23 Bulgaria Romania In the event of problems you should contact your local Xerox representative in the first instance. This product has been tested to and is compliant with TBR21, a specification for terminal equipment for use on analogue-switched telephone networks in the European Economic Area.
-
Page 24: Environmental Compliance
Xerox ENERGY STAR equipment is preset at the factory to enter a "low power" state and/or shut off completely after a specified period of use. These energy-saving features can reduce product energy consumption in half when compared to conventional equipment. -
Page 25: Illegal Copies
"fair use" or library reproduction rights provisions of the copyright law. Further information of these provisions may be obtained from the Copyright Office, Library of Congress, Washington, D.C. 20559. Ask for Circular R21. Xerox WorkCentre 4118 User Guide Page 1-17... - Page 26 Canada or of a province, the government of a state other than Canada or a department, board, Commission or agency established by the Government of Canada or of a province or of a government of a state other than Canada. Page 1-18 Xerox WorkCentre 4118 User Guide...
- Page 27 Copyright material or trademarks without the consent of the owner Postage stamps and other negotiable instruments This list is not inclusive and no liability is assumed for either its completeness or accuracy. In case of doubt, contact your legal counsel. Xerox WorkCentre 4118 User Guide Page 1-19...
-
Page 28: Product Recycling And Disposal
Product Recycling and Disposal If you are managing the disposal of your Xerox product, please note that the product contains lead, mercury, and other materials whose disposal may be regulated due to environmental considerations in certain countries or states. The presence of lead and mercury is fully consistent with global regulations applicable at the time that the product was placed on the market. - Page 29 North America Xerox operates an equipment takeback and reuse/recycle program. Contact your Xerox sales representative (1-800-ASK-XEROX) to determine whether this Xerox product is part of the program. For more information about Xerox environmental programs, visit www.xerox.com/ environment or for recycling and disposal information, contact your local authorities. In the United States, you may also refer to the Electronic Industries Alliance web site: www.eiae.org.
- Page 30 Page 1-22 Xerox WorkCentre 4118 User Guide...
-
Page 31: Getting Started
Machine Setup......2-20 Installing Software ......2-24 Xerox WorkCentre 4118 User Guide Page 2-1... -
Page 32: Unpacking
( moved, push the switch to the lock position ( Scanner Module Pull open the paper tray and remove the packing material from the tray. Page 2-2 Xerox WorkCentre 4118 User Guide... -
Page 33: Cd Contents
Starter Toner Cartridge USB Cable Telephone Line Cord Software CD Contents User Guide CD The User Guide provides detailed information, technical specifications and procedural step by step instructions on all the features available. Xerox WorkCentre 4118 User Guide Page 2-3... - Page 34 (regardless of language version) may only be used by you on or from a single Seat. A "Seat" means each computer (a) on which the software or a portion of the software is either installed or run, or (b) from which the software is accessed. Page 2-4 Xerox WorkCentre 4118 User Guide...
-
Page 35: Cd Installation
PC. Refer to “Installing Drivers” on page 2-24 for further information. Nuance CD The program is designed to Autorun. If this is not enabled double-click on the install.exe file on the CD. Xerox WorkCentre 4118 User Guide Page 2-5... -
Page 36: Machine Overview
Standard Standard Tray Digital Copying Standard Standard Direct Printing Standard Standard Network Printing Option Option Direct Scanning Standard Standard Paper Tray 2 Option Option Cabinet and Stand Option Option Foreign Interface Option Option Page 2-6 Xerox WorkCentre 4118 User Guide... -
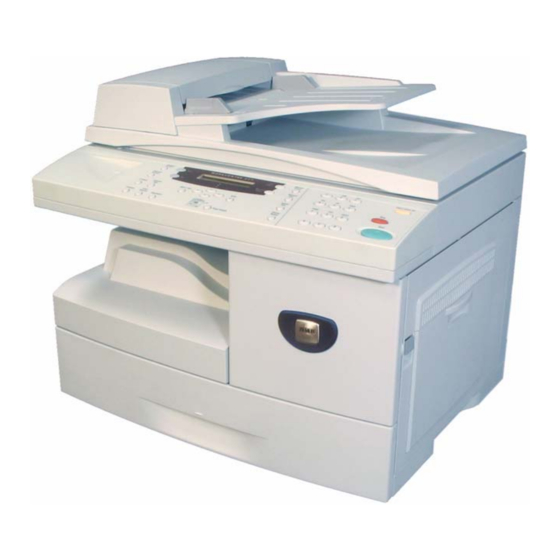
Page 37: Component Location
Side Cover Scanner Module Paper Release Lever Tray 1 Front Cover Paper Tray 2 NOTE: The components on each model vary, this picture represents the WorkCentre 4118 with the optional Paper Tray 2. Xerox WorkCentre 4118 User Guide Page 2-7... -
Page 38: Rear View
Document Glass Telephone Connections Paper Tray AC Power Cord Connector Paper Exit Extension Power Switch Parallel Connector USB Connector NOTE: The components on each model vary, this picture represents the WorkCentre 4118, standard configuration. Page 2-8 Xerox WorkCentre 4118 User Guide... -
Page 39: Control Panel Overview
Use to adjust the contrast level to improve output quality. Reduce/Enlarge Use to adjust copy size from 25% to 400% when using the Document Glass, and 25% to 100% using the Document Feeder. Xerox WorkCentre 4118 User Guide Page 2-9... - Page 40 If an error occurs, a red light displays and a message appears on the display providing further information. For a detailed description of the error messages, refer to “LCD Error Messages” on page 10-11. Page 2-10 Xerox WorkCentre 4118 User Guide...
- Page 41 Use to stop an operation at any time. Clear/Clear All (AC) Press once to clear a current entry e.g. an incorrect number or character entry. Press twice to clear all programmed settings, the display requests confirmation. Xerox WorkCentre 4118 User Guide Page 2-11...
-
Page 42: Installing Drum And Toner Cartridges
CAUTION: Ensure the side cover is always open before opening the front cover. Open the front cover. If the cartridge locking lever is in the lower position, turn the lever upward until it locks into place. Page 2-12 Xerox WorkCentre 4118 User Guide... - Page 43 When the drum or Turn the cartridge locking lever toner cartridge downwards until it locks in place. need to be replaced a Close the front cover and the side message cover. displays. Xerox WorkCentre 4118 User Guide Page 2-13...
-
Page 44: Making Connections
AWG telephone and/or answering #26 or larger tele- communication machine. line cord. If required, plug the cord of your extension phone into the EXT jack. Page 2-14 Xerox WorkCentre 4118 User Guide... - Page 45 Fast and Slow. Fast is the default mode. Some PC User’s may experience poor functionality in the default mode. If this occurs, select the Slow mode. For information about changing the USB mode, refer to “Machine Setup” on page 2-20. Xerox WorkCentre 4118 User Guide Page 2-15...
-
Page 46: Powering On The Machine
The power cord must be plugged into a grounded power socket. Press the ON/OFF switch to the ON ( I ) position. The machine displays ’Warming Up Please Wait...’. Page 2-16 Xerox WorkCentre 4118 User Guide... -
Page 47: Loading Paper
Guide The Paper Trays can hold a maximum of 550 sheets of 80 g/m² (20 lb) plain paper. You can use A4, Folio, Letter or Legal size paper only. Xerox WorkCentre 4118 User Guide Page 2-17... - Page 48 Bypass Tray. edge of the sheet is placed at the right side. Ensure that the paper is positioned under the snubbers. Corner snubbers Do not fill above the Maximum Fill Line. Max Fill Line Page 2-18 Xerox WorkCentre 4118 User Guide...
- Page 49 Refer to “Machine Setup” starting on page 2-20 to set the correct size for the Paper Tray. For more detailed information about Paper Supply, refer to the Chapter “Paper and Other Media” starting on page 4-1. Xerox WorkCentre 4118 User Guide Page 2-19...
-
Page 50: Machine Setup
Using the “Machine Setup Options” starting on page 2-21 customize the settings to meet your requirements. Press [Enter] to save your selections. Press [Menu/Exit] to exit each menu level and return to standby mode. Page 2-20 Xerox WorkCentre 4118 User Guide... -
Page 51: Machine Setup Options
ID, the page number, the date and time of reception and the reduction rate of the image to be printed on each page of each received transmission. The information is printed on the bottom edge of each page. Xerox WorkCentre 4118 User Guide Page 2-21... - Page 52 Some PC users may experience poor Slow USB implementation in the default mode. If this occurs, select Slow. Machine ID Use to enter the fax number and name of the machine. Name Page 2-22 Xerox WorkCentre 4118 User Guide...
- Page 53 If the received page is outside the discard margin set, it will print on two sheets of paper at the actual size. Margins can be set between 0 - 30mm (1.2"). Xerox WorkCentre 4118 User Guide Page 2-23...
-
Page 54: Installing Software
The following table shows Windows requirements. ITEM REQUIREMENTS RECOMMENDED Windows 98/Me/NT 4.0/ Pentium II 400 MHz or Pentium III 933 MHz 2000 higher Windows XP Pentium III 933 MHz or Pentium IV 1 GHz higher Page 2-24 Xerox WorkCentre 4118 User Guide... -
Page 55: Installing Drivers In Windows
Various Linux - with Network Kit option. Installing Drivers in Windows All applications should be closed on your PC before beginning installation. Installing Xerox Drivers in Microsoft Windows XP or Windows 2000 using the USB port Insert the Xerox Drivers CD into the CD-ROM drive. - Page 56 Choose the components you want to install and then click [Next]. The confirmation screen summarizes your selections. Either Click [Back] to reselect or Click [Next] to install your selections. When the setup has completed click [Finish]. Page 2-26 Xerox WorkCentre 4118 User Guide...
- Page 57 Plug the Parallel cable into the WorkCentre 4118 and connect it to your PC. Start your PC and switch on the WorkCentre 4118. Insert the Xerox Drivers CD into the CD-ROM drive. In Microsoft Windows click [Start] and then [Run]. Type [E:\Xinstall.exe], replacing "E" with the letter of your CD-ROM drive and click [OK].
- Page 58 Choose the components you want to install and then click [Next]. The confirmation screen summarizes your selections. Either Click [Back] to reselect or Click [Next] to install your selections. Click [Finish]. The driver installation is now complete. Page 2-28 Xerox WorkCentre 4118 User Guide...
- Page 59 Installing Xerox Drivers in Microsoft Windows 98 or Windows Millennium using the USB port Plug the USB cable into the WorkCentre 4118 and connect it to your Personal Computer (PC). Start your PC and switch on the WorkCentre 4118. Insert the Xerox Drivers CD into the CD-ROM drive.
- Page 60 At the next screen click [Have Disk], and browse to your CD-ROM drive. Open the Driver directory, then open the Print directory, then open the AddPrint directory and them choose the Win9x directory and click [OK]. The next screen will display the Xerox WorkCentre 4118 driver, click [Next]. Page 2-30 Xerox WorkCentre 4118 User Guide...
- Page 61 You can type in a name for your new printer or accept the default then click [Next]. Choose [Yes] to print a test page and click [Finish]. The WorkCentre 4118 driver will now be installed and a test page should print. Xerox WorkCentre 4118 User Guide Page 2-31...
-
Page 62: Test Print Or Scan
Test Print Open a document on the Workstation. Select the Xerox WorkCentre 4118 as the printer to which the document will be sent. Print the selected document on the device and verify that it prints correctly. The installation process is now complete. -
Page 63: Copy
3 Copy Digital copying is available as standard on the Xerox WorkCentre 4118. Copying Procedure ......3-2 Basic Copy Features . -
Page 64: Copying Procedure
If two tray lights display together, Status Map the Auto Tray Switching feature is active. When one tray runs out of Paper Supply paper, the machine will switch to the other selected tray. Page 3-2 Xerox WorkCentre 4118 User Guide... -
Page 65: Load The Originals
Up to 40 sheets of 80 g/m² (20lb bond) paper can be loaded. Weight ranges from 45 - 105 g/m² (12.5 - 28lb). Sizes range from B5 to Legal (7” x 10” to 8.5” x 14” ). Refer to “Scanner and Copier Specifications” on page 11-5 for full Document Feeder specifications. Xerox WorkCentre 4118 User Guide Page 3-3... -
Page 66: Document Glass
Copy features, refer to “Basic Copy Features” on page 3-6, and “Special Copy Color Original Features” on page 3-9. Using the Navigation Keys, select the setting required for the feature and press [Enter]. Page 3-4 Xerox WorkCentre 4118 User Guide... -
Page 67: Enter The Quantity
[Enter]. Continue the procedure until all the originals have been scanned. Select [No] when all the originals have been scanned, and press [Enter]. Printing commences and copies are delivered to the Output Tray. Xerox WorkCentre 4118 User Guide Page 3-5... -
Page 68: Basic Copy Features
25 - 100% using the Enter the percentage required using the Numeric image from 25% to 400%, Document Feeder. Keypad. The selected number displays. depending on the input area Press [Enter] to save the selection. used. Page 3-6 Xerox WorkCentre 4118 User Guide... - Page 69 2 copies of a 3 Press [Collated]. Use to produce page job will print one collated copy complete document, Use the Navigation Keys to select [On] and press sets. followed by the second [Enter]. complete document. Xerox WorkCentre 4118 User Guide Page 3-7...
- Page 70 Use the Navigation Keys to select in the Bypass Tray. the Paper Type being loaded and press [Enter]. If using the Bypass, remember to load the required stock. Page 3-8 Xerox WorkCentre 4118 User Guide...
-
Page 71: Special Copy Features
[Press Start S.1] displays. Load Side 1 of the original on the Document Glass and press [Start]. Repeat for Side 2 when [Press Start S.2] displays. The machine prints both sides of the ID document on one side of paper. Xerox WorkCentre 4118 User Guide Page 3-9... - Page 72 If required, enter a shift amount using the Numeric margin. Keypad and press [Enter]. Use to enter a shift Margin amount for the top margin. Bottom Use to enter a shift Margin amount for the bottom margin. Page 3-10 Xerox WorkCentre 4118 User Guide...
- Page 73 Select the Paper Tray containing the covers stock Front & Use to add a blank or and press [Enter]. Back printed front and back Select [Blank] or [Printed] depending on your cover to the copies. requirement, and press [Enter]. Xerox WorkCentre 4118 User Guide Page 3-11...
- Page 74 Use the Navigation Keys to select [N Up] and page. press [Enter]. 4 Up Use to print the images Select the required N Up option and press [Enter]. from 4 originals on to one page. Page 3-12 Xerox WorkCentre 4118 User Guide...
-
Page 75: Compatible Features
Glass / Document Feeder Binder Holes & Border Surround Only AutoFit Glass Small Orig Only Clone Glass Small Orig Only Collate Glass / Document Feeder Not Book Center & Edges Key: =Compatible =Incompatible Xerox WorkCentre 4118 User Guide Page 3-13... - Page 76 Page 3-14 Xerox WorkCentre 4118 User Guide...
-
Page 77: Paper And Other Media
4 Paper and Other Media There is one Paper Tray and a Bypass Tray as standard on the Xerox WorkCentre 4118. A second Paper Tray is available to purchase as an option. Loading Paper ......4-2 Setting the Paper Size. -
Page 78: Loading Paper
The Paper Trays can hold a maximum of 550 sheets of 80 g/m² (20 lb) plain paper. To load paper, pull open the Paper Tray. Push down on the pressure plate until it locks into position. Page 4-2 Xerox WorkCentre4118 User Guide... - Page 79 If loading Letterhead, ensure the and if the problem design is face-up and the top continues, use the Bypass Tray. edge of the sheet is placed at the right side. Xerox WorkCentre4118 User Guide Page 4-3...
- Page 80 Do not allow the guide to press against the edge of the paper tightly. Close the Paper Tray. Use the instructions “Setting the Paper Size” on page 4-8 to set the correct size for the Paper Tray. Page 4-4 Xerox WorkCentre4118 User Guide...
-
Page 81: Using The Bypass Tray
30 sheets or 9 mm (0.35 inch) Label 10 sheets or 9 mm (0.35 inch) Cardstock 10 sheets or 9 mm (0.35 inch) The height is measured with the stack of sheets laid on a flat surface. Xerox WorkCentre4118 User Guide Page 4-5... -
Page 82: Loading The Bypass Tray
Adjust the paper guide to the width of the stack of print material. Ensure you have not loaded too much print media. The stack should be under the Max. Fill Line. Page 4-6 Xerox WorkCentre4118 User Guide... - Page 83 Use the Navigation Keys to select the Paper Type being loaded and Status Map Enter press [Enter]. Paper Supply Use the instructions “Setting the Paper Size” on page 4-8 to set the correct size for the Bypass Tray. Xerox WorkCentre4118 User Guide Page 4-7...
-
Page 84: Setting The Paper Size
Use the Navigation Keys to select the Paper Size required and press [Enter] to save the selection. Repeat the procedure for [Tray 2 Size] if available, and [Bypass Size]. Press [Menu/Exit] to exit each menu level and return to Standby mode. Page 4-8 Xerox WorkCentre4118 User Guide... -
Page 85: Media Specifications
Depending on paper thickness, maximum capacity may be reduced. Feed one sheet at a time through the Bypass Tray if jams occur. NOTE: For information about Media weight specifications, refer to “General Specifications” starting on page 11-6. Xerox WorkCentre4118 User Guide Page 4-9... - Page 86 Do not load more than 10 sheets of special media into the Bypass Tray at a time. Verify that your labels’ adhesive material can tolerate fusing temperature of 200 C (392 for 0.1 second. Page 4-10 Xerox WorkCentre4118 User Guide...
- Page 87 Do not feed a sheet of labels through the machine more than once. The adhesive backing is designed for one pass through the machine. Do not use labels that are separating from the backing sheet or are wrinkled, bubbled, or otherwise damaged. Xerox WorkCentre4118 User Guide Page 4-11...
- Page 88 Page 4-12 Xerox WorkCentre4118 User Guide...
-
Page 89: Fax (4 In 1 Only)
5 Fax (4 in 1 only) The Fax function is available as standard on the Xerox WorkCentre 4118, 4 in 1 only. Faxing Procedure ......5-2 Dialing Methods. -
Page 90: Faxing Procedure
Up to 40 sheets of 80 g/m² (20lb bond) paper can be loaded. Weight ranges from 45 - 105 g/m² (12.5 - 28lb). Sizes range from B5 to Legal (7” x 10” to 8.5” x 14” ). Refer to “Scanner and Copier Specifications” on page 11-5 for full Document Feeder specifications. Page 5-2 Xerox WorkCentre 4118 User Guide... - Page 91 On completion of the job, ensure the Document Feeder is closed. Select the Fax key Fax Key Press the [Fax] key to activate Fax mode. The Fax key remains illuminated when selected. Xerox WorkCentre 4118 User Guide Page 5-3...
-
Page 92: Select The Fax Features
Navigation Keys to select to “Dialing the incorrect number and then Methods” on Numeric Keypad page 5-6. press the correct number. Clear/Clear All Pressing the [Clear/Clear All] key will delete the entire fax number entered. Page 5-4 Xerox WorkCentre 4118 User Guide... -
Page 93: Job Status
To delete a job, select the required job and press [Enter]. Select [Cancel Job?] and press [Enter]. A confirmation message displays, select [1:Yes] and press Enter [Enter]. Navigation Keys Press [Menu/Exit] to exit Job Status. Xerox WorkCentre 4118 User Guide Page 5-5... -
Page 94: Dialing Methods
Select [Yes] to add more originals, or [No] to begin transmission. Press [Enter]. The machine automatically sends the fax to each of the numbers in the Group. Page 5-6 Xerox WorkCentre 4118 User Guide... - Page 95 The Redial Memory in the machine retains the last 10 numbers dialled. Using the Navigation Keys, select the number required and press [Enter]. Press [Start] to dial the number. The fax is automatically scanned and sent. Xerox WorkCentre 4118 User Guide Page 5-7...
-
Page 96: Basic Fax Features
Use to select the type of Mixed Use for documents with Using the Navigation Keys, select the option document being mixed text and graphics. required and press [Enter]. scanned. Photo Use for photographs. Page 5-8 Xerox WorkCentre 4118 User Guide... - Page 97 Also used when sending a color fax. Super Fine Use for documents containing extremely fine detail. This is available only if the remote machine also supports Super Fine resolution. Xerox WorkCentre 4118 User Guide Page 5-9...
-
Page 98: Special Fax Features
Select [Start Time] and enter a date and time to start the Toll Save period. Press [Enter]. Select [End Time] and enter a date and time to end the Toll Save period. Press [Enter]. Page 5-10 Xerox WorkCentre 4118 User Guide... - Page 99 [Enter]. If you set a time earlier than the current time, the job will be sent at that time the following day. The originals are scanned into memory ready for sending. Xerox WorkCentre 4118 User Guide Page 5-11...
- Page 100 Enter a 4 digit Poll Code and press [Enter]. machine. To store the originals in the Bulletin Board select [On]. If the Bulletin Board is not required, select [Off]. Press [Start]. The originals are scanned into memory ready to be polled. Page 5-12 Xerox WorkCentre 4118 User Guide...
- Page 101 Using the Navigation Keys select [Fax Features] Feature must be enabled in Fax and press [Enter]. Setup. Select [Secure Receive] and press [Enter]. Select [Print] and press [Enter]. Enter a passcode and press [Enter]. Xerox WorkCentre 4118 User Guide Page 5-13...
-
Page 102: Fax Forwarding
Yes is displayed and press [Enter]. Otherwise, choose No and press [Enter]. If you want to delete the assigned recipient of the forwarded faxes, press until Yes is displayed and press [Enter]. Otherwise, choose No and press [Enter]. Page 5-14 Xerox WorkCentre 4118 User Guide... -
Page 103: Mailbox Setup
Enter the passcode using the keypad and press [Enter]. Enter the Mailbox Id. using the keypad and press [Enter]. If you want to create another Mailbox, press until Another is displayed and press [Enter]. Repeat steps 6 and 7. Xerox WorkCentre 4118 User Guide Page 5-15... -
Page 104: Delete A Mailbox
Mailbox Setup is displayed and press [Enter]. Press until Mailbox is displayed and press [Enter]. Press until Delete is displayed and press [Enter] Enter the Box Number to be deleted. Enter the Passcode for the mailbox. Confirm the deletion. Page 5-16 Xerox WorkCentre 4118 User Guide... -
Page 105: Mailbox Procedures
Using the Navigation Keys select [Mailbox] and press [Enter]. Select [Store] and press [Enter]. Enter the Box Number for the mailbox and press [Enter]. The originals are scanned and stored in the mailbox. The display shows the number of pages stored. Xerox WorkCentre 4118 User Guide Page 5-17... -
Page 106: Printing Mailbox Contents
Select [Print] and press [Enter] Enter the Box Number for the mailbox and press [Enter]. Enter the Passcode for the mailbox and press [Enter]. The contents of the mailbox are printed and deleted. Page 5-18 Xerox WorkCentre 4118 User Guide... -
Page 107: Deleting Mailbox Contents
Menu/Exit Enter Select [Delete] and press [Enter]. Enter the Box Number for the mailbox and press [Enter]. Enter the Passcode for the mailbox and press [Enter]. The contents of the mailbox are deleted. Xerox WorkCentre 4118 User Guide Page 5-19... -
Page 108: Polling From A Mailbox
Enter a Start Time for the mailbox to be polled and press [Enter]. If you set a time earlier than the current time, the originals will be retrieved at that time the following day. The mailbox will be polled at the specified time. Page 5-20 Xerox WorkCentre 4118 User Guide... -
Page 109: Sending To A Mailbox
If you set a time earlier than the current time, the job will be sent at that time the following day. The originals will be sent to the mailbox at the specified time. Xerox WorkCentre 4118 User Guide Page 5-21... -
Page 110: Fax Setup Options
Using the “Fax Setup Options” starting on page 5-23 customize the settings to meet your requirements. Press [Enter] to save your selections. Press [Menu/Exit] to exit each menu level and return to standby mode. Page 5-22 Xerox WorkCentre 4118 User Guide... -
Page 111: Fax Setup Options
Use to set fax jobs to print 2 sided, with the binding edge on the long edge. Short Edge Use to set fax jobs to print 2 sided, with the binding edge on the short edge. Xerox WorkCentre 4118 User Guide Page 5-23... - Page 112 Press [Enter]. Repeat the procedure until all the editing has been completed. Press the [Menu/Exit] key when you have finished editing. The name appears in the upper line of the display. Change the name if required and press [Enter]. Page 5-24 Xerox WorkCentre 4118 User Guide...
- Page 113 MSG Confirm Sets the machine to print a transmission report for every fax transmission. De-activates printing a transmission report. On-Err Sets the machine to print a transmission report only if an error has occurred. Xerox WorkCentre 4118 User Guide Page 5-25...
- Page 114 Use to set the default option for receiving secure faxes. To switch On, enter passcode, then confirm passcode. To switch Off, enter current passcode. Any secure faxes still in memory will be printed. Page 5-26 Xerox WorkCentre 4118 User Guide...
- Page 115 Call your fax number from another telephone. It is not necessary to place the call from a fax machine. When your machine begins to ring, do not answer the call. The machine requires several rings to learn the pattern. Xerox WorkCentre 4118 User Guide Page 5-27...
- Page 116 Page 5-28 Xerox WorkCentre 4118 User Guide...
-
Page 117: Print
6 Print Direct Printing using a USB or Parallel Port connection is available as standard on the Xerox WorkCentre 4118. Networked Printing, including a PostScript driver, is available as an option. Printing a Document ..... . . 6-2 Printer Settings . -
Page 118: Printing A Document
Windows 98/Millennium Edition Mac OS10.3 and Linux are supported in the optional Network Kit Your Workstation and the Xerox WorkCentre 4118 must be connected and configured for printing from these environments. A PCL print driver is supplied as standard and a PostScript driver is supplied in the optional Network Kit. -
Page 119: Printer Settings
Select File > Print > Properties or File > Print Setup from within any Windows application. Select Xerox WorkCentre 4118 printer from the Printers folder, then select File > Properties (or select the printer icon in the Printers folder, and click the right mouse button). - Page 120 Windows XP Select File > Print > Properties from within any Windows application. Select Xerox WorkCentre 4118 printer from the Printers and Faxes folder, click the right mouse button, then select Printing Preferences from the drop-down list. Page 6-4 Xerox WorkCentre 4118 User Guide...
-
Page 121: Pcl Driver
Settings made when Printer Properties are accessed through an application File menu and Print or Print Setup will remain active until the application you are printing from is closed. Xerox WorkCentre 4118 User Guide Page 6-5... -
Page 122: Layout Tab
Page 6-6 Xerox WorkCentre 4118 User Guide... -
Page 123: Paper Tab
Source Use to select the required Use to select the required paper source for a cover paper source for the job. page. Banner Page Use to select whether a banner page is required. Xerox WorkCentre 4118 User Guide Page 6-7... -
Page 124: Image Options Tab
Graphic Options Provides access to additional options which allow you to select to print your output as graphics or bitmaps. You can also select to print all text in black. Page 6-8 Xerox WorkCentre 4118 User Guide... -
Page 125: Output Options Tab
Use Print Fonts If this option is selected the fonts which are resident on the printer will be used for the job. Collate Select to produce collated output Xerox WorkCentre 4118 User Guide Page 6-9... -
Page 126: Watermark Tab
Select this option if you want the Watermark to print on the first page only, and not the rest of the Message Angle document. Select to print the Watermark horizontally, vertically or a specified angle. Page 6-10 Xerox WorkCentre 4118 User Guide... -
Page 127: About Tab
The About Tab provides information about the printer driver. It provides the program version number and copyright information relating to the printer driver. Clicking on this page will connect you to the Xerox website, provided you have access to the Internet Xerox WorkCentre 4118 User Guide... - Page 128 Page 6-12 Xerox WorkCentre 4118 User Guide...
-
Page 129: Scan (4 In 1 Only)
7 Scan (4 in 1 only) Direct Scanning using a USB or Parallel Port connection is available as standard on the Xerox WorkCentre 4118, 4 in 1. A color scanner is provided as standard. TWAIN Scanner Program ....7-2 TWAIN Scanning Procedure . -
Page 130: Twain Scanner Program
TWAIN Scanner Program The Xerox WorkCentre 4118 TWAIN Scanner program is used to scan images, graphics, photographs, and printed text. Documents can be fed from the Document Feeder or placed on the Document Glass. The TWAIN driver is a program for PC printing that supports Windows 98, Windows NT4.0, Windows 2000, Windows ME and Windows XP environments. -
Page 131: Twain Scanning Procedure
Align the stack with the left and rear edges of the tray. Adjust the guides to just touch the edges of the originals. Xerox WorkCentre 4118 User Guide Page 7-3... -
Page 132: Select The Scan Features
TWAIN and Copier driver options. Specifications” on page 11-5. Customize the settings available on the TWAIN driver for the job, for example Image Type, Resolution, Document Type and Enlarge/Reduce. Page 7-4 Xerox WorkCentre 4118 User Guide... - Page 133 Scan Save the Image Select [File] and [Save]. The image is saved and can now be used in another document if required. Remove your original from the Document Glass or Document Feeder. Xerox WorkCentre 4118 User Guide Page 7-5...
-
Page 134: Scanning Using The Wia Driver
From the Start menu on your desktop window, select [Settings], [Control Panel], and then [Scanners and Camera]. Double click your scanner driver icon. The Scanner and Camera Wizard launches. Choose your scanning preferences and click [Preview] to see how your preferences affect the picture. Click [Next]. Page 7-6 Xerox WorkCentre 4118 User Guide... - Page 135 Follow the on-screen instructions to edit the picture after it is copied to your computer. If you want to cancel the scan job, press the Cancel button on the Scanner and Camera Wizard. Xerox WorkCentre 4118 User Guide Page 7-7...
- Page 136 Page 7-8 Xerox WorkCentre 4118 User Guide...
-
Page 137: Machine Administration
8 Machine Administration The Xerox WorkCentre 4118 can be customized to meet your individual requirements. Reports ....... . . 8-2 ControlCentre . -
Page 138: Reports
This report lists the billing counters and their current amounts. Connect Page Provides connection information when the optional Network Kit is installed. Print All Reports Use this option to print all the available reports. Page 8-2 Xerox WorkCentre 4118 User Guide... -
Page 139: Printing Reports
Press the [Machine Status] key. Enter Machine Status Using the Navigation Keys select [Reports] and press [Enter]. Using the Navigation Keys select the required report and press [Enter]. The report is processed and printed. Xerox WorkCentre 4118 User Guide Page 8-3... -
Page 140: Controlcentre
ControlCentre ControlCentre is software available for the Xerox WorkCentre 4118 which enables Fax and Print options and features to be setup and viewed remotely using a PC. This tool also enables firmware upgrades. After setting up Fax options, creating phonebooks or setting Print options simply click [Apply] on the ControlCentre screen to download the new settings to the machine. -
Page 141: Firmware Update Tab
Firmware Update Tab Click on the [Firmware Update] tab to update the firmware of the machine. This feature should be used by System Administrator only. For further information, please refer to the System Administration Guide. Xerox WorkCentre 4118 User Guide Page 8-5... -
Page 142: Printer Tab
Printer Tab Click on the [Printer] tab to set default print options. PCL Button Click on the [PCL] button on the Printer tab to set options for PCL printing. Page 8-6 Xerox WorkCentre 4118 User Guide... -
Page 143: Passcode Protection
Press [Enter]. FUNCTION PERMISSIONS Machine Setup Protect All Allow All Allow Tray Sizes Fax Setup Protect All Allow All Allow Speed Dials Allow Group Dials Allow Speed and Group Dials Xerox WorkCentre 4118 User Guide Page 8-7... -
Page 144: Change The Passcode
Select [Change Passcode] using the Navigation Keys and press [Enter]. Enter the existing passcode and press [Enter]. This will be blank if you have just enabled Passcode Protection Enter the new passcode and press [Enter]. Confirm the new passcode and press [Enter]. Page 8-8 Xerox WorkCentre 4118 User Guide... -
Page 145: Clear Memory
[Enter]. Select [Clear Memory] using the Navigation Keys and press [Enter]. Select the option required and press [Enter]. The choices are: System Data Fax Phone Book Fax RX History Fax TX History Xerox WorkCentre 4118 User Guide Page 8-9... -
Page 146: Maintenance Tools
Notify Toner Low New Drum Clean Drum Billing Counters These tools can also be accessed using Xerox CentreWare, refer to the System Administration Guide for more information. Check the Serial Number Press the [Machine Status] key. Using the Navigation Keys select [System Admin Tools] and press [Enter]. -
Page 147: Notify Toner Low
If the System Admin Tools have already been passcode protected, type in the password and press [Enter]. Select [New Drum] and press [Enter]. To set the drum counter to zero, select [On] and press [Enter]. Otherwise, select [Off] and press [Enter] to exit the selection. Xerox WorkCentre 4118 User Guide Page 8-11... -
Page 148: Clean Drum
If the System Admin Tools have already been passcode protected, type in the password and press [Enter]. Select [Clean Drum] and press [Enter]. The Xerox WorkCentre 4118 will print a special cleaning page. Billing Counters Billing can display the contents of a number of counters used in the WorkCentre 4118. These counters are: Total Impressions - the total number of prints produced by the machine. -
Page 149: Enabling Or Disabling Auxiliary Access
If the System Admin Tools have already been passcode protected, type in the password and press [Enter]. Select [Auxiliary Access] and press [Enter]. To enable Auxiliary Access, select [On] is displayed and press [Enter]. Otherwise, select [Off] and press [Enter]. Xerox WorkCentre 4118 User Guide Page 8-13... - Page 150 Page 8-14 Xerox WorkCentre 4118 User Guide...
-
Page 151: Maintenance
Ordering Supplies ......9-4 Customer Replaceable Units ....9-5 Xerox WorkCentre 4118 User Guide Page 9-1... -
Page 152: Cleaning
Wipe the surface of the Document Glass and CVT Glass until they are clean and dry. Wipe the underside of the Document Feeder until it is clean and dry. Close the Document Feeder. Page 9-2 Xerox WorkCentre 4118 User Guide... -
Page 153: Control Panel And Lcd
Control Panel and LCD screen with a soft, lint-free cloth, lightly dampened with water. Outside Areas of the Machine Use a cloth moistened with water to clean the outside areas of the machine. Xerox WorkCentre 4118 User Guide Page 9-3... -
Page 154: Ordering Supplies
Toner Cartridge 006R01278 Drum Cartridge 113R00671 To obtain supplies, contact your local Xerox representative, giving the company name, the product number and the machine serial number. Use the space below to keep a record of the telephone number. Supplies Telephone Number:... -
Page 155: Customer Replaceable Units
This procedure can only be performed once prior to changing the Toner Cartridge. Pull the release latch to open the side cover. CAUTION: Ensure the side cover is always open before opening the front cover. Xerox WorkCentre 4118 User Guide Page 9-5... - Page 156 Reinstall the toner cartridge, then lock the lever. Close the front cover and the side cover. The display shows [New Toner?], select [No] and press [Enter]. The machine returns to standby. Page 9-6 Xerox WorkCentre 4118 User Guide...
-
Page 157: Replacing The Toner
This feature will be activated only when the phone number of the service company or the dealer is stored in the machine’s memory. For instructions on setting the Send Toner Low Information to On, refer to “Maintenance Tools” on page 8-10. Xerox WorkCentre 4118 User Guide Page 9-7... -
Page 158: Drum Cartridge
Replace the drum cartridge when copy/print quality becomes degraded. Pull the release latch to open the side cover. CAUTION: Ensure the side cover is always open before opening the front cover. Open the front cover. Page 9-8 Xerox WorkCentre 4118 User Guide... - Page 159 Pull out the used drum cartridge. Unpack the new drum cartridge and slide it in place, making sure not to touch the surface of the drum. Xerox WorkCentre 4118 User Guide Page 9-9...
- Page 160 The machine returns to Standby mode. If the counter is not reset, ‘Drum Warning’ may appear before the new drum reaches its maximum life. To reset the counter manually refer to the “Maintenance Tools” on page 8-10. Page 9-10 Xerox WorkCentre 4118 User Guide...
-
Page 161: 10 Troubleshooting
LCD Error Messages ..... 10-11 Problem and Solutions Charts ....10-14 Xerox WorkCentre 4118 User Guide Page 10-1... -
Page 162: General
Follow routine maintenance schedules for cleaning areas such as the Document Glass and Control Panel. Always set the guides in the Paper Trays to the size of the media in the tray. Ensure paper clips and paper debris do not contaminate the machine. Page 10-2 Xerox WorkCentre 4118 User Guide... -
Page 163: Fault Clearance
If a document jams while it is feeding through the Document Feeder, ‘Document Jam’ displays and the Document Jam LED on the Status Map flashes. Details for clearing the three areas of the Document Feeder are given below. Input Misfeed Open the Document Feeder top cover. Xerox WorkCentre 4118 User Guide Page 10-3... - Page 164 If the jammed document cannot be easily removed, skip to Roller Misfeed. Close the Document Feeder and reload the documents. Page 10-4 Xerox WorkCentre 4118 User Guide...
- Page 165 Turn the release knob to enable easy removal of the misfed document from the exit area. Carefully pull the document to the right using both hands. Close the Document Feeder and reload the documents. Xerox WorkCentre 4118 User Guide Page 10-5...
-
Page 166: Paper Jams
If there is any resistance and the paper does not move immediately when pulled, pull the release lever to open the side cover. Carefully remove the misfed paper in the direction shown. Page 10-6 Xerox WorkCentre 4118 User Guide... -
Page 167: Paper Exit Area
CAUTION: Ensure the side cover is always open before opening the front cover. Open the front cover. Pull down on the Fuser Lever. This will release pressure on the paper. Xerox WorkCentre 4118 User Guide Page 10-7... - Page 168 Gently pull the paper out through the exit area. Push the Fuser Lever up. Turn the Jam Remove Lever back to the original position. Close the front cover and side cover. Page 10-8 Xerox WorkCentre 4118 User Guide...
-
Page 169: Sided Jam
’Bypass Jam’ displays and the Bypass Tray LED on the Status Map flashes. ’Bypass Jam’ may also occur when the paper has not fed correctly in the machine. Open the Bypass Tray and pull the paper out of the machine. Xerox WorkCentre 4118 User Guide Page 10-9... -
Page 170: Customer Support
If a fault cannot be resolved by following the LCD instructions, check the troubleshooting tables in the next section - they may help to solve the problem quickly. If you need further assistance or information, please visit the Xerox website for online solutions and support: http://www.xerox.com... -
Page 171: Lcd Error Messages
Overheat Group Not Available You have tried to select a Try again. Check location for a group. group. Incompatible Remote party did not have the requested feature such as polling. Xerox WorkCentre 4118 User Guide Page 10-11... - Page 172 DISPLAY MEANING SOLUTION Non-Xerox Toner Cart You have used an You must use a Xerox approved cartridge. unauthorized toner cartridge. Operation Not Assigned The machine has no job to handle. Line Busy The remote fax did not Try again. Contact recipient to ensure remote answer.
- Page 173 The memory has become Either delete unnecessary documents, or full. retransmit after more memory becomes available. The transmission can also be split into more than one operation if it is a large job. Xerox WorkCentre 4118 User Guide Page 10-13...
-
Page 174: Problem And Solutions Charts
Image rubs off the copy easily Replace the paper in the tray with paper from a new package. In high humidity areas do not leave paper in the product for extended periods of time. Page 10-14 Xerox WorkCentre 4118 User Guide... -
Page 175: Printing Problems
The printer driver may not Reinstall the software. be installed properly. The Parallel port cable Use an IEEE-1284 compliant Parallel port specifications may not be cable. correct. Xerox WorkCentre 4118 User Guide Page 10-15... - Page 176 The transfer roller may be Print a few blank pages to clean the transfer dirty. roller. Incorrect fonts TrueType fonts may be Use the fonts dialog box in the Control Panel to disabled. enable TrueType fonts. Page 10-16 Xerox WorkCentre 4118 User Guide...
-
Page 177: Faxing Problems Solution Chart
Check with the party trying to send the original that there are no problems with the remote fax. Paper is not collated Ensure the machine has paper loaded. Check if a paper jam has occurred. Xerox WorkCentre 4118 User Guide Page 10-17... - Page 178 Refer to “Maintenance Tools” on page 8- 10 for instructions. Paper is collated but not printed. Ensure there enough toner. Check with the party sending the fax that the original was placed correctly when scanned at the remote Fax. Page 10-18 Xerox WorkCentre 4118 User Guide...
- Page 179 General Specifications..... 11-6 Media Specifications ..... . 11-7 Xerox WorkCentre 4118 User Guide Page 11-1...
-
Page 180: Specifications
Introduction The Xerox WorkCentre 4118 adheres to strict specifications, approvals and certifications. These specifications are designed to provide for the safety of users and to ensure that the machine operates in a fully functional state. Use the specifications listed in this chapter to quickly identify the capabilities of the machine. -
Page 181: Printer Specifications
17 ppm for A4 / 18 ppm for Letter Effective printing width 208 mm (8.2 inches) for letter / legal (216 x 356 mm / 8.5 x 14 inch) 202 mm (8 inches) for A4 Xerox WorkCentre 4118 User Guide Page 11-3... -
Page 182: Fax Specifications
Tray 1 and Tray 2 (optional): 550 sheets 80 g/m² (20 lb) Each Bypass Tray: 100 sheets 80 g/m² (20 lb) Document Feeder Document Feeder: Up to 40 pages 80 g/m² (20 lb) Document Glass: 1 page Page 11-4 Xerox WorkCentre 4118 User Guide... -
Page 183: Scanner And Copier Specifications
25% ~ 100% in 1% increments (from Document Feeder) Maximum print edge margin Top, Bottom, Each side 4 mm (0.16 inch) First Copy Out Time Under 10 seconds (Normal - Ready) 35 seconds (from Power Save) Xerox WorkCentre 4118 User Guide Page 11-5... -
Page 184: General Specifications
540 x 441 x 488 mm (21 x 17 x 19 inches) without Tray 2 540 x 441 x 619 mm (21 x 17 x 24.4 inches) with Tray 2 Memory Size 64MB Page 11-6 Xerox WorkCentre 4118 User Guide... -
Page 185: Media Specifications
4.12 x 9.5 Envelope DL 110 x 220 4.33 x 8.66 Envelope C5 162 x 229 6.38 x 9.02 Custom 98 x 148 ~ 3.86 x 5.83 ~ 215.9 x 355.6 8.5 x 14 Xerox WorkCentre 4118 User Guide Page 11-7... - Page 186 3/4), COM10, #9, C5, DL, Custom Duplex Plain Paper A4, Letter, Folio, 80 ~ 90 g/m² Legal (20lb ~ 24lb) B5 means JIS and ISO Transparency film thickness: 150 µm Paper Label thickness: 140 µm Page 11-8 Xerox WorkCentre 4118 User Guide...
-
Page 187: Index
Book Copy Conventions 1-3 copy 3-11 Copier Problems Solution Chart 10-14 Bypass Tray 4-5 Copy 3-6 1-2 Sided 3-7 Auto Fit 3-7 Auto Suppress 3-11 Calling for Service 1-5 Book Copy 3-11 Xerox WorkCentre 4118 User Guide Index - 1... - Page 188 General Specification 11-6 Cleaning 9-2 Getting Started Drum Cartridge 9-8 Copying Procedure 3-2 Replacing the Drum Cartridge 9-8 Loading Paper 4-2 Drum Cartridge, installing 2-12 Drum Cleaning 8-12 Drum Replacement 8-11 ID Card Copy Index - 2 Xerox WorkCentre 4118 User Guide...
- Page 189 Power On 2-16 Clean Drum 8-12 Preparing paper for loading 4-2 New Drum 8-11 Print 6-2 Notify Toner Low 8-11 Printer Specification 11-3 Making Connections 2-14 Printer Tab 8-6 Manual Dialing 5-7 Xerox WorkCentre 4118 User Guide Index - 3...
- Page 190 Setting the Product to Send Toner Low Information Faxing Problems Solution Chart 10-17 General Problems 10-2 Setting up the Machine 2-20 2-21 LCD Error Messages 10-11 ControlCentre 8-4 Printing Problems Solution Chart 10-15 Index - 4 Xerox WorkCentre 4118 User Guide...
- Page 191 WIA driver 7-6 Using ControlCentre 8-4 Using the Document Feeder 3-3 Using the document feeder 5-2 Xerox Website 1-5 Using the Document Glass 3-4 Xerox Welcome Center 1-5 Using the document glass 5-3 Xerox WorkCentre 4118 User Guide Index - 5...
- Page 192 Index - 6 Xerox WorkCentre 4118 User Guide...
Need help?
Do you have a question about the 4118P - WorkCentre B/W Laser and is the answer not in the manual?
Questions and answers