Table of Contents
Advertisement
Advertisement
Table of Contents

Related Manuals for Brooks MT3809 TFE Lined


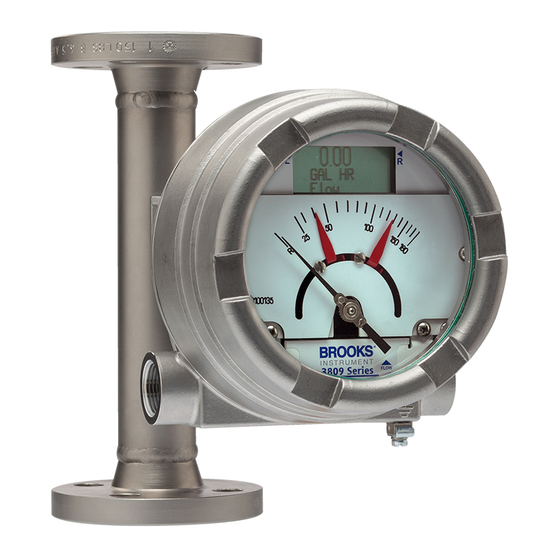
Summary of Contents for Brooks MT3809 TFE Lined
- Page 2 Read before proceeding! Brooks Instrument designs, manufactures and tests its products to meet many national and international standards. These products must be properly installed, operated and maintained to ensure they continue to operate within their normal specifications. The following instructions must be adhered to and integrated into your safety program when installing, operating and maintaining Brooks Instrument products.
-
Page 3: Table Of Contents
Brooks Instrument Installation Manual MT3809G & MT3810G Table of Contents Section 1 Introduction Introduction .............................1 Design Features..........................1 ....................2-3 Pressure Ratings ..........................4-6 Temperature Ratings........................7 Outline and Dimensions ........................7-10 Optional Valves and Flow Controllers .....................11 Optional Electronic Features......................11 Current Loop 4-20 mA with HART Transmitter, with Alarms, Display and Pulse Output ....12 Fieldbus Transmitter, with Alarms and Pulse Output ..........13... - Page 4 Exploded View, Model MT3809G and MT3810G - Gas Service ............ 63 Exploded View, Model MT3809G and MT3810G - Liquid Service ..........64 Exploded View, Model MT3809G, Size 15 (Gas or Liquid Service) ..........65 Exploded View, Model MT3809G, Size 16 (Liquid Service Only) ..........65...
- Page 5 Brooks Instrument Installation Manual MT3809G & MT3810G Table of Contents Tables Table Number ..........................2 1-1b ELF Body/Float Stop/Float/Metering Tube Material Restrictions ............2 Flow Capacities, Pressure Drop and Viscosity Immunity Ceiling Values ..........3 Model MT3809/MT3810 Pressure Ratings, Flanged ................4 Model MT3809/MT3810 Pressure Ratings, NPT Female ..............5 Model MT3809/MT3810 Pressure Ratings, NPT Male ................6...
-
Page 6: Introduction
Also available are front adjustable inductive alarms, high Design Features The Brooks Model MT3809 has been the “go to” meter for several years and the choice of Engineering Contractor customers (EPC). Brooks is proud to raise the performance of the standard meter by adding these new features and options: •... - Page 7 Brooks Instrument Installation Manual MT3809G & MT3810G Section 1 Introduction MT3809 MT3809 ELF MT3810 TFE Lined Measuring See Capacity Tables Range Rangeability 10:1 (most sizes) Tefzel® Lined 316/316L (dual certified Metering Tube Standard 316/316L (dual certified stainless steel) stainless steel) Premium Alloy 625, Hastelloy®...
- Page 8 Brooks Instrument Installation Manual MT3809G & MT3810G Section 1 Introduction water Pressure Pressure drop volume mass volume volume visc. Meter Meter Float Float drop inches type size code material unit unit unit unit mbar category Titanium 0.96 0.25 0.34 0.96 1400 0.11...
-
Page 9: Pressure Ratings
Brooks Instrument Installation Manual MT3809G & MT3810G Section 1 Introduction Pressure Ratings Please reference Tables 1-3, 1-4 and 1-5. X-VA-MT3809G-MT3810G-eng/541B182AAG/A/2022-10... - Page 10 Brooks Instrument Installation Manual MT3809G & MT3810G Section 1 Introduction X-VA-MT3809G-MT3810G-eng/541B182AAG/A/2022-10...
- Page 11 Brooks Instrument Installation Manual MT3809G & MT3810G Section 1 Introduction X-VA-MT3809G-MT3810G-eng/541B182AAG/A/2022-10...
-
Page 12: 1-4 Temperature Ratings
Brooks Instrument Installation Manual MT3809G & MT3810G Section 1 Introduction 1-4 Temperature Ratings Please reference Table 1-6. Outline and Dimensions Please reference Figures 1-1, 1-2 and 1-3 on the following pages. X-VA-MT3809G-MT3810G-eng/541B182AAG/A/2022-10... - Page 13 Brooks Instrument Installation Manual MT3809G & MT3810G Section 1 Introduction Model 3809 & 3810 General Purpose Indicator Housing with Threaded Female Connections mm [inches] 141 5.57 98 3.85 A 1.5[1/16] 137 5.40 Model 3809 & 3810 General Purpose Indicator Housing with Flanged Connections mm [inches] 98 3.85...
- Page 14 Brooks Instrument Installation Manual MT3809G & MT3810G Section 1 Introduction Model 3809 Intrinsically Safe Indicator Housing with Threaded Female Connections mm [inches] 160 6.29 A 1.5[1/16] 160 6.29 Model 3809 Intrinsically Safe Indicator Housing with Flanged Connections mm [inches] 160 6.29 A 1.5[1/16]...
- Page 15 Brooks Instrument Installation Manual MT3809G & MT3810G Section 1 Introduction Model 3809 Explosion Proof Indicator Housing with Threaded Female Connections mm [inches] A 1.5[1/16] 172 6.75 165 6.50 Model 3809 Explosion Proof Indicator Housing with Flanged Connections mm [inches] 172 6.75 A 1.5[1/16]...
-
Page 16: Optional Valves And Flow Controllers
Brooks Instrument Installation Manual MT3809G & MT3810G Section 1 Introduction Optional Valves and Flow Controllers outlet side of the instrument. Needle valves can be supplied up to size 12 1-1/2" maximum 10000 l/hr / 46 gpm water equivalent. Needle valves and... -
Page 17: Current Loop 4-20 Ma With Hart Transmitter, With Alarms, Display And Pulse Output
The transmitter is HART-programmable or for numerous variables such as shipment, commonly used default values are programmed by Brooks to ensure ease of operation and quick startup. However, parameters may be reprogrammed by the user if needed. Flow rate information may be viewed locally at the meter scale, LCD display or displayed remotely. -
Page 18: Foundation Tm Fieldbus Transmitter, With Alarms And Pulse Output
Brooks Instrument Installation Manual MT3809G & MT3810G Section 1 Introduction Fieldbus Transmitter, with Alarms and Pulse Output OUNDATION Design Features • F Fieldbus digital communication network interface OUNDATION • Ease of wiring and installation with a single 2-wire bus connection •... -
Page 19: Inductive Alarms
Brooks Instrument Installation Manual MT3809G & MT3810G Section 1 Introduction Inductive Alarms Design Features • 1 or 2 normally open inductive limit switches • For low or high limit signaling/switching • Front adjustable • Optional Relay Power Supply – recommended... - Page 23 Brooks Instrument Installation Manual MT3809G & MT3810G Section 1 Introduction Maximum Process Temperature (°C) Temperature Class Approval Ambient Meter type type Temperature (°C) -40 to 32.5 300* 420* Flanged and -40 to 47 300* Male -40 to 58 Threaded -40 to 65...
- Page 24 Brooks Instrument Installation Manual MT3809G & MT3810G Section 1 Introduction Maximum Process Temperature (°C) Meter Option Without Digital Display With or without Digital Display Temperature Class Without With or without With or without With or without With or without Approval...
- Page 25 Brooks Instrument Installation Manual MT3809G & MT3810G Section 1 Introduction Electronics Function / signal Ui,V Ii, mA Pi, mW Ci, nF Li, H Recommended Barrier # configuration Stahl Type: 9260-13-11-105 Signal 4-20mA 0.365 Stahl Type : 9001/01-280-075-101 (J1 terminals 12+ and 13-) Pepper &...
- Page 26 Brooks Instrument Installation Manual MT3809G & MT3810G Section 1 Introduction ATEX/IECEx Protection Concept Ex ia, Ex ic Ex ia, Ex ic Ex Ex db/Ex tb Ex db/Ex tb Electrical Connection Entry Ex nA, Ex tc nA, Ex tc 3/4" NPT - F 3/4"...
-
Page 27: General
Recommended Storage Practices If intermediate or long-term storage is required for equipment, as supplied by Brooks Instrument, it is recommended that the equipment be stored in accordance with the following: a. Within the original shipping container. b. Stored in a sheltered area, preferably a warm, dry, heated warehouse. -
Page 28: Installation Of Flowmeter
Brooks Instrument Installation Manual MT3809G & MT3810G Section 2 Installation Installation of Flowmeter Recommended installation for Models MT3809 and MT3810 is as follows: removed before use. top. plumbing practices. pressure rating or the operating pressure. Also note corrosion resistance and thermal stability. - Page 29 Brooks Instrument Installation Manual MT3809G & MT3810G Section 2 Installation measurement section of the meter, and potentially even blockage of iii. pressure rating or the operating pressure. Also note corrosion resistance and thermal stability. Important Table 2-1 Important: PTFE is deformable under pressure in the cold state. Do not exceed maximum torque.
-
Page 30: How To Remove And Reinstall Gp Housing Indicator Covers
Brooks Instrument Installation Manual MT3809G & MT3810G Section 2 Installation How to Remove and Reinstall GP Housing Indicator Covers Directions to remove and reinstall the GP Housing 2. Loosen the 4 cover screws. - For aluminum housing, use a T20 TORX drive tool. -
Page 31: How To Remove And Reinstall Is Housing Indicator Covers
Brooks Instrument Installation Manual MT3809G & MT3810G Section 2 Installation How to Remove and Reinstall IS Housing Indicator Covers Directions to remove and reinstall the IS Housing Indicator Cover, through the meter. 2. Using a T20 TORX tool loosen the 3 cover screws. Note, the screws will stay attached to the cover. -
Page 32: How To Remove And Reinstall Xp Housing Indicator Covers
Brooks Instrument Installation Manual MT3809G & MT3810G Section 2 Installation How to Remove and Reinstall XP Housing Indicator Covers Directions to remove and reinstall the XP Housing going through the meter. 2. Using your hands or a strap wrench turn the cover counter clockwise to remove the cover from the housing 3. -
Page 33: Electrical Connections To Mt3809 With 4-20 Ma/Hart Transmitter, Alarms And Pulse Output
Brooks Instrument Installation Manual MT3809G & MT3810G Section 2 Installation Electrical Connections to MT3809 with 4-20 mA/HART Transmitter, Alarms and Pulse Output a) Before electrical connection, install the meter into the pipeline as described in previous Section 2.5. b) The electrical installation practice for conventional 4-20 mA and wired HART devices is generally the same: i. - Page 34 Brooks Instrument Installation Manual MT3809G & MT3810G Section 2 Installation v. Staying below the maximum allowable cable length which depends upon the cable capacitance and the number of network devices. Most installations are well within the 3000 meter (10,000 ft) theoretical limit for HART communication.
- Page 35 Brooks Instrument Installation Manual MT3809G & MT3810G Section 2 Installation high and low range parameters. The analog output (AO) transmitter parameters, AO Hi-Range and AO Lo-Range span the 4-20 mA signal. For Range parameter is set at 500 and the AO Lo-Range is set at 100.
- Page 36 Brooks Instrument Installation Manual MT3809G & MT3810G Section 2 Installation iii. Then, zero the transmitter shorting the two pins at the terminal block. Reference Figure 2-4 below. Note: The zero function may be activated as part of a periodical maintenance check. If desired, a zero switch can be remotely mounted determine the wiring methods used for this switch.
-
Page 37: 4-20 Ma/Hart Transmitter Intrinsically Safe Installation
Figure 2-5a/2-5b. Alternatively, the optional intrinsically safe power supply available from Brooks may be used. Cable parameters for inductance and capacitance still apply. To ensure full EMC protection the ferrite core included with the meter must be installed to the input power I/O cable at the supply end of cable. - Page 38 Brooks Instrument Installation Manual MT3809G & MT3810G Section 2 Installation X-VA-MT3809G-MT3810G-eng/541B182AAG/A/2022-10...
- Page 39 Brooks Instrument Installation Manual MT3809G & MT3810G Section 2 Installation X-VA-MT3809G-MT3810G-eng/541B182AAG/A/2022-10...
- Page 40 Brooks Instrument Installation Manual MT3809G & MT3810G Section 2 Installation X-VA-MT3809G-MT3810G-eng/541B182AAG/A/2022-10...
- Page 41 Brooks Instrument Installation Manual MT3809G & MT3810G Section 2 Installation X-VA-MT3809G-MT3810G-eng/541B182AAG/A/2022-10...
- Page 42 Brooks Instrument Installation Manual MT3809G & MT3810G Section 2 Installation X-VA-MT3809G-MT3810G-eng/541B182AAG/A/2022-10...
- Page 43 Brooks Instrument Installation Manual MT3809G & MT3810G Section 2 Installation X-VA-MT3809G-MT3810G-eng/541B182AAG/A/2022-10...
- Page 44 Brooks Instrument Installation Manual MT3809G & MT3810G Section 2 Installation X-VA-MT3809G-MT3810G-eng/541B182AAG/A/2022-10...
-
Page 45: 4-20 Ma/Hart Transmitter Division 2 Installation
Brooks Instrument Installation Manual MT3809G & MT3810G Section 2 Installation 4-20 mA/HART Transmitter Division 2 Installation parameters are not applicable. The electrical code will require the use of conduit for wire protection. Refer to Figure 2-5a/2-5b. 4-20 mA/HART Transmitter Flameproof Installation required and explosion proof installation methods must be followed. - Page 46 Brooks Instrument Installation Manual MT3809G & MT3810G Section 2 Installation X-VA-MT3809G-MT3810G-eng/541B182AAG/A/2022-10...
-
Page 47: Oundation
Brooks Instrument Installation Manual MT3809G & MT3810G Section 2 Installation Electrical Connections to MT3809 with F Fieldbus Transmitter, Alarms and Pulse Output OUNDATION a) Before electrical connection, install the meter into the pipeline as described in previous Section 2-5. b) For electrical installation follow the general F... - Page 48 Brooks Instrument Installation Manual MT3809G & MT3810G Section 2 Installation f) Common transmitter parameters are set during manufacturing at well as on-line monitoring can be done through the F Fieldbus OUNDATION communication protocol.See Foundation Fieldbus supplemental manual (X-DPT-FF-MT3809G-Alarms-eng). g) After installation and power up of the transmitter, the transmitter must be zeroed, both electrically and mechanically.
- Page 49 Brooks Instrument Installation Manual MT3809G & MT3810G Section 2 Installation OUNDATION iii. Then, zero the transmitter shorting the two pins at the terminal block, See Figure 2-11. Note: The zero function may be activated as part of a periodical maintenance check. If desired, a zero switch can be remotely mounted determine the wiring methods used for this switch.
-
Page 50: Foundation Fieldbus Transmitter Intrinsically Safe Installation
Brooks Instrument Installation Manual MT3809G & MT3810G Section 2 Installation Refer to Figures 2-5a/2-5b and 2-8a/2-8b. required and explosion proof installation methods must be followed. Refer to Figure 2-9. a. The shielded cable must be used for hook up. In case of installation into... - Page 51 Brooks Instrument Installation Manual MT3809G & MT3810G Section 2 Installation X-VA-MT3809G-MT3810G-eng/541B182AAG/A/2022-10...
- Page 52 Brooks Instrument Installation Manual MT3809G & MT3810G Section 2 Installation X-VA-MT3809G-MT3810G-eng/541B182AAG/A/2022-10...
- Page 53 Brooks Instrument Installation Manual MT3809G & MT3810G Section 2 Installation X-VA-MT3809G-MT3810G-eng/541B182AAG/A/2022-10...
- Page 54 Brooks Instrument Installation Manual MT3809G & MT3810G Section 2 Installation X-VA-MT3809G-MT3810G-eng/541B182AAG/A/2022-10...
-
Page 55: Installation Of The Model Mt3809 Flowmeter With Inductive Alarms (1 Or 2 Switches)
Brooks Instrument Installation Manual MT3809G & MT3810G Section 2 Installation a. Install the meter as described in Section 2-5 b. Install the inductive alarms (1 or 2 switches) following the wiring (with or without HART or FOUNDATION™ Fieldbus transmitter) c. Intrinsically safe installations require the use of relay isolators for the alarms and a barrier for the transmitter, if equipped. - Page 56 Brooks Instrument Installation Manual MT3809G & MT3810G Section 2 Installation turn the screw to align with the “R” on the scale. It may take a few adjustments to get the pointer on the “R”. X-VA-MT3809G-MT3810G-eng/541B182AAG/A/2022-10...
-
Page 57: Operation
Brooks Instrument Installation Manual MT3809G & MT3810G Section 3 Operation Operation Start-up and Operation of Flowmeter b. Check for leaks around the meter inlet and outlet connections. If no leaks are present, bring the system up to operating pressure. on the scale. If necessary, adjust the pointer as per directions in the Maintenance Section 4. -
Page 58: Operation Of The Model Mt3809 Flowmeter With A Transmitter With Or Without Optional Alarms And Pulse Output For Totalization
Brooks service department for a fee. * Basic transmitter setup parameters meter. -
Page 59: Communication With Hart Transmitter Using Device Descriptor
Brooks Instrument Installation Manual MT3809G & MT3810G Section 3 Operation Communication with HART Transmitter using Device Descriptor The structure of the device descriptor for the HART transmitter is given in Figures 3-1 and 3-2. DD structure: X-VA-MT3809G-MT3810G-eng/541B182AAG/A/2022-10... - Page 60 Brooks Instrument Installation Manual MT3809G & MT3810G Section 3 Operation X-VA-MT3809G-MT3810G-eng/541B182AAG/A/2022-10...
- Page 61 Brooks Instrument Installation Manual MT3809G & MT3810G Section 3 Operation other preferred high and low limits. The units of measure of the alarm limits are the same units of measure as the process variable itself. Computations: Totalization Totalizers are available in both resettable and inventory options.
-
Page 62: Communication With Foundation Fieldbus Transmitter
Brooks Instrument Installation Manual MT3809G & MT3810G Section 3 Operation Fieldbus Transmitter Communication with F OUNDATION For details on the Foundation Fieldbus interface, refer to the supplemental manual (X-DPT-FF-MT3809G-Alarms-eng), also available on BrooksInstrument.com/Documentation Communication with Transmitter using Local Operator Interface with LCD Display The LCD display is a three line liquid crystal display. - Page 63 Brooks Instrument Installation Manual MT3809G & MT3810G Section 3 Operation Left LOI button = Scroll through options. Right LOI button = Activate option. X-VA-MT3809G-MT3810G-eng/541B182AAG/A/2022-10...
-
Page 64: General Service Information
Brooks Instrument Installation Manual MT3809G & MT3810G Section 4 Maintenance General Service Information There is no routine maintenance required for the Models MT3809 and must be followed. WARNING If this equipment is not properly serviced, serious personal injury and/or damage to the equipment can result from potentially high operating pressures. -
Page 65: Meter Float Cleaning (Mt3809 & Mt3810)
Brooks Instrument Installation Manual MT3809G & MT3810G Section 4 Maintenance Float replacement procedures are dependent on the meter size, appropriate section below for instructions along with Figures 4-1 thru 4-4. 1. FLANGED CONNECTION 1. It is NOT recommended to disassemble these meters. Contact Service for repair. - Page 66 Brooks Instrument Installation Manual MT3809G & MT3810G Section 4 Maintenance 5. To clean the gas damper, unscrew the cylinder head. Then remove the bolt and carefully take out the small piston so as to not damage the critical surfaces. Secure the inlet/bottom screw. While holding the damper in place with a pin(1/8”...
- Page 67 Brooks Instrument Installation Manual MT3809G & MT3810G Section 4 Maintenance 1. It is NOT recommended to disassemble these meters. Contact Service for repair. 1. Remove the meter from the process line and lay the meter horizontal on a table. inlet by pushing from the top with a round bar stock (3/4” or 19 mm diameter).
- Page 68 Brooks Instrument Installation Manual MT3809G & MT3810G Section 4 Maintenance X-VA-MT3809G-MT3810G-eng/541B182AAG/A/2022-10...
- Page 69 Brooks Instrument Installation Manual MT3809G & MT3810G Section 4 Maintenance X-VA-MT3809G-MT3810G-eng/541B182AAG/A/2022-10...
-
Page 70: Meter Float Cleaning (Mt3809 Etfe Option)
Brooks Instrument Installation Manual MT3809G & MT3810G Section 4 Maintenance Flanged connections, all sizes, liquid or gas. a. Flush only. Contact factory. b. See Section 2-5-1 on how to remove indicator housing and expose the pointer assembly. c. Turn the slotted screw on the bottom of the point until the pointer is in line with the reference (zero) mark on the scale. -
Page 71: Inductive Alarm Replacement
Replace the indicator housing cover and secure with four screws. Transmitter Replacement with Inductive Alarms your nearest authorized Brooks service representative. However, the inductive alarms may be replaced according to the procedure in Section 4.6... - Page 72 In many cases this service can be provided under in-situ conditions, and the results will be traceable to the relevant international quality standards. SEMINARS AND TRAINING Brooks Instrument can provide seminars and dedicated training to engineers, end users and maintenance persons. Please contact your nearest sales representative for more details. TRADEMARKS Brooks is a trademark of Brooks Instrument, LLC All other trademarks are the property of their respective owners.
Need help?
Do you have a question about the MT3809 TFE Lined and is the answer not in the manual?
Questions and answers