Table of Contents
Advertisement
GILAIR-3 & GILAIR-5
AIR SAMPLING SYSTEMS
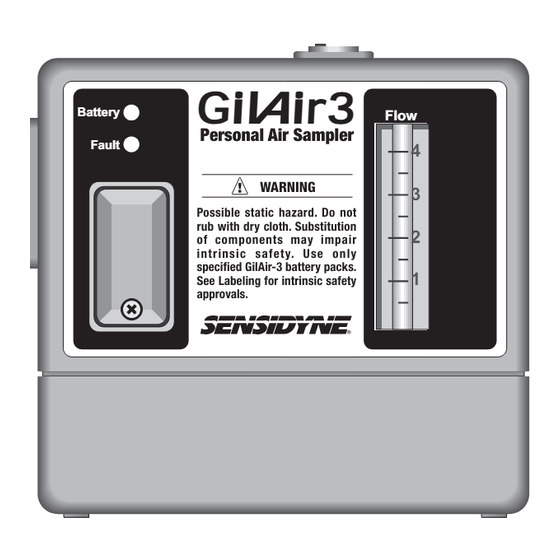
Gil ir3
Battery
Personal Air Sampler
Fault
Possible static hazard. Do not
rub with dry cloth. Substitution
of components may impair
intrinsic safety. Use only
specified GilAir-3 battery packs.
See Labeling for intrinsic safety
approvals.
16333 Bay Vista Dr. • Clearwater, Florida 33760 USA • (800) 451-9444 • (727) 530-3602 • (727) 539-0550 [FAX] • www.sensidyne.com
OPERATION MANUAL
A A
Flow
4
5
WARNING
4
3
3
2
2
1
1
REF 360-0040-01 (F)
A A
Gil ir5
Battery
Personal Air Sampler
Fault
WARNING
Possible static hazard. Do not
rub with dry cloth. Substitution
of components may impair
intrinsic safety. Use only
specified GilAir-5 battery packs.
See Labeling for intrinsic safety
approvals.
Flow
5
5
4
4
3
3
2
2
1
1
Advertisement
Table of Contents

Related Manuals for Sensidyne GILAIR-3


Summary of Contents for Sensidyne GILAIR-3
- Page 1 Use only specified GilAir-5 battery packs. See Labeling for intrinsic safety approvals. 16333 Bay Vista Dr. • Clearwater, Florida 33760 USA • (800) 451-9444 • (727) 530-3602 • (727) 539-0550 [FAX] • www.sensidyne.com REF 360-0040-01 (F)
-
Page 3: Notices
PROPRIETARY NOTICE This manual was prepared exclusively for the owner of the Sensidyne GilAir Air Sampling System. The material within this manual is proprietary information and is to be used only to understand, operate, and service the instrument. By receiving... -
Page 4: Table Of Contents
TABLE OF CONTENTS • PREFACE • Notices ........................... 3 • WARNINGS ..........................6 • Certifications .......................... 7 SECTION ONE: INTRODUCTION • Components .......................... 9 SECTION TWO: PUMP OPERATION Setting/Verifying Flow Rate .................... 12 • Equipment Set-Up ......................12 • Field Calibration/Flow Verification ................13 Taking A Sample ......................15 SECTION THREE: DISPLAY FEATURES Stopping The Sampling Run: Clock Model .............. - Page 5 TABLE OF CONTENTS SECTION FOUR: MAINTENANCE Battery Maintenance ....................... 24 Filter Maintenance ......................25 SECTION FIVE: APPENDICES • Appendix A: Parts List ......................26 • Appendix B: Specifications ....................27 • Appendix C: Troubleshooting Guide ................. 28 • Appendix D: Constant Low Flow Module ................. 29 •...
-
Page 6: Warnings
Operation Manual. Service to be performed by Sensidyne Authorized Service Departments only. Use ONLY specified Sensidyne parts when performing maintenance procedures described in this manual. Intrinsic safety certifications become void by substitution of components, unauthorized repair or alteration. -
Page 7: Certifications
III. Temp Code T3C, when used with battery pack 800869 (NiCd) with battery pack 800464 (NiCd) or 783-0009-02 (NiMH) or 783-0008-03 (NiMH) Manufactured by Sensidyne • Clearwater, FL USA Manufactured by Sensidyne • Clearwater, FL USA Class I = Flammable Gases, Vapors, or Liquids... -
Page 8: Rub With Dry Cloth. Substitution
Gil ir5 Battery Flow Personal Air Sampler Fault WARNING Possible static hazard. Do not rub with dry cloth. Substitution of components may impair intrinsic safety. Use only specified GilAir-5 battery packs. See Labeling for intrinsic safety approvals. REF 360-0040-01 (F) -
Page 9: Components
SECTION ONE INTRODUCTION • COMPONENTS • Clock and Program Models Only • See Figures 1.1 (GilAir-3) and 1.2 (GilAir-5) (7) Liquid Crystal display (LCD) • All Models Note: All times are displayed in minutes. (1) On/Off switch (7.1) Battery icon. A flashing icon indicates battery voltage is below its nominal value. -
Page 10: Air Sampling Pump: Front View (Gilair-3 Shown)
GILAIR-3 & GILAIR-5 AIR SAMPLING PUMPS (7.5) 0. Indicates percent of time pump runs SHUT/OFF (alternately) outside of ± 5% fault tolerance envelope Reminder message to turn the pump during sampling run. Maximum indication is off. It indicates that 5 minutes have 9% regardless of actual performance. -
Page 11: Field Calibration/Flow Verification Equipment Set-Up
GILAIR-3 & GILAIR-5 AIR SAMPLING PUMPS PROG Gilian ® GilAir/P MODE/HOLD Program Timer Gil ir3 Battery Flow Personal Air Sampler Fault WARNING Possible static hazard. Do not rub with dry cloth. Substitution of components may impair intrinsic safety. Use only Gilian ®... -
Page 12: Setting/Verifying Flow Rate
PUMP OPERATION 2.1 Setting/Verifying Flow Rate • Equipment Set-Up 1) Use a GilAir-3 or GilAir-5 pump with a fully charged battery pack. 2) Attach tubing to the pump. 3) Connect the collection device to the tubing. 4) Connect the tubing from the collection media to a Gilibrator 2. -
Page 13: Field Calibration/Flow Verification
GILAIR-3 & GILAIR-5 AIR SAMPLING PUMPS • Field Calibration/Flow Verification Field calibration (flow rate verification) must be per- 5) Rotate the front cover plate 180°. formed before sampling and when setting the flow rate. 6) Move On/Off switch to the On position. -
Page 14: Sampling
GILAIR-3 & GILAIR-5 AIR SAMPLING PUMPS Battery Fault Gilian ® GilAir/C MODE/HOLD Clock Timer PROG Gilian ® GilAir/P MODE/HOLD Program Timer Battery Fault Flow Adj. Charge Gil ir3 FLOW Battery Flow Personal Air Sampler Fault AVERAGE WARNING SAMPLE # Flow Adj. -
Page 15: Taking A Sample
GILAIR-3 & GILAIR-5 AIR SAMPLING PUMPS 2.2 Taking A Sample Note for Basic Models Start and stop times must be recorded to determine sample time. 1) Move the On/Off switch to the On position. 2) Place the pump, tubing and cassette on your person as shown in Figure 2.3. -
Page 16: Stopping The Sampling Run: Clock Model
SECTION THREE DISPLAY FEATURES 3.1 Stopping The Sampling Run: Clock Model 3.2 Display Self-Test: Clock Model Move the On/Off switch to Off to stop the sampling Side Anti-Tamper Plate should be open and rotated. run. Pump should be off. The run time is displayed, “R”, and the percentage of Using a pointed instrument push the MODE/HOLD time the sampling run varied more than ±... -
Page 17: Retrieving "Last" Run Data: Clock Model
GILAIR-3 & GILAIR-5 AIR SAMPLING PUMPS 3.3 Retrieving “LAST” Run Data: Clock Model Note: Side Anti-Tamper Plate should be open and rotated. 1) Make certain pump is off. 2) Using a pointed instrument push MODE/HOLD Button one time. 3) “LAST” is displayed. -
Page 18: Pausing A Sampling Run: Clock Model
GILAIR-3 & GILAIR-5 AIR SAMPLING PUMPS 3.4 Pausing A Sampling Run: Clock Model Note: Side Anti-Tamper Plate should be open and rotated. 1) Make certain pump is running. 2) The clock icon indicates the pump is taking a sample. 3) Using a pointed instrument push MODE/HOLD button for at least 1 second. -
Page 19: Stopping The Sampling Run: Program Model
GILAIR-3 & GILAIR-5 AIR SAMPLING PUMPS 3.5 Stopping The Sampling Run: Program Model 3.6 Display Self-Test: Program Model Move the On/Off switch to Off to stop the sampling Side Anti-Tamper Plate should be open and rotated. run. Pump should be off. -
Page 20: Retrieving "Last" Run Data: Program Model
GILAIR-3 & GILAIR-5 AIR SAMPLING PUMPS 3.7 Retrieving “LAST” Run Data: Program Model Note: Side Anti-Tamper Plate should be open and rotated. 1) Make certain pump is off. 2) Using a pointed instrument push MODE/HOLD Button one time. 3) “LAST” is displayed. -
Page 21: Pausing A Sampling Run: Program Model
GILAIR-3 & GILAIR-5 AIR SAMPLING PUMPS 3.8 Pausing A Sampling Run: Program Model Note: Side Anti-Tamper Plate should be open and rotated. 1) Make certain pump is running. 2) Display shows that pump is taking a sample. 3) Using a pointed instrument push MODE/HOLD button for at least 1 second. -
Page 22: Programming The Pump: Program Model
GILAIR-3 & GILAIR-5 AIR SAMPLING PUMPS 3.9 Programming The Pump Side Anti-Tamper Plate should be open and rotated. 5) Press the PROG button again to view the current Pump should be off. Run Delay Time (represented by “D” & “R” icons in the display window [5A]). -
Page 23: Programming Flow Chart: Program Model
GILAIR-3 & GILAIR-5 AIR SAMPLING PUMPS LAST MODE/HOLD LAST PROG PROG PROG PROG Note The above sample delays the start by 18 minutes, runs four hours, shuts off one hour, and runs four more hours. PROG Figure 3.1 Programming Flow Chart: Program Model... -
Page 24: Battery Maintenance
SECTION FOUR MAINTENANCE 4.1 Battery Maintenance The GilAir-3 and GilAir-5 air sampling pumps use re- • Chargers chargeable Nickel-Cadmium or Nickel-Metal-Hydride batteries that must be fully charged and properly NOTE maintained to achieve maximum pump run time. The See Battery/Charger compatibility matrix in Appendix A: battery pack may be charged separately or while in- Parts List. -
Page 25: Filter Maintenance
GILAIR-3 & GILAIR-5 AIR SAMPLING PUMPS 4.2 Filter Maintenance The inlet filter should be changed after six months of regular use or whenever the outer portion of the filter be- comes discolored. The filter center retains its original color as a reference. -
Page 26: Appendix Aparts List
Accessories Part Number Description 800518 ......GilAir-3 / GilAir-5 Low flow Module, Constant Flow 800519 ......GilAir-3 / GilAir-5 Low flow Module, Multi-Flow 800149 ......Tube Holder Kit, Single Tube Holder Assembly (No Manifold), 6 x 70 mm 800259 ......Tube Holder Kit, Single Tube Holder Assembly (No Manifold), 7-10 x 110 mm 800148 ...... -
Page 27: Appendix B: Specifications
Dimensions (GilAir-3) ........3.6” (H) x 3.9” (W) x 2.0” (D) 90 mm (H) x 100 mm (W) x 51 mm (D) Dimensions (GilAir-5) ........4.1” (H) x 3.9” (W) x 2.0” (D) 103 mm (H) x 100 mm (W) x 51 mm (D) Weight (GilAir-3) .......... -
Page 28: Appendix Ctroubleshooting Guide
APPENDIX C TROUBLESHOOTING GUIDE • t i s E " " . i t i o i t • e t t i - e l a t t i l . y l REF 360-0040-01 (F) -
Page 29: Appendix D: Constant Low Flow Module
APPENDIX D CONSTANT LOW FLOW MODULE D.1 Overview The Constant Low Flow Module is suitable for sampling between 5 and 500 cc/min , and maintains a constant sampling flow despite load changes up to 25” H D.2 Installing The Constant Low Flow Module NOTE Install the Low Flow Module in a clean environment with the pump turned off. - Page 30 APPENDIX D CONSTANT LOW FLOW MODULE D.3 Constant Low Flow Calibration Set-Up • See Figure D.2 The front anti-tamper cover plate should be open and rotated. The pump should be off. Set up the calibration equipment as shown. Make certain that the sampling media [A] is properly installed as shown.
-
Page 31: Constant Low Flow Module: Calibration Set-Up
APPENDIX D CONSTANT LOW FLOW MODULE UNIVERSAL TUBE HOLDER SYSTEM (THH-L-240) Patent Pending Made in USA Gil ir3 Battery Flow Personal Air Sampler Fault WARNING Flow Adj. Possible static hazard. Do not rub with dry cloth. Substitution of components may impair intrinsic safety. -
Page 32: Constant Low Flow Module: Bag Sampling Installation
APPENDIX D CONSTANT LOW FLOW MODULE D.4 Bag Sampling Installation The module is provided with an internal Luer taper for bag sampling. The unique feature of this system is that it will automatically shut the flow off when the bag has been filled. The maximum pressure within the bag is ap- proximately 8”... -
Page 33: Appendix E: Multi-Flow Module
APPENDIX E MULTI-FLOW MODULE E.1 Overview The Multi-Flow Module is suitable for multiple tube sampling between 1 and 750 cc/min and can be used in conjunction with the Gilian Universal Tube Holder System to perform multiple tube sampling. E.2 Installing The Multi-Flow Module NOTE Install the Multi-Flow Module in a clean environment with the pump turned off. - Page 34 APPENDIX E MULTI-FLOW MODULE E.3 Multi-Flow Calibration Set-Up • See Figure E.2 The front anti-tamper cover plate should be open and rotated. The pump should be off. Set up the calibration equipment as shown. Make certain that the sampling media [A], [B], [C] or [D] is properly installed as shown.
-
Page 35: Multi-Flow Module: Calibration Set-Up
APPENDIX E MULTI-FLOW MODULE Figure E.2 Multi-Flow Module: Calibration Set-Up REF 360-0040-01 (F) -
Page 36: Multi-Flow Module: Bag Sampling Installation
APPENDIX E MULTI-FLOW MODULE E.4 Bag Sampling Installation The module is provided with an internal Luer taper for bag sampling. • See Figure E.3 1) Insert the Luer taper [1]. 2) Attach the tubing [2] to the taper. 3) Attach the adapter [3] to the variable manifold [4]. 4) Connect the tubing [2] to the adapter [3]. -
Page 37: Appendix F: Service
APPENDIX F SERVICE Domestic Service European Service Sensidyne, LP Goffin Meyvis 16333 Bay Vista Drive Analytical and Medical Systems B.V. Clearwater, Florida 33760 USA Deliveries: 800-451-9444 727-530-3602 Ecustraat II 4879 NP Etten Leur 727-539-0550 [Main fax] the Netherlands 727-538-0671 [Service fax] Mail: e-mail: info@sensidyne.com... - Page 38 Notes: REF 360-0040-01 (F)
- Page 40 Weseler Str. 35 • 45478 QUALITY MANAGEMENT AMTAC MEDIQA Mulheim-Ruhr Germany ISO 9001:2000 Registered 800-451-9444 • 727-530-3602 • 727-539-0550 [fax] Tel. +49 (0) 208 9 99 10 • Fax. +49 (0) 208 5 41 10 www.sensidyne.com • info@sensidyne.com www.schauenburg.com • international@schauenburg.com...
Need help?
Do you have a question about the GILAIR-3 and is the answer not in the manual?
Questions and answers