Table of Contents
Advertisement
Quick Links
Advertisement
Table of Contents

Related Manuals for SMART Podium ID370


Summary of Contents for SMART Podium ID370
- Page 1 SMART Podium ID350/ID370 Installation Guide...
-
Page 2: Product Registration
Copyright Notice © 2002 – 2009 SMART Technologies ULC. All rights reserved. No part of this publication may be reproduced, transmitted, transcribed, stored in a retrieval system or translated into any language in any form by any means without the prior written consent of SMART Technologies ULC. -
Page 3: Important Information
Important Information Please read this guide carefully before setting up and using your SMART Podium interactive pen display. WARNING • If the screen is damaged, don’t touch any liquid that leaks from it. This liquid is an irritant. If the liquid makes contact with your skin, eyes or mouth, immediately rinse the area with running water for at least 15 minutes. -
Page 4: Other Precautions
IM P O RT A NT I NF O R M A TI O N Other Precautions For proper installation, read this guide carefully and observe the following precautions. The Interactive Pen Display • Don’t place sharp or heavy objects on the interactive pen display. •... - Page 5 Unplug the interactive pen display if you won’t use it for an extended period. • Don’t hit or drop the interactive pen display or subject it to intense shock or vibration. • If the interactive pen display requires replacement parts, use parts that are specified by SMART Technologies. 99-00724-00 D0...
- Page 6 IM P O RT A NT I NF O R M A TI O N 99-00724-00 D0...
-
Page 7: Table Of Contents
Changing the Angle of the Interactive Pen Display ......... 4 Connecting the Interactive Pen Display ............5 Integrating a Monitor or a Projector..............5 Attaching the Pen .................... 6 Installing SMART Notebook Software .............7 Matching the Resolution.................. 8 Adjusting the Screen ..................9 Orienting the Screen ..................11 Securing the Interactive Pen Display ............ - Page 8 CON T EN TS Maintaining the Interactive Pen Display...............19 Cleaning the Screen..................19 Cleaning the Pen...................19 Replacing the Pen Tip ................... 20 Troubleshooting ....................21 Checking the Power of the Interactive Pen Display ........21 Checking the Status of the Interactive Pen Display ........22 Image Problems ....................23 Control and Writing Problems ...............
-
Page 9: Overview
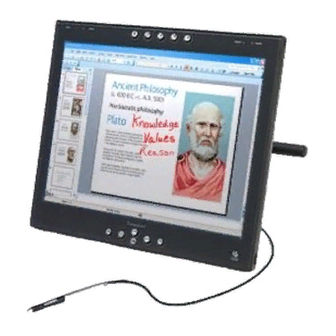
Chapter 1 Overview The SMART Podium interactive pen display works with your computer and SMART software to create an interactive presentation environment. Both the ID350 and the ID370 include dynamic and interactive tools for creating presentations and lessons. You can control applications and create notes using the tethered pen, all while facing the audience. -
Page 10: The Tethered Pen
• Use the function buttons to perform a right-click and to access specific SMART tools, such as SMART Notebook software. • Use the on-screen display control buttons to configure the display’s settings. -
Page 11: Installing The Interactive Pen Display
• integrate a monitor or a projector (page 5) • attach the pen (page 6) • install SMART Notebook software (page 7) • match your computer’s and interactive screen’s resolutions (page 8) • adjust the screen settings (page 9) •... -
Page 12: Determining The Best Location For The Interactive Pen Display
Keep the computer keyboard and the mouse close to the interactive pen display, because the pen won’t function until you install the SMART software and the SMART Board™ drivers are running. You should also keep your computer within 19' 6"... -
Page 13: Connecting The Interactive Pen Display
CH A P T E R 2 – I NS T A L L I N G T H E I N T E R A C T I V E P E N D I S P L A Y Connecting the Interactive Pen Display CAUTION •... -
Page 14: Attaching The Pen
CH A P T E R 2 – I NS T A L L I N G T H E I N T E R A C T I V E P E N D I S P L A Y To connect a projector or 1. -
Page 15: Installing Smart Notebook Software
Then slip the pen and the rest of the tether through the loop. Carefully pull the pen until the loop is snug. Installing SMART Notebook Software Your interactive pen display comes with a SMART Notebook software CD, which you can use to install SMART Notebook software on your computer. NOTE You’ll need to use the computer’s keyboard or mouse to perform the... -
Page 16: Matching The Resolution
Display Properties Control Panel. The SMART Board drivers must be running before you can use the interactive pen display. You’ll know that the drivers are running if you can see your SMART software icon in the system tray or the Dock. -
Page 17: Adjusting The Screen
CH A P T E R 2 – I NS T A L L I N G T H E I N T E R A C T I V E P E N D I S P L A Y 5. - Page 18 10 | CH A P T E R 2 – I NS T A L L I N G T H E I N T E R A C T I V E P E N D I S P L A Y To adjust the screen 1.
-
Page 19: Orienting The Screen
1. (Windows operating systems) Press the SMART Notebook icon in the system tray, and press Orient. (Mac computers) Press and hold the SMART Notebook icon in the Dock, and press Open Orient. 2. Follow the on-screen instructions. For more details, see the SMART Notebook software online Help. -
Page 20: Securing The Interactive Pen Display
12 | CH A P T E R 2 – I NS T A L L I N G T H E I N T E R A C T I V E P E N D I S P L A Y Securing the Interactive Pen Display You can secure the interactive pen display by attaching a cable (not supplied) between the security slot that’s built into the back of the unit and an immovable... -
Page 21: Other Integrations
For example, you can integrate your interactive pen display with a projector and a SMART Board interactive whiteboard. NOTE If you want to use a video cable longer than 50' (15 m), you must boost the video signal with a video distribution amplifier. - Page 22 14 | CH A P T E R 2 – I NS T A L L I N G T H E I N T E R A C T I V E P E N D I S P L A Y 99-00724-00 D0...
-
Page 23: Using The Interactive Pen Display
– the tethered pen and pen tool buttons function like the SMART pen tray tools on the interactive whiteboard Touching the Interactive Screen You can manipulate objects, select items, and create and remove digital ink by touching the screen with the tethered pen. -
Page 24: Using The Pen Tool Buttons
SMART Board software online Help. Writing on the Screen and Saving Your Notes When the SMART Board drivers are running on a connected computer, you can use the interactive pen display’s Digital Ink pen tool buttons to create notes over any computer application. -
Page 25: Using The Eraser
You can write notes over computer applications only if the SMART Board drivers are running on the computer. You’ll know the SMART Board drivers are running if you can see the SMART software icon in the system tray (Windows operating systems) or the Dock (Mac computers). -
Page 26: Using The Function Buttons
SMART Notebook software – an application that helps you organize, save and share your notes. • SMART Keyboard – a virtual keyboard that floats over your active application and lets you enter typed text at the cursor location. NOTE You can reconfigure the Keyboard button. For details on customizing this button, see the SMART software online Help. -
Page 27: Maintaining The Interactive Pen Display
Maintaining the Interactive Pen Display This chapter tells you how to keep the SMART Podium interactive pen display clean and replace the pen tip when it wears down. Cleaning the Screen You should clean the interactive screen once a week because dirt and dust can stick to the screen. -
Page 28: Replacing The Pen Tip
Your interactive pen display comes with five replacement pen tips and an o-ring tool to assist in tip replacement. If you require more replacement tips, contact your local SMART Reseller (page 27). NOTE If you misplace your o-ring tool, you can use a pair of tweezers or pliers to remove the old tip. -
Page 29: Troubleshooting
Chapter 5 Troubleshooting This chapter offers suggestions for troubleshooting your interactive pen display. Checking the Power of the Interactive Pen Display The power indicator shows whether power is reaching the interactive pen display. Power Indicator NOTE: This figure shows an ID370 but the indicators are in a similar location on the ID350. -
Page 30: Checking The Status Of The Interactive Pen Display
• the interactive pen display is turned on. If the power indicator still doesn’t illuminate, contact your SMART Reseller (page 27). Checking the Status of the Interactive Pen Display The Status indicator shows whether the pen is interacting with the display. -
Page 31: Image Problems
23 | CH A P T E R 5 – T R O U B L E S H O O T I N G Image Problems If you don’t see an image on the interactive pen display, check that the interactive pen display is turned on and that you have properly connected the power, video and USB cables. -
Page 32: Control And Writing Problems
If the pointer doesn’t accurately follow the movement of the pen, orient the interactive pen display (page 11). Before you can write on the screen in digital ink, the SMART Board drivers must be running on the attached computer. You’ll know that the SMART Board drivers... -
Page 33: Hardware Environmental Compliance
Waste Electrical and Electronic Equipment regulations apply to all electrical and electronic equipment sold within the European Union. When you dispose of any electrical or electronic equipment, including SMART Technologies products, we strongly encourage you to properly recycle the electronic product when it has reached end of its life. If you require further information, please contact your reseller or SMART Technologies for information on which recycling agency to contact. -
Page 34: Packaging
China’s EIP regulations. U.S. Consumer Product Safety Improvement Act The United States has enacted the Consumer Product Safety Improvement Act which limits the lead (Pb) content in products. SMART Technologies is committed to complying with this initiative. 99-00724-00 D0... -
Page 35: Customer Support
Technical Support If you experience difficulty with your SMART product, please contact your local reseller before contacting SMART Technical Support. Your local reseller can resolve most issues without delay. NOTE To locate your local reseller, visit www2.smarttech.com/st/en-US/... -
Page 36: General Inquiries
Toll Free 1.888.42.SMART (U.S./Canada) +1.403.228.2500 E-mail info@smarttech.com Warranty Product warranty is governed by the terms and conditions of SMART’s “Limited Equipment Warranty” that shipped with the SMART product at the time of purchase. Registration To help us serve you, register online at www.smarttech.com/registration. - Page 38 Toll Free 1.866.518.6791 (U.S./Canada) or +1.403.228.5940 www.smarttech.com 99-007274-00 D0...
Need help?
Do you have a question about the Podium ID370 and is the answer not in the manual?
Questions and answers