Table of Contents
Advertisement
Advertisement
Table of Contents

Subscribe to Our Youtube Channel
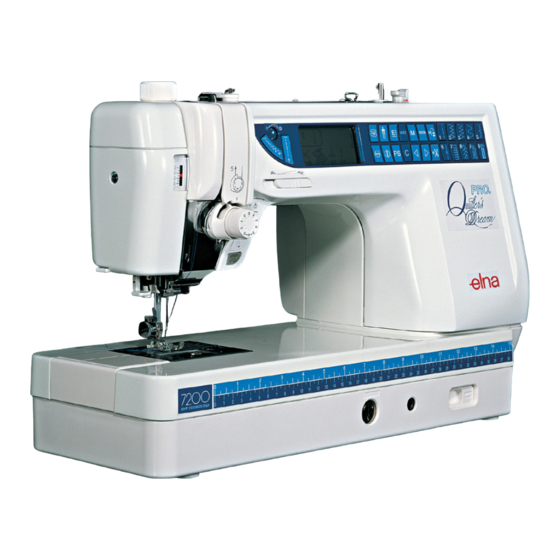
Related Manuals for ELNA 7200


Summary of Contents for ELNA 7200
- Page 2 IMPORTANT SAFETY INSTRUCTIONS Your Elna 7200 sewing machine is designed and constructed for HOUSEHOLD use only. Read all instructions before using this machine. DANGER – To reduce the risk of electric shock: 1. Your sewing machine should never be left unattended when plugged in. Always unplug the machine from the electrical outlet immediately after using and before cleaning.
-
Page 3: Table Of Contents
Sensor Buttonholes ............42-45 NOTE: Information found in this instruction manual Corded Buttonhole ..............46 is current at the time of printing. Elna reserves the 4 Step Memory Classic Buttonhole ......... 47-48 right to change and update specifications and 4 Step Memory Bound Buttonhole ........49-50 information as needed. -
Page 4: Section I - Machine Parts And Functions Part Names
SECTION I Machine Parts and Functions Part Names 1. Stitch chart brackets (to attach, see page 7) 2. Foot pressure dial 3. Thread take-up lever 4. Thread guide plate 5. Stitch chart 6. LCD screen brightness control 7. Retractable thread guide (pull up) 8. -
Page 5: Standard Accessories
Standard Accessories 1. A: Standard metal foot (attached to machine) 2. B: Buttonhole foot (4-step) 3. C: Overlock foot 4. D: Hemmer foot 5. E: Zipper foot 6. F: Satin stitch foot 7. F-2:Open toe satin stitch foot 8. G:Blind hem foot 9. -
Page 6: Presser Foot And Accessory Definitions
Presser Foot and Accessory Definitions A: Standard Metal Foot This foot comes attached to your machine. It is mainly used for straight stitches and zigzag stitches longer than 1.0. The button locks the foot in a horizontal position helping to sew over multiple layered seams. - Page 7 H: Multi-Cord Foot Design your own braids or trims. Place one to three cords in the foot and sew over cord(s) for a simple couching method. Or sew over one cord with a zigzag to gather heavier weight fabrics. Scant 1/4˝ Foot Accuracy is the key to successful patchwork/quilt sewing.
-
Page 8: How To Attach Stitch Chart Brackets
How to Attach Stitch Chart Brackets Align the screws with the holes on the backside of the machine. Firmly tighten screws with screwdriver. Stitch Chart The stitch chart can be placed in two positions on the chart bracket, store or view. Store Position The back slots q on the bracket are for store position e. -
Page 9: Quilt Table
Quilt Table The table provides more sewing surface to support large fabric pieces to make sewing easier. Assemble table by attaching six legs to underside of quilt table with screws. Attaching Table to Machine Fit the table around the machine, as shown in the illustration. -
Page 10: Connecting Machine To Power Supply
Connecting Machine To Power Supply Before connecting the power cord, make sure the voltage and frequency shown on the machine are identical to your electrical power. To connect machine to power supply, turn off the power switch q. Insert the foot control plug w and machine plug e into the machine and the power supply plug r into the wall socket. -
Page 11: Main Function Of Keys
Main Function of Keys q q q q q Start/Stop Key (changes color to indicate function) Press this (green) key to start the machine. The first few stitches will be sewn at a slow speed and then machine sews at the speed set by the speed control lever. -
Page 12: Keyboard Selection Keys
Keyboard Selection Keys t y u i o !1 !2 !3 !4 !5 !6 !7 1. LCD Screen Brightness Control Lighten or darken the screen with this dial. 2. Stitch Width and Needle Position Key Press “–” or “+” side of key to change setting. Press “–”... - Page 13 8. Memory Save/Recall Key The 3 Digit Mode has four separate memories for saving a sequence of stitches. Press this key to activate memory 1 (M1). Press key again to activate M2. Continue to press this key to access M3, M4 or to exit memory. Once a memory is activated, press the “ENTER”...
- Page 14 Recommended range for setting needle thread tension dial. e Elna recommends using this presser foot for best sewing results. r Stitch width or needle position – computer automatically sets width or needle position after a stitch is selected.
-
Page 15: Setting Quick Resumption, Sound And Language Modes
Setting Quick Resumption, Sound and Language Modes These three modes/functions can be set according to your preferences. Each new setting requires you to turn OFF the power switch. Turn ON the power switch while pressing “ENTER” key. Message screen appears. Press “1” key to change quick resumption or “2”... -
Page 16: Controlling Sewing Speed
Reset to Factory Default It is possible to reset the machine to the factory defaults with English language as default. Turn OFF the power switch. Press “ENTER” key while turning power switch ON. Message screen appears. Press “0” key. Message screen appears. Press “ENTER”... -
Page 17: How To Drop The Feed Dog
How To Drop the Feed Dog The feed dog can be dropped out of position for special sewing techniques: free motion embroidery, stippling, button sewing, etc. The feed dog must always be up for regular sewing. The machine will run with the feed dog down if the following stitches are selected: 1, 2, 3, 4, 011, 014, 015, 016, 017, 042, 061 and 062. -
Page 18: Attaching And Removing Presser Feet
Attaching and Removing Presser Feet Press the “Up/Down Needle” key until the needle is in the raised position. Turn OFF the power switch. Raise the presser foot and press the red button q on back of the shank. The presser foot will drop off. Place the selected presser foot so the pin e on the foot lies just under the groove w of the shank. -
Page 19: Adjusting Needle Thread Tension
Adjusting the Needle Thread Tension Choosing the Correct Tension - Straight Stitch The ideal straight stitch will have threads locked between the two layers of fabric. According to the LCD screen, needle thread tension can range from 2 – 6 q and is normally set on 4. Align the number 4 on the tension dial with the setting mark w. -
Page 20: Using The Fine Adjustment Screw
Using the Fine Adjustment Screw Choice of fabrics and threads may affect the stitch formation when sewing decorative stitches, letters and numbers or classic 4 step memory buttonhole (071). The fine adjustment screw can be used to either lengthen or shorten the stitch. q Fine adjustment screw w Standard mark e Setting mark... -
Page 21: Getting Ready To Sew
SECTION II Weight Fabric Needle Type Needle Size Getting Ready to Sew Very Chiffon, Fine Lace, Universal 9 (65) Light Organdy Ball Point 9 (65) Selecting the Correct Needle and Thread Light Batiste, Lawn, Crepe Stretch 11 (75) de Chine, Challis, Handkerchief Linen, There are many kinds of fabrics, threads and Crepe, Taffeta, Satin... -
Page 22: Needle Definitions
Needle Definitions The illustration identifies the main parts of a sewing machine needle. q Body w Shaft e Long groove (round side of needle) r Short groove (flat side of needle) t Eye y Point Universal – an all-purpose needle that handles most woven and knit fabrics. -
Page 23: Winding A Bobbin
Winding a Bobbin To remove bobbin, slide bobbin cover plate release button q to the right and lift away the bobbin cover plate w. Lift out the bobbin e. Turn ON the power switch. CAUTION: Avoid using a bobbin if it is almost empty, as thread may tangle. - Page 24 Pull the thread up and through the right retractable thread guide q from behind. Pull the thread under and around the bobbin winding tension disc w. Pass the thread through the hole in the bobbin e from inside to the outside. Place the bobbin on the bobbin winder spindle r.
-
Page 25: Inserting The Bobbin
Inserting the Bobbin Place the bobbin in the bobbin case with the thread running counterclockwise. Guide the thread into notch q on the front side of the bobbin case. Hold the bobbin with your right hand and pull the thread to the left, through the tension spring blades w. -
Page 26: Threading The Machine
Threading the Machine Raise the presser foot. Press the “Up/down Needle” key until the needle is in an up position. Place the spool of thread on the left spool pin with the thread coming off the spool as shown and attach the spool holder. - Page 27 Continue to pull the thread down into the right channel and around the tension dial from right to left. Pull up on the thread until it is inserted between the tension discs and under the loop of the check spring t. Check that the thread is coming out over the notch y of the disc.
-
Page 28: Built-In Needle Threader
Built-in Needle Threader Press the “Up/Down Needle” key q until the needle is in an up position. Turn OFF the power switch. Lower the presser foot. Lower the needle threader lever w as far as it will go. Hook e is automatically inserted into the needle eye. -
Page 29: Drawing Up The Bobbin Thread
Drawing Up the Bobbin Thread Turn ON the power switch. Raise the presser foot and hold the needle thread lightly with your left hand. Press the “Up/Down Needle” key q twice to pick up the bobbin thread. Draw up the needle thread together with a loop of bobbin thread. -
Page 30: Section Iii - Basic Sewing
SECTION III Basic Sewing How to Select a Stitch z Select stitches 1 – 0 in Direct Select Mode by touching the corresponding key. x Select stitches in the 3 Digit Mode by pressing “MODE” key and then the 3 corresponding keys. -
Page 31: Cutting The Threads
Cutting the Threads After sewing is stopped, press the “Auto Thread Cut” key q (LED signal turns on). (Needle should be in down position before using auto thread cutting mechanism to avoid extra needle penetrations.) Raise the presser foot and remove the fabric. Pull both threads to the back under the presser foot so they are ready for sewing again. -
Page 32: Adjusting Stitch Length
Adjusting Stitch Length When you press the “Stitch Length” key, the stitch length can be set at 0.00 or between 1.0 and 5.0. Press the top “–” side of the key to shorten the stitch length. Press the bottom “+” side of the key to lengthen the stitch length. - Page 33 Reset Stitch To Factory Default Settings It is possible to reset the machine so personal settings for an individual stitch revert to the factory default settings. z Display the stitch you want to reset in the LCD screen. x Press “My Personal Setting” key. Message screen appears.
-
Page 34: Sewing On Heavy Fabrics
Sewing On Heavy Fabrics The black button on presser foot “A” locks the foot in a horizontal position when pushed in before lowering the presser foot. This ensures even feeding at the beginning of seams and helps when sewing many layers of fabric such as welt seams used to hem jeans. -
Page 35: Zipper Insertion
Zipper Insertion Lapped Application Lapped zippers are usually inserted into a side seam of skirts or pants, for example. Use zipper foot E instead of standard metal foot A. Attach the pin on zipper foot E to the groove on the shank. - Page 36 Close zipper. Turn zipper face up (right seam allowance forms a small fold at basting line) and smooth zipper teeth away from seam. Attach foot with right side pin. Reset straight stitch length to 2.5. Starting at the bottom, sew through the folded seam allowance and zipper tape.
-
Page 37: Rolled Hem
Rolled Hem An easy, professional way to sew hems. The spiral on the hemmer foot guides the fabric edge to create a rolled hem. Recommended for fine, sheer fabrics used in bridal wear. Attach hemmer foot D. Trim about 6.5 mm (1/4˝) from corners to reduce bulk. -
Page 38: Zigzag Stitch
Zigzag Stitch The zigzag stitch is a very versatile stitch. Simply change its width and length. Use the zigzag to finish raw seam edges, sew narrow hems, sew satin stitch appliques and create beautiful monograms. Select 2. Adjusting Stitch Width and Length Press the “–”... -
Page 39: Satin Stitch Appliqué
Satin Stitch Appliqué The zigzag stitch is commonly used for appliqué, monogramming, stems of flowers and petals. (A short zigzag stitch length creates the satin stitch.) Threads of 100% cotton, rayon or silk provide the best results. • Apply stabilizer to the fabric for the stitch to form correctly. -
Page 40: Mending A Tear
Mending a Tear Pull torn edges together and fuse a piece of interfacing slightly larger than the tear to the wrong side of the garment. Select 3. Decrease stitch length to 0.20 – 0.50. Begin sewing above the tear. Stitch down the middle, pulling edges together. -
Page 41: Blind Hem Stitches
Blind Hem Stitches The stretch blind hem (5) is a great method for finishing a hemline or sleeve. Use the woven blind hem (064) on non-stretch fabrics. Finish the raw hem edge with a zigzag or 3 step zigzag q before sewing the blind hem. Select 5 or press “MODE”... -
Page 42: Buttonhole Variations
Buttonhole Variations All buttonholes should use interfacing that is the same weight as the fabric. Interfacing is especially important when sewing on stretch fabrics. Classic Buttonhole (Sensor or 4 Step Memory) 0 or 071 The most common buttonhole, found on blouses, shirts, pants, etc. It consists of a bartack at each end and a compact zigzag stitch along each side. -
Page 43: Sensor Buttonholes
Sensor Buttonholes (Totally Automated Buttonholes) Select a buttonhole - 0, 072 thru 075. The LCD screen will briefly show a message advising that the buttonhole lever must be lowered. Alter the buttonhole width to match the fabric and thread. See page 45. When attaching buttonhole foot (R), make sure the button opening is at the back of the foot. - Page 44 Mark the buttonhole area on the fabric. Place both threads to the left under the foot. Insert the garment under the foot and hand turn the flywheel to lower the needle at the starting point. Lower the buttonhole foot. Memory Auto Thread Cut Key It is possible to program the machine to automatically cut the threads when a buttonhole is completed.
- Page 45 Press “MODE” key to access 3 Digit Mode for Buttonholes 072 – 076. 072 Classic Keyhole Buttonhole The buttonhole will automatically sew: q the front left half of keyhole, zigzag backwards on left side and straight stitch on right side to front w front right half of keyhole and zigzag backwards on right side...
- Page 46 Cutting Open Buttonhole Place a pin just inside the bartack at each end to prevent accidentally cutting bartacks. Cut buttonhole open with the seam ripper. Troubleshooting Tips If the button is extremely thick and difficult to fit through the test buttonhole, you can lengthen the buttonhole by pulling the buttonholder on the foot back a little extra.
-
Page 47: Corded Buttonhole
Corded Buttonhole Corded buttonholes are found on coats and other garments that require extra strong buttonholes. The cording reinforces and accentuates the buttonhole. Sew a corded buttonhole using the same procedure as described for a classic buttonhole. • Set the stitch width to match the thickness of the cording. -
Page 48: Step Memory Classic Buttonhole
071 Classic Buttonhole (4 Step Memory) The classic buttonhole is especially suited for oversized novelty buttons or larger decorative openings for weaving curtain rods and scarves, for example. All buttonholes should use interfacing suitable for the fabric weight. Test sew the buttonhole on sample swatch. Select 071. - Page 49 Start sewing – front bartack, lockstitch. Machine will automatically stop when buttonhole is completed. Sewing Additional Buttonholes To sew another buttonhole the same size - raise foot, move fabric, lower foot and sew. Reset Buttonhole Size To sew a buttonhole a different size (or to adjust stitch length), reset the machine by pressing “ENTER”...
-
Page 50: Step Memory Bound Buttonhole
076 Bound Buttonhole (4 Step Memory) Great for oversized buttons requiring tailored buttonholes, welt pockets or larger decorative openings. All buttonholes should use interfacing suitable for the fabric weight. Test sew the buttonhole on sample swatch. Select 076. The LCD screen will briefly show two messages. - Page 51 , Start sewing – straight stitch front edge, lockstitch. Machine will automatically stop when buttonhole is completed. . Cut down center of sewn rectangle, snipping into each corner. ⁄0 Pass the bias square through slit and pull to wrong ⁄0 side of garment to form the lips of buttonhole.
-
Page 52: How To Sew On A Button
How To Sew On a Button Hand sewing buttons to a garment is very timeconsuming. Sew them on in one quick, easy step. Select 2. Attach satin stitch foot F. Drop the feed dog. See page 16. • Set the stitch width according to the position of the holes in the button. -
Page 53: Triple Seam
This stitch can also be used for topstitching. Elna invented this stitch in 1952. Using a straight stitch (stitch length 4.0), baste a seam together. Verify the fit. Select 063. -
Page 54: Super Overlock Stitch
Apply ribbing to knits and garment retains its shape. Elna invented this stitch in 1982. Select 067. Place the fabric edges together under the presser foot next to the right side edge of the presser foot. -
Page 55: Overcast Stitch
Overcast Stitch A reinforced straight stitch and zigzag are sewn simultaneously. If your seam does not need to be opened flat, this stitch will sew the seam and overcast the edge in one operation. Select 070. NOTE: Do not set the stitch width lower than 5.0 when using overlock foot C because the needle could hit wires on the foot. -
Page 56: Bartacks
Bartacks A bartack is a reinforced stitch used on garment areas that receive extra stress like pockets, belt loops and zippers. Select 078. The LCD screen will briefly show a message. Automatic Bartack Place the fabric under presser foot. Lower presser foot. -
Page 57: Darning
Darning Darning with a sewing machine saves a lot of time. It is used for repairing very worn areas (not holes) in fabric. Select 079. The LCD screen will briefly show two messages. Automatic Darning Extend the buttonholder q completely open. Place both threads to the left under the foot. -
Page 58: Eyelets
Eyelets Small eyelets may be sewn on belts, used for lacing cords or simply used for a decorative effect. Select 080. The machine will sew an eyelet and automatically stop. Cut open the eyelet with a seam ripper, pointed scissors or an awl. -
Page 59: Section Iv - Quilting
SECTION IV Quilting Piecing Fabrics Together Accuracy is the key when sewing together fabric pieces for a quilt. Be sure to precisely cut your fabric pieces with 6.5 cm (1/4") seam allowances. Select 1. Attach scant 1/4” foot. The bar on the foot is a perfect 1/4˝ seam guide from center needle position (3.5). -
Page 60: Walking Foot
Walking Foot Great for keeping quilt layers from shifting when sewing and keeping stripes and checks matched. How To Attach Open Toe Walking Foot Press the “Up/Down Needle” key until the needle is in an up position. Raise the presser foot. Turn OFF power switch. -
Page 61: Quilt Guide
Quilt Guide The quilt guide is helpful when sewing parallel, evenly spaced rows of stitching. Loosen the quilt guide holding screw q, slide the quilt guide in the opening w until the desired width is set and tighten the screw. Use a washable marker to draw the first line for stitching. -
Page 62: Buttonhole Appliqué
Buttonhole Appliqué A favorite method of applying small pieces of fabric to quilts for decoration. Select 7 or 019- 024. Use fine embroidery thread (50 weight or finer) and needle appropriate to fabric. You may need to set the foot pressure dial to 2. z In this type of appliqué, raw edges are folded under. -
Page 63: Patchwork
Patchwork A fun method of decorating your quilt (often called “Crazy Quilting”) is to sew a patchwork stitch over the opened seam. Select 1. Sew a straight stitch seam and press seam allowance open. Select a patchwork stitch: 8, 013, 014 and 025 – 040. -
Page 64: Stippling Stitch
Stippling Stitches A pre-programmed stippling stitch is a fast and easy method to quilt small areas. Select 9, 015 or 016. Place batting (wadding) between quilt top and backing fabric. Basting Stitch The basting stitch can be used to temporarily hold together two or more layers of fabric. -
Page 65: Section V - Heirloom Pintucks
SECTION V Heirloom Pintucks A beautiful accent to any project. Pintucks should be added to your fabric before cutting out the pattern piece. Select 1. Use a washable marker to draw parallel lines for pintucks on fabric right side. Fold fabric on first line with wrong sides together. -
Page 66: Hemstitches
Hemstitches Hemstitching, also known as French hand sewing, was traditionally only a hand sewn art. There are several stitches to choose from that will add an “old world charm”. Best results require the use of linen, cotton or a blend of linen/cotton. Thread machine, needle and bobbin with a fine cotton embroidery thread (50 weight or finer). -
Page 67: Fringing
Fringing Fringing adds a special touch on table linens and shawls. Choose a firm, woven fabric like linen where threads can be removed easily. Select 052 (Mirror Image) or 020. z Carefully cut the fabric on grain. Remove a single yarn or thread where the fringing is to begin. -
Page 68: Smocking
Smocking Smocking is a delicate, decorative treatment on children’s clothing or women’s blouses. Choose a soft, lightweight fabric such as batiste, gingham or challis. Cut the fabric three times the finished width. Select 1. Increase stitch length to 5.0. Sew rows of straight stitches about 10-13mm (3/8"- 1/2˝) apart, across the area to be smocked. -
Page 69: Section Vi - Decorative Sewing French Knots
SECTION VI Decorative Sewing French Knots Why spend time sewing French Knots by hand? Select 060. Tighten needle tension 5-8. Place fabric under foot and sew one French Knot. Lift up presser foot, move fabric, lower presser foot #060 #062 and sew next French Knot. -
Page 70: Corded Trim
Corded Trim Sew over three strands of cording to create unique borders and trims. Pearl cotton, knitting yarn, embroidery floss, lace thread, fine wool or lily yarn may be used as cording. Select 089. Slide the sewing threads to the left and insert three strands of cording into the slots of H cording foot with 5 cm (2˝) extending behind the foot. -
Page 71: Twin Needle Sewing
Twin Needle Sewing As the name implies, the twin needle results in two identical parallel rows of stitches – utility or decorative. The “Twin Needle” key should be pressed whenever using a twin needle. Be sure to test the stitch before sewing because twin needles are available in a variety of widths. - Page 72 Twin Needle Hem A twin needle hem is quick and easy. This is an excellent hemming method for knit fabrics because the bobbin thread zigzags, allowing the hem to stretch with the fabric. Be sure to use a stretch twin needle when sewing knit fabrics.
-
Page 73: Satin Stitches - Elongation
Satin Stitches – Elongation Satin stitches 081 - 089 can be lengthened up to five times their original size without the stitch length varying. Select 087. Press “Elongation” key. (Each touch changes readout to next elongation.) Place fabric and stabilizer under foot and sew. Press “Auto-Lock”... -
Page 74: Section Vii - Programming Combinations
SECTION VII Programming Combinations (Must have 3 Digit Mode Activated) Single Repeat with Memory Auto-Lock z Select 081. Machine automatically converts to show selected stitch image and information after third digit is pressed. x Press “Mirror Image” key. c Press “Elongation” key. v Press “Stitch Length”... -
Page 75: Combining A Sequence
Combining a Sequence z Select 091. (Press “Mirror Image” key and change stitch width or length if desired.) x Press “ENTER” key to memorize. A blinking cursor will appear to indicate where next selected and entered stitch will be memorized within the sequence. -
Page 76: Reset Combined Sequence To Beginning
n Change thread color. m Select 104. Press “ENTER” key. , Press “Memory Auto-Lock” key. . ⁄0 . Place fabric and stabilizer under foot and sew over straight stitch, placing flower between leaves. ⁄0 Cut connecting threads. Reset Combined Sequence to Beginning It is possible to partially sew the combined sequence and restart the machine at the beginning. -
Page 77: Combining Letters
Combining Letters There are 2 font styles: Block letters (300 stitch numbers) Script or Monogram letters (500 stitch numbers) z Select 315. x Press “ENTER” key. c Select 348. v Press “ENTER” key. b Select 350. n Press “ENTER” key. m Select 337. -
Page 78: How To Preview The Combined Sequence
How to Preview the Combined Sequence (Utility, Satin, Decorative or Letters) Program the following stitches using the “ENTER” key: 519, 094, 523, 535, 315, 348, 350 and 337. The LCD screen will show a maximum of 8 stitches at one time. The ARROW symbol q located under the sequence indicates that there are more stitches off screen in that direction. -
Page 79: Uniformly Adjusting Stitch Width Or Length
Uniformly Adjusting Stitch Width or Length If the cursor is positioned to the right of the last stitch in the programmed sequence, the stitch width or length adjustment is applied to the entire sequence. Stitch Width: z Program 083, 094 and 083. (Cursor must be to the right of last stitch in sequence.) x Press “–”... -
Page 80: Individually Adjusting Stitch Width Or Length
Individually Adjusting Stitch Width or Length If the cursor is positioned under a stitch in the programmed sequence, the stitch width or length adjustment is applied only to that stitch. z Program 088 two times. x Press “Review Memory Left” key to move cursor. c Press “–”... -
Page 81: Permanent Memory
Permanent Memory It is possible to retain a sequence for future use even if the machine is turned off. Simply save the sequence in one of the four permanent memories. Each memory has a capacity of 50 stitches. Saving Memory z Program 112 (Face to Face), 091 and 112. - Page 82 Recalling Memory z Press “M” key. x Press “Mirror Image” key. (An hourglass will briefly appear.) Deleting an Individual Memory z Press “M” key. x Press “C” key to delete.
-
Page 83: Section Viii - Taking Care Of Your Machine
SECTION VIII Taking Care of Your Machine Your machine has been meticulously designed and manufactured to give you a lifetime of sewing pleasure. Do not store the machine in a high humidity area, near a heat radiator or in direct sunlight. -
Page 84: Replacing The Bobbin Case
Replacing the Bobbin Case Insert the bobbin case so the knob q fits next to the stopper w in the hook area. The red triangle marks e on the bobbin case and stopper must align with each other. Attach the needle plate and tighten the screws. After cleaning, be sure to replace the needle, presser foot and bobbin. -
Page 85: Stitch Chart
Stitch Chart NOTE: Stitches 001, 061, 062 and 063 have a number to the right of the stitch illustration. This number indicates how many stitches will be sewn if programmed into a sequence. Stitches that are compatible with the Face to Face key are identified on the stitch chart with an “F” directly following the stitch number. -
Page 86: Optional Accessories
Elna is pleased to offer the following optional accessories for your machine. This listing is current at time of printing but we are always developing new accessories to make sewing easier. Contact your authorized Elna dealer or service center to learn more about the latest innovations OR visit us at our website: www.elna.com. -
Page 87: Warning Messages
Warning Messages Three beep sounds will alert you to machine problems. The LCD screen will show one of these messages. What to Do Message Reason Release the foot control. Power switch is turned on while foot control is pressed. Press the “Up/Down Needle” Power switch is turned on with the needle key. - Page 88 Remove tangled thread. The machine is malfunctioning because of Contact your authorized the item indicated. Example: “BM init Elna dealer or service error” – error in initialization of stepping center where you motor. purchased your machine. The LCD screen is abnormal.
-
Page 89: Troubleshooting
TROUBLESHOOTING Condition Cause See page(s) Needle thread 1. The needle is not threaded properly. 25-26 breaks 2. The needle thread tension is too tight. 3. The needle is bent or blunt. 4. The needle is not inserted correctly. 5. The needle thread and bobbin thread are not properly under (drawn to the back of) the presser foot when starting to sew. -
Page 90: Index
INDEX Fabric ................20 Accessories ............4, 85 Face Plate ..............3, 83 Accessory Definitions ..........5-6 Face to Face Key ............. 2, 72 Accessory Storage ............4 Factory Default Settings ......12, 15, 31, 32 Alignment of Stitches within a Sequence ....79 Fagoting ............... - Page 91 Scallop Edges .............. 68 Script Letters ............76, 84 Needle Plate ........... 1, 3, 4, 17 Seam Allowance Lines ..........17 Needle Position ..........10, 11, 30 Select Mode Key ............ 11, 29 Needle Threader ..........3, 26, 27 Sensor Buttonholes ..........42-45 Needles ............
Need help?
Do you have a question about the 7200 and is the answer not in the manual?
Questions and answers
1st, back of material has a lot of thread buildup. 2nd I cleaned out machine under the silver plate. Now presser foot is not working, thread is not pulling up (not sure if bobbin case I put back in looks right).
Thread buildup on the back of the material could be caused by improper threading, incorrect bobbin placement, or lint buildup in the bobbin case. A non-working presser foot could be due to it not being lowered properly or an issue with the presser foot mechanism. After cleaning, ensure the bobbin case is correctly reassembled, the presser foot is properly positioned, and all lint is removed from the feed dog and hook area.
This answer is automatically generated