
Related Manuals for Plus CreativeBoard CB+


Summary of Contents for Plus CreativeBoard CB+
- Page 1 CreativeBoard CB+ Operation Manual Thank you for purchasing the CreativeBoard CB+. To fully utilize the product's features, please read this user manual carefully before use.
-
Page 2: Table Of Contents
Table of contents ⚫ 01 ⚫ 01 Before Use ご使用 Introduction ⚫ About the CreativeBoard CB+ ⚫ What’s in box ⚫ Features and components P07-10 ⚫ ⚫ 02 ⚫ 0⃣ 0 2 How to set up the Creative Board CB+ Setup Procedure ⚫... -
Page 3: Before Use
Before Use... -
Page 4: About This Manual
Introduction About this manual This manual is the user guide for the CreativeBoard CB+ (Model No: CB-1600). Use this guide to master the features of the CreativeBoard CB+. About the CreativeBoard CB+ The CreativeBoard CB+ is designed to support effective meeting. The CreativeBoard CB+ features a scrollable writing surface, allowing you to slide the surface smoothly by hand. -
Page 5: About The Creativeboard Cb+ P05
About the CreativeBoard CB+ The CreativeBoard CB+ is designed to support effective meeting. The CreativeBoard CB+ features a scrollable writing surface, allowing you to slide the surface smoothly by hand. By connecting to a LAN, you can share the board surface in real-time with your remote participants and also send scanned board data via email or transfer it to a file server. -
Page 6: What's In Box
What’s in box Items included with the CreativeBoard CB+ are as follows. Please check in advance to ensure that all items are included. Items included • Cable cover... (1 piece) Main unit (1 unit) • Covers the USB cable connecting the main unit and the control panel. -
Page 7: Features And Components P07-10
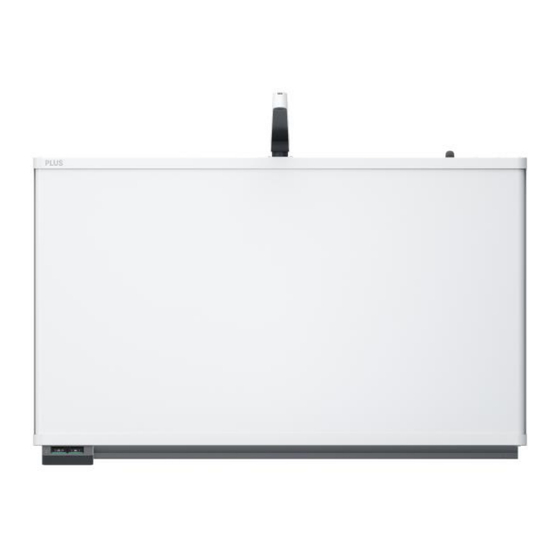
Features and Components Board Camera Captures the board surface. Scrollable Writing Surface Write and erase using the dedicated markers and eraser. The sheet can be slide manually. Control Panel Turn the power on/off and opere live streaming , scanning and setting using the touch panel. - Page 8 Features and Components Control panel (Top) Power button Turn the device on/off. To turn it off, press and hold the power button. If there is no operation for a certain period, the CreativeBoard CB+ will enter sleep mode, and the touch panel will also turn off.
-
Page 9: Touch Panel
Touch Panel This section explains the home screen of the touch panel. Home screen ① ② ③ ④ ⑤ Item Name Description Signal indicator ① Displays the reception status of wireless and wired signals. ② Help Displays a QR code and URL to access the Help screen. ③... -
Page 10: How To Set Up The Creativeboard Cb
How to set up the CreativeBoard CB+... -
Page 11: Turning On The Power
How to set up the CreativeBoard CB+ This section describes the setup procedure for connecting the CreativeBoard CB+ to a network. ■ Items required for setup • CreativeBoard CB+ • A computer connected to the network • Information required for network configuration (e.g., SSID, Passcode, IP address (if manually entered), etc.) •... - Page 12 Step 1: Turn on the power of the CreativeBoard CB+ This section explains how to turn on the CreativeBoard CB+. Power input port (USB Type-C) The device's LED will light up red, and Connect the included 'USB power cable' after a while, the system startup will into the power input terminal (USB be complete, and the LED will turn Type-C) of the CreativeBoard CB+.
- Page 13 Step 2: Connect the CreativeBoard CB+ to the network. Use the CreativeBoard CB+’s touch panel to connect to the network following the steps below. The connection procedure differs for wired and wireless connections. Please refer to each page for details. Connect to the LAN wirelessly Home Tap 'Settings’...
- Page 14 Step 2: Connect the CreativeBoard CB+ to the network. Use the CreativeBoard CB+’s touch panel to connect to the network following the steps below. The connection procedure differs for wired and wireless connections. Please refer to each page for details. Connect to the LAN wirelessly WiFi Setting Tap the 'Passcode' input field, and the keyboard will...
- Page 15 Step 2: Connect the CreativeBoard CB+ to the network. Use the CreativeBoard CB+’s touch panel to connect to the network following the steps below. The connection procedure differs for wired and wireless connections. Please refer to each page for details. Connect to LAN via a wired connection Home Tap 'Settings’...
- Page 16 Step 2: Connect the CreativeBoard CB+ to the network. Use the CreativeBoard CB+’s touch panel to connect to the network following the steps below. The connection procedure differs for wired and wireless connections. Please refer to each page for details. Connect to LAN via a wired connection 【ホーム】...
- Page 17 Step 3: Set up the mail server Configure the 'Email Server Settings' to send emails from the CreativeBoard CB+ to the computer. The 'Email Server Settings' are configured through the web browser. WEB Browser Connect from computer to the CreativeBoard CB+ via the browser Launch the web browser on the computer (e.g., Microsoft Address bar Edge).
- Page 18 Step 4: Create the 'Address Book File'. To send the live streaming URL or scan images from the CreativeBoard CB+, address registration is required. For address registration, a CSV file with the mail or folder addresses must be created in advance. ■...
- Page 19 Step 5: Register the email recipients and the folder addresses for forwarding. Upload the ‘Address Book File' to the CreativeBoard CB+ to register the email and foldler addresses . Address Book Settings Click "Address Book Settings". Upload the 'Address Book File. Click 'Select' under 'Address Book File’.
-
Page 20: How To Use The Creativeboard Cb
How to use the CreativeBoard CB+... -
Page 21: Basic Operations
Basic Operations Scroll Sheet Manually Move the Sheet Move the sheet with your palm. You can move it to the left or right. NOTE: Do not move the sheet with the magnets attached. This may occasionally cause the device to catch the sheet, leading to damage. Also sheet-type magnets cannot be used. -
Page 22: Live Streaming
How to Operate the Live Streaming Share the board surface in real-time remotely. Live Streaming "Tap 'LIVE.'" Once the live board screen is displayed, tap ‘Invitation’. Contrast adjustment You can adjust the brightness of the image quality using the slide bar on the right side of the screen (5 levels). Please adjust it according to your lighting environment. - Page 23 How to Operate Live Streaming This explains the web browser screen for viewing the live streaming screen from a computer. Live Streaming Screen ② ③ ① ④ Capture ⑤ × ⑥ ⑧ ⑦ tem Name Description ① Live Streaming screen Displays the board surface in real time.
- Page 24 How to Send Scan Images via Email Send via email Send scan images via email from this device Tap 'Scan.’ The camera will begin scanning the board surface. NOTE: Please avoid getting too close to the board surface while operating. Your body may appear in the image. The scanned image will be displayed.
-
Page 25: Folder Transfer
How to Transfer the scanned mage to a Folder Transfer Scanned Images to a Folder Transfer to Folder Tap 'Scan.’ The camera will begin scanning the board surface. NOTE: Please avoid getting too close to the board surface while operating. Your body may appear in the image. The scanned image will be displayed. - Page 26 How to Save the scanned Image to a USB Flash Drive Save to Save the scanned Image to a USB Flash Drive USB Memory Connect the USB flash drive to the USB port (Type A) located on the left side of the control panel.
- Page 27 How to Save the scanned Image to a computer. Save to PC Connect the PC with a USB cable to save the scanned image. Connect the PC to the PC connection USB port (Type C) on the left side of the control panel using a USB cable."...
- Page 28 About the AI-OCR Function The AI-OCR function converts the hand-written text on the surface into digital text, which is then displayed in the body of the email sent from the CreativeBoard CB+. AI-OCR The hand-written on the surface is converted into digital text and sent via email.
-
Page 29: Advanced Settings
Advanced settings... -
Page 30: Basic Settings
Advanced settings via touch panel This explains the settings that can be configured via the touch panel. Tap 'Settings' on the 'Home' screen to open the 'Settings’ and make the necessary settings. Settings Home Board Settings Basic Settings Item Description Options Default Image Format... - Page 31 Advanced settings via touch panel Network Settings For detailed setting information, please refer to 'Connecting the device to the network' on pages Page 14 to 17. Maintenance Item Description Options Default Adjusts the camera's field of view for capturing the board Calibration Execute surface.
- Page 32 Advanced settings via web browser This section explains advanced settings configured via the web browser from the computer. Network ③ ④ Home Screen ① ② Item Name Description Live Streaming Allows viewing of live streaming. Enter the passcode to view the board surface. ①...
-
Page 33: Board Settings
Advanced settings via web browser Board Settings Basic Settings Item Description Options Default Image Format Slect the format to save the scanned image. JPEG, PDF JPEG Select whether to display a header or footer on the Header/Footer None, Yes None scanned image. -
Page 34: Network Settings
Advanced settings via web browser Settings Item Description Options Default AI-OCR Enable or disable AI-OCR. Disabled, Enabled Disabled Network Settings Connection Settings item Description Options Default Value XXXXXX Displays the host name. Host Name Tap to edit. Default: cbplus-last 6 digits of MAC address. Wireless LAN Connection Method Select the connection method. -
Page 35: Address Book Settings
Advanced settings via web browser Mail Settings Item Description Options Default Set the SMTP server address used for sending emails. SMTP Server Please enter up to 64 characters of alphanumeric symbols. Set the username registered on the SMTP server. Required User Account for the device to log in to the SMTP server and send emails. -
Page 36: Maintenance
Advanced settings via web browser Maintenance Item Description Options Default Adjusts the camera's field of view for capturing the board Calibration Execute surface. Deletes all settings configured on the device and restores it to Reset All Settings Execute factory default settings. System Update Updates the device's software via the network. -
Page 37: Additional Information
Additional Information... -
Page 38: How To Update Software
How to update software The software update for the CreativeBoard CB+ can be performed in two ways: via the network or by connecting a USB flash drive. Update the software via the network Software updates can be performed either from the touchscreen or the web browser. Open the 'Maintenance' screen, and if '※Update data found' is displayed, the software update can be performed. -
Page 39: Product Specifications P39
Product Specifications Product Name : CreativeBoard CB+ CB-1600 Model No. W1691xD173xH644 ※1 External Dimensions (mm) W1691xD1124xH1277 ※2 W1600xH900 Effective Board Surface (mm) Weight (kg) White Body Color Resolution: 1920 × 1080 pixels Image Quality Real-time Streaming (Video) Frame Rate: Approx. 5 fps Scanned Image Resolution: 1920 ×... - Page 40 2503EN_A...
Need help?
Do you have a question about the CreativeBoard CB+ and is the answer not in the manual?
Questions and answers