Plus M-12S User Manual
Copyboard
Hide thumbs
Also See for M-12S:
- User manual (37 pages) ,
- Brochure & specs (2 pages) ,
- Service manual (68 pages)
Table of Contents
Advertisement
Quick Links
Download this manual
See also:
Service Manual
http://www.monomachines.com
M - 12S/M - 12W/M-125
Thank you for your purchase of the PLUS Copyboard.
Please read this User's Manual carefully before use to take full advan-
tage of the functions of this product. After you have finished reading
the manual, please keep it for future reference.
http://www.monomachines.com
Copyboard
User's Manual
Advertisement
Table of Contents

Related Manuals for Plus M-12S


Summary of Contents for Plus M-12S
- Page 1 M - 12S/M - 12W/M-125 User’s Manual Thank you for your purchase of the PLUS Copyboard. Please read this User’s Manual carefully before use to take full advan- tage of the functions of this product. After you have finished reading the manual, please keep it for future reference.
- Page 2 The use of a printer as the peripheral device of the PLUS Copyboard is taken to be a prerequisite; therefore, operation will not be guaranteed when the printer is used with a direct connection to a personal computer.
-
Page 3: Table Of Contents
Names of the Parts..........................E-9 Front ............................E-9 Rear ............................E-10 Changing the Height of the Unit....................E-11 Control Panel (models M-12S and M-12W) ................. E-12 Control Panel (model M-125) ....................... E-13 Operation Steps..........................E-14 Connecting the Power ........................E-15 Setting the Time ..........................E-16 Printing ............................E-18... -
Page 4: Important Safety Information
• Do not connect any AC adapter other than the dedi- to the unit EXCEPT those specified by PLUS cated one to the unit. Doing so could result in fire or other Vision Corp. in this manual. Failure to comply accidents. - Page 5 http://www.monomachines.com Important Safety Information Handling the AC power adapter’s cord and plug of the main unit, mount fittings and printer for a long • Damaging the power cord could lead to fire or electric period of time (including during earthquakes). If the wall is shock.
- Page 6 • PLUS Vision will not be responsible for the loss of content stored in the internal memory of this unit (i.e., images that have been read), or in USB memory.
-
Page 7: Package Contents
Use this to erase the drawing. • CD-ROM [1] This includes the user's manual (in PDF format) and special software for using the copyboard (PLUS • AC power adapter (with power cord) [1] TOOLBOX). This is the power adapter for supplying power to the copyboard (See Page E-37). -
Page 8: Main Functions
http://www.monomachines.com Main Functions Text or images drawn on the copyboard’s sheet surface can be printed in color or black and white on regular paper. A press of the “Print” button on the operation panel quickly prints what has been hand written on the sheet surface to regular LETTER or A4 size paper. -
Page 9: Names Of The Parts
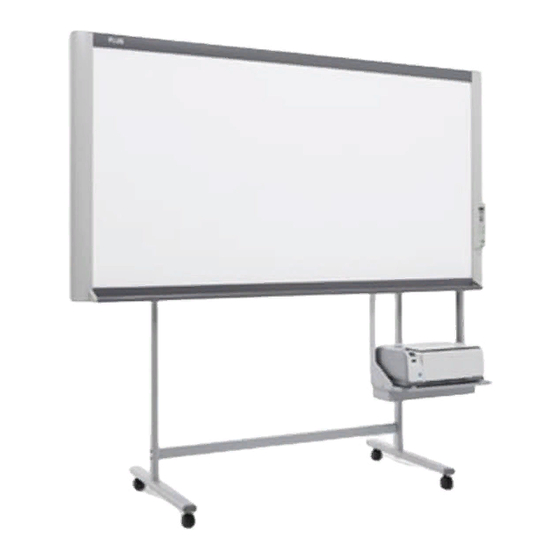
http://www.monomachines.com For More Info Names of the Parts Click Here ---> Front Main unit Frame cover Sheet Dedicated markers are used on the sheet to draw diagrams and to write. Control panel (See Page E-12, 13) Printer table Pen tray The printer* is placed here. -
Page 10: Rear
http://www.monomachines.com Names of the Parts Rear DC input connector Connect this with the DC plug end of the AC power adapter. (See Page E-37.) (Only connect the supplied AC power adapter; nothing else.) Personal computer (PC) dedicated USB port (Type B) Connect this with the USB port (type A) of the PC. -
Page 11: Changing The Height Of The Unit
http://www.monomachines.com For More Info Names of the Parts Click Here ---> Changing the Height of the Unit This is the height adjustment when setting up the copyboard on the optional stand. The stand height can be adjusted to 3 levels by 100 mm. CAUTION •... -
Page 12: Control Panel (Models M-12S And M-12W
Names of the Parts Control Panel (models M-12S and M-12W) When pressing a button, please press the center area (i.e., the round and protruding portion). The button may not work if it is pressed on a corner. Print button... -
Page 13: Control Panel (Model M-125
http://www.monomachines.com For More Info Names of the Parts Click Here ---> Control Panel (model M-125) When pressing a button, please press the center area (i.e., the round and protruding portion). The button may not work if it is pressed on a corner. + / −... -
Page 14: Operation Steps
Please be sure to draw with the dedicated markers. Failure to do so may result in a drawing that cannot be erased or soiling of the sheet. To move the sheet manually (models M-12S and M-12W only), see “Moving the Sheet Surface Manually” on page E-23. -
Page 15: Connecting The Power
http://www.monomachines.com Connecting the Power Note About the connection and the AC adapter box The AC power adapters of the copyboard and printer are stored in the AC adapter box. In this manual, "AC power plug" refers to the AC power plug of either the copyboard or the printer. If the AC power adapter is not connected or placed in the AC adapter box, see the separate "... -
Page 16: Setting The Time
http://www.monomachines.com For More Info Setting the Time Click Here ---> Set the copyboard's clock properly. The date and time are printed in the header/footer when printing and recorded in the file data when saving the file. Overview of the Operation Switch to the function settings. - Page 17 http://www.monomachines.com Setting the Time Press the + button or the − button, select 20 (the first 2 digits of the year), and press the Print button to finalize. There will be a change to the “last 2 digits of the year” setting mode ( display).
-
Page 18: Printing
http://www.monomachines.com Printing Use a printer to print out the image that has been drawn on the sheet surface. Operations and names of parts differ from printer to printer. For details of operations, see your printer’s operat- ing instructions. Preparing the Printer Please check that the copyboard and the printer have been connected. -
Page 19: Basic Printing Operation
Note • The one-screen that is visible is printable position. • To fine-adjust the sheet surface position (M-12S and M-12W only), with the sheet stopped, move the sheet slowly by hand. The sheet can be moved either to the left or to the right. - Page 20 • For model M-125, do not move the sheet surface by hand. Doing so could damage the copyboard. • For Models M-12S and M-12W, the sheet surface can be moved, but the M-12S/M-12W Erase Reminder function may not work properly.
-
Page 21: Selecting The Printing Density
(for model M-125, the copyboard returns to the original page), and the partially read image data is printed. Wait until the sheet is expelled from the printer. For models M-12S and M-12W For model M-125 Continued on next page E-21 http://www.monomachines.com... -
Page 22: Specifying The Page (Model M-125
Printing continued from previous page M-12S/M-12W Stopping the printing after the Print button was pressed and the reading completed Stopping the process when multiple copies are being made when making addi- tional copies (When the Reprint button has been pressed) Press the copyboard’s ON/Standby... -
Page 23: Printing In The Same Ratio As The Sheet Surface (Model M-12W
This completes the setting. Press the ON/Standby button to return to the normal mode. Moving the sheet surface manually (Model M-12S/M-12W) The sheet can be moved even when the power of the copyboard is switched off. The sheet can be moved with your hand either in left or right. Please place your hand at the vertical center and move the sheet slowly. -
Page 24: Using Usb Memory
Doing so could damage the USB memory device or USB port. M-125 Press the Feed/Stop button (for model M-125, the Page change buttons) and display the sheet surface you want to store. For model M-125 For models M-12S and M-12W E-24 http://www.monomachines.com... - Page 25 http://www.monomachines.com For More Info Using USB Memory Click Here ---> Step 3 (continued) The procedure for displaying the sheet surface you want to store is the same as for printing. See “Basic Printing Operation” on page E-19 and “Specifying the Page (model M-125)” on page E-22. Notice •...
- Page 26 http://www.monomachines.com Using USB Memory Removing the USB memory Check that the flashing rotation of the display window has changed to steady lighting and that the USB memory access indicator is not flashing, then pull the USB memory straight out. (Please see your USB memory manual for details.) Note •...
-
Page 27: Saving Image Files On A Computer/Deleting Image Files
http://www.monomachines.com Using USB Memory Saving Image Files on a Computer/Deleting Image Files Examples of operations follow for saving the image files in the USB memory device to the hard disk of the personal computer, and for deleting the folder when the USB memory capacity is full. (There are various methods that can be used for saving and deleting including the use of Explorer.) See the instruction manual of your personal computer or the software that you are using for information about using a personal computer. - Page 28 http://www.monomachines.com Using USB Memory Deleting USB memory image files with the computer Before deleting important image files, be sure to save them on the computer (as a data backup). 1. Open “My Computer” and then open the drive icon which shows USB memory. The folder named “CB_image”...
-
Page 29: Making The Function Settings
See the "Table of Function Numbers, Selected Modes and Lamp Statuses" on the following page. Selecting the function's setting For models M-12S and M-12W For model M-125 Press the Feed/Stop button (or for Model M- 125, use the page change... -
Page 30: Table Of Function Numbers, Selected Modes And Lamp Statuses
http://www.monomachines.com Making the Function Settings Table of Function Numbers, Selected Modes and Lamp Statuses When at step 2 under "Basic Setting Operations" on the previous page, display the number of the function you want to set on the display window. At step 3, check whether the lamps are lit or off as indicated for the desired mode. -
Page 31: Accompanying Software
* This driver may not work on some applications. * This driver conforms to TWAIN standard (ver. 1.9). • "PLUS TOOLBOX" dedicated software This is a utility for loading images from a computer, setting the copyboard's operating environment, making security settings, etc. -
Page 32: Operating Environment
For More Info Click Here ---> Factory defaults The "Settings" menu of the "PLUS TOOLBOX" dedicated software on the included CD-ROM can be used to change the copyboard's settings. For setting instructions, see the separate "Software Operating Instructions". Below are the setting items and factory defaults. -
Page 33: Meaning Of Error Messages
• The settings can be changed using the protection abled by the security settings. exclusive software. For details, contact your nearby PLUS Vision sales office, dealer or store. Restrict color • Setting for disabling printing/storing in the • Can be changed in the copyboard's mode "Function Settings". -
Page 34: Troubleshooting
• Is the copyboard connected to the PC via a USB hub? (Connect the copyboard directly to the USB port of the PC.) * If the problem persists, please contact your nearby PLUS Vision sales office, dealer, or store. E-34... - Page 35 http://www.monomachines.com Troubleshooting Condition Please Check A press of the Print button does not • Check that the power cable of the printer and the printer cable are result in printing. securely connected. • Check that the printer power indicator is lit. •...
-
Page 36: Specifications
Specifications BOARD TYPE (Model name) Standard (M-12S) Wide (M-12W) 5-surface (M-125) Installation method Self-standing (T-shaped legs), or wall mounting External dimensions W1470 × D700 × H1970*² W1970 × D700 × H1970*² W1470 x D700 x H1970* (T-shaped legs*¹) Form Main unit weight 31 kg*³... -
Page 37: Appendix
http://www.monomachines.com Appendix Connections and Wiring Diagram b The connections and wiring diagram below is included here for checking the connections. * For connection of the copyboard and computer, see the separate "Software Operation Manual". [Copyboard and Printer Connections Diagram] Back surface To DC INPUT connector To Printer connector To USB connector...
Need help?
Do you have a question about the M-12S and is the answer not in the manual?
Questions and answers