Table of Contents
Advertisement
Quick Links
https://www.supplychimp.com/
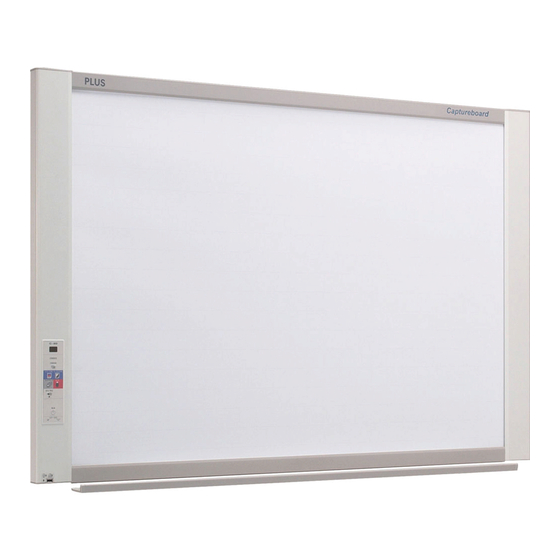
Captureboard
C - 20S/C - 20W
User's Manual
Thank you for your purchase of the PLUS Captureboard.
Please read this User's Manual carefully before use to take full advan-
tage of the functions of this product. After you have finished reading
the manual, please keep it for future reference.
Advertisement
Table of Contents

Related Manuals for Plus C-20W


Summary of Contents for Plus C-20W
- Page 1 C - 20S/C - 20W User’s Manual Thank you for your purchase of the PLUS Captureboard. Please read this User’s Manual carefully before use to take full advan- tage of the functions of this product. After you have finished reading...
-
Page 2: Introduction
Cautions on using networks About the network connection environment • The required operating environment is subject to change without notice. Also, PLUS does not guarantee all operations. • Even if all required operating environment conditions are met, it may happen that operations do not work properly or that some problems arise. Depending on the communications status, displays may be delayed and communication errors may occur. Disclaimer • PLUS will accept no responsibility whatsoever for any consequences of problems of communication impediments in con- nected devices due to the network functions. • PLUS will accept no responsibility whatsoever for impediments incidental to usage of or the inability to use the network func- tions (loss of business profits, losses due to interruption of activities, etc.). • PLUS will accept no responsibility whatsoever for malfunctions due to combinations with connected devices or the software used, nor for damages arising from hang-up, etc. NOTE Do not use ruled type tapes. -
Page 3: Table Of Contents
https://www.supplychimp.com/ Table of Contents Introduction ...............E-2 When the folder for saving is set to “Board” ..E-25 Package Contents ............E-4 Deleting image files from the captureboard ..E-27 Names of the Parts ............E-5 When the folder for saving is set to “FTP Server”... -
Page 4: Package Contents
Pen tray [1] Pen tray fixing screws (M4 × 20) (temporarily fastened on main unit) Wall brackets [1 set] C-20S: 3 screws, C-20W: 4 screws These are brackets for mounting the main unit on a wall. (See the Assembly and Setup Manual for assembly instruc- (See the Assembly and Setup Manual.) tions.) -
Page 5: Names Of The Parts
https://www.supplychimp.com/ Names of the Parts Front Main unit Frame cover Sheet Dedicated markers are used on the sheet to draw diagrams and to write. Control panel (See Page E-8) Input/output terminals Pen tray (see next page) * Located on the bottom surface. Printer table The printer* is placed here. (See the Assembly and Setup Manual.) * The printer is sold separately. AC adapter box Store the AC power adapters of the capture- * This illustration does not show the connection cords. -
Page 6: Input/Output Terminals
https://www.supplychimp.com/ Names of the Parts Input/output terminals USB memory port (type A) Insert a commercially available USB memory device here. Scanned images can be saved. (See page E-17) The connector is located on the bottom sur- face of the main unit. The diagram view is seen from the bottom. * This illustration does not show the printer or connection cords. DC input connector Connect this with the DC plug end of the AC power Personal computer (PC) dedicated USB adapter. (See Page E-51.) (Only connect the supplied port (Type B) -
Page 7: Changing The Height Of The Unit
https://www.supplychimp.com/ Names of the Parts Changing the Height of the Unit This is the height adjustment when setting up the captureboard on the optional stand. The stand height can be adjusted to 3 levels by 100 mm. CAUTION • At least two persons should hold the main unit. If not, the main unit could drop or tip, resulting in accidental injury. • Lock the stand’s casters by pressing the bottom of the caster lock button. If not, the stand could move while the main unit is being mounted or removed, resulting in accidental injury. -
Page 8: Control Panel
https://www.supplychimp.com/ Names of the Parts Save ( ) button (USB memory storage) Control Panel The sheet is moved by 1 screen and read, and the image is stored on the USB memory device. When pressing a button, please press the center area When connected to a computer by USB cable, the image (the square bulge). The button may not work if it is is stored in the captureboard’s internal memory. pressed on a corner. Network ( ) button Scrolls and scans the sheet one screen’s worth and saves... -
Page 9: Functions Of The Captureboard
Functions specific to the captureboard ⑥ ⑦ Combining images projected from a projec- Printing computer data on printer connect- tor with hand-drawn data ed to board Projector Scanning with the C-20 Software’s C-20 Software preview screen Printer Combining of image on computer with board’s hand- Printing of combined image on computer from printer drawn data connected to captureboard Note • For details on operating the “PLUS C-20 Software” and on connecting the equipment, see the separate “Software Opera- tion Manual”. -
Page 10: Operation Steps
https://www.supplychimp.com/ Operation Steps When used as a Copyboard The captureboard uses an image scanner to scan characters or diagrams drawn using special markers (four colors). When the Color Print or B/W Print button is pressed, the image on the screen is printed out to the printer. -
Page 11: When Used As A Captureboard
Note When combining the sheet surface drawing with a projector image • For details on operating PLUS C-20 Software and on connecting devices, refer to the separate “Software (1) Connect the computer on which “PLUS C-20 Soft- Operation Manual”. ware” is installed to the captureboard. -
Page 12: Setting The Time
https://www.supplychimp.com/ Setting the Time The date and time are stamped on the printing paper and recorded in the file information when files are stored on the captureboard and FTP server, so set the captureboard’s time correctly. The time can also be set from a computer via a network (when connected to a LAN). (See page E-38.) Description of Operations Switch to “CB Setup”. - Page 13 https://www.supplychimp.com/ Setting the Time While “F1” is displayed, press the Save button to enter. The display switches to “c1” (first 2 digits of year). If no buttons are operated for 10 seconds while in the time setting mode, the mode returns to the “CB Setup” mode. Press the Save button to move to the last dig- its of the year The display switches to “c2” (last 2 digits of year). Notice: The first two digits of the year (“20”) are fixed. Simply press the Save button to switch to the last 2 digits of the year setting position.
-
Page 14: Printing (Printer Sold Separately
Printing (printer sold separately) Use a printer to print out the image that has been drawn on the sheet surface. Use a PLUS-designated printer. Operations and names of parts differ from printer to printer. For details of operations, see your printer’s operat- ing instructions. -
Page 15: Basic Printing Operation
https://www.supplychimp.com/ Printing Basic Printing Operation Preparation: Preparation: Check that the AC power plugs of the captureboard and printer are connected to wall power outlets. Press the ON/Standby button and switch on the power. Prepare the printer. (See the previous page.) Note • When turning on the power, wait about 5 seconds or more after the power plug has been connected before pressing the ON/Standby button. -
Page 16: Moving The Sheet Surface Manually
Cancellation of the print operation in progress When the ON/Standby button is pressed, the reading of the sheet stops, and the partially read image data is printed. Wait until the sheet is expelled from the printer. Note • If the ON/Standby button is pressed while the sheet surface is being read, printing is interrupted and only part of the image will be printed. To move the sheet surface, wait until scrolling stops, then press the Scroll/Stop button . • The one-screen portion is reduced to A4 paper size and printed. For wide type captureboards (model C-20W), the image is compressed about 75% in the horizontal direction. To print with the same proportions as the image on the sheet surface, see “Making the Device Settings” (page E-31). • A flashing “ ” in the display window indicates a print error. See “Meaning of Error Messages” on Page E-46. • When printing, a time stamp (date and time) is printed at the top right of the sheet. See “CB Setup” on page E-30, E-38. When the captureboard is not going to be used, press the ON/Standby button and switch off the power (standby mode). • Switch off the printer power. Note • When the Erase Reminder function is set to “Enable”... -
Page 17: Using Usb Memory
https://www.supplychimp.com/ Using USB Memory The content of what has been drawn on the sheet surface of the captureboard can be saved in USB memory. Later, the saved image can be read into a personal computer and made into a document of the proceedings of the meeting, or affixed to a document. - Page 18 https://www.supplychimp.com/ Using USB Memory Press the Save button to store. Flashing indicator “rotates” sequentially during USB memory storage operation. Display window • The reading operation is performed for a one-sheet portion (while the sheet is scrolled) and USB memory storage starts after the scrolling completes. The (5 second) flashing “US” display indicates that the USB memory has not been inserted. Please insert the USB memory and then press the Save button. A (5 second) flashing “FL” display indicates that there is insufficient free capacity to permit storage in USB memory. Replace with a USB memory device having sufficient capacity.
-
Page 19: Saving Image Files On A Computer/Deleting Image Files
https://www.supplychimp.com/ Using USB Memory Saving Image Files on a Computer/Deleting Image Files Examples of operations follow for saving the image files in the USB memory device to the hard disk of the per- sonal computer, and for deleting the folder when the USB memory capacity is full. (There are various methods that can be used for saving and deleting including the use of Explorer.) See the instruction manual of your per- sonal computer or the software that you are using for information about using a personal computer. - Page 20 https://www.supplychimp.com/ Using USB Memory Deleting USB memory image files with the com- puter Before deleting important image files, be sure to save them on the computer (as a data backup). Open “My Computer (or “Computer”)” and then open the drive icon which shows USB memory. The folder named “CB_Image” contains the memory stor- age data of the captureboard.
-
Page 21: Using The Captureboard Connected To A Computer
https://www.supplychimp.com/ Using the captureboard connected to a computer When the captureboard and a computer are connected by USB cable, the captureboard is recognized as an external memory device (removable device). Below is the procedure for copying the “CBImage” file from this device onto the computer. - Page 22 https://www.supplychimp.com/ Using the captureboard connected to a computer On the computer, open “My Computer”, and from there open the captureboard identified as a removable device. (1) Double-click the “My Computer” (or “Computer”) icon to open it. (2) When the device icon for the captureboard (displayed as a C-20) is double-clicked, the captureboard’s internal memory opens.
-
Page 23: Using The Captureboard Connected To A Network
LAN)” on page E-35.) If you plan to store image files on an FTP server, create the folder for storing the files on the FTP server. Ask your network administrator for instructions on settings and creating the folder. Notice • Be sure to transfer important image files stored on the captureboard itself to a computer (data backup). If the captureboard should for some reason malfunction, depending on the malfunction the stored data may be lost or become impossible to transfer. Note that PLUS will accept no responsibility whatsoever for loss of data, etc. • The captureboard will not operate properly if the firewall is activated. The following explanation assumes that the LAN cable has been connected and the various network settings have been completed. Saving scanned images on the captureboard or FTP server Preparations : Check that the power plug is connected to a wall power outlet. - Page 24 https://www.supplychimp.com/ Using the Captureboard Connected to a Network Press the Network button to save the image. LEDs flash in circular motion during saving [Display window] • The scanning operation (scrolling) is performed over one sheet’s worth of image, and when scanning stops the data is stored in the save to location set in the network settings. For instructions on selecting the save to location, see “Network Settings” on page E-40. Note • Depending on the network communications conditions, some time may be required for identification and storage. • If “E8” flashes (for about 5 seconds), “Invalid” is set at “Security Setting” → “Network Storage”. (See page E-42.) • If “L1” to “L5” flashes (for about 5 seconds), this indicates that the network settings are incorrect. (See page E-47.) • If “FL” flashes (for about 5 seconds), there is not enough space in the save to location. Delete image files to pro- vide space. (See pages E-27 and E-29.)
-
Page 25: Transferring Image Files To/Deleting Them From The Computer
https://www.supplychimp.com/ Using the Captureboard Connected to a Network Transferring image files to/deleting them from the computer Image files stored in the folder for saving (“Board” or “FTP Server”) can be transferred to your own computer. The operation differs according to the setting for where scanned images are stored. (See “Network Settings” on page E-40.) The image files are saved in JPEG (default), PNG or PDF format, according to the image format setting. - Page 26 https://www.supplychimp.com/ Using the Captureboard Connected to a Network Click the desired date. • Image files are managed in groups by date (the date the scanned image files were saved). Because of this, display the date list. • Check that “Download” is selected for the [Download/Delete] selection button. When “▾” is clicked, a pull-down list is displayed. Click [Down- load]. [Download/Delete] selection button From the file list, select the image to be transferred to the computer. When the radio button is clicked, it is checked and a preview image is displayed. Download the image onto the computer. (1) Click the [Download] button.
-
Page 27: Deleting Image Files From The Captureboard
https://www.supplychimp.com/ Using the Captureboard Connected to a Network Deleting image files from the captureboard Notice • When “Invalid” is set at “Delete User Image Data” in “Security Setting”, files cannot be deleted. This can be changed to “Valid” with the administrator’s authority. (See page E-42.) Perform steps 1, 2 and 3 on page E-25 to display the file list screen. Select [Delete]. -
Page 28: When The Folder For Saving Is Set To "Ftp Server
https://www.supplychimp.com/ Using the Captureboard Connected to a Network When the folder for saving is set to “FTP Server” When the folder for saving is set to “FTP Server”, the scanned images are saved on the FTP server connected on the network. Transfer these images onto the computer connected on the network. The following explains how to transfer the files using Explorer on the computer. Click the computer icon or, from the Start menu, click “Computer”. Explorer opens. Log in to the FTP server. Click on Explorer’s address field, input the FTP server’s IP address after “ftp://”, then press the [Enter] key. The FTP server’s verification screen opens. Input the required fields on the verification screen. Input the user name and password registered on the FTP server, then click the [Log In] button. • Input the user name (case sensitive) and password (case sensi- tive), then click the [Log In] button. -
Page 29: Deleting Image Files On The Ftp Server
https://www.supplychimp.com/ Using the Captureboard Connected to a Network Note • Logging in to the FTP server from a web browser The procedure is the same as for “When the folder for saving is set to “Board”” on page E-25. However, to log in, input the FTP server’s IP address (input “ftp://”, then input the IP address), and at the verification screen input the user name and password registered on the FTP server. Deleting image files on the FTP server At step 4 on the previous page, select the folder(s) or image file(s) to be deleted, right-click the mouse to display a pull-down menu and select “Delete”. At the verification screen, click “Yes”. The folder(s) or file(s) are deleted. If folder(s) or file(s) cannot be deleted • Is access to the FTP server’s folder restricted? Notice • Be very careful when deleting folders or files from the FTP server. • Check again before deleting to avoid accidentally deleting other folders or files. E-29... -
Page 30: Cb Setup And Network Setting Procedure
https://www.supplychimp.com/ CB Setup and Network Setting Procedure There are three ways to make the device settings: using the captureboard’s operation buttons to make the set- tings (“CB Setup”), making the settings using a USB connection (simple network settings, and making the set- tings via LAN (detailed settings: “CB Setup”... -
Page 31: Table Of Function Numbers And Settings
https://www.supplychimp.com/ CB Setup and Network Setting Procedure Table of Function Numbers and Settings Function Setting Item Description Setting Status Indicators Number The date and time are stamped on the printing paper Year, month, Not lit Time Setting and recorded in the file information when files are day, hours, stored. minutes Selection of whether to print in A4 paper size or letter Printer size. (Lit) (Off) Paper Size • This operates when the captureboard is connected Letter... - Page 32 https://www.supplychimp.com/ CB Setup and Network Setting Procedure Function Setting Item Description Setting Status Indicators Number Setting of whether or not to notify the user that char- Disable* Printer acters or diagrams drawn on the back side of the (Lit) (Off) captureboard’s sheet surface have not been erased. Enable Printer This is effective for confidential meetings, etc. (Off) (Lit) Disable: T he Erase Reminder function does not work.
-
Page 33: Simple Network Settings (Via Usb
Open “My Computer”, and in this open the captureboard (removable device). 1 Double-click the “My Computer” (or “Computer”) icon to open. 2 Double-click the captureboard (a device displayed as a removable disk) to open the captureboard’s computer storage memory. • T o check that the captureboard is operating as a device, right-click “My Computer” (or “Computer”) to display the menu, then check that “PLUS Captureboard USB Device” is displayed as the disk drive name at “Management” → “Device Manager” for Windows 7 (“Properties” → “Device Manager” for Windows XP). Use a program on the computer (Notepad, etc.) to open the “setting.ini” file in the “setup” folder. 1 Double-click the “setup” folder to open it. 2 Open the “setting.ini” file (text format) located in this folder using Notepad or another program on the computer and directly overwrite the contents of the settings file. - Page 34 https://www.supplychimp.com/ CB Setup and Network Setting Procedure Contents upon purchase and when network settings are reset IP Address=* Input the IP address (fixed). Subnet Mask=* Input the subnet mask. Default Gateway=* Input the default gateway if necessary. Item Item name Setting Default IP address IP Address Any value Blank Subnet mask Subnet Mask Any value Blank Default gateway Default Gateway Any value Blank Save the “setting.ini” settings file, overwriting the previous file. Save to location: “ setup” folder on captureboard (removable disk) File name: s etting.ini • We recommend making a note of changed settings for future refer- ence.
-
Page 35: Making Detailed Settings (Via Lan
https://www.supplychimp.com/ CB Setup and Network Setting Procedure Making Detailed Settings (via LAN) Use this procedure to make the captureboard device settings (“CB Setup”), network settings, etc., with the captureboard con- nected to a local area network (hereafter referred to as “LAN” or “the network”) using a computer’s web browser. Access authority is required to make the detailed settings. There are three levels of authority – “administrator authority”, “file list browsing authority” and “no authority”, and the selectable menu items (some setting items) are restricted accordingly. Register the administrator and users at “User Setting” on page E-41. Table of Menu Items and Access Authority Levels Menu Item Some Setting Items Administrator Authority... - Page 36 https://www.supplychimp.com/ CB Setup and Network Setting Procedure Input the captureboard’s IP address. In the web browser’s URL field, input “http://” followed by the cap- tureboard’s IP address, then press the [Enter] key. When the captureboard is connected, the top screen appears. Connecting the captureboard to the network upon purchase Upon purchase, the captureboard’s IP address and subnet mask are not yet set. Be sure to check the section “Simple Network Settings (via USB)” (see page E-33) and set the IP address, etc.
- Page 37 https://www.supplychimp.com/ CB Setup and Network Setting Procedure Make the changes or settings. The screen at the right is an example of what may be displayed, here showing the “CB Setup” page. Selecting and inputting Radio buttons One of the selection items can be selected. When is clicked, it switches to . Input boxes When a box is clicked, the arrow cursor switches to the “ | ” char- acter input cursor. Input characters in the same way as you would on a computer. • The characters that can be input are restricted according to the item’s type of setting. (See page E-41) Browse and Upload buttons...
-
Page 38: Cb Setup
https://www.supplychimp.com/ CB Setup and Network Setting Procedure CB Setup This is the page where the captureboard’s various functions are set and changed. The settings are the same as on “Table of Func- tion Numbers and Settings” in the section on making the settings operating the captureboard’s buttons. (For instructions on dis- playing the screen, see “Basic Setting Operations” step 3 on page E-36.) Captureboard Setting Item Setting/Description Default Paper size Select the printing paper size. Aspect Ratio Setting Select the aspect ratio for printing. Match to printing paper size Time Date Stamp Set the captureboard’s date and time. Input as follows: Year: 4 digits, Month: 2 digits (Ex.: 03 for March), Day: 2 digits (Ex.: 06 for the 6th), Hours: 2 digits in 24-hour mode (Ex.: 14 for 2 pm, 06 for 6 am), Minutes: 2 digits (Ex.: 00 for 0 minutes) • Do not insert spaces. If the date and time setting values are incorrect, an error message is displayed. Get Current Time: When the “Get Current Time” button is clicked, the display switches to the computer’s current time. This eliminates the need to make the cur- rent date and time setting. -
Page 39: Header/Footer
https://www.supplychimp.com/ CB Setup and Network Setting Procedure Header/Footer This is the screen for registering headers and footers on the captureboard and checking the image. (For instructions on displaying the screen, see “Basic Setting Operations” step 3 on page E-36.) Image Select screen Preview screen Image Select/Preview Item Setting/Description Default Select Header/Footer Select whether the image to be registered on the captureboard is a Header Image header or footer. Click the radio buttons to select. • For instructions on creating images, see page E-45. Browse When the [Browse] button is clicked, the computer’s “Browse Files” —... -
Page 40: Network Setting
https://www.supplychimp.com/ CB Setup and Network Setting Procedure Network Setting Make the settings for the captureboard’s IP address, the FTP server’s IP address, etc. (For instructions on displaying the screen, see “Basic Setting Operations” step 3 on page E-36.) Network Setting Item Setting/Description Default IP address Change the captureboard’s IP address. Use a fixed IP address for the Any value captureboard. When connecting to a network using the DHCP of a rout- er, etc., change the IP address to one that is outside of the automatic acquisition range Subnet Mask Set the captureboard’s subnet mask. -
Page 41: User Setting
https://www.supplychimp.com/ CB Setup and Network Setting Procedure User Setting Set the user name and password required for administrator and user verification and the number required for resetting the network settings. (For instructions on displaying the screen, see “Basic Setting Operations” step 3 on page E-36.) User Setting Item Setting/Description Default Admin User name Set the administrator’s user name. admin • Input using no more than 14 characters. The name will be case sensi- tive for verification. Admin Password Set the administrator’s password. None • Input using no more than 14 characters. The password will be case sensitive for verification. User Name Set the user name. admin The limit to the number characters that can be input is the same as for the administrator’s user name. -
Page 42: Security Setting
https://www.supplychimp.com/ CB Setup and Network Setting Procedure Security Setting These security settings can be made to restrict access to setting items. For this page, the security settings page cannot be displayed unless [Administrator Menu] is clicked and the administrator’s user name and password are input on the verification screen. (For instructions on displaying the screen, see “Basic Setting Operations” step 3 on page E-36.) Security Setting Item Setting/Description Default USB Memory Set whether or not to enable or disable saving on USB memory devices. Valid PC connection (USB) Set whether or not to enable or disable saving in a computer storage Valid memory. Network Storage Set whether or not to enable or disable transfer of image files to network Valid storage (folder for saving: “Board” or “FTP Server”) to a computer or FTP server. Notice: • When set to “Invalid”, the network storage memory is formatted. -
Page 43: Disk Management Setting
https://www.supplychimp.com/ CB Setup and Network Setting Procedure Disk management Setting The amount of disk space used can be checked, the disk can be checked and the disk can be formatted here. (For instructions on displaying the screen, see “Basic Setting Operations” step 3 on page E-36.) Disk Management Setting Setting/Description Default Item Disk Usage This displays the amount of network storage memory used (in percent- — age). Disk Check When the [Disk Check] button is clicked, checking of the network stor- — age memory starts. When checking is completed, the results of the check are displayed. If a warning is displayed, format the disk. Disk Format When the [Disk Format] button is clicked, the disk is formatted. — Notice: • Transfer important image files to a computer before formatting. -
Page 44: Resetting The Network Settings
https://www.supplychimp.com/ CB Setup and Network Setting Procedure Resetting the Network Settings Operate the buttons on the captureboard to reset the network settings to their defaults. Setting items that are reset: A dmin User name, Admin Password, User Name, Password, IP Address, Subnet Mask, Default Gate- way, Folder for saving, FTP User Name, FTP Password, FTP Server IP Address, FTP Server Port, FTP Save Directory Name Notice • Once reset, the network settings cannot be restored. While pressing the ON/Standby button, press the Network button. The captureboard switches to the network settings reset mode and “00” flashes on the display window. Press the Color Print (Increase) or B/W Print (Decrease) button to display the network reset number. • The network reset number can be viewed when User Setting is selected with administrator authority. -
Page 45: Creating And Registering Headers And Footers
https://www.supplychimp.com/ CB Setup and Network Setting Procedure Creating and Registering Headers and Footers The header/footer function allows you to superimpose your company name, logo, etc., at the top or bottom of scanned images for printing or display. The date and time are printed at the top right of the header. Creating header and footer images Use your image software to create a JPEG file. Create the image with the resolutions below. Max. size for header images: 1248 × 110 dots * Image format: JPEG Max. size for footer images: 1248 × 40 dots Image format: JPEG * This is sometimes expressed as “pixels”. Note • Even for image data whose resolution is within the allowable limits, it may happen that the top and bottom of the image are not displayed. Image display position Images are displayed at roughly the center in the horizontal direction. In the vertical direction they are positioned next to the scanned image area. Consider this when creating images with less than the maximum size. -
Page 46: Meaning Of Error Messages
When the “USb” letter display is • A USB memory device is plugged into • Did you press the ON/Standby button flowing...Warning that disconnec- the main unit. When the USB memory while the USB memory device was plugged tion of USB memory has been for- device is disconnected, the power will into the main unit? gotten be switched off and the unit will enter the standby mode. If the problem persists, please contact your nearby PLUS Corporation sales office, dealer, or store. E-46... - Page 47 https://www.supplychimp.com/ Meaning of Error Messages Network (main unit) related errors Error Display Number Problem and Solution LAN cable dis- • No cable is connected to the LAN terminal. • Connect the LAN cable properly. connected FTP server rec- • The user name or password is wrong. • Input the correct user name and pass- ognition error word. (See page E-40.) FTP server con- • The FTP server’s IP address is wrong. • Consult the network administrator then nection failure set the FTP server’s IP address. (See page E-40.)
-
Page 48: Troubleshooting
When the captureboard and PC are con- • Check whether the captureboard is in an operable condition, and whether nected, the PC does not recognize the the USB cable is connected properly. captureboard • Is the captureboard connected to the PC via a USB hub? (Connect the captureboard directly to the USB port of the PC.) The date is not updated. • The captureboard’s battery is dead. Contact your store of purchase. * If the problem persists, please contact your nearby PLUS Corporation sales office, dealer, or store. Condition Please Check The captureboard’s power turns on, but the • Check whether the printer’s power plug (DC plug) is securely inserted. printer’s power does not. If the power still does not turn on, disconnect the AC adapter box and check whether the printer’s AC power adapter side plug is unplugged from the AC power adapter. (For some printers it is directly mounted.) Printing is not possible when Color Print (or • Check that the power cable of the printer and the printer cable are securely... - Page 49 1) With the captureboard’s power on (with the display window lit), press the Number of Copies button repeatedly to display “ ” on the display window. 2) Press the Color Print ( ) button for a color print, the B/W Print ( ) button for a black-and-white print. * Test printing starts. Check the print • Is the each color line printed uniformly? • Are there missing dots, pale lines, lines with thinner ink than others, etc.? Remedy • If the nozzle is partially choked, clean it. • If the quality of the print does not improve even though the nozzle has been cleaned, wipe off the ink on the surface of te nozzle. For details, see the “User’s Guide” included with the printer. * Please see your printer manual for information about printing problems, printer maintenance, and details related to printing. Updating the captureboard’s internal program See the PLUS website for instructions on updating the program and to download the latest program. E-49...
-
Page 50: Specifications
Specifications BOARD TYPE (Model name) Standard (C-20S) Wide (C-20W) Installation method Self-standing (T-shaped legs), or wall mounting External dimensions (T-shaped W1480 × D675 × H1947*² mm W1980 × D675 × H1947*² mm legs*¹) Form Main unit weight 20 kg*³... -
Page 51: Appendix
https://www.supplychimp.com/ Appendix Connections and Wiring Diagram • The connections and wiring diagram below is included here for checking the connections. [Captureboard and Printer Connections Diagram] Computer Captureboard front panel To USB port To PC dedicated USB port USB cable (included with Captureboard: 3m) To Printer connector To DC INPUT connector USB cable (supplied with the printer) To USB connector Printer To DC connector Printer AC power adapter AC power adapter (supplied) (supplied with the printer) To wall power outlet * Appearance of printer is for illustration purposes. Note • The AC power adapters of accessories and printers that have been verified to be operation many differ from the ones shown on the connections diagram (they may be of the built-in or mounted-on type).
Need help?
Do you have a question about the C-20W and is the answer not in the manual?
Questions and answers