Table of Contents
Advertisement
Quick Links
Download this manual
See also:
Service Manual
PROPRIETARY NOTICE AND LIABILITY DISCLAIMER
The information disclosed in this document, including all designs and related
materials, is the valuable property of NEC Corporation (NEC) and/or its licensors.
NEC and/or its licensors, as appropriate, reserve all patent, copyright and other
proprietary rights to this document, including all design, manufacturing,
reproduction, use, and sales rights thereto, except to the extent said rights are
expressly granted to others.
The NEC product(s) discussed in this document are warranted in accordance with
the terms of the Warranty Statement accompanying each product. However, actual
performance of each such product is dependent upon factors such as system
configuration, customer data, and operator control. Since implementation by
customers of each product may vary, the suitability of specific product
configurations and applications must be determined by the customer and is not
warranted by NEC.
To allow for design and specification improvements, the information in this
document is subject to change at any time, without notice. Reproduction of this
document or portions thereof without prior written approval of NEC is prohibited.
UltraCare is a U.S. registered trademark of NEC Technologies, Inc.
Versa and SurePoint are U.S. trademarks of NEC Technologies, Inc.
All other product, brand, or trade names used in this publication are the trademarks or
registered trademarks of their respective trademark owners.
Copyright 1994
NEC Technologies, Inc.
1414 Massachusetts Avenue
Boxborough, MA 01719
All Rights Reserved
First Printing — May 1994
7-1 Shiba 5-Chrome, Minato-Ku
Copyright 1994
NEC Corporation
Tokyo 108-01, Japan
All Rights Reserved
Advertisement
Table of Contents

Related Manuals for NEC VERSA S


Summary of Contents for NEC VERSA S
- Page 1 PROPRIETARY NOTICE AND LIABILITY DISCLAIMER The information disclosed in this document, including all designs and related materials, is the valuable property of NEC Corporation (NEC) and/or its licensors. NEC and/or its licensors, as appropriate, reserve all patent, copyright and other...
-
Page 2: About This Guide
This Versa™ S Series User’s Guide contains all the infor- mation you need to use your notebook computer. To help you get the most out of your Versa S, this guide describes system features, options, and setup programs. Read the following chapters to find out more about your Versa S. -
Page 3: Text Setup
Appendix B describes Advanced Power Management settings and the Communications Assistant. Use this guide along with the software documentation that comes with your Versa S. TEXT SETUP To make this guide as easy to use as possible, text is set up in the following ways. -
Page 4: Related Documents
The Versa Series Quick Reference Card contains brief descriptions of function keys, LEDs, NEC help tele- phone numbers and troubleshooting tips. Tuck this card inside the Versa S when you take it with you. The card is designed as quick portable reference to frequently used functions. -
Page 5: Table Of Contents
Contents About this Guide ..............Text Setup ............... Related Documents........... 1 Getting to Know Your Versa S What’s in the Box ............ The Outside of the Unit ..........AC Adapter Features........... Diskette Drive Features ........Versa S Setup ............Opening the LCD Panel........ - Page 6 Using Audio ........... Communicating from Your Office......Modem............Pager ............. Data Transfer..........E-Mail ............Unwinding with the Versa S ........ In Meetings .............. Creating Agendas and Outlines ......Organizing Teams and Goals....... Communicating the Essentials ......VGA Connector ..........Wireless LAN ..........
- Page 7 3 Adding Options PCMCIA Cards ............Modem Card Connection ........External Devices ............Parallel Devices........... Serial Devices ............. Keyboard ............Mouse..............3-10 Monitor............... 3-12 4 Using the SCU What Is the SCU? ............ SCU Access ............. SCU Use..............SCU Menu Options ..........Standard .............
- Page 8 Power Mgmt ............Defaults .............. 4-10 Exit..............4-11 5 Utilizing Power Management What Is Power Management ........Power Management Access ......... Power Management Setup ........Menu Options ............Controls .............. Power Savings..........LCD Bright Ctrl..........Battery Low ........... Alarm Resume ..........Cover Close Switch ........
- Page 9 7 If You Need Help UltraCare Support............ Support from the NEC Reseller ........ Support from NEC ........... NEC FastFacts............ NEC Bulletin Board System ........ What Is the BBS?........... How Do You Use the BBS?......NEC Technical Support ........NEC Customer Service Response Center .....
-
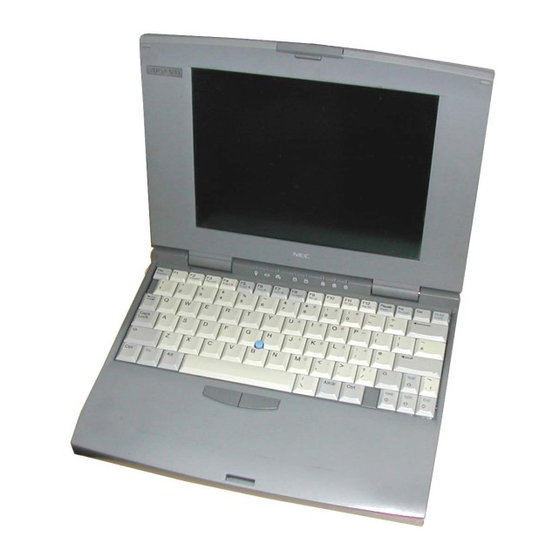
Page 10: Getting To Know Your Versa S
The keyboard itself is positioned towards the back of the system base. This ergonomic design gives you a palm rest for comfort. It also makes the Versa S easy to use when you’re in a tight spot, like a narrow airplane seat. -
Page 11: What's In The Box
WHAT’S IN THE BOX Check the box when you unpack your Versa S. You should have the equipment and documents shown in the following figure. If anything is missing, contact your dealer. Versa S Diskette Drive Power Cable AC Adapter... -
Page 12: The Outside Of The Unit
THE OUTSIDE OF THE UNIT Versa S external features are shown and described next. You can see these ports, buttons, and features without opening the LCD panel. Some of the ports on the back of the system are behind a protective cover. - Page 13 Mouse Drive Port Port Ports on the back of the Versa S Power port. Lets you plug in the AC adapter so you can run the Versa S on AC power. Keyboard/Mouse port. Gives you the option of attaching a PS/2-style external keyboard or mouse to the system.
- Page 14 Power button. Lets you power on and power off your Versa S. Simply push in the button. PCMCIA slots. Allows you to add optional PCMCIA cards to enhance your system. The protective cover keeps dust and foreign objects from getting into the unit.
- Page 15 Retractable legs — let you adjust the angle at which the system sits on a flat surface. Battery Release latch — secures and releases the battery pack. Battery pack — provides battery power for running the Versa S. 1-6 Getting to Know Your Versa S...
-
Page 16: Ac Adapter Features
The AC Power LED lights when you connect the AC power cable to the adapter and a wall outlet. The LED lights even if the adapter is not attached to the Versa S. The Power Connector plugs into the power port on the Versa S. -
Page 17: Diskette Drive Features
It has two locking tabs that secure the connection. The diskette drive Disk Release button allows you to remove a diskette from the drive. The drive busy lamps lights when the diskette drive is accessed. 1-8 Getting to Know Your Versa S... -
Page 18: Versa S Setup
Versa S system. Opening the LCD Panel Open the LCD panel on the Versa S notebook as follows. Locate the LCD latch on the front of the Versa S. Slide the latch up and raise the LCD panel. -
Page 19: Connecting The Ac Adapter
Attaching the AC adapter NOTE: When the AC adapter is attached to the Versa S and a wall outlet, the Charge LED on the system lights. The LED remains lit until you press the power button and power on the system. To find out what the Charge LED means, see “LED Status... -
Page 20: Attaching The Diskette Drive
Attaching the Diskette Drive You can use your Versa S notebook with or without its external diskette drive attached. Attach the diskette drive as follows. Turn off Versa S system power. NOTE: Some programs do not recognize the diskette drive unless the drive is attached when you start up the system. -
Page 21: Disconnecting The Diskette Drive
Disconnecting the Diskette Drive Disconnect the diskette drive from the Versa S as follows. Squeeze and hold the two locking tabs on the drive cable connector. Pull the connector away from the system. Locking Tabs Locking tabs Replacing a Battery Pack Follow these instructions to replace a battery pack installed in your notebook computer. - Page 22 Lift up and remove the battery pack. Locate the tabs on the end of the new battery pack. Fit the tabs into the grooves inside the compartment. Battery Battery Pack Tabs Pack Grooves Locating the tabs and grooves Getting to Know Your Versa S 1-13...
-
Page 23: Turning On The Versa S
Inserting the battery pack Turn the Versa S right side up and reconnect any exter- nal options you disconnected. Turning On the Versa S Prepare to power on your system as follows. -
Page 24: Features
Locate and press the power button. Power Button Power button FEATURES Versa S features include: LCD Panel Keyboard LED Status Bar Controls Online Help. These features are described next. Getting to Know Your Versa S 1-15... -
Page 25: Lcd Panel
Although this may mean a pixel or two is non- functional, its impact on your display should prove minimal. Keyboard The Versa S keyboard is equipped with many features of its own. They include the following. Function keys Typewriter keys... -
Page 26: Typewriter Keys
Shift Shift Ctrl Versa S keyboard Function Keys The Versa S gives you twelve function keys, through . When used in conjunction with , some of the func- tion keys act as system control keys. (These are described under “Control Keys” later in this section.) Otherwise, function key performance depends on the application that you are using. -
Page 27: Surepoint And Selection Buttons
SurePoint, like an application to run, press the left mouse button. You can single, double, or tri- ple click, depending on the application that is running. Selection SurePoint Buttons SurePoint and selection buttons 1-18 Getting to Know Your Versa S... -
Page 28: Cursor Control Keys
Rev LCD Bright Bright Cont Cont Pwr Mgmt Set Up Scr Lock Sys Rq Break Prt Scr Pause Num Lock & Back Space Caps Enter " Lock > < Shift Shift Ctrl Embedded keypad Getting to Know Your Versa S 1-19... -
Page 29: Control Keys
Control Keys The Versa S keyboard provides a number of control keys, including: Ctrl Home Pg Up Pg Dn Caps Lock Shift , and are used to change the functions of other Ctrl keys. To use these control keys, press and hold the control key while pressing another key. - Page 30 — increases the display brightness. Fn-F4 Fn-F5 — decreases the display brightness. NOTE: The degree of brightness affects the length of battery operation. Brighter adjustments use more battery power. For longer battery power, decrease the brightness. Getting to Know Your Versa S 1-21...
-
Page 31: Led Status Bar
Usually, the screen provides some indication of the current mode. LED Status Bar Eight Light Emitting Diodes (LEDs) light or blink to show the status of Versa S system components. LEDs indicate the following. 1-22 Getting to Know Your Versa S... - Page 32 AC adapter is not attached. Getting to Know Your Versa S 1-23...
-
Page 33: Controls
Num Lock LED — lights green when Num Lock mode is in effect. Controls Versa S controls let you turn power on your computer, power off your computer, or restart the system without powering it off. These controls are described next. -
Page 34: Online Help
Use this if your system locks up or fails to respond to keystrokes. Online Help The Versa S offers online help in case you have questions about the system. Access online help as follows. From Windows Program Manager, click on the Versa Help icon. -
Page 35: Precautions
Precautions Adhere to the following precautions when using your Versa S and its diskette drive and AC adapter. Avoid dropping or bumping the computer, the diskette drive, or the AC adapter. Keep from stacking heavy objects on the computer, the diskette drive, or the AC adapter. -
Page 36: Storage Requirements
Special screen wipes are available through your local computer dealer. Diskette Drive — Use commercially available 3.5-inch wet-type cleaner disk to clean the diskette drive. Getting to Know Your Versa S 1-27... - Page 37 System Case — If the Versa S case gets dirty, carefully wipe it with a slightly damp, almost dry, cloth. Be extremely careful not to drip any moisture onto or into the Versa S. 1-28 Getting to Know Your Versa S...
-
Page 38: Using Your Versa S
Using Your Versa S The Versa S can make your daily life easier in a number of ways. Whether you’re at home, in the office, or on the road, the Versa S will prove to be the best information tool you have. -
Page 39: Time Management
Time Management The Versa S can help you manage and save time. Use the Windows calendar to track your appointment dates and times. Set the alarm to sound when it’s time to go to meet- ings and appointments. Because the Versa S can go wherever you go, there are many ways to redeem formerly idle time. -
Page 40: Scanner
Security For security, you can choose a system password to protect your Versa S from unauthorized use. You can also enter a password to keep anyone from making unwanted changes to your system’s start-up settings. -
Page 41: Using Audio
Versa S gives you a wide range of communications possi- bilities. You can send e-mail messages, faxes, and files, or page someone using the Versa S. All you need is the Versa S, an optional modem, and the right software. -
Page 42: E-Mail
IN MEETINGS Today’s business practices often mean long hours in meet- ings. Take your Versa S with you and try using it in some of the following ways. Creating Agendas and Outlines Create an instant agenda and print it with a portable printer for other meeting attendees. -
Page 43: Organizing Teams And Goals
Print and distribute the outline at the end of the meeting. Organizing Teams and Goals Use your Versa S to organize project teams, set up goals, and define milestones. Coordinate team schedules and meetings and establish standards to follow. Print the infor- mation and distribute it to team members and attendees. -
Page 44: On The Road
With the appropriate software, you can even make on-site sketches of layouts, floor plans, and traffic patterns. On your way home, use the Versa S to write up your expense report. Organizing on Your Trip Organize your itinerary and incorporate last-minute changes as needed. -
Page 45: Modem
Call the office using VersaConnect and your cellular phone. Pagers With VersaPage, a PCMCIA pager option, and your Versa S, you can send pages to reach fellow travelers or the home office. If you have a page receiver, you can also receive paging messages. -
Page 46: Before You Go
If you don’t have these, the inspection might include disassembling your system. Checking Power Connections With the right accessories, you can run your Versa S almost anywhere. Your system self-adjusts to various power sources. The United States, Canada, and most of Central and South America use 100-volt alternating current (AC). -
Page 47: Taking What You Need
Taking What You Need The following lists can help you prepare for your trip with the Versa S. Look over the lists and use the suggestions that fit your situation. When traveling with your Versa S system, take the follow- ing when appropriate. -
Page 48: What To Do
Make sure you have a fully charged battery pack in- stalled so you can quickly boot up for the airport secu- rity check. Fully charge all your batteries. Tape your business card to your Versa, AC adapter, batteries, and diskette drive. Using Your Versa S 2-11... -
Page 49: Adding Options
Adding Options You can add options and connect a number of external devices to your Versa S. Some upgrades, like adding memory or a larger hard disk drive, must be done by an authorized NEC dealer. Devices that you can connect are described in this chapter, including the following. -
Page 50: Pcmcia Cards
The PCMCIA slots are located on the left side of your Versa S. The slots are stacked one above the other and are accessed through the same opening. Slot 0 is the top slot;... -
Page 51: Modem Card Connection
Follow these steps to connect your system to a phone line. Install the PCMCIA modem card in one of the slots in your Versa S system. (See the PCMCIA user’s guide for details about installation.) PCMCIA Card... - Page 52 Connect the modem adapter to the modem card. Modem Adapter Connecting the adapter Plug one of the modular telephone cable connectors into the jack on the modem adapter. Proceed as follows. To connect your modem directly to a wall outlet, plug the other end of the phone cable into a telephone jack in the wall.
- Page 53 To connect your modem and a telephone to the same wall jack, go to step 5. (To connect both your modem and a telephone, you need a dual-RJ11 connector.) Telephone Jack Telephone line connection Plug the other end of the phone cable into the single jack on a dual-RJ11 connector.
-
Page 54: External Devices
EXTERNAL DEVICES You can connect external devices, like parallel and serial printers, a keyboard, monitor or mouse to your Versa S. Before connecting an external device, set it up using the instructions that come with the device. -
Page 55: Parallel Devices
® a 36-pin Centronics -compatible connector. Follow these steps to attach a parallel device to the Versa S. Open the port cover on the back of the Versa S and locate the parallel port. Fit the 25-pin cable connector and the parallel port together and attach them. -
Page 56: Serial Devices
9-pin female connector for the system. Follow these steps to attach a serial device to your Versa S. Check that power to both Versa S and the device is off. Open the port cover on the back of the system and locate the serial port. -
Page 57: Keyboard
CAUTION: Make sure the Versa power is off when- ever you attach or remove the keyboard. Failure to do so can damage the keyboard. Open the cover on the back of the Versa S and locate the external keyboard port. Adding Options 3-9... -
Page 58: Mouse
The software needed to recognize the external mouse in Windows and DOS programs is already installed in your system. Connect an external mouse to your Versa S as follows: Turn off the Versa S. Do not leave it in Suspend or Standby mode. 3-10 Adding Options... - Page 59 Otherwise, the system fails to recognize the mouse. Open the port cover on the back of the Versa S and locate the external keyboard connector. Align the mouse cable connector with the port and plug in the connector.
-
Page 60: Monitor
To use an external monitor, the VGA option should be either CRT or Both. If your setting is LCD, the Versa S does not recognize or activate the external monitor. See Chapter 4 for details about using this SCU setup program. - Page 61 Monitor Cable Connector Locating the external monitor port Align the 15-pin cable connector and the monitor port on the Versa S. Attach and secure the connection with the screws provided. Plug the monitor power cable into a properly grounded wall outlet.
-
Page 62: Using The Scu
WHAT IS THE SCU? Your computer has battery-backed memory (internal CMOS memory) where it stores information about your Versa S hardware and software even when power is off. Each time you start up the system, this information is read and used. -
Page 63: Scu Access
SCU ACCESS Access the SCU from the DOS prompt. (Do not try to access the utility from Windows.) From the DOS prompt, press Ctrl-Alt-S to access the SCU. A screen similar to the following appears. Standard Preferences Memory PowerMgmt Defaults Exit SystemSoft SCU. -
Page 64: Scu Use
The next three blocks show system settings. The Memory block displays system memory information. The Peripherals block shows settings for system peripherals. The Drives block specifies the diskette drive and hard disk drive installed. The bottom line of the screen shows what key functions are available at that screen level and what they do. -
Page 65: Scu Menu Options
Some options display a list from which to choose as when selecting a typematic rate. Use the up and down arrows to highlight your choice and press Enter To return to the previous menu, press Press to save your SCU changes to backup battery memory at any time while using the SCU. -
Page 66: Stick Pointer (Surepoint)
Hard Disk Set the hard disk drive type for Drive C. Unless you replace the disk drive installed in the Versa S, we recommend that you leave this drive setting alone. Otherwise, see the docu- mentation that comes with the new drive for disk drive set- ting information. -
Page 67: Video Display
Video Display Set the video display type. Choose from the following se- lections if you are connecting an external monitor. Other- wise, leave this setting as is. VGA — default setting CGA80 Column CGA40 Column Monochrome Preferences Options available under the Preferences menu are described next. -
Page 68: Typematic Rate
Typematic Rate Set the speed at which a character repeats when a key is pressed and held. Choose from the following character per second (cps) values. 30 cps 20 cps 15 cps 10 cps — default setting 6 cps 2 cps Typematic Delay Set the delay time between the key press and starting the repeat action. -
Page 69: Scu Password
When the password entry is verified, Boot Password is enabled. No one will be able to use the system without first entering the password. If you forget your password, call the NEC Technical Sup- port number listed in Chapter 6. SCU Password Set a password to access the SCU. -
Page 70: Vga
Choose from the following selections. Drive A — default setting PCMCIA Card Drive C VGA submenu option is described next. Display Mode Select and activate the display mode. To use an external monitor with your notebook, keep the default setting. Choose from the following selections. -
Page 71: Defaults
Defaults Defaults lets you reset system parameters to their initial factory settings, which are called default values. To set system parameters back to the default settings, high- light “Defaults.” Press . At the prompt, type to re- Enter turn the system to its initial factory settings. Otherwise, type Defaults set for the Standard menu are as follows: Date —... -
Page 72: Exit
SCU Password — Disabled First Boot — Drive A The default setting in the VGA submenu is as follows. Display Mode — LCD The default setting in the Memory submenu is as follows. Cache Enable — Enabled. Exit and press Ent r to exit the SCU. -
Page 73: Utilizing Power Management
LCD backlight, and protect against data loss due to low battery power. Power Management lets you direct your Versa S to go into Suspend mode automatically after a preset time of system inactivity. You can also put the system in Suspend mode... -
Page 74: Power Management Access
Advanced Power Management (APM), which provides the system with timeout and device defaults for various power management modes. Power Management Access Access Power Management setup in one of the following methods. (Do not try to access this utility from Windows.) Use the function key combination Fn-F8 to go directly... -
Page 75: Power Management Setup
The Power Management menu is made up of the following areas: A menu bar at the top of the screen lists the menus that you can select The block that follows shows information about the utility. The next three blocks show system power management settings. -
Page 76: Menu Options
To make selections in Power Management setup, use the keyboard keys as follows: Use the right and left cursor arrows to highlight your menu selection. Press Enter In the submenu, use the up and down cursor arrows to highlight a suboption. Press . -
Page 77: Power Savings
Power Savings This option lets you specify when power saving features are enabled. Select from the following choices. Always – enables Power Management when the system is running on either battery or AC power. (This is the initial setting that is set at the factory. Such settings are called defaults.) Battery –... -
Page 78: Cover Close Switch
Cover Close Switch This option directs the Versa S to do one of the following when the LCD panel is closed. It either turns off just the LCD panel or puts the entire system in Suspend mode. -
Page 79: Global Standby
Global Standby Specify how long the system is idle before entering Global Standby mode. Global Standby powers down the specified devices and slows the CPU clock speed. 1 Minute (Min) 2 Min 4 Min 6 Min 8 Min 12 Min 16 Min Disable —... -
Page 80: Video Monitoring
Video Monitoring Specify whether Power Management monitors video activity as it relates to going into Suspend mode. Disabling video monitoring is useful for applications that have something happening on the screen constantly. For example, a chang- ing clock on the screen can keep the system from initiating power saving features even though the system is not in use. -
Page 81: Hard Disk
Hard Disk Set how long the hard disk waits for access before going into Hard Disk Standby mode. Hard Disk Standby mode slows the hard disk drive speed. 1 Min 2 Min 4 Min 6 Min 8 Min 12 Min 16 Min Always On —... -
Page 82: Apm Program
APM PROGRAM The Advanced Power Management (APM) program pro- vides four power management modes and some hardware settings. APM Idle saves system power through the use of an Idle Detector. The Idle Detector monitors system hardware and puts the system into Suspend mode when the system is idle. -
Page 83: Extending Battery Life
EXTENDING BATTERY LIFE Use the following guidelines to reduce power consumption and maximize battery life. These guidelines work with AC power as well as battery power. (Some of these features must be set up through the Power Management utility. See the preceding sections in this chapter for details.) Turn off the system when you are done using it. -
Page 84: Solving Problems
Solving Problems The Versa S has a built-in checking program that automati- cally tests its components when you turn on system power. This diagnostic test is call the Power-On Self-Test (POST). If the system finds a problem during the POST, it displays an error message. - Page 85 System parameters are set correctly through the SCU for your hardware. Troubleshooting PROBLEM WHAT TO DO The system does not power on If you are operating the system on battery power, check that the battery pack is correctly inserted. Check that the battery pack is charged. If you are using AC power, check that the electrical outlet in use is working.
-
Page 86: Start-Up Problems
Troubleshooting PROBLEM WHAT TO DO The Suspend button does not work A disk drive might be busy. Wait until the disk drive is idle and try again. You connected an external CRT Press Ctrl-Alt-S to access the SCU. but it does not work Under VGA Setup, check that the Display Mode is set to CRT or Both. -
Page 87: Post Error Messages
POST Error Messages MESSAGE WHAT TO DO Diskette drive failure The diskette drive does not work or is not properly connected. Check that the drive is securely connected and power is on. Press Ctrl-Alt-S to check the diskette drive parameters. If the problem persists, the drive might need repair. -
Page 88: If You Need Assistance
If you have a problem with your computer, first review the checklist and troubleshooting table in the previous section. If you still have a problem, call the NEC Technical Support Center (TSC), toll free, at 1-800-632-4525. Direct technical assistance is available Monday through Friday, between 8:30 a.m. -
Page 89: Remote Technical Support
Follow these steps to prepare your system for remote support. A modem must be installed in the system and connected to a telephone line. With the system power off, insert the NEC Hardware Utilities diskette into the diskette drive. Turn on the system power. A menu appears. -
Page 90: Features
Features Remote Support Session has the following features: The remote screen (technician’s screen) looks like your computer’s screen. The technician can access data, run and control applica- tions on your system, and print reports using the remote keyboard and mouse. Solving Problems 6-7... -
Page 91: If You Need Help
This means that anywhere in the U.S. or Canada, your Versa S is covered — no matter what the problem — by the NEC warranty. If you are enrolled in UltraCare, your Versa S is covered anywhere in the U.S. -
Page 92: Ultracare Support
The warranty covers only NECTECH-supplied compo- nents. Service required as a result of third-party compo- nents is not covered under this warranty. Repair service and technical support for the Versa S can be obtained from any of the following sources: UltraCare Your reseller Directly from NEC. -
Page 93: Support From The Nec Reseller
NEC’s factory repair depot. When you enroll in UltraCare, NEC sends you a package of registration materials within 30 days. The materials include a registration decal to attach to your system, a special toll- free number for UltraCare customers only, and details about using the program. -
Page 94: Support From Nec
SUPPORT FROM NEC NEC is ready to support you in operating and maintaining your NEC system. If you need support, NEC suggests that you use the following services in the order presented. NEC FastFacts: An automated electronic service that offers the latest technical information about all our products. -
Page 95: Nec Bulletin Board System
Quick reference guides Troubleshooting information. NEC Bulletin Board System The NEC Electronic Bulletin Board System (BBS) is available to all customers free of charge. If you dial us directly at (508) 635-4706, your only expense is the cost of the phone call. The BBS is also accessible through CompuServe for customers who are already members. -
Page 96: How Do You Use The Bbs
A Bulletin Menu that contains online help, important NEC Technologies phone numbers, and a selection of useful files and utilities available for downloading. These files include: BIOS update files Driver files for CD-ROMs, video boards, and printers. Replacement set-up disks. -
Page 97: Nec Technical Support
NEC Technical Support NEC offers a free technical support service to use if you have a technical problem that cannot be resolved by your dealer. NEC’s technical support can help you with ques- tions about software and hardware compatibility, operating system software issues, and using the products. -
Page 98: Specifications
Specifications The following specifications are standard except where noted. System Processor Versa S/33M, Versa S/33D, Versa S/33C — Intel SL Enhanced 486SX-33 Versa S/50C — Intel SL Enhanced 486DX2-50 Random Access Memory (RAM) Standard size: 4 MB Expandable up to 12 MB total using 4 MB or 8 MB... - Page 99 Input/Output (I/O) Facilities Integrated industry-standard interfaces Serial — 1 port, 9-pin D-sub, RS-232C Parallel — 1 port, 25-pin, EPP specification VGA — 1 port, 15-pin S-sub External Keyboard/Mouse (combined) — 1 port, PS/2, 6-pin MiniDin Integrated, non-standard Diskette Drive — 1 port, 26-pin PCMCIA Card Slots Two slots for two Type 1/Type 2 PCMCIA cards or one Type 3 PCMCIA card...
- Page 100 Monochrome LCD Technology — Dualscan Super-Twisted Nematic (DSTN), backlit monochrome LCD Resolution — 640 x 480 Black and white — 64 shades of gray Dot pitch — 0.3 mm Viewing area — 9.4-inch screen Color LCDs Technology Thin-film transistor (TFT), backlit color LCD, 4096 colors Dualscan Super-Twisted Nematic (DSTN), cold cathode fluorescent tube (CCFT), backlit color...
- Page 101 50/60 Hz, 1.5 A, auto-sensing DC/DC adapter — on board Battery Pack — 12 V, 1400 mAH Battery life under typical operating conditions Versa S/33M: approximately 2.5 hours Versa S/33D: approximately 2 hours Versa S/33C, Versa S/50C: approximately 1.5 hours Recharging time: approximately 1 hour Bridge battery —...
- Page 102 Depth — 8.36 in. (212 mm) Height Versa S/33M: 1.42 in. (36 mm) Versa S/33D: 1.54 in. (39 mm) Versa S/33C, Versa S/50C: 1.65 in. (42 mm) Diskette Drive Width — 4.61 in. (117 mm) Depth — .5.18 in. (132 mm) Height —...
- Page 103 Recommended Environment Operating Temperature: 41°F to 95°F (5°C to 35°C) Humidity: 20 to 80% non-condensing Vibration: 5 to 150 Hz, 0.25 G, XYZ 3 directions Storage Temperature: –4°F to xx°F (–20°C to 60°C) Humidity: 10% to 80% non-condensing Vibration: 5 to 150 Hz, 1 G, XYZ 3 directions Warranty 3-year limited A-6 Specifications...
-
Page 104: Maintenance Contracts
(See the section on UltraCare earlier in this chapter for information about NEC’s industry-leading warranty service program.) You can buy maintenance contracts through NEC’s Service Telemarketing Department. Call 1-800-632-4525. Pricing depends on the product and your location. -
Page 105: Other Utilities
Other Utilities This appendix describes the settings and defaults specified in the Advanced Power Management (APM) program. The appendix also describes the NEC Communications Assis- tant provided with the Versa S. Advanced Power Management settings are already specified in your system. When you enable power management through the SCU, the system retrieves the settings specified in APM and initiates them after the defined timeouts. -
Page 106: Hardware
Four levels of system power management, including: APM Idle CPU Standby Global Standby Auto Suspend. A true Suspend/Resume mode that can be accessed from both DOS and Windows applications. (Described in Chapter 5, Utilizing Power Management.) The status of various system devices during Auto Suspend, CPU Standby, Global Standby, and Suspend modes is listed in the section “Device Status”... -
Page 107: System
System System power management features act as follows. APM Idle. APM uses an Idle Detector to sense system inactivity. (The detector does not work with some applications.) CPU Standby. When enabled, APM slows the CPU clock speed to 3.125 MHz if no system activity is detected for the specified timeout. -
Page 108: Device Status
Device Status The following table shows the status of system devices in Auto Suspend mode. Status of Devices in Auto Suspend Mode DEVICE STATUS Pico Power Chip Set Suspend Main/Expansion Memory Slow refresh Peripheral Controller Active 32-KHz Oscillator Active Keyboard Controller Standby VGA Controller Standby... -
Page 109: Status Of Devices In Power Saving Modes
The following table shows the status of devices when the system is in the listed power-saving mode. Status of Devices in Power Saving Modes GLOBAL DEVICE STANDBY STANDBY SUSPEND 8 MHz 8 MHz Evergreen/PINE Suspend Mode Peripheral Controller Suspend Mode FDC37C665 Main Memory Normal... -
Page 110: Nec Communications Assistant
You can find the NEC Communications Assistant icon in the Versa Help group in Windows. Use the “always-on-top” feature while you are using a communications package for faxing or file transfers. This keeps the file close at hand in case you need it. - Page 111 Battery power, 1-14 Display interface, A-2 BBS use, 7-6 BIOS updates, 7-4 Blank screen, 6-2 Embedded Keypad, 1-19 Bulletin Board Service, NEC, 7-5 Extending battery life, 5-11 External Diskette Drive, 1-8 External devices, 3-6 Cache memory, A-1 keyboard connection, 3-9...
- Page 112 Hardware setup, 1-9 Monochrome LCD, 1-18, A-3 Help, Online, 1-25 Mouse, external, 3-11 If you need help, 6-5, 7-1 NEC Bulletin Board System Input/output (I/O) facilities, A-2 (BBS), 7-5 communications settings, 7-6 how to use, 7-6 Keyboard, 1-16, 1-17, A-3...
- Page 113 Power Button, 1-15, 1-24 Repair Power LED, 1-23 NEC Customer Service Power Management, 5-1 Response Center, 7-4 accessing setup, 5-2 NEC technical support, 7-7 alarm resume, 5-5 Reset Button, 1-25 APM, 5-2 auto suspend, 5-7 battery low, 5-5 Screen is blank, 6-1...
- Page 114 5-1 System care, 1-25 System Configuration Utility (SCU), 4-1 System processor, A-1 System Setup, 1-9 Taking care of the Versa S, 1-25 Technical support, 7-7 TFT Panel, 1-16 Time management, 2-2 Time, setting, 4-4 Troubleshooting, 6-2 Turning on the Versa S, 1-14...
- Page 115 Warranty information, 7-1, A-6 FastFacts, 7-4 reseller support, 7-3 technical support, 7-4 what is covered, 7-1, 7-2 where, 7-1 Warranty service, UltraCare, 7-2 Index-5...
- Page 116 Glossary applications programs Software designed to perform specific functions, like solv- ing business or mathematical problems. AC adapter A device that connects a Versa portable computer and an AC wall outlet to provide AC power for running the system or recharging the battery. base RAM Area of system memory between 0 and 640 kilobytes available to the user for operating system and application...
- Page 117 boot To start up a computer. See cold boot and warm boot. An electronic circuit within a computer used for transmit- ting data or electrical power from one device to another. byte Group of eight contiguous bits. clock Electronic timer used to synchronize computer operations. CMOS Complementary Metal Oxide Semiconductor.
- Page 118 diskette A thin flexible platter coated with a magnetic material for storing information. diskette drive A magnetic drive that writes on and retrieves data from a diskette. DSTN Double-Scan Super-Twisted Nematic. A type of technology used in some Versa LCD screen displays. enhanced VGA A video interface that offers more colors or higher resolu- tion than VGA.
- Page 119 hertz (Hz) A unit of frequency equal to one cycle per second. hot key Combination of two or three keys (such as Ctrl-Alt-D ) that you press simultaneously for a particular function. input/output (I/O) The process of transferring data between the computer and external devices.
- Page 120 load To copy a program into the computer's memory from a storage device. megabyte (MB) 1,048,576 bytes. memory Electronic storage area in a computer that retains infor- mation and programs. A computer has two types of memory — read-only memory (ROM) and random access memory (RAM).
- Page 121 operating system Set of programs that manage the overall operation of the computer. overwrite Storing information at a location where information is already stored, thus destroying the original information. page A type of message transmission in which a message is sent or received via modem to a paging device from a computer (with paging communications software) or telephone.
- Page 122 pixels Picture elements. Tiny dots that make up a screen image. port Provides the means for an interface between the microproc- essor and external devices. A cable connector is usually plugged into the port to attach the device to the computer. processor In a computer, a functional unit that interprets and executes instructions.
- Page 123 resolution The degree of screen image clarity. Video display resolution is determined by the number of pixels on the screen. Reso- lution is usually specified in pixels by scan lines, for exam- ple, 640 by 480. See pixels. RS-232C Standard interface for serial devices. scanner An optical device that reads printed material and converts it to a computer screen image.
- Page 124 Video Graphics Array. Graphics technology that supports up to 256 K colors and a graphics resolution of 640 by 480 pixels. volatile memory Storage media that loses its data when system power is turned off. Standard memory and memory that you add to the Versa are volatile memory.
- Page 125 (For United States Use Only) FEDERAL COMMUNICATIONS COMMISSION RADIO FREQUENCY INTERFERENCE STATEMENT WARNING: Changes or modifications to this unit not expressly approved by the party responsible for compliance could void the user’s authority to operate the equipment. NOTE: This equipment has been tested and found to comply with the limits for a Class B digital device, pursuant to Part 15 of the FCC Rules.
Need help?
Do you have a question about the VERSA S and is the answer not in the manual?
Questions and answers