Advertisement
- 1 What's in the Box
- 2 Technical Parameters of the Drone
- 3 Drone Diagram
- 4 Drone Battery Charging
- 5 Open the Phone Holder
- 6 Product Assembly
- 7 Unfold the Drone
- 8 Installing Battery
- 9 How to Power on/off the Drone
- 10 Remote controller layout
- 11 Remote controller LED Icons /Layout
- 12 Remote Controller Battery Installation
- 13 Remote Controller Signal Connection
- 14 Control Mode Selection (Options)
- 15 Camera
- 16 How to Pair the Remote to the Drone
- 17 Remote Control Status Indicator
- 18 Drone Initialization Detection
- 19 Drone Compass calibration
- 20 Gyroscope Calibration
- 21 How to Lock and Unlock the Drone
- 22 Lost Control of the Drone
- 23 Flight Operation (Mode 2)
- 24 One-Key Takeoff/ Landing
- 25 Adjust the Gimbal Camera Angle Manually
- 26 Flight Modes
- 27 Capturing Photos and Videos
- 28 Low Battery Warning
- 29 Signal Strength Indicator Signal
- 30 Pre-flight Preparation
- 31 Flight Preparation
- 32 Smartphone Device Application ("M RC PRO" App)
- 33 A Flight Path
-
34
Troubleshooting
- 34.1 Indicator yellow light flash fast
- 34.2 Indicator yellow green red light flash by turn
- 34.3 Indicator yellow light stays on
- 34.4 Indicator green light stays on
- 34.5 Indicator green light flash fast
- 34.6 Indicator yellow light flash
- 34.7 Indicator green light flash
- 34.8 Indicator red light flash slow
- 34.9 Indicator red light flash fast
- 34.10 The drone's GPS fails
- 34.11 The drone fails to unlock
- 34.12 Flight out of control
- 35 Vision System
- 36 Technical Support
- 37 Safety First
- 38 Documents / Resources
What's in the Box
Products/ Spare Parts Included In The Box
- 1 Drone
- 1 Charging Dock
- 1 Battery
- 4 Propeller Blades
- 1 USB Cable
- 1 Remote Control
- 1 Screwdriver
- 1 Warranty Card
- 1 Instruction Manual
Technical Parameters of the Drone
- Diagonal: 6.9 inches
- Overall Height: 2.17 inches
- Flight Weight: 249g/8.78Oz
- Battery: 7.6 V 1500 mAh Li-Polymer
- Charging Time: Approximately 150 minutes
- Maximum Flying Time: Approximately 15 Minutes
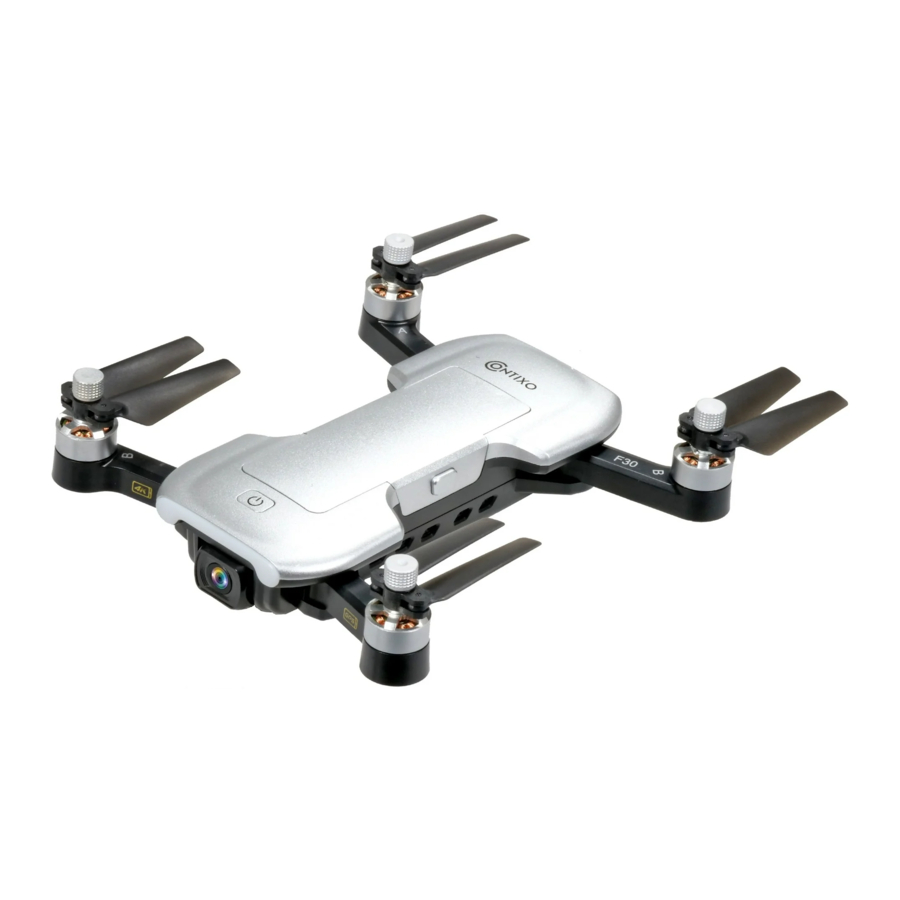
Drone Diagram

- Power switch
- Drone's status indicator light
- Propeller
- Battery
- Camera
- Bottom lights
- Optical flow camera
Drone Battery Charging
How to Charge the Drone Battery:

- Please charge the battery fully before using it.
- Be sure you use the officially supplied USB charging cable to charge.
- The charging time is about 2.5 hours.
- This aircraft charging data is based on 5V 2A power adaptor. Different types power adaptor and power device will affect the charging time. It is recommended that 5V 2-2.1A adaptor be used for charging.
 ATTENTION:
- Adult supervision is required when charging the batteries.
- Only batteries of the same type as recommended are to be used.
- Exhausted batteries are to be removed from the drone.
- The supply terminals are not to be short-circuited.
- The charging line to be used with the product should be regularly examined for potential hazards, such as damage to the cable, cord, or plug.
- If battery or charger is damaged, stop charging immediately and contact us at support@contixo.com for replacement parts.
Open the Phone Holder
- Pull out the mobile phone holder upwards completely (Pic. 1);

- Tilt the holder 30 degrees towards you and then you will hear a click sound (Pic. 2);

- Rotate and fix the support board in place (Pic. 3);

- Adjust the mobile phone holder upward or downward according to the size of your mobile phone (Pic. 4).


Product Assembly
Attention: Please install all fittings step by step as below pictures. Keep in mind that the propellers are distinguished by A & B mark and propellers screws are distinguished by dot mark. Please pay attention to your rotation direction.
- Attach the propellers: Select corresponding propellers, (A and A, B and B), install into the motor shaft, Using screwdriver to fix the screws clockwise. (as pic. 1-2)


- Detach the propellers: Using screwdriver turn anti-clockwise, take out 2 screws, Disassemble the propeller. (as pic. 3-4)


![]()
Propellers must be properly installed with the correct Letter A and B propellers.- Use caution when installing the propellers (as they are sharp).
- Please use Contixo propellers only for this drone. Replacement part can be ordered through Contixo by sending an email to support@contixo.com.

Unfold the Drone
The Aircraft is folded inside the package. Follow the steps as below to unfold the aircraft.

- Unfold the front arms (Pic. 1);
- Repeat again to unfold rear arms (Pic. 2).
Installing Battery

Insert the fully charged battery into the aircraft battery box (push 2 side buttons in), ensure the battery install correctly.
How to Power on/off the Drone

Short-press the aircraft's power button, it will turn on, in the same time, the aircraft will have power-on sound and indicator light stays on. Long-press the power button for 3 seconds, the aircraft will turn off and indicator light will turn off too.
Remote controller layout


- Photo/Video
- Left stick
- Unlock/Lock
- One-key RTH
- Right stick
- Power switch
- LCD display
- One-key takeoff/ One-key landing
- Short- press for the optical flow switch Long- press for the fast-slow speed switch.
- GPS Switch
Remote controller LED Icons /Layout
![]()
- Headless mode
- Aircraft battery level
- Distance against Home Point
- Altitude against Home Point
- GPS mode
- Satellite amount
- Remote controller throttle mode
- Signal strength
- Remote controller battery level
- Photo/Video
- High/Low speed mode
- Return to Home (RTH) icon
Remote Controller Battery Installation
- Unfold the hand sticks and open the battery door (Pic. 1);

- Install 2*AA batteries into the battery compartment according to the given polarity (Pic. 2);

- Close the battery compartment (Pic. 3).


- Insert batteries with correct polarity.
- Do not mix old and new batteries.
- Do not mix alkaline, standard (carbon-zinc), or rechargeable (nickel-cadmium) batteries.
- Rechargeable batteries are to be removed from the aircraft before being charged.
- Rechargeable batteries are only to be charged under adult supervision.
- Exhausted batteries are to be removed from the aircraft.
- The supply terminals are not to be short-circuited.
Remote Controller Signal Connection
NOTE - Please make sure that the drone is turned off
All you need to do is simultaneously press and hold the "Red Lock/Unlock" button on the remote controller and turn "ON" the remote controller (by moving the power switch to the right). The remote controller will send out 2 beeping sounds and the indicator light "  " will keep flashing (indicating that the remote controller is now ready to pair; you can also change the "Throttle Mode" at this time).
During this point (and before pairing with the drone), you are able to select the control mode which best suits you.

ATTENTION:
- Any interruption during the pairing process will disrupt pairing.
- You must not turn on the drone prior to this step. Otherwise, you will not be able to connect the drone and the remote successfully.
- This is the only time you can change between Remote Controller Throttle Modes. If you wish to change modes after pairing, you must turn off the drone and the remote and repeat this process again.
Control Mode Selection (Options)
 - Step 1")
Mode 1: The right stick serves as the throttle.
Mode 2: The left stick serves as the throttle.
- The remote controller is set at Mode 2 by default.
- Keep pressing the red button "
![]() " and turn on the remote controller, the remote controller is under signal connection status (Pic. 1);
" and turn on the remote controller, the remote controller is under signal connection status (Pic. 1);
 - Step 2")
- Keep pressing the RTH button "
![]() " for 3 seconds to choose the throttle control mode (Pic. 2). The throttle control mode will change according to each press. The mode number is shown on the LCD screen. The throttle control mode is set at mode 2 by default.
" for 3 seconds to choose the throttle control mode (Pic. 2). The throttle control mode will change according to each press. The mode number is shown on the LCD screen. The throttle control mode is set at mode 2 by default.
 - Step 3")

 - Step 2")

 - Step 3")
Attention: To change the stick mode of the remote controller, please make sure that the remote controller is under signal connection status (the indicator light "  " keep flashing). If not, the stick mode could not be changed.
Camera
Short-press the button indicated as below, the camera icon " " on the LCD screen flashes once, the camera takes one photo; Long-press the same button, the video icon " " on the LCD screen flashes slowly, the camera is taking video. Long-press again will exit shooting.

How to Pair the Remote to the Drone

- Press and hold the red button "
![]() " and simultaneously turn "ON" the remote controller (by moving the power switch to the right) (Pic. 1). The remote controller will send out 2 "beeping" sounds and the indicator light "
" and simultaneously turn "ON" the remote controller (by moving the power switch to the right) (Pic. 1). The remote controller will send out 2 "beeping" sounds and the indicator light "![]() " will keep flashing.
" will keep flashing. - Press the power button to power on the aircraft (Pic. 2). The aircraft will make beep sounds with front lights flashing and will automatically link to the remote controller. Once the remote controller sends out a long beep sound and the indicator light of the remote controller turns from flashing to solid on and the signal icon "
![]() " is shown on the LCD screen, it means that signal connection is succeeded.
" is shown on the LCD screen, it means that signal connection is succeeded.

Signal connection will only need to be completed once. The remote controller will remember your drone once paired.
Remote Control Status Indicator
| No. | Status | Meaning |
| 1 | Indicator lights "  " flash quickly. " flash quickly. | The remote controller is under Signal Connection Status. |
| 2 | The remote control beeps with steady "beep...beep" sound and the battery icon "  " on the LCD display is flashing. " on the LCD display is flashing. | The remote controller battery is low. |
| 3 | battery icon "  " on LCD display is as shown (with steady beep...beep...beep) sound. " on LCD display is as shown (with steady beep...beep...beep) sound. | battery is running low "  "; the drone will return when the altitude is over 98 feet or the distance is over 328 feet. "; the drone will return when the altitude is over 98 feet or the distance is over 328 feet. |
| 4 | battery icon " " on LCD display is as shown with steady long beep sound. | The battery is low " "; the drone will return when the altitude is less 50 feet or the distance is less than 50 feet and will land immediately. |
| 5 | Signal icon on LCD display is less than two bars or not displaying, with steady "beep...beep...beep" sound. |
|
Drone Initialization Detection
After Signal Connection has been successful, the drone enters the initialization detection procedure. Make sure that the drone is set on a flat and level surface for this step. In this time, the yellow red green light flash alternately. If the aircraft is always in initialization, can't enter compass calibration. Please place the aircraft in ground, let the aircraft do gyro calibration to exit the initialization. The initialization process takes about 8 seconds. The process is done once the front and the rear lights glow yellow and flash alternately. Now the drone will enter Compass Calibration mode.
ATTENTION: Please make sure that the drone is set on a flat and level surface for the initialization detection procedure to be successful. If the aircraft is always in initialization, can't enter compass calibration. Please place the aircraft in ground, let the aircraft do gyro calibration to exit the initialization.
Drone Compass calibration
Two Steps for Compass calibration:
- Horizontal calibration
When the drone's front lights flash yellow alternatively, hold the drone horizontally and rotate it 360 degrees along the horizontal axis for about 3 circles (counterclockwise). The drone's front lights will change from flashing yellow to flashing green alternatively when complete.
Drone Compass calibration must be done for each flight. When changing new battery or the battery is reinstalled, Compass calibration should be done again. Compass calibration must be performed after successful drone initialization detection.

- Vertical Calibration
Hold the drone vertically with its front (camera) facing up and rotate it 360 degrees counterclockwise along its horizontal axis for about 3 full circles until the front light of the drone change from flashing to solid yellow. After you are done with this step, please set the drone on a flat surface and wait for the satellite signal connection to be at least 7 and above. The compass calibration will be successful when the front light is solid green. Your Drone is ready for take off.


ATTENTION:
- To fly with GPS mode, choose an open and wide space for the flight. Please also make sure that there be at least 7 satellite signals showing on your controller.
- DO NOT calibrate drone compass in an area with a strong magnetic field (such crowded areas as parking lots, heavy traffic zones).
Gyroscope Calibration
Once the drone has been calibrated, set drone on a flat surface. Now, push down both of the control sticks to the lower-left corner and release (as indicated in photo below). When the front light shows green and flashing rapidly, it means that the gyroscope is under calibration status. When the light on your drone turns solid color the calibration is successful.

- The gyroscope calibration has been done in factory by default. Gyroscope calibration is not required to be performed unless the drone cannot exit the drone initialization detection procedure while the drone initialization detection is finished.
- Please make sure to set the drone on a level horizontal surface when performing calibration. Failure to follow these instructions can and will affect the flight performance.
How to Lock and Unlock the Drone
Unlock the Drone:
Press the Unlock button. The motors and propellers will begin to rotate and spin. The drone is now ready for liftoff. (If you do not activate takeoff within 15 seconds, the motor/propellers will automatically stop spinning. )

Locking the Drone:
There are 3 methods to control the drone in case of event of the following situation.
Methods
- When the drone is on the ground and the motor is still rotating, pull down the throttle stick to the bottom position or simultaneously push the left stick to lower-left corner and the right stick to the lower-right corner until the propellers stop. When the propellers stop, it means the drone is locked.
- When using 1-Key Landing or Auto Return, the motor will stop turning when the drone lands (and will automatically lock, turn off).
- Emergency Stop - When the drone is within 30 meters distance and 15 meters altitude, long-press the RED LOCK button for 3 seconds. The motors stops immediately and the drone will stop flying and fall. (This last method is not recommended as it can cause damage to the drone and endanger the safety of others).
Lost Control of the Drone
If you lose control of the drone, please follow the step outlined below to avoid the drone from flying off: Turn off the remote controller - The drone will automatically return (when the GPS signal connection is good with at least 7 satellites). Turn off the remote controller – After 6 seconds, the drone will start to slowly descend until it lands on the ground and will self-lock (when there is no GPS signal or the GPS signal is weak; satellites number is less than 7). Long-press the RED button and push the throttle to the down. This will activate the "Emergency Stop" function and the drone will stop flying and perform a sudden stop. (This is not recommended as it can cause damage to the drone and endanger the safety of others).
Flight Operation (Mode 2)
")
One-Key Takeoff/ Landing

- After the drone is unlocked, press the "
![]() " button (as indicated below). The drone will automatically start hovering up to an altitude of between 5-9 feet. When using this feature, please also make sure that you have at least 5-9 feet of clear open space (in height) and do not operate the drone indoors.
" button (as indicated below). The drone will automatically start hovering up to an altitude of between 5-9 feet. When using this feature, please also make sure that you have at least 5-9 feet of clear open space (in height) and do not operate the drone indoors. - When the drone is flying, short-press the
![]() button (as indicated below). The drone will automatically land on the ground.
button (as indicated below). The drone will automatically land on the ground.
 " button (as indicated
 When the drone lands and the motors stop, the drone will be locked. (Please refer to locking instructions.) You must unlock the drone again in order for takeoff.
Adjust the Gimbal Camera Angle Manually
By rotating the aircraft's camera manually, the shooting angle of gimbal camera will be adjusted. Please adjust the angle according to the using situation.

Flight Modes
Manual Controls:
Switch or slide the GPS button to the down. This will turn off the GPS function and the drone can now be operated manually (recommended for more advanced users). You will see the GPS Icon disappear from the LCD display.


The drone cannot fly with precise positioning and hovering without GPS enabled (turned ON). We only recommend you try this if you are an experienced pilot.
GPS Mode
GPS mode enables precise positioning and prevents drone loss. Simply move the GPS switch to the above side ("On") position before operating the drone to use all of the GPS features such as "Return-To-Home" and "Low Battery Return-To-Home." (Note - You must wait until you achieve a GPS signal of at least 7 satellites before flying the drone with GPS feature enabled.)

The Return-to-Home (RTH) procedure brings the drone back to the last recorded Home Point. There are 3 types of RTH procedures: Smart RTH, Fail-Safe RTH and Low Battery RTH. The following section describes the Home Point and GPS signal in detail.
| GPS | Description | |
| Home Point |  | The Home Point is the location from where the drone takes off. A strong signal of at least 7 satellites must be present prior to take off in order for the drone to remember the home point. |
Smart RTH
If a strong GPS signal is available (more than 7 satellites on the LCD screen) and the Home Point is recorded at takeoff, press the Return-To- Home button. The drone will fly back to the Home Point. You must use the Remote Controller to guide the drone around any obstacles during the Smart RTH procedure. You can press the RTH button again to exit RTH procedure and regain the control of the drone.

PLEASE NOTE: The drone does not have sensors allowing it to avoid obstacles. The drone must always be flown in a wide-open area and must be manually controlled to avoid obstacles. Use caution when using the Return-To-Home (RTH) function and make sure the drone does not end up on a rooftop, a tree, or any other obstacle that may be in the way during return and descent.
Fail-Safe Return
Fail-Safe RTH will be triggered if the remote controller signal is lost for more than 6 seconds. The GPS control system will guide the drone automatically to the last recorded Home Point. Regain control of the drone by pressing the RTH button if the remote controller signal is recovered.
- During the Fail-Safe Return procedure, the drone cannot avoid obstacles (there is no auto-detection sensors for any obstacles).
- The drone cannot Return-To-Home if the GPS signal is weak (satellites number is less than 7).
- If there is no GPS signal, and remote controller signal lost for more than 6 seconds, the drone will not Return-to-Home but descend slowly until it lands on the ground and is locked.
- When returning home automatically, if the aircraft flies above 45 feet, the aircraft will immediately perform the return operation. When the altitude is lower than 45 feet, the aircraft will automatically rise to 45 feet before performing the return operation (the return altitude can be set in the APP).
Low Battery Return-To-Home (RTH)
The drone will perform a Low Battery Return-To-Home function when the Battery is low. If the Battery icon on the LCD screen shows "  ", the rear lights flash red slowly and you will hear a steady "DiDiDi...DiDiDi" sound. This is a notification that your drone's Battery is low and it is time to bring it home. If the drone's altitude is over 100 feet or the drones distance is 328 feet away, the drone will automatically fly back to the original Home Point. If the Battery icon on the LCD screen shows "
 ", and you hear a steady "Di...Di" sound, this is a notification that your drone's Battery is very low and it is time to bring it home. If the drone's altitude is over 45 feet or the drones distance is over 45 feet away, the drone will automatically fly back to the original Home Point. If the drone flying altitude is less than 45 feet or the flying distance is less than 45 feet, then drone will automatically land to the ground.
You can regain control of the drone by pressing the RTH button if the Battery icon on the LCD screen shows " ". But when the Battery icon on the LCD screen shows " ", you can not regain control of the drone by pressing the RTH button.
Capturing Photos and Videos

Photo: To capture breathtaking photos, simply short-press the Photo/ Video button. The LCD screen camera icon will flash once and the remote will beep once notifying you that the image has been captured.
Video: To capture breathtaking videos, simply long-press the Photo/Video button. The remote will beep twice and the LCD video icon will flash during recording. To stop recording, simply long-press the Photo/Video button. The remote will beep twice and the video icon will disappear from the LCD screen.
ATTENTION: It is not possible to capture photo or video when the drone does not have a micro SD card inserted or if the micro SD card is malfunctioned. You can always capture photo and video by using the "M RC PRO" App interface. However, if you do not finish recording a video prior to powering off the drone, the video file will be corrupted and it will not be viewable or saved.
Low Battery Warning
Keep an eye out for the Low Battery Warning. The drone and the remote will notify you when you are running low on battery. The drone's front indicator light will flash slowly when the battery is beginning to run out.
At this point, we recommend bringing the drone to a safe landing.
Signal Strength Indicator Signal
Strength icon shows the strength of the received signal. The more, the better. If the signal is weak or irregular, then please do not fly the drone in the same area.

- DO NOT attempt to fly over populated areas in case you lose connection and for the general public safety of others.
- During the Fail-Safe Return procedure, the drone cannot avoid obstacles.
- The drone cannot Return-To-Home if the GPS signal is weak (satellite number is less than 7).
- If there is no GPS signal and the remote controller signal is lost for more than 6 seconds, the drone will not Return-To-Home but instead descend slowly until it lands on the ground and locks itself.
Pre-flight Preparation
Before you take off, please make sure:
- The drone and the remote controller are completely charged.
- The propellers are installed correctly and screwed in the right direction.
- The motors (and propellers) work normally after unlocking.
- Make sure the you have at least 7 GPS signals before taking off.
Flight Preparation
- Link the remote controller with the drone.
- Perform the drone initialization detection.
- Perform the drone compass calibration.
- Unlock the drone.
- Slowly push the throttle stick upward and the drone will take off.
- After you are done with your flight, you must pull the left-side (altitude) throttle lever slowly to the bottom (down) until the drone lands safely and the motor stops rotating. The drone will automatically lock itself.
- Take out the battery from battery compartment of the drone and store or recharge it for your next flight.
Smartphone Device Application ("M RC PRO" App)
The "M RC PRO" Smartphone App is essential to accessing all the features of the "M RC PRO" drone. Please make sure that your smartphone supports 5G Wi-Fi and be sure to download & install the "M RC PRO" App to your smartphone before you fly your drone.
Where to download "M RC PRO" App:
For Android users, please go to the Google Play Store and search for "M RC PRO" to download and install. For Apple (iOS) users, please go to the Apple App Store and search for "M RC PRO" to download and install.
Scan the following code with your smart phone in order to download the flight control app.


How to Link the "M RC PRO" App to the Drone:

Turn on the drone. Then, enter your smartphone's SETTINGS option. Turn on Wi-Fi, find " Contixo F30-XXXX " on the list and connect your device to that Wi-Fi signal. Make sure that your smartphone and the drone have successfully connected. Next, exit settngs and tap the "M RC PRO" App on your smartphone; click 'START' to enter the App interface.

Tap on the "Start" button for the Introduction for Beginner.
SYSTEM REQUIREMENTS: Please make sure that your smart-phone supports 5G WI-Fi

From the interface screen select and click next.

Tap on the "CLICK" button.

You will see a live feed from the drone camera and you will be ready to use your app to record videos, take photos, view your gallery, and enter the VR Headset FPV Viewer (VR Headset not included).

Tap on the "  " button on the right hand corner to enter the gallery, you are now ready to use your app to record videos/picture taking to your gallery or remove it.

Tap on "  " button to exit the gallery.
Gallery Viewer
You can view all of your captured files via the "M RC PRO" App interface. Simply press the "Gallery" icon to enter the gallery interface.
 | Video Internal Viewer: Press this icon to access the video files recorded or downloaded internally on your device. Video TF Card Viewer: To see the videos stored in the micro SD card through your smartphone, you must connect your drone to the phone's WiFi first, then click the "  " TF button to download the videos into the phone. Click the " " button for playback. You also can delete the files by pressing the " " button. " TF button to download the videos into the phone. Click the " " button for playback. You also can delete the files by pressing the " " button. |
 | Photo Internal Viewer: Press this icon to access the photo files recorded or downloaded internally on your device. Photo TF Card Viewer: To see the photo stored in the micro SD card through your smartphone, you must connect your drone Wi-Fi to the phone first, then click the "  " button to download the photo into TF the phone. Click the " " button to playback. You also can delete TF the files by pressing the " " button. " button to download the photo into TF the phone. Click the " " button to playback. You also can delete TF the files by pressing the " " button. |
 | "Show" button: Press this icon to show three more icons on the App |
 | "Hide" button: Press this icon to hide the icons on the App |
 | 3D Split Screen: Press this icon to enter the 3D VR viewer. You will need a VR headset for this feature to work. |
 | 180° Screen Rotation: Press this icon to rotate the orientation of the camera feed if it is upside down. |
 | GPS Signal: The number in the lower-right corner of the icon shows the number of satellites that have been found. If no satellite signal is present, then the icon will be red. |
 | Settings: This is where you set the flight parameters. |

 | Horizontal Distance (RTH Home Point Distance): Display the horizontal distance of the drone to the return point. |
 | Vertical Distance (Altitude): Display the vertical distance from the drone to the return point. |
 | Aircraft Battery Level: Display the power of the drone. |
 | Remote Controller Battery Level: Display the power of the remote controller. |
 | Remote Controller Signal Strength: Display the Signal Connection between the remote controller and the drone. |
 | Signal Strength: Display the Signal Connection status between the smartphone 5G Wi-Fi and the drone camera. |
 | "Return" Button: Press this icon to return to the previous menu. |
 | Location of Aircraft |
 | Location of Mobile Phone |
 | Photo Button: Click to take a photo. |
 | Video Button: Click to start recording. Click again to close and save the video. If you are disconnected from the Wi-Fi connection (or if you turn off the power without saving the recording of the video), then the video may not be saved successfully. |
 | Image Settngs: Click to set the quality of the picture, video and FPV image. |

ATTENTION:
- When there is a micro 32 GB SD card in the drone, the pictures and videos will be stored in the micro SD.
- When there is no micro SD card in the drone, you can only use the smart-phone APP to take pictures and videos (which will be stored in the "M RC PRO" APP within your smart-phone).

RTH Switch (Return-To-Home) Icon: If a strong GPS signal is available (more than 7 satellites displayed on the LCD screen) and the Home Point is recorded at takeoff, press the RTH icon and swipe the button to the right. The drone will then begin to fly back to the Home Point. The icon will turn green when you enter the Auto Return-To-Home (RTH) mode. Click " " again to exit and regain control of the drone.

PLEASE NOTE: The drone must always be flown in a wide-open area and must be manually controlled to avoid obstacles. Use caution when using the Return-To-Home (RTH) function and make sure the drone does not end up on a roof area, tree or any other obstacle that may be in the way during return and descent.

"Show" Button: Click to view four more buttons.


App joystick: Click to enter the App control mode. In this mode, you can control your drone through "M RC PRO" APP in your smart phone. (This mode can only work when the remote control is turned off)


Headless mode: Click to enter headless mode. Headless Mode will cause the flight controller to "remember" which direction is "forward" when the drone is ready to fly and use that direction as "forward", "backward", "left", or "right" regardless of the current orientation of the drone.

The following three functions can only be used if your drone is hovering and GPS signals are available. In case of emergency, you can turn off the power on the remote controller and let the drone end the flight and automatically return.

Orbit Flight: Press the " " switch and swipe the button to the right. Your drone will circle clockwise around the preset point. By default, the radius is 10 meters. To change the point, please click "  " --" Orbit semidiameter" to reset. The icon will turn green. Click "
  " again to exit and regain control of the drone.


Follow Me Switch: Press the " " icon and swipe the button to the right. The Follow Me feature is now enabled. The drone's camera lens will keep facing the smartphone and remain within a fixed distance to your smartphone. The altitude can be adjusted manually by using the left control stick (throttle). When the Follow Me feature is enabled, the icon will turn green. Click "  " again to exit and regain control of the drone.

A Flight Path
 | TapFly: With this feature enabled, you can switch between flying the drone with "by touch" (with your finger within the map ) or set a trajectory flight path. |
 | TapFly (Track): Start by tracing a flight path (route) on the map within the app, then click "Submit" > swipe the button to the right. The drone will then follow the trajectory drawn, The throttle altitude could be adjustedmanually. The icon will turn green. Click "  " again to exit and regain control of the aircraft. " again to exit and regain control of the aircraft. |
 | TapFly (Point): You can set several coordinate points on the map (up to 18 points within a valid control distance), then click "Submit" > swipe the button to the right. The drone will then fly over these coordinate points that you had set up. With the left throttle, you can also adjust the altitude manually. When enabled, the icon will turn green. Click " " again to exit and regain control of the drone. |
Troubleshooting
| No. | Status | Meaning |
| 1 | Indicator yellow light flash fast | Aircraft 2.4GHz disconnected. |
| 2 | Indicator yellow green red light flash by turn | Aircraft is in initialization detection status. |
| 3 | Indicator yellow light stays on | No GPS signal, Aircraft is in gesture mode. |
| 4 | Indicator green light stays on | Good GPS signal, Aircraft is preparing for GPS mode. |
| 5 | Indicator green light flash fast | Aircraft is in gyroscope calibration status. |
| 6 | Indicator yellow light flash | Aircraft is in compass horizontal calibration. |
| 7 | Indicator green light flash | Aircraft is in compass vertical calibration. |
| 8 | Indicator red light flash slow | Aircraft is nearly low voltage, 1/6 battery level left. |
| 9 | Indicator red light flash fast | Aircraft is in low voltage, only 1/8 voltage left. |
| 10 | Indicator red light flash once then stop for 1.5 seconds. | Gyroscope malfunction. |
| 11 | Indicator red light flash twice then stop 1.5 for seconds. | Barometer malfunction. |
| 12 | Indicator red light flash three times then stop for 1.5 seconds. | Compass malfunction. |
| 13 | Indicator red light flash four times then stop for 1.5 seconds. | GPS module malfunction. |
| 14 | Indicator red light flash six times then stop for 1.5 seconds. | Something wrong with the vision positioning module. |
| 15 | The indicator lights of the drone flash red, yellow, and green alternately and do not change. |
|
| 16 | The indicator lights of the drone flash yellow alternately. |
|
| 17 | The indicator lights of the drone flash green alternately. |
|
| 18 | The drone's GPS fails | The GPS signal is weak. Please fly in another wide-open area with less magnetic interference and better Wi-Fi reception. |
| 19 | The return point of the drone is far away from the takeoff point. |
|
| 20 | The drone fails to unlock |
|
| 21 | Flight out of control |
|
Vision System
The optical flow system consists of optical flow lens modules. The optical flow system is an image positioning system, obtaining the aircraft's position through the optical image thereby ensuring the the accurate positioning and safe flight.

Vision Positioning System function
The Vision Positioning System is typically used in indoor environment when GPS is weak or unavailable. It works best when the aircraft altitude is less than 3 meters.

The measuring precision of optical flow system will be affected easily by the light strength and the features of object surface texture. Once the optical flow is unavailable, the aircraft will enter to altitude-holding mode automatically. Please be cautious in as following situations:
- Fly fast at an altitude below 0.5m.
- Fly over monochrome surfaces (like pure black, pure red, pure red and pure green).
- Fly over strong light reflective surfaces or surfaces prone to reflection.
- Fly over water or transparent object surfaces.
- Fly over moving object surfaces (such as crowds, swaying juggles and glass).
- Fly over an area where light changes dramatically and rapidly.
- Fly over surfaces extremely dark (lux<10) or extremely bright (lux>10,000).
- Fly over surfaces without clear textures.
- Fly over surfaces with highly repeating textures (small grid brick in the same color).
- Fly over surfaces that are tilting over 30 degrees.
- Flying speed should be controlled not to be too fast. When the aircraft is 1 meter against the ground, the flying speed should not be over 5m/s; When the aircraft is 2 meter against the ground, the flying speed should not be over 14m/s.
- Keep sensors clean at all times.
- The vision system is only effective when the aircraft is within the altitude range of 3 meters.
- Make sure that the light is bright enough and the surfaces is with clear textures so that the vision system can acquire the movement information through recognizing the ground textures.
- The vision system may not function properly when the aircraft is flying over water, low light ground and surfaces without clear patterns or textures.
- If the light is dim, please turn on the optical flow supplement light.
Technical Support
Have questions? E-mail: support@contixo.com
We are open Mon-Fri 9:00 am – 4:00 pm PST
Website: www.contixo.com
Safety First

Battery Warnings and Usage
The battery charger included with the drone has been designed to safely charge the Li-Po battery.

AII instructions and warnings must be carefully followed. Mishandling of the Li-Po batteries can result in a fire, personal injury, and/or property damage.
- By handling, charging, or using the included Li-Po battery you assume all risks associated with the lithium batteries. We cannot be responsible for any misuse.
- If at any time the battery begins to balloon or swell, please discontinue use immediately. Never charge or discharge a battery that is ballooning or swelling as this can result in a fire.
- For best results, always store the battery at room temperature and in a dry area.
- Always transport or temporarily store the battery in a temperature range of 40-120°F. Do not store battery or drone in a car or direct sunlight. If stored in a hot car or temperature, the battery can be damaged or even catch fire.
- Never use a Ni-CD or Ni—MH charger. Failure to charge the battery with a compatible charger may cause fire (resulting in personal injury and/ or property damage).
- Never exceed the recommended charge rate.
- Never cover warning labels with hook and loop strips.
We recommend using a 5V (2A) adapter for charging. Please do not attempt to charge by computer. Do not use more than a 5V power supply (otherwise, property damage and injury can occur). When a Li-Po battery is discharged below 3.7V, the battery may be damaged and will no longer accept a charge. If the drone battery is low, then please land the drone immediately and recharge the battery.
Always follow proper operating procedures and safe-flight guidelines
Please read this instruction manual carefully before flights for important information regarding product functions and operation tips. It is important to learn how to use the product to achieve a safe flight. Stay informed of local laws and regulations regarding flying this product and always abide by the law. Keep away from any no-fly zones and always respect the privacy of others. Please do not operate the drone in a highly-populated public area or without prior permission.
Safe flying
Always keep the remote controller at least 8 inches away from your body when flying the drone. Please keep in mind the safety of others when operating this drone.
Keep a safe distance from a flying drone
Never use your hands to touch a flying drone under any circumstances!
Keep away from heat sources
This drone is made of metal, fiber, plastic, electronic components, and other materials. Please keep it away from heat sources to avoid any deformation. This drone will be subject to damage caused by any prolonged sun exposure at high temperatures.
Documents / Resources
References
Download manual
Here you can download full pdf version of manual, it may contain additional safety instructions, warranty information, FCC rules, etc.
Advertisement


Need help?
Do you have a question about the F30 and is the answer not in the manual?
Questions and answers