Table of Contents
Advertisement
Advertisement
Table of Contents

Related Manuals for Contixo F19


Summary of Contents for Contixo F19
- Page 1 — F19 DRONE INSTRUCTION MANUAL —...
-
Page 2: Table Of Contents
------------------------------------------------------------ Preface -------------------------------------------------------- Safety Precautions -------------------------------------------------------- What’s in the Box Remote Control Functions ------------------------------------- -------------------------------------------------- Drone Diagram ------------------------------------- Install the WiFi UAV App -------------------------------------------------- Flight -------------------------------------------------- 3D Roll Obstacle Avoidance Mode -------------------------------------------------- -------------------------------------------------- Headless Mode -------------------------------------------------- Fine-tuning Function -------------------------------------------------- Camera Functions Follow Me Mode -------------------------------------------------- --------------------------------------------------... -
Page 3: Preface
PREFACE: Thank you for Purchasing the Contixo F19 RC Drone The Contixo F19 Drone is a mini quadcopter that’s purposely built for drone application developers to enable you to get your custom applications airborne quickly. This development platform is intended to be modified by developers according to their professional judgment. - Page 4 NOTE: This equipment has been tested and found to comply with the Federal Code of Regulation for a class b digital device, pursuant to part 15 of the FCC rules. These limits are designed to provide reasonable protection against harmful interference in a residential installation.
- Page 5 Flight Safety Recommended for indoor use or flying below 16 feet (5m). Fly in Open Maintain Line Areas of Sight Avoid flying over or near obstacles, crowds, high voltage power lines, trees, airport s or water. DO NOT fly near strong electromagnetic sources such as power lines and base stations as it may affect the onboard compass.
-
Page 6: What's In The Box
What’s in the Box · 1 Instruction Manual · 1 Drone · 1 Warranty Card · 1 Remote Control · 1 USB Cable · 2 Batteries · 1 Screwdriver · 2 Propeller Blades · 4 Propeller Guards It’s important to understand basic flight guidelines for the safety of both you and those around you. -
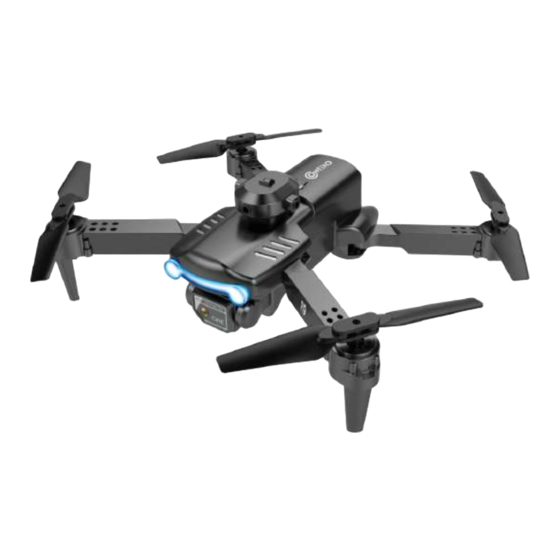
Page 7: Drone Diagram
MOBILE PHONE INSTALLATION 1. Open the mobile phone bracket on the remote control. 2. Install the mobile phone on the mobile phone bracket. Drone Diagram 1. Upper Casing 7. Battery 2. Lower Casin 8. Motor 3. Propeller 9. Camera 4. Arm 10. - Page 8 Opening Steps 1. Open the front arm(close to camera) 2. Open the back arm Fold the back arm firstly and then the front arm when folding. 1. Install the Propellers Align the blades with the motor shaft and install them (the arm identification must be consistent with the blade identification).
- Page 9 2. Intelligent Flight Battery — To power ON, long-press the button. To power OFF, long-press the button. — When the battery is at low power, the power indicator will start flashing. At this time, return the drone immediately and charge the battery to avoid unnecessary power failures.
- Page 10 4. Lithium Battery Charging Instructions a. Charging: Insert the USB cable into the USB port of the charger and connect to the charging port of the battery to charge. The LED lights on when charging and red light turn off when full charging completes.
-
Page 11: Install The Wifi Uav App
Install the WiFi UAV App Search “WiFi UAV” application in APP Store. Search “WiFi UAV” application in Google Play Store. Required Operating Systems: IOS 8.0 or higher / Android 5.0 or higher. WiFi UAV Flight Step 1: Turn on the drone and put down on a level surface Turn on the drone and the lights of the drone will start blinking. - Page 12 WiFi UAV app. Throttle Joystick Step 3: Connect App Contixo - F19 - XXXX — Connect your smartphone to the WiFi of the drone and check the drone’s status on the “WiFi UAV” app. — Open the “WiFi UAV” application on your smartphone to access the control interface.
- Page 13 Left Hand Mode Operating Method Throttle Joystick DOWN Direction Joystick Right Hand Mode Operating Method DOWN Throttle Joystick Direction Joystick - 11 -...
- Page 14 Click “ ” then click “Start”. APP Introduction 2 3 4 5 6 7 8 9 10 11 1. Gesture Selfie Mode 11. Hide/Display Button 2. Zoom in or out 12. Switch Speed 3. Palm Follow 13. Take Photo 4. Follow Mode 14.
- Page 15 If you want to turn on the app control mode, you need to turn off the remote control first. Step 5: Reset to Factory Setting/Calibrate Gyroscope — Push the joysticks into the 7 o’clock (left joystick) & 5 o’clock (right joystick) position or click “...
-
Page 16: 3D Roll
Landing Press the 1-Key landing button or click “ ” on the app when the drone is under APP control. 3D Roll About 5 feet 3D Roll: Short press “ ” button and push the direction joystick forward, backward, left or right. The drone will roll in the air in the corresponding direction. - 14 -... -
Page 17: Obstacle Avoidance Mode
Obstacle Avoidance Mode Press the button to turn on the obstacle avoidance mode, and press again to turn offthe obstacle avoidance mode. Avoid obstacles on four sides and when an obstacle is detected, the drone will stop in place, the remote controller will sound an alarm. It is recommended to turn on the obstacle avoidance function in an indoor flight environment with a length and width of 6x6 meters (20x20 feet) or more. -
Page 18: Fine-Tuning Function
The direction of control when the drone is paired. Don’t change your direction. Don’t change your direction. While in Headless Mode, the forward direction is the direction the pilot faces when the pilot pairs the drone with the remote control. If the pilot pushes the direction joystick forward, the drone will fly forward. -
Page 19: Camera Functions
1. Forward/Backward Fine-tuning 2. Left/Right Side Fly Fine-tuning Camera Functions Tap “ ” on the app to take a picture. Tap “ ” on the app to take a video. Tap “ ” on the app again to save video. Photos and videos will be saved in the phone. -
Page 20: Follow Me Mode
Follow Me Mode Click “ ” then the camera will automatically recognize the person or human-shaped object in the lens. Tap on the object or person you want to track, and the drone will automatically follow the object or person you choose. NOTE: If there are multiple people on the screen, you can choose one of them to track. -
Page 21: Flight Path
Flight Path Successfully connect the drone WiFi with your smartphone,click “ ” on the App. Find the transparent box on the screen. Mark the path you plan to fly within the transparent box range on the map. (This mode can only be used in APP controlled mode.) Palm Follow Successfully connect the drone WiFi with your smartphone,click “... -
Page 22: Entertainment Mode
Entertainment Mode Click “ ” to enter entertainment mode. You can choose photo effects and composite short videos. Gravity Control Mode Click “ ” to enter gravity control mode. (This mode can only be used in APP controlled mode.) You can control the flying direction of the drone according to the tilt angle of the phone. -
Page 23: Gallery
Gallery Open the App, click “ ”(gallery) to access your picture and video files - 21 -... -
Page 24: Specifications
Specifications Drone Model: F19 Drone Weight: 109g/3.8 oz Battery Type: Lipo Lithium-Ion Battery Flight Time: About 10 minutes Max Charging Time: About 80 minutes Capacity: 1800 mAh Voltage: 3.7V Recommend Control Height: 5M (16 feet) Max RC Control Range: 50M (160 feet) (Unobstructed) -
Page 25: Trouble Shooting
2. Defective motor. during flight with fine tuning. 2. Replace the motor. Four-axis acceleration sensor Drone cannot takeoff after Recalibrate compass. loses balance. accident. Technical Support Have questions? E-mail: support@contixo.com Mon-Fri 9:00 am - 4:00 pm PST Website: www.contixo.com - 23 -... - Page 26 CONTACT INFORMATION E-Mail: support@contixo.com Website: www.contixo.com ©2022 Contixo Inc. All rights reserved. Contixo®, the Contixo logo and associated characters, trademarks and design elements are owned and licensed by Contixo Company. - 24 -...
- Page 27 - 25 -...
Need help?
Do you have a question about the F19 and is the answer not in the manual?
Questions and answers
How do you connect the camera
The Contixo F19 drone's camera connects using Wi-Fi technology.
This answer is automatically generated