Advertisement
Advertisement
Table of Contents

Related Manuals for Contixo F24


Summary of Contents for Contixo F24
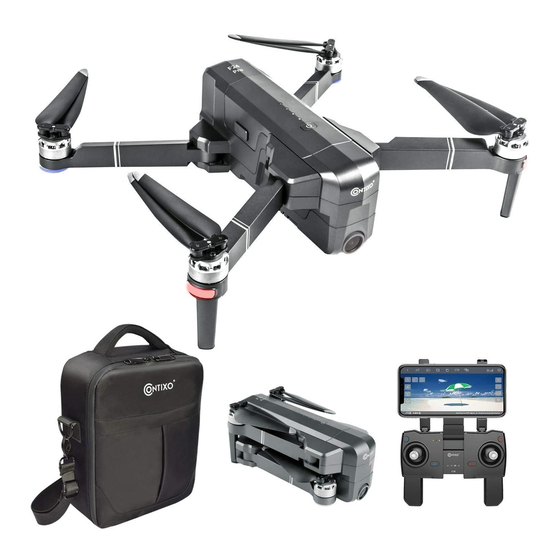
- Page 1 — F24 DRONE INSTRUCTION MANUAL —...
-
Page 2: Table Of Contents
-------------------------------------------------------- Flight Safety Remote Control Func�ons ------------------------------------- -------------------------------------------------- Drone Diagram 8-10 Dual Remote Controller Mode ------------------------------- Remote Control Opera�ng Method ------------------------------- Install the Con�xo F24 App 12-22 ------------------------------------- -------------------------------------------------- WayPoint Flight Orbit Mode -------------------------------------------------------- Camera Func�ons -------------------------------------------------- 24-27 Specifica�ons --------------------------------------------------... - Page 3 PREFACE: Thank you for purchasing the Con�xo F24 GPS drone. Please read all instruc�ons and warnings carefully before opera�ng. Please keep this instruc�on manual for future reference and maintenance. IMPORTANT: 1. This product is not a toy. It is a precision device integra�ng machinery and electronics with air mechanics and high frequency transmission.
- Page 4 4. Avoid controlling it independently. New users may have certain difficul�es during the early stages of learning to operate this drone. Please try to avoid opera�ng the drone alone. When available, always operate this drone under the guidance of a more experienced user.
-
Page 5: Warning
WARNING: 1. There is important informa�on contained in this package and instruc�on manual, please keep it for future reference. 2. It is your responsibility to ensure that this drone will not cause injury to others or cause any damage to property. 3. - Page 6 20. The drone should be kept away from any other electric appliances, equipment, or magne�c objects, as these may cause interference with each other and your drone. 21. Please keep a safe distance from the high-speed rota�ng rotor to prevent dangerous wounds, cuts, or twis�ng in the rotors.
-
Page 7: Flight Safety
Flight Safety Fly in Open Strong GPS Maintain Line Fly Below Areas Signal of Sight 400 feet (120 m) Avoid flying over or near obstacles, crowds, high voltage power lines, trees, airport s or water. DO NOT fly near strong electromagne�c sources such as power lines and base sta�ons as it may affect the onboard compass. -
Page 8: Remote Control Func�Ons
It’s important to understand basic flight guidelines, for the safety of both you and those around you. Don’t forget to read the safety guidelines before flight. Remote Control Func�ons 1. Thro�le S�ck 2. Direc�on S�ck 3. 1-Click Return-To-Home 4. Power Bu�on: ON –... - Page 9 5. 1-Click Headless Mode (Hold the bu�on for 3 seconds to turn off GPS mode) 6. 1-Click Takeoff with Auto-Hover; 1-Click Landing (Hold the bu�on for 3 seconds for Emergency Stop) 7. 1-Click Photo Capture; Hold 3 Seconds to Enter Trim Mode (Note: No need to trim under the GPS mode) 8.
-
Page 10: Drone Diagram
Drone Diagram 1. HD Camera 2. Propeller 3. Propeller Motor 4. LED Indicator 5. Intelligent Ba�ery 1. Drone Unfold and Fold ①. Drone Unfold Unfold the front arm first, then expand the back arm. ②. Drone Fold Fold the back arm first, then fold the front arm. 2. - Page 11 3. Intelligent Flight Ba�ery Electricity High 1. Power Bu�on 2. Ba�ery Power Indicator 3. USB Charging Port — To power ON, hold the bu�on for 3 seconds.; To power OFF, hold the bu�on for 3 seconds. — When the ba�ery is at low power, the blue power indicator will start flashing. At this �me, return the drone immediately and charge the ba�ery to avoid unnecessary power failures.
- Page 12 Phone adapter: Charging �me: Remote Control About 4 hours Charging Es�ma�on 5V/ 3A �me : Around 60 minutes Tip: When the remote control ba�ery is low, the power indicator light on the remote control will keep flashing. Please charge the remote control. 5.
-
Page 13: Dual Remote Controller Mode
Dual Remote Controller Mode — Press (camera) then press (power) at the same �me. A beeping sound means the Right Joys�ck has switched to the thro�le s�ck. When you turn off the remote control and turn it on again, the remote resets to default with the Le�... -
Page 14: Remote Control Opera�Ng Method
REMOTE CONTROL OPERATING METHOD Thro�le Joys�ck Thro�le Joys�ck DOWN Direc�on Joys�ck Direc�on Joys�ck Install the Con�xo F22 App QR code for “Con�xo F22” applica�on for Apple iOS system (Please scan this QR code to install this so�ware). QR code for “Con�xo F22” applica�on for Android system (Please scan this QR code to install this so�ware). - Page 15 Con�xo - F24 - XXXX — Connect your smartphone to the WiFi of the drone and check the drone’s status on the “Con�xo - F24 - XXXX ” app. — Open the “Con xo F22” applica on on your smartphone to access the control interface.
- Page 16 First select the drone model F24, then click the “CONTROLS” bu�on to enter the APP interface. APP INTRODUCTION Wait un�l the Drone Status at the bo�om le� of the screen reads “Ready to Fly” before ini�a�ng flight. This will ensure that your GPS is synced and your drone is ready to fly.
- Page 17 Step 4: Compass Calibra�on Part 1: Compass Calibra�on — Push the joys�cks into the 1 o’clock (le� joys�ck) & 11 o’clock (right joys�ck) posi�on. — Lights will rapidly blink Blue/Red (back) and White/Red (front). — App Drone Status: “Compass Calibra�on” Part 2: Compass Calibra�on —...
- Page 18 Part 3: Compass Calibra�on — From the bo�om, hold the drone ver�cally so the camera is facing toward the ground. Rotate your body in one full circle (360°). — Front lights will turn to solid white. — App Drone Status: “Compass Calibra�on Okay” NOTE: If compass does not calibrate quickly, tap the screen on the Con�xo F22 App and restart the calibra�on process.
- Page 19 Star�ng/Stopping motors Star�ng Motors: 1. Push the joys�cks into the 5 o’clock (le� joys�ck) & 7 o’clock (right joys�ck) posi�on. 2. Motors will begin to start. Push the le� joys�ck up to takeoff or press the 1-Key Take off bu�on. NOTE: Start the motors before drone takeoff.
- Page 20 This could be due to signal loss from surrounding buildings and trees or conges�on from too many mobile phones in the area. Always fly in open and clean area, the F24 drone does not have obstacle avoidance capability when the drone returns back to assigned area.
- Page 21 Follow Object Click (running person) then click (box around person or Object ). Tap on the object or person you want to track, then tap again to confirm your selec�on. NOTE: Make sure the size of the frame you mark is the same as the object or person you tap, the frame should not exceed the object or person in the capture frame.
- Page 22 Return-to-Home (RTH) The Return to Home (RTH) func�on brings the drone back to the Take Off Point. This func�on can only be achieved under GPS mode. There are 3 types of RTH: Smart RTH/Low-ba�ery RTH/Fail connec�on RTH ①. Smart Return To Home RTH Bu�on RTH Bu�on in App ②.
- Page 23 Headless Mode 1. The drone defaults to Normal Mode when the drone and remote control are matched successfully. Click (compass) to enter into Headless mode. Click (compass) again to exit Headless mode. 2. Normal Mode: Before take off, the white lights on the drone indicate the forward-facing direc�on.
-
Page 24: Waypoint Flight
Adjus�ng Trim in No GPS Mode If the drone flies in None GPS Mode, you can trim the drone to obtain more balanced flight. Press and hold (camera bu�on) for 3 seconds, it will enter trim mode. Holding the bu�on at same �me pushing the direc�on joys�ck to the opposite side that the drone dri�s to rebalance it. -
Page 25: Orbit Mode
Orbit Mode 1. Hover the drone around the center point. 2. Press (camera) + (video camera) on the remote control at the same �me. 3. Move and set the drone in the radius range you prefer (within 6� – 30�) using the direc�on joys�ck. -
Page 26: Camera Func�Ons
Flight The Default GPS Mode is Beginner Mode. In Beginner Mode: 1. Flight Distance from remote control is limited to between 0 – 90 feet. 2. Flight Al�tude from remote control is limited to between 0 – 90 feet. 3. Return-To-Home Al�tude is below 75 feet. You can turn off... - Page 27 1. One-Bu�on Media Sharing Pic. 1 Photo Video 2017-12-28 Share Save to the Delete Check all phone album - 25 -...
- Page 28 Pic. 2 Pic. 3 1. Open the App, click (gallery) to access your picture and video files (Pic 1.) 2. Click once or press (checkmark list) to choose the photos you want to share. Click (box with arrow) to choose the pla�orms to share to (Pic 3). Reminder: You can share up to 9 pictures at the same �me, but you can only choose one video for sharing each �me.
- Page 29 2. How To Find a Lost Drone ①. Click the (satellite) 3 �mes to open the map to search for the drone. ②. The last posi�on of the lost drone will appear on the map, and you can find the last posi�on of the drone according to the label on the map (about 30 �...
-
Page 30: Specifica�Ons
USB outlet of a computer to retrieve the photos and videos from the Micro SD card. The images can be also viewed in the App. SPECIFICATIONS ● Drone MODEL: F24 Weight (Including Ba�ery): 520g/18.3 oz Flight Time: About 26~30 minutes WIFI Camera Distance: 300m~700m( 980feet~2200 feet) - Page 31 ● App / Live View Mobile App: “Con�xo F22” in App Store & Google Play Store Live View Working Frequency: 5 GHz ISM Live View Quality: 1920x1080P@20fps Smart phone video:1920x1080P@20fps, Photo:1920x1080P. TF card video:1920x1080P@20fps,Photo:1920x1080P (Depend on condi�ons and mobile device) Latency: Low Latency Video (depend on condi�ons and mobile device) Required Opera�ng Systems: iOS 8.0 or later / Android 4.4.4 or later Recommended Devices: 4.7”...
-
Page 32: Parts List (Included)
PARTS LIST (Included) Blade x 4 USB cable Only for charging Screw driver x 1 Screw x 12 Charger Instruc�ons x 1 COMMON PROBLEMS AND SOLUTIONS THE PROBLEM REASON TROUBLESHOOT Drone lights flashing and 1. Remote is not synced to 1. - Page 33 13 miles by taking both ends of the runway as the center is HIGHLY FORBIDDEN. Flying on the route of the airline is also PROHIBITED.Do not use drone, drones, or other flying drones in areas that are forbidden or prohibited by your local laws and regula�ons. Email: support@contixo.com...
- Page 34 CONTACT INFORMATION E-Mail: support@con�xo.com Website: www.con�xo.com ©2018 Con�xo Inc. All rights reserved. Con�xo®, the Con�xo logo and associated characters, trademarks and design elements are owned and licensed by Con�xo Company.
Need help?
Do you have a question about the F24 and is the answer not in the manual?
Questions and answers