Advertisement
- 1 Product Details
- 2 Transmitter Details
- 3 Lithium Battery
- 4 Download the Contixo F36 App
- 5 Flight
- 6 Battery Usage Instructions and Storage Safety
- 7 Specification
- 8 Packing Detail
- 9 Trouble Shooting
- 10 Important
- 11 Safety Precautions
- 12 Warnings
- 13 Exemptions
- 14 Flight Safety
- 15 Documents / Resources
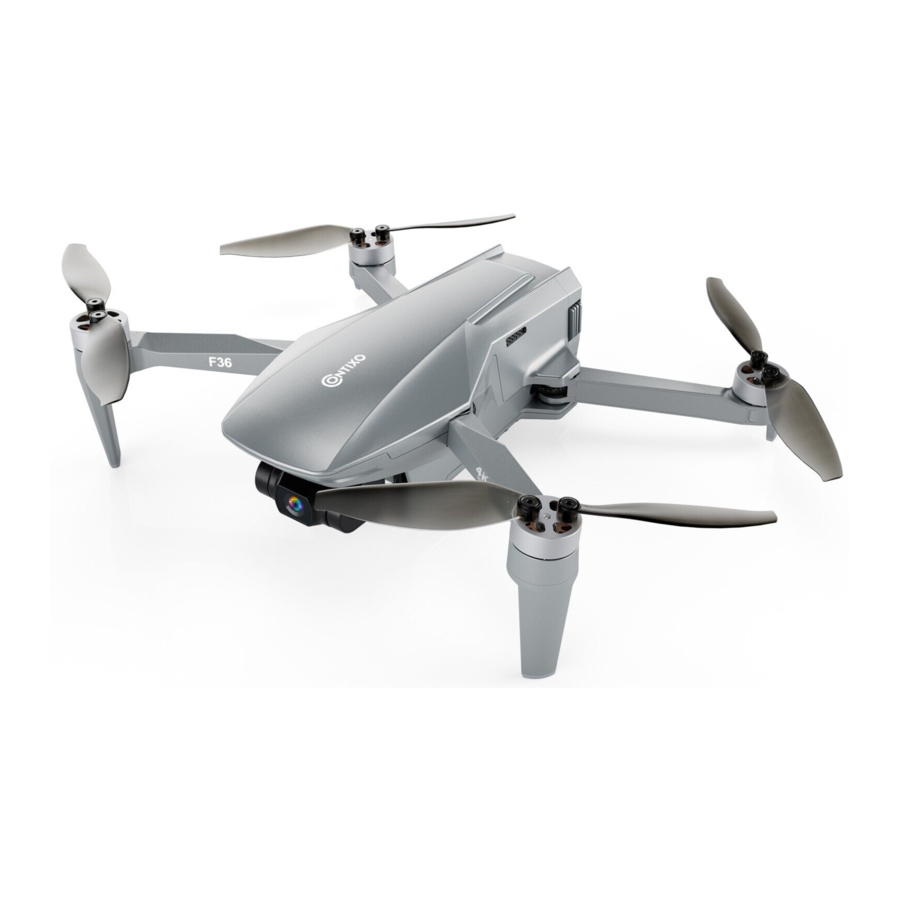
Product Details
Product Diagram

- CW Motor
- CW Propeller
- CCW Propeller
- CCW Motor
- Foot Stool
- Gimbal & Camera
- Flight Status Indicator Light
- Aircraft Power Indicator
- 4G Module Expansion Interface
- MicroSD Card Slot
Before using the aircraft, please read the user manually carefully. Always be aware of your surroundings and keep a safe distance from the aircraft. Keep the aircraft away from people, pets, crowds, buildings, trees or other obstacles to avoid collisions.
LEDs and Status Indicators of the Unit
The indicator light on the rear battery of the aircraft is used to indicate the current status of the flight control system, please refer to the table below for the status indicators.
| No. | Indicator Light | Status |
| 1 | Flashing blue light | RC and aircraft are not paired, GPS is not located |
| 2 | Solid blue light | RC and aircraft are not paired, GPS is located |
| 3 | Solid green light | RC and aircraft are paired, GPS is located |
| 4 | Flashing green light | RC and aircraft are paired, GPS is not located |
| 5 | Red and blue light flashing alternately | Horizontal calibration process |
| 6 | Red and green light flashing alternately | Vertical calibration process |
| 7 | Solid red light | Serious error |
| 8 | Flashing red light | Low battery alarm |
| 9 | Red light flashes doubly | Alarm for severely low battery |
| 10 | Green light flashes doubly | Optical flow system is located |
| 11 | Blue and green light flashes alternately | Compass data error |
Transmitter Details
Transmitter Functions
The remote control is only designed to work with the F36 aircraft. The controller includes a built-in digital image transmission system. After connecting to a mobile device, the high-definition picture and flight data can be displayed on the mobile phone in real time from the app. Through the joystick and various function buttons on the controller. The aircraft and the camera can be controlled within a communication distance of up to 3000m when flying without obstructions or interruptions.
The telescopic foldable phone holder located at the bottom of the remote control is used to place the phone. The rocker is detachable for easy packing and carrying.
The remote control has a built-in rechargeable lithium battery with a capacity of 2600mAh, and the average working time is 2.5 hours.
Remote Control Diagram


- Gimbal Adjustment: Control the angle of the camera.
- Photo Button: Press to take a picture.
- USB Port: For charging.
- Video Button: Press to start / stop recording the video.
- Zoom Button: Press and hold this button and move #1. At the same time to adjust the zoom of the camera, and the picture will be enlarged or reduced accordingly.
- Antenna: Transmit signals for aircraft control.
- Connection Status Indicator: When the green light is always on, the aircraft is connected, and when the red light is always on, the aircraft is not connected.
- Power Indicator
- Power Switch: Press button to check the battery's power status, to power off the device hold down the button.
- Data Wire Port: Port to connect the controller with a mobile device.
- Left Joystick
- One-Key Takeoff / Landing: Press this button before takeoff, and the aircraft will takeoff automatically. Press this button again after takeoff, and the aircraft will land automatically.
- Sport Mode Switch: When sports mode is off, the aircraft will travel at normal speed. When sports mode is on, the aircraft will travel at higher speeds, fly with caution when using this setting.
- RTH / Pause Button: Hold down for over 1.5 seconds, the aircraft will initiate RTH (Return to Home) mode. Press the button again to halt RTH mode. Will not halt RTH mode due to low battery.
- Right Joystick
Status Indicator of Remote Control
There are two groups of LEDs on the remote-control panel, one LED on the left side indicates the current aircraft connection status, and four LEDs on the right side indicate the remote-controlspower status. The LEDs are illuminated in the following way and their meanings are described below.
| Connection Status Indicator – LED | |||
| No. | Indicator Light | Sound | Status |
| 1 | Solid green light | No | RC and aircraft are paired. |
| 2 | Solid red light | No | RC and aircraft are not paired. |
| Power Indicator – LED | |||
| No. | Indicator Light | Sound | Status |
| 1 | Flashing green light during | No | Charging. |
| 2 | Solid green light during charging | No | Charging complete. |
| 3 | Solid green light | No | The remote control is working normally. |
| 4 | Green light flashes slowly | Beep | Low battery alarm, please charge. |
| 5 | Green light flashes twice | Beep | The remote control is idle for more than 9 minutes. |
Joystick Mode
The most common default joystick mode are right-handed throttle mode (Mode-1) and left-handed throttle mode (Mode-2). The default factory setting for the F36 drone is left-handed throttle mode, or mode-2. This user manual is also written to instruct users in left-handed throttle mode. The operations are as follows.


How to Control the Device

Refer to the diagram above to control the aircraft.
Lithium Battery
Battery Life Check

Tap the on/off button to know the current battery level by the lighting status of the indicator.
Charging the Unit Battery

Before each use of the aircraft battery, please ensure that the battery is fully charged. If the battery is low, please remove the battery and the charging cable and charge it according to the diagram above.
Charging the Remote Control

If the remote control is low on power, please charge it as shown above:
Download the Contixo F36 App

The Contixo F36 App supports Android Ver: 6.0 and above, and iOS Ver: 10.0 and above. Scan the QR code below to download the app.
For the best experience and all features, be sure to connect your phone to the device through the app.


When Using the App:
- Ensure your phone is fully charged before use.
- When operating the drone, be sure to focus on your flight without distractions.
- Do not answer calls, send or receive text messages or use other live phone functions when in flight.
- The maps used by in-app must be downloaded from the internet, before using this function. It is recommended you connect your mobile device to the internet to cache the map files.
- The F36 drone will continually upgrade and occasionally add new features from time to time, so the contents of this section may differ from the current app version.
Interface Description
Through the Contixo F36 App, users can stream real-time video, view photos and video recordings, as well as check the current status of the aircraft. Users can control the aircraft, the camera, set flight parameters, and initiate various functions.
Power on the remote control, connect the controller to your phone, via the included data cable. Open the app homepage, when the upper left-hand corner of the interface says:
"Connected device", select: "Start Flight" to enter the control interface.

- Homepage: Back.
- Flight Mode & Status Prompt: Display the current flight status.
- GPS Status: Displays GPS status.
- Remote Control Signal: Display the signal of the remote control.
- GPS Signal of Phone: Display the GPS accuracy of the mobile device.
- Battery Life: Displays the current battery life.
- General Settings: Click the icon to expand the settings menu, the sub-menu includes aircraft settings, remote control settings, aircraft battery settings, and more.
- One Key Takeoff / Landing: Before the aircraft takes off, the take-off icon
![]() is displayed. After selecting, the aircraft will automatically takeoff and hover at a height of 1.2 meters. After the aircraft takes off, the landing icon
is displayed. After selecting, the aircraft will automatically takeoff and hover at a height of 1.2 meters. After the aircraft takes off, the landing icon ![]() is displayed, and the aircraft automatically descends to the ground after clicking.
is displayed, and the aircraft automatically descends to the ground after clicking. - Start or Exit the RTH: In the process of returning, click this icon, and the aircraft will stop returning and enter the hovering position.
- Intelligent Flight Mode: Includes functions for follow me mode, waypoint flight, skyrocketing mode, orbit mode, far fly mode, spiral mode and comet mode.
- Integrated Position Display: Display the map, the orientation of the aircraft relative to the person, the direction of the nose, the direction and position of the mobile phone.
- Aircraft Flight & Status Data:
HS: Horizontal flight speed of the aircraft.
VS: Vertical flight speed of the aircraft.
H: Current Altitude
D: Distance between aircraft and point of takeoff - Camera Pitch Angle: Displays the current camera angle. Angle is negative when the camera is pointed down, and positive when the camera is pointed up.
- SD Card Capacity: Displays the used and available storage of the SD Card on-board the aircraft.
- Photo / Video Switch: Click this icon to switch between photo and video modes.
- Camera Zoom Status: Display the current camera zoom magnification.
- Photo / Video Button: Click this icon to take a photo in photo mode; click this icon to start the recording in video mode, click again to stop and save the video.
- Camera Settings: Set different parameters for the camera.
- Album: Access photos and video files stored on the aircraft. Quickly share download or manage files.
 is displayed. After selecting, the aircraft will automatically takeoff and hover at a height of 1.2 meters. After the aircraft takes off, the landing icon
  is displayed, and the aircraft automatically descends to the ground after clicking.
Flight
Prepare the Remote Control
Unfold the antenna and connect the data cable: Unfold the remote control handle and install the phone in place. Then unfold the antenna. There are 3 kinds of data cables included in the package, please select the appropriate cable to connect the remote control to the phone according to the phone interface model.
- Unfolded Antenna
![]()
- Connect the data cable


Attention:
- During the flight, the direction of the remote-control antenna is very important, which directly affects the flight distance and the quality of the image transmission.
- When the antenna and the back of the remote controller have an included angle of 180 or 270 degrees and the antenna plane is facing the aircraft, the signal quality of the remote control and the aircraft can reach the best state.

- The antenna position should be adjusted to ensure that the aircraft is always in the best communication range.
- When controlling the aircraft, the user should adjust the orientation and distance between the remote control and the aircraft, and adjust the antenna position to ensure the aircraft is always in good position.
- Communication equipment in the same frequency band will cause interference to the aircraft, please stay away from interference sources when flying.

Preparing the Device
The aircraft is shipped in a folded position. Please follow the guide below to prepare the aircraft.
- Extend the front and rear arms outward.
![]()
- Separate the propeller blades.
![]()
- Remove the gimbal cover.
![]()
- Insert the SD card.
![]()
- Insert the battery.
![]()
- Complete.
![]()


Ready to Fly
Start & Connect
- Hold down the power button for 2 seconds to turn on the power of the remote control.
- Hold down the power button for 2 seconds to switch on the aircraft battery switch to turn on the aircraft.
- Place the aircraft in a still, horizontal position, wait until the connection status indicator of the remote controller changes from red to green, and the aircraft status indicator changes from blue to green, indicating that the connection is successful.
Note: Before turning on the power of the aircraft, make sure that the gimbal cover is removed and the front and rear arms are unfolded, so as not to affect the self-test of the aircraft.
Upgrade
After activating the aircraft and the remote control, you may be notified of an available firmware update. It is recommended that you follow the prompts to upgrade for the best possible experience.
GPS Satellite Positioning Signal Description

Look for the GPS status icon of the aircraft in the upper right-hand corner of the apps status bar. As shown in the figure above, this displays the current number of satellites connected to the aircraft and the signal strength.
When the aircraft status indicator is steady green, it means that the GPS connection has successfully positioned the aircraft, and it's safe to takeoff.
When the aircraft status indicator light is blinking green, it means that the GPS signal is weak, or there is no signal available. This will cause the GPS to fail in locating the device. Flight is not recommended until a GPS connection has been established. When GPS is not available, the flight altitude will be limited to 20 ft. During this time, there is no return function, so please do not fly out of sight.
Prepare Flight Inspection
- Make sure the remote controller, aircraft battery, and mobile device are fully charged.
- Make sure the propellers are intact and installed correctly.
- Ensure that the front and rear arms, as well as the blades are fully unfolded.
- Make sure the gimbal cover is removed.
- Ensure the camera lens is clean.
- Make sure the MicroSD card is installed correctly.
- Ensure the battery is installed and firmly in place.
- Always use original components or accessories certified by the manufacturer. Contixo Inc. is not responsible for any damages or hazards posed by the use of accessories parts or any modifications from external parties.
Compass calibration
The aircraft has a built-in compass, which can ensure that the aircraft maintains an accurate heading during intelligent flight.
If any of the following situations occur, please calibrate the compass of the aircraft:
- Contixo F36 APP prompts for calibration.
- When the aircraft status indicator indicates that the compass is abnormal (the blue and green lights flash alternately).
- When hovering in a circle, or flying straight and deviated from the course, please land in time to calibrate the compass.
- It is recommended to perform a calibration after each flight position change.
Enter calibration mode
The mobile device, the aircraft and the remote controller are all connected, and the compass calibration is turned on in the Contixo F36 APP settings of the mobile device (path:  > Aircraft Settings > Click "Calibrate Compass" on the right of "Sensor Calibration").
When the APP pops up a prompt, please follow the prompt to check the current environment and keep away from metal objects, and then click the "Calibrate" icon. When the aircraft status indicator light turns red and blue and flashes alternately, it enters the compass calibration mode. At this time, please operate the aircraft according to the prompts of the APP.
- When the APP prompts to rotate the aircraft horizontally, put the aircraft flat and rotate it horizontally. When the status indicator of the aircraft turns red and green and flashes alternately, the horizontal calibration is completed;

- When the APP prompts to rotate the aircraft vertically, turn the nose of the aircraft vertically upwards and rotate it horizontally. When the aircraft status indicator turns green (flickering or steady on), the calibration is complete.
![]()


If the status indicator turns red and stays on for about 6 seconds, it means that the compass calibration has failed. Please change the position and follow the above steps to re-calibrate.
Note:
- After changing the flight site, be sure to calibrate the compass before the first flight.
- During use, if the indicator light of the aircraft is "blue and green lights flashing alternately", it means that the compass is abnormal, and the compass needs to be calibrated.
- Please keep away from environments that have a magnetic field interference during calibration, otherwise the calibration will fail.
- Do not calibrate in areas with strong magnetic fields, such as magnetic mines, parking lots, construction areas with underground steel bars, etc.
- When calibrating, please do not carry ferromagnetic materials around, such as keys and mobile phones.
- Do not calibrate near large pieces of metal.
Operating the Unit & Takeoff
Unlock to Fly
- Manually control the aircraft or use the one-key takeoff and landing function to begin flight. Toggle the left and right joysticks outward to get the propellers started. Slowly push the throttle for the aircraft to take off.

- To initiate one-key take off, hold down the
![]() button for 2 to 3 seconds. When the remote control beeps steadily, the aircraft will automatically takeoff and ascend to an altitude of 1.2 meters and hover. Optionally, select the
button for 2 to 3 seconds. When the remote control beeps steadily, the aircraft will automatically takeoff and ascend to an altitude of 1.2 meters and hover. Optionally, select the ![]() button within the app, then confirm, the aircraft will automatically take off and ascend to an altitude of 1.2 meters and hover.
button within the app, then confirm, the aircraft will automatically take off and ascend to an altitude of 1.2 meters and hover.


 button for 2 to 3 seconds. When the remote control beeps steadily, the aircraft will automatically takeoff and ascend to an altitude of 1.2 meters and hover. Optionally, select the
  button within the app, then confirm, the aircraft will automatically take off and ascend to an altitude of 1.2 meters and hover.
Operating the Unit
Refer to "Joystick Mode" and "How to Control the Unit" sections for further instructions.
Flight Mode

Control the aircraft in sport gear or normal gear through the switch on the controller. Pull the SPORT switch to switch gears
Sport Mode (off) - Use GPS and optical flow positioning system to achieve precise hovering, stable flight, intelligent flight functions, etc. When the GPS signal is good, GPS can be used for precise positioning; When the GPS signal is not good, and the environmental conditions such as lighting meet the requirements of the optical flow system, the optical flow system can be used for positioning in normal mode, the maximum flying speed is 10m/s.
Sport Mode (on) - Using GPS module, optical flow positioning system, the aircraft can achieve precise hovering and stable flight. When the sport mode is turned on, the control sensitivity of the aircraft will be adjusted, and the maximum flight speed will be increased to 14 m/s.
Note: When the GPS satellite signal is poor or the compass is disturbed and does not meet the working conditions of visual positioning, the aircraft will enter altitude mode. In altitude mode, the aircraft will drift in the horizontal direction and some intelligent flight functions will not be available. Therefore, in this mode, the aircraft itself cannot achieve hover and autonomous braking, so it should land in a safe place as soon as possible to avoid accidents. User should try their best to avoid flying in GPS satellite conditions with poor signal and narrow space, so as to avoid entering altitude mode and causing flight accidents.
RTH & Pause
Aircraft has return-to-home (RTH) function, and there are 3 types of RTH: one-key RTH, low battery RTH and lose control RTH. Before the aircraft takes off, when the aircraft indicator turns green and the GPS mode is displayed on the app, the current position of the aircraft will be recorded as the return point.
- One-Key RTH When the GPS signal is good (the aircraft status indicator is solid green), the aircraft can return to the return point via the
![]() button on the remote control, and the return process is the same as lose control RTH. The difference is that when the aircraft returns and begins to land, the user can control the aircraft through the joystick to avoid obstacles and change the landing position. After pressing and short pressing the
button on the remote control, and the return process is the same as lose control RTH. The difference is that when the aircraft returns and begins to land, the user can control the aircraft through the joystick to avoid obstacles and change the landing position. After pressing and short pressing the ![]() button for more than 2 seconds to exit the return, the user can regain control of the aircraft. During RTH, the user can control the altitude of the aircraft, adjustment range is between altitude of RTH to limit altitude of the aircraft.
button for more than 2 seconds to exit the return, the user can regain control of the aircraft. During RTH, the user can control the altitude of the aircraft, adjustment range is between altitude of RTH to limit altitude of the aircraft. - Low Battery RTH
During the flight, when the battery power of the aircraft is low enough to return home, a selection pop-up window will appear in the app at the same time. At this point: If the user selects "Confirm", the aircraft will immediately execute the return procedure. During the return process, the user can click the return icon from the app interface to terminate the return. After that, the aircraft will no longer perform low-power return, and the user needs to control the return of the aircraft by themselves.
If the user selects "Cancel", the aircraft will continue to fly in its current state, and the user can control the aircraft normally. After that, the aircraft will no longer perform low-power return, and the user needs to control the return of the aircraft by themselves;
If the user does not choose, the aircraft will immediately execute the return procedure after the 10-second countdown in the app ends.
During the return process, the user can adjust the altitude of the aircraft through the joystick, and the adjustment range is between the current return altitude and the set "return altitude setting".
When the battery power of the aircraft reaches a serious low level, the status indicator of the aircraft will turn red and double flash, and the aircraft will perform a forced landing procedure.
When the aircraft lands, the user can control the aircraft to avoid obstacles and change the landing position. - Lose Control RTH
When the GPS signal is good (the aircraft status indicator is solid green), the compass is working normally, and the aircraft successfully records the point of return. If the remote-control signal continues to be lost for more than 2 seconds, the flight control system will take over the control of the aircraft to fly back to the last recorded return point. If the signal of the remote controller is restored later during the flight, the return process will continue, but the user can cancel the return and regain the control of the aircraft through the pause button![]() .
.
During lose control RTH, the user can control altitude of the aircraft, adjustment range is between altitude of RTH to limit altitude of aircraft.- In order to ensure an accurate return position, please use this mode to take off after the GPS has been positioned (the status indicator light is always green) in an open and flat area (no large buildings within a radius of 50m, and the ground is flat within a radius of 10m). The return function will take effect.
- Failure to meet take-off and set-up conditions is at the users own risk.
- Before using the smart "Return to Home" function, make sure the aircraft has been positioned by GPS before takeoff.
- During RTH process, when the aircraft is flying above 30 meters, the aircraft will immediately perform the RTH function; when flying below 30 meters, the aircraft will rise to 30 meters automatically and then perform the RTH function.
- When the GPS signal is poor or the GPS does not work, it is not possible to return.
- If the the aircraft fails to locate by GPS, and the remote-control signal continues to be interrupted for more than 2 seconds, the aircraft will not be able to return. At this time, the aircraft will slowly descend until it lands and the propellers stop.
- The return altitude is set to 30m by default, and the flight limit altitude is set to 120m by default. Users can set appropriate parameters on the "Aircraft Settings" page of the app according to their needs.
 button on the remote control, and the return process is the same as lose control RTH. The difference is that when the aircraft returns and begins to land, the user can control the aircraft through the joystick to avoid obstacles and change the landing position. After pressing and short pressing the
  button for more than 2 seconds to exit the return, the user can regain control of the aircraft. During RTH, the user can control the altitude of the aircraft, adjustment range is between altitude of RTH to limit altitude of the aircraft.
 .
.Operate the Unit Landing
Choose any of the following methods to control the aircraft to land:
- Manually operate the remote control to land: Slowly pull down the throttle stick, and the aircraft will land slowly. When the aircraft land, continue to keep the throttle stick at the lowest position until the propeller stops rotating.
![]()
- One key land: Press and hold
![]() the one-key takeoff and landing button on the remote control for 2-3 seconds, the remote control will make a beeping sound and the aircraft will land vertically from the current position until the propeller stops rotating. You can also select the
the one-key takeoff and landing button on the remote control for 2-3 seconds, the remote control will make a beeping sound and the aircraft will land vertically from the current position until the propeller stops rotating. You can also select the ![]() icon from the app interface and a confirmation dialog box will pop-up. After clicking "OK", the aircraft will land vertically from the current position until the propeller stops rotating.
icon from the app interface and a confirmation dialog box will pop-up. After clicking "OK", the aircraft will land vertically from the current position until the propeller stops rotating.

- Automatic landing after automatic return or low power return and other intelligent return.

 the one-key takeoff and landing button on the remote control for 2-3 seconds, the remote control will make a beeping sound and the aircraft will land vertically from the current position until the propeller stops rotating. You can also select the
  icon from the app interface and a confirmation dialog box will pop-up. After clicking "OK", the aircraft will land vertically from the current position until the propeller stops rotating.
Note: During landing, please keep a safe distance from the aircraft.
Power Off
After completing the flight, please turn off the power of the aircraft and the remote control in sequence.
Gimbal
The three-axis stabilized gimbal provides a stable platform for the camera, so the camera can take stable pictures even when the aircraft if flying at high speed.
The user can control the tilt angle of the camera through the pull wheel on the remote control, and the angle rotation range is from -90 to 15 degrees. (The default adjustment angle is -90 to 0 degrees, users can set the adjustable angle on the "Aircraft Settings" page of the app to achieve the effect of upward adjustment)

Photo / Video

Users can use the remote-control buttons to take pictures and record videos, or click the icon on the app to take pictures and record videos.
- Select the working mode: touch the camera mode change icon
![]() to switch the working mode.
to switch the working mode. - Take a photo: click the photo icon
![]() to take a photo.
to take a photo. - Recording: Click the recording icon
![]() to start recording, and then select the
to start recording, and then select the ![]() stop icon to stop recording and save.
stop icon to stop recording and save.
 to switch the working mode.
 to take a photo.
 to start recording, and then select the
  stop icon to stop recording and save.
The camera on the app interface of the mobile device must receive the screen transmitted by the aircraft camera in order to realize the control on the app interface.
Operate the Remote Control
Take a photo: Short press the  button on the upper left corner of the remote control, the remote control makes a "beep" sound, and the camera takes a photo and saves it to the aircraft SD card.
Video recording: Short press the  button on the upper right corner of the remote control, the remote control will make a "beep - beep" sound, and the camera will start recording. Press the button again, the remote controller will make a "beep-beep" sound, the camera will stop and save the video.
Note: Please stop recording before shutting down, otherwise the file may be damaged.
When the aircraft has no SD card or the memory card has an error, the shooting files will be stored in the phone and the video file quality is normal at this time. Cannot take pictures during video recording.
Intelligent Flight Mode
The aircraft can automatically shoot a variety of classic aerial photography according to the set auxiliary shooting flight mode. Auxiliary shooting flight modes include skyrocketing mode, orbit mode, far fly mode, spiral mode and comet mode.
 Skyrocketing Mode: After locking the target, select the skyrocketing button on the app interface, the aircraft will aim at the target automatically fly directly above the target and start to climb, when the time limit is reached or click the sky button again, the sky mode will be canceled.
 Far Fly Mode: After locking onto a target, select the far fly button on the app interface, the aircraft will align with the target, and automatically fly away from the target while rising. When the time limit is reached or select the fade button again to cancel the operation.
 Spiral Mode: After locking the target select the spiral button on the app interface, the aircraft will aim at the target, and automatically climb while flying around in a spiral. This action will halt once the time limit is reached or once the mode is cancelled.
 Comet Mode: After locking the target select the comet button on the app interface, the aircraft will aim at the target, and automatically 180° rise followed by 180° fall. This action will halt once the time limit is reached or once the mode is cancelled.
Note: The drone requires a memory card to be installed to activate the above four functions.
 Orbit Mode: After locking onto the target, select the orbit button on the app interface, and the aircraft will aim at the target and continue to orbit. When the time limit is reached or you click the orbit button again, the orbit will be cancelled.
 Follow Me Mode: After locking onto the target, select the follow me button on the app interface, and the aircraft will follow the GPS coordinates set by your smartphone to follow you wherever you go. Click the follow me button again to cancell the follow me mode.
Note: The GPS Follow-me function will be affected by tall structures, trees, and living areas with Wi-Fi signal interference.
The GPS "Follow Me" function will not activate if the GPS signal is weak or if GPS positioning is turned off from the connected mobile device.
![]() WayPoint Flight: Select the waypoin button on the app, and you'll see a red circle to signify the flight range. You'll also see markers on the map for both the drone and the take-off position, you can set up to 10 points within the flight range on the map. Click "Start" to confirm initiation of waypoint flight. Click the waypoint button again to cancell the waypoint mode.
WayPoint Flight: Select the waypoin button on the app, and you'll see a red circle to signify the flight range. You'll also see markers on the map for both the drone and the take-off position, you can set up to 10 points within the flight range on the map. Click "Start" to confirm initiation of waypoint flight. Click the waypoint button again to cancell the waypoint mode.

- Please use the intelligent flight function in an open and unobstructed environment without obstacles, and always pay attention to whether there are people, animals, buildings and other obstacles in the path of the aircraft.
- Always pay attention to objects from around the aircraft and use manual operations to avoid accidents (such as collisions) and obstructions to the aircraft.
- Please do not use the smart flight function near buildings or places with poor GNSS signal, otherwise it may lead to unexpected situations such as unstable flight trajectory of the aircraft.
- When users use the intelligent flight function, please be sure to abide by the local laws and regulations on privacy.
Other Instructions
Optical Flow Position Hold
The aircraft is equipped with an optical flow positioning system, which provides better environmental adaptability.
The optical flow positioning system is located at the bottom of the fuselage. As shown the camera module  , optical flow positioning system obtains the aircraft position information through image.

Optical flow position system
The optical flow position system is typically used in indoor environment when GPS is weak or unavailable. It works best when the altitude is less than 3 meters.
Note:
- Please pay attention to the flight environment. Optical flow position system only play a safety auxiliary role under limited conditions and cannot replace human judgment and control. The user should always pay attention to the surrounding environment during the flight, maintain the control of the aircraft and be responsible for the control behavior.
- The measurement accuracy of optical flow positioning system is easily affected by light intensity and object surface texture. Therefore, the optical flow position system in the following scenarios cannot work normally, so it must be used with caution.
- Solid color surface (such as pure black, pure white, pure red, pure green).
- A surface (such as ice) that has strong reflections or reflections.
- The surface of water or transparent objects.
- The surface of a moving object (such as above a stream of people, shrubs or grass blown by a strong wind).
- A scene in which the light changes dramatically and rapidly.
- Object surfaces that are particularly dark (light intensity less than 10 Lux) or particularly bright (light intensity greater than 40000 Lux).
- Material surface with strong absorption or reflection of infrared (such as mirrors).
- Surfaces with particularly sparse texture (such as electric poles, pipes, etc.).
- The surface of an object with a high degree of texture repetition (such as small checkered bricks of the same color).
- Small obstacles (such as branches, wires, etc.).
- Do not block or interfere with the optical flow position system in any way, and ensure that the lens is clear and free of stains.
- Avoid flying in rainy and foggy weather or other scenes with low visibility (visibility less than 100 m).
Replace the propeller
The propellers are already installed on the aircraft when it leaves the factory. If the propeller is damaged during use, please replace it as shown in the figure.

Turn the screw counterclockwise to remove the propeller.

Install the propeller and screw, turn the screw clockwise to lock.

When installing the propeller, make sure that the arrow on the propeller is in the same direction as the arrow on the arm.
Note:
- Propellers are vulnerable consumables. If necessary, please purchase accessories separately.
- The propellers on the same motor must be replaced at the same time, otherwise there may be a large vibration, which will affect the flight performance and image quality.
- When replacing the propeller, make sure that the character on the installed propeller is the same as that of the removed propeller (for example, both are CW or both are CCW). Make sure that the arrow mark on the propeller is in the same direction as the arrow mark on the arm. If the propeller is installed incorrectly, the aircraft will not be able to fly normally and may cause injury.
- Due to the thinness of the propeller, please be careful when installing it to prevent accidental scratches.
- Please use official propeller accessories.
Switch mode 1 / mode 2

Switch to left hand throttle mode (Mode 2)
First pull the left joystick to the lowest position, then press and hold the  and
and  buttons at the same time to turn on the power.
When the remote control 'beeps' and the green light is always on, it has successfully switched to the left hand throttle mode. Then release the joystick and buttons, and restart the remote control to use it.

Switch to right hand throttle mode (Mode 1)
First pull the right joystick to the lowest position, then press and hold the  and buttons at the same time to turn on the power.
When the remote control 'beeps' and the green light is always on, it has successfully switched to the right hand throttle mode. Then release the joystick and buttons, and restart the remote control to use it.
Instructions for Binding the Aircraft to the Remote Control
The set version of the drone has been bound to the remote control when it leaves the factory, and the user can use it after turning it on.
If the remote control is replaced, or the aircraft and the remote controller are not paired and bound for other reasons, please follow the steps below to complete the frequency binding:
- Turn on the power of the aircraft and the remote controller respectively;
- Use a data cable to connect the remote control and the mobile phone;
- Open the Contixo F36 app, enter "Homepage Devices --> My --> Remote Control Pairing", and click the "Remote Control Pairing" option;
- Click Scan in the dialog box to display the name of the scanned aircraft;
- Please select the name of the aircraft, such as "Drone-xxxxxx", click "OK" after confirmation and wait.
- When the aircraft status indicator turns green slowly flashing or steady on, it means the remote control has been bound to the aircraft.
Battery Usage Instructions and Storage Safety
- Be sure to store the intelligent flight battery in a cool and dry place.
![burn hazard]() Improper use, charging or storage of batteries may result in fire and personal injury. Be sure to use the battery according to the following safety guidelines.
Improper use, charging or storage of batteries may result in fire and personal injury. Be sure to use the battery according to the following safety guidelines.
 Improper use, charging or storage of batteries may result in fire and personal injury. Be sure to use the battery according to the following safety guidelines.
Notes on battery use
- Do not expose the battery to any liquid, do not immerse the battery in water or get it wet. Do not use the battery in rain or wet environment. When the battery comes into contact with water, it may undergo a decomposition reaction, causing the battery to ignite spontaneously, and may even cause an explosion.
- It is strictly forbidden to use batteries not provided by our company. If user need to replace it, please go to the company's official website for relevant purchase information. Due to the use of non-company. The company is not responsible for battery accidents and flight failures caused by the batteries provided by the company.
- Do not use bulging, leaking or damaged batteries. If the above situation occurs, please contact the company or its designated agent for further processing.
- Before installing or removing the battery from the aircraft, please keep the battery power off. Do not unplug when the battery power is on battery, otherwise the power connector may be damaged.
![burn hazard]() The battery should be used at an ambient temperature of -10~45℃. If the temperature is too high (higher than 50℃), it will cause the battery to catch fire or even explode. Over temperature low (below -10℃), battery life will be severely compromised.
The battery should be used at an ambient temperature of -10~45℃. If the temperature is too high (higher than 50℃), it will cause the battery to catch fire or even explode. Over temperature low (below -10℃), battery life will be severely compromised.- Do not use the battery in a strong static or magnetic field environment. Otherwise, the battery protection board will fail, which will lead to serious failure of the aircraft.
![burn hazard]() It is forbidden to disassemble or pierce the battery with sharp objects in any way. Otherwise, it will cause the battery to catch fire or even explode.
It is forbidden to disassemble or pierce the battery with sharp objects in any way. Otherwise, it will cause the battery to catch fire or even explode.- The liquid inside the battery is highly corrosive, if there is leakage, please stay away. If the internal liquid splashes on the human skin or eyes, please clean it immediately. Flush with water for at least 15 minutes and seek medical attention immediately.
- If the battery is dropped from the aircraft or subjected to external impact, it cannot be used again.
- If the battery accidentally falls into water during flight or other circumstances, please pull out the battery immediately and place it in a safe open place area, keep away from the battery until the battery is completely dry. Dried batteries should not be reused and should be discarded and disposed of properly.
- Do not place the battery in a microwave or pressure cooker.
- Do not place battery cells on a flat conductor.
- It is forbidden to short-circuit the positive and negative poles of the battery with wires or other metal objects.
- Do not hit the battery. Do not place heavy objects on the battery or charger.
- If there is dirt on the battery interface, wipe it off with a dry cloth. Otherwise, it will cause poor contact, which will cause energy loss or failure to charge.
Battery storage safety and warnings
- Do not put the battery close to fire sources such as open flames or heaters.
- Please keep the battery out of the reach of children.
- Please ensure that the battery is stored at room temperature: around 25℃.
- For batteries that are not used for a long time, please control the storage voltage between 7.3V~7.7V.
- When not in use for a long time, check whether the battery storage status is abnormal every two weeks, and recharge and discharge activation every two months to maintain the activity of the battery.
Specification
| Aircraft | |
| Size (fold) Size (unfold) | 165 x 188 x 59 mm (LxWxH) 142 x 84 x 57 mm (LxWxH) |
| Wheelbase | 218 mm |
| Weight | 238g |
| Max ascent speed | Normal mode: 2.5m/s, Sport mode: 4m/s, RTH mode: 3.5m/s |
| Max descent speed | Normal mode: 2m/s, Sport mode: 3m/s, RTH mode: 3m/s |
| Max speed | Normal mode: 8m/s, Sport mode: 14m/s, RTH mode: 12m/s |
| Max service ceiling above sea | 3000m |
| Max flight time | 25 mins |
| Satellite positioning systems | GPS / GLONASS |
| Hover accuracy range | Vertical: +/- 0.5 m Horizonal: ± 0.3 m (Optical flow system works) |
| Maximum flight height | 120m (maximum 500m, need to change setting on app) |
| Operating temperature range | 0~40℃ |
| Optical flow system | |
| Operating environment | Surface with clear pattern and adequate lighting (lux > 15) |
| Velocity range | ≤1.5 m/s at 6.6 ft (2 m) above ground |
| Altitude range | 0.5~5m |
| 3-axis gimbal | |
| Controllable | Pitch: -90°~15° (need to change setting on app) |
| Stabilization | Pitch: +35/-125°, Roll: ± 35°, Yaw: ±30° |
| Pitch speed | 12°/s (default), can be set from 4°-28°/s |
| Angle jitter amount | ±0.01° |
| Camera | |
| Sensor | Sony CMOS |
| Image size | 3840×2160 |
| Shooting mode | Single shot |
| Video recording resolution | 3840×2160 |
| Maximum video bit | 15 Mbps |
| Supported file systems | FAT32(<=32GB) |
| Photo | JPEG |
| Video | MP4 |
| Supported SD cards | Micro SD Max capacity: 128GB. C10 rating required |
| Operating temperature range | 0~40℃ |
| Battery | |
| Capacity | 2100mAh |
| Voltage | 7.7V |
| Battery type | LiPo 2S |
| Energy | 16.17Wh |
| Net weight | 82 g |
| Max charging power | 35W |
| Charge time | <2.5h (with 5V 2A adapter) |
| Charging temperature range | 0~40℃ |
| APP | |
| Mobile app | Contixo F36 |
| Live view quality | Maximum 720P, the resolution will be automatically switched according to the environmental conditions |
| Aerial photography mode | Far fly, skyrocketing, orbit, helix |
| Required operating systems | Andrio 6.0 above, IOS 10.0 above |
| FPV transmission distance | 3000m |
| Remote controller | |
| Operating frequency | 5.8 GHz |
| Max transmission distance | 3000m |
| Transmitter power (EIRP) | < 26 dBm (FCC), < 20 dBm (CE/SRRC/MIC) |
| Operating current / voltage | 700mA @ 3.7V |
| Capacity | 2600mAh |
| Battery capacity (built-in) | 3.7V |
| Battery type | LiPo 18650 1S |
| Battery power | 9.62Wh |
| Operating temperature range | 0~40℃ |
| Supported mobile device size | Thickness supported: 6.5-8.5mm |
| Charge | USB |
| Maximum charge power | 5W |
| Charge time | < 2.5h(with 5V 2A adapter) |
Packing Detail
Before using this product, please check whether the product package contains all the following items. If something is missing, please contact our company or authorized dealers.

Trouble Shooting
| THE PROBLEM | REASON | COUNTER-MEASURES |
| Drone lights flash and no response from the drone when operating |
|
|
The blades spin but the unit cannot take off |
|
|
The quadcopter shakes heavily | The blades distorted. | Replace the blades. |
The unit cannot stay balanced in flight |
|
|
Important
Never fly in or near controlled airspace and do not exceed a height of 400ft. To ensure you're operating within the law and following FAA regulations within the United States. Do not fly along airline routes, and do not fly in areas with strong radio, electromagnetic or electrostatic emissions. Do not operate the drone in any way that is prohibited by related authorities of your country. NEVER use for any illegal purpose or use beyond the scope of which your local laws and regulations have stipulated.
The F36 drone should only be operated by individuals over 14 years of age, and is best suited for experienced UAV pilots. This is a precisely-made device, from electronics, mechanical components, and high-frequency transmission technology, according to its aerodynamic design. Using this device requires proper calibration and potential assembly or debugging to avoid complications or accidents. The user should always operate and control this product in a safe manner. Inappropriate use can lead to serious injury, cause property damage, or can lead to the drone being lost during operation.
In the event that the product is faulty. Please reach out to our technical support team. Likewise, should the product malfunction, or become damaged and need maintenance, reach out to our customer service team at: Support@contixo.com.
Safety Precautions
This remote-control aircraft can be dangerous when in use. Please make sure you keep a safe distance from people, animals, and hazardous objects, and do not fly in controlled airspace. Incorrect installations, poor weather conditions, or users unfamiliar with operation may cause damage to the aircraft, or other property or may cause injury. Pay close attention when in use and recognize unsafe or accident-prone conditions to avoid any accidents due to negligence.
- Keep it far away from any structures or crowds: This remote-control aircraft may vary slightly in speed or sensitivity while flying and can cause potential danger. Therefore, please keep it far away from crowds, buildings, trees, structures, high-voltage wires, etc... Please also avoid flying in adverse weather conditions such as rain, snow, electrical storms, and high winds to ensure the safety of the user, any spectators, and surrounding property.
- Keep it away from any moist environments: The inside of the aircraft is composed of many precise electronic and mechanical parts. Therefore, please try to avoid any moisture or water content from entering the main body of the aircraft as it may cause a breakdown of the mechanical and electronic parts and thus cause an accident.
- Only operate with included parts for intended use: Please use the original parts made by Contixo for any re-equipping or maintenance to ensure flying safety. Please operate and use only under the scope of the product functions permitted. Using unapproved parts will void the warranty.
- Novice users should seek assistance: New users may face obstacles while learning to operate this aircraft, in this case, please try to avoid operating the aircraft alone. When available, operate this aircraft under the guidance of a more experienced user.
- DO NOT operate under the influence of drugs or alcohol: Please operate this remote-control aircraft in accordance with state law and within your abilities. Do not operate in a state of fatigue, or a bad mental state. Incorrect operation may increase the probability of accidents.
- Please keep a safe range from aircraft when using top speed: When the operator is flying at high speed, please keep the aircraft far away from the pilot and any surrounding people or objects so as not to cause damage or endanger others.
- Store it in a cool, dry place: The remote-control aircraft is composed of various materials including: metal, fiber, plastic, electronics, etc. Therefore, please keep it away from sources of heat and avoid prolonged exposure to direct sunlight. Excessive heat exposure can cause distortion and damage.
Warnings
- There is important information contained in this package and instruction manual, please keep it for future reference.
- You have the responsibility to make sure that this model of aircraft won't cause injury to yourself, or others, and won't cause any property damage.
- Please operate strictly as shown in the instruction manual when debugging or assembling this aircraft. During the process of flying or landing, please maintain a distance of 1-2 meters between the user and the aircraft to avoid collisions to the head, face, or body, which may cause injury.
- Our company and distributors won't be responsible for any incorrect operation, which may cause loss, damage, or bodily injury.
- Children ages 14 and up should use this product under the guidance of an adult. This product is NOT to be used by children under 14 years old.
- Please correctly assemble and use this product as shown in the instruction manual or packaging instructions. Some parts should be assembled by an adult.
- Small parts are included with this product. Please place it beyond the reach of the children to avoid a CHOKING HAZARD or parts being mistakenly swallowed.
- Stay clear of roads or high-traffic areas flying in these areas is extremely hazardous and may be illegal.
- Please promptly dispose of the packing materials, so as not to cause injury to children.
- Please DO NOT disassemble or modify the aircraft as it may cause a breakdown of the aircraft during flight.
- Batteries in the battery compartment of the charger should be inserted into the designated power source which has the same logo as the product.
- Built-in rechargeable 3.7V lithium polymer battery, included in the transmitter.
- Only use charging cables provided by the manufacturer.
- When charging the battery, please ensure an adult is present. Keep the battery far away from any combustible objects or materials while charging.
- DO NOT short-circuit or squeeze the battery to avoid damaging the component, and to avoid potential explosion.
- DO NOT mix or replace the Li-ion battery with a different type of battery.
- Intelligent lithium battery is loaded in the drone.
- Please DO NOT cause the battery to short-circuit or decompose, keep the battery far away from fire and sources of excessive heat.
- The aircraft should be kept far away from any other electrical equipment that may cause interference.
- Please keep a safe distance from the high-speed rotating rotor to avoid injury of being wounded or being cut.
- Components may get hot during use. Please DO NOT touch motors to avoid being burned or injured.
- 5V wall charger recommended for charging. DO NOT use any charger stronger than 5V.
- Keep your UAS within sight.
- Never fly over groups of people.
- Never fly over stadiums or sports events.
- Understand airspace restrictions and requirements.
CHOKING HAZARD - Small parts. Not for children under 3 years..
The product should only be used by adults and children 14 years and older. Adult supervision is required for children under 14 years of age.
CHARGING OF THE AIRCRAFT BATTERY MUST BE SUPERVISED AT ALL TIMES BY AN ADULT. UNPLUG THE BATTERY WHEN FULLY CHARGED. DO NOT OVER-CHARGE THE BATTERY.
Exemptions
When using this product, Contixo Inc. shall not be responsible for direct or indirect damages caused by the following:
- Any damages caused by the user experiencing: fatigue, nausea, poor physical / mental health conditions, or under the influence of alcohol, or drugs.
- Personal injury, property loss, and legal liability caused by the user's subjective intention or wrong judgment.
- Damage caused by users flying in flight areas prohibited by law and regulations, such as nature reserves.
- Other damage caused by poor operation or modification of equipment. Training or replacement of accessories or parts not produced by Contixo Inc.
- The quadrotor sends a low-pressure alarm and it still does not land, resulting in the Quadrotor falling down.
- Damage caused by forced flight knowing that the quadrotor is in an abnormal state, knowing the assembly is not completed, or knowing the components have obvious faults, defects, or missing parts.
- Flying in an area with radio, electrostatic, or magnetic interference, such as near: high-voltage power lines, large power equipment, radio and television transmission towers, mobile phone base stations, etc. Avoid areas restricting flight specified by the government. Ensure the user's vision is not impaired, or blocked by obstacles. Users with impaired vision should wear any prescribed eyewear. Avoid any conditions unsuitable for controlling the device.
- Flight in bad weather conditions, such as rain, winds above force 4, snow, hail, or other bad weather.
- The quadrotor encounters a collision, overturns, combusts, gets struck by lightning, and is damaged in a storm, tornado, rainstorm, flood, tsunami, ground subsidence, ice subsidence, cliff collapse, avalanche, hail, debris flow, landslide, earthquake, or natural disaster, etc.
- Damage caused by infringement of any data, audio, or video data obtained from the user using the quadrotor.
- Damage to the battery, such as damage caused by improper matching of the protection circuit, battery pack, and charger.
- Any indirect losses or legal liabilities caused by problems with equipment or accessories (including memory cards), for example, images or videos that cannot be saved.
- Losses or legal liabilities caused by reckless or unsafe flights without completing sufficient flight training.
- The user promises to use the product only for legitimate purposes and agrees to abide by these terms and any relevant policies or guidelines that may be formulated by Contixo Inc. Some details of this document may change with the upgrade of the product software version and its terms of use. Please read the upgrade details carefully before upgrading the software version. The instruction manual will be updated with or without prior notice.
Flight Safety
Wi-Fi transmission area requirements:
- Ensure the drone is flown in an open area without any interference and obstacle.

- Do not fly against the wind.


Avoid flying over or near obstacles, crowds, high-voltage power lines, trees, airports, or bodies of water.
DO NOT fly near strong electromagnetic sources such as power lines and base stations as it may affect the onboard compass.

DO NOT use the drone in adverse weather conditions such as rain, snow, fog and wind speeds exceeding 12 mph, or 5 m/s.

Stay away from the rotating propeller blades and motors.

No Fly Zone

It's important to understand basic flight guidelines, for the safety of both you and those around you. Don't forget to read the Safety Guidelines before flight.
Documents / Resources
References
Download manual
Here you can download full pdf version of manual, it may contain additional safety instructions, warranty information, FCC rules, etc.
Advertisement


Need help?
Do you have a question about the F36 and is the answer not in the manual?
Questions and answers