Table of Contents

Related Manuals for PowMr Keeper MPPT 20A-40A


Summary of Contents for PowMr Keeper MPPT 20A-40A
- Page 1 Keeper SERIES Maximum Power Point Tracking Solar Charge Controller MPPT 20A-40A Please connect the battery first, and then connect the solar panel after setting the system parameters. If you do not operate in order, the battery will be damaged. 240116-V1.8...
- Page 2 Table of Contents Focus P1-P2 ※ ※ Product Instructions P3-P5 User Interface Overview and Configuration P5-18 Protection and Troubleshooting P19-21 Technical Data P22-23 ※When using lithium batteries, please set the system voltage first, and then set the corresponding battery type (see P7 3.7 Setting Pages & P11 3.9 System Voltage Setting)
-
Page 3: Wiring Precautions
1. Wiring Precautions Solar energy system wiring diagram ※ ※ Perform the following steps to connect cables and install them (You can ignore this if no inverter) Step 1 Step 4 Connect Step 3 Step 2 Connect the inverter to the Connect the Connect the batteries... - Page 4 2. Notice NOTICE This series of MPPT is a common positive controller, PV array, battery and load of the positive pole can be grounded at the same time. NOTICE If the inverter or other staring current is loaded in the system, please connect the inverter directly to the battery.
-
Page 5: Product Instructions
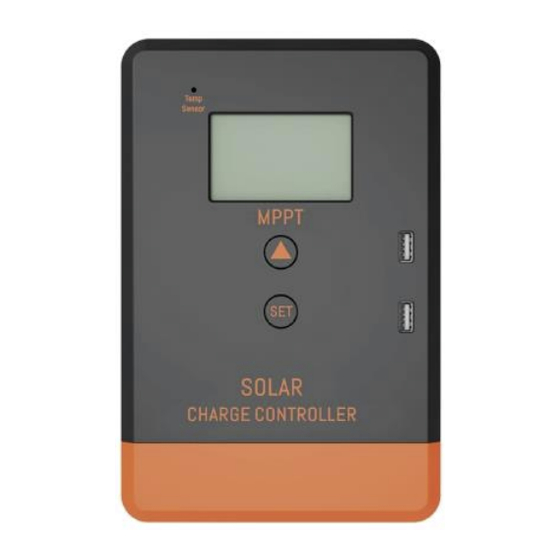
3. Product Instructions 3.1 LCD Screen... - Page 6 3.2 Status Introduce Item Icon Status Night PV array Charging Uncharged/ Battery capacity Battery Battery type Load Load on Load off * On the main page, the load on/off button is functional in any load operating mode.
-
Page 7: Button Definition
3.3 Button Definition Button meaning Button pattern Button function Short Press to switch down press, and hold for 3 seconds to enter the next MENU interface. Short press to switch up. Press and hold for 3 seconds to exit without saving. 3.4 Boot Screen Battery voltage Starting interface... - Page 8 3.5 Load Switch on/off 3.5.1 Short pressing “SET” button to switch on/off the load * On the main page, the load on/off button is Main page functional in any load operating mode. 3.6 Main Loop Pages Accumulated Main page Battery temperature Charging current Discharging current charging AH After the controller is powered on, LCD screen will enter the main page.
- Page 9 3.7 Setting Pages Constant voltage Main page Equalization charge Absorption charge Resume charge charge (CV) System voltage Low voltage Float charge Battery type Low voltage recovery voltage protection For details, see 3.10 Setting Battery Voltage Parameters Load working mode Temperature compensation Under the main page, long press “MENU”...
-
Page 10: Battery Type
3.8 Battery Type Under the main page, long press “MENU” for 3 seconds to enter the setting page, and then short press “MENU” to switch to the battery type page (user mode 1). After entering battery type page(user mode 1), long press “MENU” for 3 seconds to enter battery type selection pages, short press “MENU”... - Page 11 Display Battery type USE 1 Lead-acid battery custom Colloidal lead acid battery Sealed lead acid battery Valve-Regulated Lead-Acid Battery 4*3.2 4S LiFePO4 battery 5*3.2 5S LiFePO4 battery 3*3.7 3S Lithium-ion battery 4*3.7 4S Lithium-ion battery USE 2 Lithium battery custom...
- Page 12 Battery type GEL battery Sealed battery User mode 1 Flooded battery User mode 1 Battery type Lithium battery Lithium battery Lithium battery Lithium battery 3.2V/cell, 5 in series User mode 2 3.7V/cell, 4 in series 3.7V/cell, 3 in series 3.2V/cell, 4 in series Lithium battery Lithium battery Lithium battery...
- Page 13 3.9 System Voltage Setting After completing the battery type configuration, proceed to the next setting, which is the system voltage setting. "AUTO" indicates automatic detection of the system voltage. After entering setting pages, switch to the system voltage page, long press for “MENU” 3 seconds until the “auto”...
- Page 14 3.10 Battery parameters of different types After completing the battery type and system voltage settings, if you choose a custom battery type (USE1/USE2), you can refer to the table below to configure the charging voltage. If the voltage parameter interface you switch to can be configured, the " "...
- Page 15 Battery Type 4*3.2 5*3.2 3*3.7 4*3.7 USE 2 Parameter Resume charge voltage 13.0V 16.2V 12.0V 16.0V 13.6V Constant voltage charge voltage 14.4V 18.0V 12.6V 16.8V 14.4V Equalization charge voltage Absorption charge voltage Float charge voltage Low voltage protection voltage 11.2V 14.0V 9.9V 13.2V...
- Page 16 3.10 Load Working Mode Then controller default load working 24 hours, and there are 4 load working modes for selection: Icon Description Regular mode: ( LD1) The load works normally and can be turn on or off manually. Light control mode: (LD2) The load automatically turns on at dark and turns off at dawn.
- Page 17 If the “Light & time control mode” is selected, the user will enter the setting interface for configuring the duration of DC output. Once the duration is set, the LD3 mode configuration program can be activated or deactivated by selecting the “on” or “off” option in the switch interface.
- Page 18 3.11 PV Voltage Page Long press “SET” for 3 seconds to switch between the main page and PV voltage page.
- Page 19 3.12 Setting of equalization charging duration After switching to the equalization charging page from the main page, long press “MENU” for 3 seconds when the parameter stats to flash, keeper pressing it for 3 seconds to turn the page to equalization charging duration setting page, short press “MENU” or “SET” to increase or decrease the time.
- Page 20 3.13 Setting of absorption charging duration After switch to the absorption charge page from the main page, long press “MENU” for 3 seconds when the parameter status to flash, keep pressing it for 3 seconds to turn the page to absorption charging duration setting page, short press “MENU” or “SET” to increase or decrease the time.
-
Page 21: Protection Function
4. Protection Function Protection Condition Status Solar panel can be reversed if Solar panel reversed battery is not connected. Controller isn’t broken. Battery can be reserved if PV is Battery is reversed unconnected. Battery voltage reaches the over- Stop charging and Battery over-voltage voltage point. -
Page 22: Fault Management
5. Fault Management Error code Cause Correction PV array indicator Check whether if PV array is off when sunlight Solar panel is disconnection. connection is proper or not. is enough. 1.Check battery voltage (at least 8V No sign on the LCD 1.Battery voltage is less than 8V. - Page 23 Error code Cause Correction The controller will restart after it cools Controller overheating. down. Check voltage of solar panel and Input voltage of solar panel is reduce quantities of solar panel in too high. series. Controller will restart after setting No operation.
-
Page 24: Technical Data
6. Technical Data Rated Charge Current PV Input Max. open voltage of PV array <60V <75V <100V System rated voltage 12/24V Auto recognized Battery voltage range 8V~32V 260W(12V) 390W(12V) 520W(12V) Maximum input power 520W(24V) 780W(24V) 1040W(24V) DC Output Rated Discharge Current Battery type User default, Sealed, Flooded, GEL, LiFePO4, Li(NiCoMn)O Maintenance-free lead-acid battery: 14.6V;... - Page 25 Maintenance-free lead-acid battery, GEL, Lead-acid Flooded ※ battery: 10.8V. Static loss ≤50mA Lead acid battery 16V Light control voltage 5V/10A Temperature compensation -4mV/℃/2V(25℃) coefficient Discharge loop voltage drop ≤0.2V -20℃~+70℃ LCD temperature -20℃~+55℃ Operating temperature -30℃~+80℃ Storage temperature ≤90%, No condensation Working humidity Protection class IP30...
Need help?
Do you have a question about the Keeper MPPT 20A-40A and is the answer not in the manual?
Questions and answers