Table of Contents
Advertisement
Advertisement
Table of Contents

Related Manuals for PowMr POW-M60-PRO


Summary of Contents for PowMr POW-M60-PRO
-
Page 2: Important Safety Instructions
Important Safety Instructions WARNING: CAREFULLY READ AND FOLLOW ALL SAFETY INSTRUCTIONS ⚫ Carefully read the manual before the controller is installed and operated; retain the manual in a safe place for future reference. ⚫ The controller must not be installed or operated by any of the following persons, unless they are under strict instruction and supervision: a. - Page 3 ⚫ Battery DC connections a. Ensure that the DC system is fully shut down/isolated prior to disconnection of any existing cabling and/or new connections are made to the battery/DC system. b. Use flexible multi stranded copper cable with sufficient cross sectional area, line with an appropriate fuse or circuit breaker;...
-
Page 4: Table Of Contents
Table of Contents Important Safety Instructions ..................1 1 Production Instructions ....................4 1.1 Features ......................5 1.1 Production Overview ..................7 2 Installation and Connection ..................8 2.1 Unpacking and Inspection .................. 8 2.2 Preparing for Installation ..................8 2.3 Things You Need .................... -
Page 5: Production Instructions
1 Production Instructions Thank you for choosing the 0 layer Series of Solar Power Controllers. The controller uses numerical control technology design, LCD display, automatic operation. Its maximum power point tracking (MPPT) type battery charging mode, as well as control technology, will greatly extend the battery life. The controller features a smart tracking algorithm that maximizes the energy from the solar PV module(s) and charge the battery. -
Page 6: Features
1.1 Features ⚫ Integrated charge presets Integrated charge presets combined with adaptive charge logic are well suited for most common battery types, such as LiFePO4, Gel and flooded lead-acid. ⚫ Flexible Application Compatible with 12V/24V/36V/48V system voltage. ⚫ Multi-stage charge algorithm The multi-stage charge algorithm is specifically engineered to optimise each recharge cycle and charge maintenance over extended periods. - Page 7 ⚫ Silent operation Almost silent operation since there is no cooling fan or moving parts, cooling is via natural convection. ⚫ Lithium battery activation Compatible with Li-ion (LiFePO₄) batteries; when the battery type parameter is set to Lithium battery the charge cycle settings are altered to suit. Moreover, when the connected lithium battery is in a protected state, the controller will activate the lithium battery using the energy from the solar panel with a current that does not exceed the lithium battery's protection voltage and current range.
-
Page 8: Production Overview
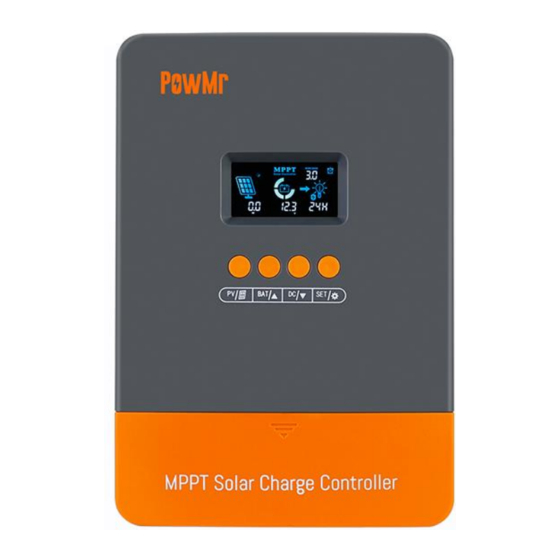
1.1 Production Overview ① ⑤ LCD display screen Load terminal ② ⑥ Function keys Mount hole ③ ⑦ PV input terminal Heat sink ④ Battery terminal... -
Page 9: Installation And Connection
2 Installation and Connection 2.1 Unpacking and Inspection Before unpacking the controller, check whether the package is damaged. After unpacking, check whether the contents of the package are damaged or missing. You should have received the following items inside of package: ⚫... -
Page 10: Things You Need
Make sure you have all the parts you need to install the controller: Product Quantity POW-M60-PRO Controller (included) DC-cable to connect the positive DC connection (+) of the controller to the positive pole of the DC-distribution DC-cable to connect the negative DC connection (-) of the controller to the positive... -
Page 11: Wiring Specification And Breaker Type
➢ Recommended input wire diameter and switch type for DC output (DC load): Model Max. DC output Current Wire Diameter Circuit Breaker Spec POW-M60-PRO 14AWG 2P-8A ➢ The cables and circuit breakers of the battery should be selected based on the maximum charging current of the battery you connected. -
Page 12: Wiring Precautions
2.6 Wiring Precautions a. Let installation and connection work be done by a licensed electrician. b. To avoid short circuit and reverse polarity connection, ensure that the positive cable is connected to the positive polarity port (+) of the device, and the negative cable is connected to the negative polarity port (-) of the device. -
Page 13: Installation And Connection Step-By-Step
2.7 Installation and Connection Step-By-Step 1. Mark the position of the mounting spots on the wall based on the mount holes of the controller. Then make 4 mounting holes in the wall with an electric drill according to the spots. Refer to the "... - Page 14 NOTICE ⚫ All wiring must be performed by a qualified personnel. For safe operation and standard application, a circuit breaker of the corresponding specifications must be installed on the cable connecting to the controller. And confirm that the wire used is thick enough. Please refer “0 ⚫...
- Page 15 WARNING: Risk of electric shock! ⚫ Make sure that all the power is turned off before above operations, and then follow the corresponding inspections and operations.
-
Page 16: Charging Mode
3 Charging Mode The charging controller is equipped with an intelligent 3-stage charge characteristic which takes care of an optimal charge of your batteries. When switched on, the controller always starts at Bulk stage. There are 3 integrated charge modes (Bulk, constant, float). Through the three stages of fast, efficient and safe battery charging mode, the system can effectively extend the battery life. -
Page 17: Alarm Function
➢ Bulk charge: The battery is charged at maximum charge current until the voltage increases to the configured boost charge voltage. The bulk stage duration is dependent on the battery’s level of discharge, the battery capacity and the charge current. When the battery voltage reaches the preset value of the Boost charging voltage, it starts to boost charging. -
Page 18: Operation Instruction
4 Operation Instruction 4.1 Icon Display on LCD Screen Function ① Day or night indicating icon ② Indicates the remaining battery capacity ③ Working mode (See “4.4 Working Mode” section for details.) Periodic running status of the load and warning state (See “5.2 Troubleshooting” ④... -
Page 19: Function Keys
4.2 Function Keys Icon Description To switch the PV input parameters information To switch the charging information/ Return the previous option. To adjust DC output mode and DC output operation duration/ Enter the next option. Confirm and reserve the settings. -
Page 20: Browse And Configuration Step-By-Step
4.3 Browse and Configuration Step-By-Step After cables are connected and the device is started, perform the initial configuration according to the following steps based on the actual situation. NOTICE ⚫ The screen will automatically turn off the backlight after about 25 seconds without pressing a button to save power consumption. - Page 21 Step 2. Calibrate battery voltage The battery calibration voltage parameter is used to correct the current battery voltage measured by the controller. The specific operations are as follows: a. Once the parameter switches to “battery calibration voltage” item, press and hold “ ”...
- Page 22 Step 4. Customize configured voltage parameters NOTICE ⚫ This step is required only when the battery type is set to “USE”. a. Once the battery type is set to “USE”, the configurable parameters are presented in the following order. Increment of each click is 0.1V. Nominal Boost Float...
-
Page 23: Working Mode
4.3.3 Load side Step 1. Configurate load enable duration a. Press and hold “ ” key to enter the load mode setting. b. Then press “ ” or “ ” adjust load state or load enable duration c. Finally press “ ”... - Page 24 4.5.2 Battery parameters of different types For lead-acid battery & User define: Battery type Parameter Boost charging voltage 14.6V 14.2V 14.4V 10.0~17.0V Float charging voltage 13.8V 13.8V 13.8V 10.0~17.0V Low DC cut-off voltage 11.0V 11.0V 11.0V 10.0~15.0V Low DC cut-off recovery voltage 12.6V 12.6V 12.6V...
-
Page 25: Protection
5 Protection 5.1 Protection Provided Protection Behavior When PV short circuit occurs, the controller will stop charging. Clear PV Array Short Circuit it to resume normal operation The controller will limit the battery charging current to the maximum PV Input Overcurrent battery current rating. -
Page 26: Troubleshooting
5.2 Troubleshooting In case of a failure, the controller display shows an error signal to help you find its source. Fault code Possible Cause What to do Increase the number of photovoltaic panels; or Input PV voltage is low increase the photovoltaic input voltage value in series. -
Page 27: Maintenance
5.3 Maintenance The following inspections and maintenance tasks are recommended at least two times per year for best performance. ⚫ Make sure controller firmly installed in a clean and dry ambient. ⚫ Make sure no block on air-flow around the controller. Clear up any dirt and fragments on radiator. -
Page 28: Technical Specification
6 Technical Specification Model POW-M60-PRO PV Input Max Open Voltage of PV Module 160Vdc Max. Input Power: For 12V system 720W 20-80Vdc; For 24V system 1440W 37-105Vdc; For 36V system 2100W 50-160Vdc; For 48V system 2800W 72-160Vdc. Charge Mode Charging Technology...
Need help?
Do you have a question about the POW-M60-PRO and is the answer not in the manual?
Questions and answers
What are the specs for the DC load on a PowMr M-60 solar charge controller. One video on line showed a 32 Amp 2-pole circuit breaker. I have a 24 volt system. Does this mean the maximum load would be 768 watts?