Advertisement
Quick Links
Advertisement

Related Manuals for Vivo MOUNT-KB08C


Summary of Contents for Vivo MOUNT-KB08C
- Page 1 Office Chair Mounted Keyboard Tray MOUNT-KB08C Assembly Manual...
- Page 2 If you do not understand these directions, or if you have any doubts about the safety of the installation, please contact our product support team at 309-278-5303 or help@vivo-us.com for further assistance. Check carefully to make sure there are no missing or defective parts. Failure to report missing parts within 30 days may result in denial of free replacement.
- Page 3 Package Contents A (x1) B (x1) C (x1) Keyboard Wrist Pad Tray Set D (x1) E (x1) F (x1) G (x1) Angled Support Vertical Support Clamping Plate Keyboard Stop Included Hardware & Tools S-A (x10) S-B (x4) S-C (x4) T-A (x1) T-B (x1) M5x12mm Screw M6x25mm Screw...
- Page 4 Assembly Steps STEP 1 Attach Angled Support (D) to the larger diameter tube on the chair’s gas spring using Clamping Plate (F), M6x25mm Screws and 4mm Allen Wrench (T-B). Note: This mount can fit pole diameters between 1.7” and 2” (44mm - 51mm).
- Page 5 STEP 2 Attach Vertical Support (E) to Angled Support (D) using M6x8mm Screws (S-C) and 4mm Allen Wrench (T-B).
- Page 6 STEP 3 Attach Arm (B) to Keyboard Tray Set (A) as shown using M5x12mm Screws (S-A) and the Phillips end of 5mm Allen Wrench (T-A). Then attach Keyboard Stop (G) to one side using M5x12mm Screws and the Phillips end of 5mm Allen Wrench.
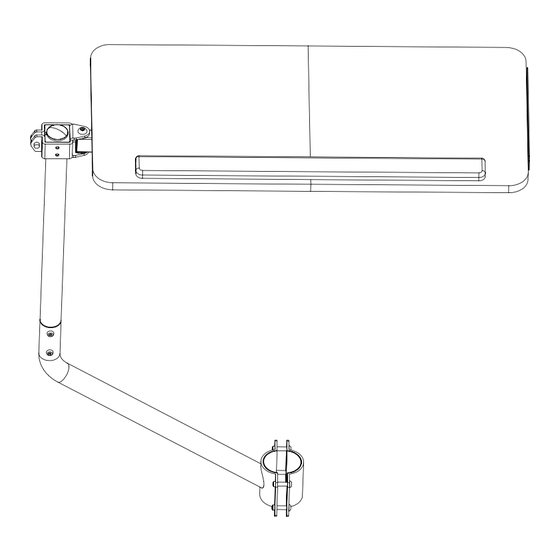
- Page 7 STEP 4 Slide the arm assembly onto Vertical Support (E). Secure by tightening the back screw using 5mm Allen Wrench (T-A). Remove adhesive backing from Wrist Pad (C) and apply where desired.
- Page 8 Need Help? We’re Here For You Monday-Friday from 7am-7pm CST Saturday 8am-4pm CST Email Us Chat with Live Agent Give Us a Call help@vivo-us.com www.vivo-us.com 309-278-5303 ext. 1 FOR MORE GREAT VIVO PRODUCTS, CHECK OUT OUR WEBSITE AT: WWW.VIVO-US.COM VIVO-us @vivo_us @VIVOus VIVO...
Need help?
Do you have a question about the MOUNT-KB08C and is the answer not in the manual?
Questions and answers