Advertisement
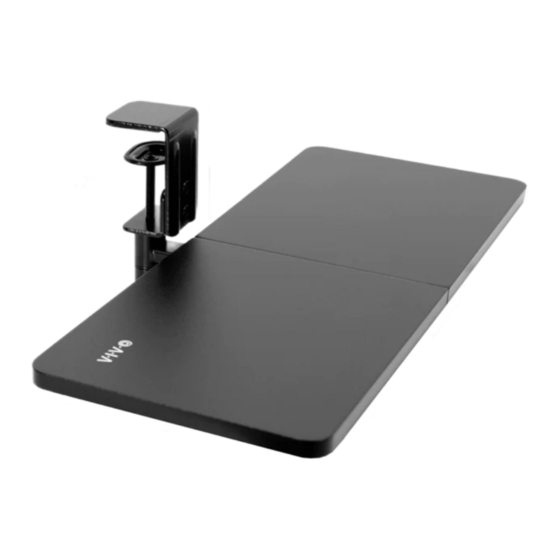
Single Clamp Rotating Keyboard Tray
Instruction Manual
SKU: MOUNT-KB01CB/CW
Scan the QR code with your mobile device or follow the link
for helpful videos and specifications related to this product.
https://vivo-us.com/products/mount-kb01cb
GET IN TOUCH | Monday-Friday from 7:00am-7:00pm CST
help@vivo-us.com
www.vivo-us.com
Chat live with an agent!
309-278-5303
Advertisement
Table of Contents

Related Manuals for Vivo MOUNT-KB01CB


Summary of Contents for Vivo MOUNT-KB01CB
- Page 1 Single Clamp Rotating Keyboard Tray Instruction Manual SKU: MOUNT-KB01CB/CW Scan the QR code with your mobile device or follow the link for helpful videos and specifications related to this product. https://vivo-us.com/products/mount-kb01cb GET IN TOUCH | Monday-Friday from 7:00am-7:00pm CST help@vivo-us.com www.vivo-us.com...
- Page 2 If you do not understand these directions, or if you have any doubts about the safety of the installation, please contact our product support team at 309-278-5303 or help@vivo-us.com for further assistance. Check carefully to make sure there are no missing or defective parts. Improper installation may cause damage or serious injury.
- Page 3 ASSEMBLY STEPS STEP 1 Place Tray Set (A) side by side and note the two sets of pilot holes. Indentify which set is closer to the combined edge, which will be the back of the tray. Connect Tray Set (A) to Tray Support (B) from the back using M5x12mm Screws (S-B) and a Phillips screwdriver.
- Page 4 STEP 2 Remove backing from Non-Slip Pad (G) and apply to underside of Upper Clamp (C). ** STOP HERE ** Choose An Assembly Option The Single Clamp features two screw hole sets to allow an adjustable height of keyboard tray below desktop.
- Page 5 STEP 3 Connect Upper Clamp (C) to Lower Clamp (D) using M8x12mm Screws (S-A) and 5mm Allen Wrench (T-A). Need More Keyboard Clearance? If you are using the upper set of holes and do not have adequate space for your keyboard, switch to the lower set. Place the clamp assembly onto the desktop.
- Page 6 STEP 4 Insert Plastic Bushings (E) into Tray Support (B). Secure Tray Support (B) to Lower Clamp (D) using Swivel Cap (F).
- Page 7 STEP 5 Place keyboard and mouse on Tray Set (A) and adjust as desired. 360° NOTE: Requires 33” rotation clearance; ensure there are no under desk obstructions.
- Page 8 : 1HR 8M (within office hrs) - 23% within < 15m - 38% within < 30m - 61% within < 1hr - 83% within < 2hr - 92% within < 3hr FOR MORE VIVO PRODUCTS, CHECK OUT OUR WEBSITE AT: www.vivo-us.com...
Need help?
Do you have a question about the MOUNT-KB01CB and is the answer not in the manual?
Questions and answers