
Related Manuals for Vivo MOUNT-KB05E Series


Summary of Contents for Vivo MOUNT-KB05E Series
- Page 1 Clamp-on Keyboard Tray MOUNT-KB05E Series Assembly Manual Individual Product SKUs MOUNT-KB05E MOUNT-KB05W MOUNT-KB05N...
- Page 2 If you do not understand these directions, or if you have any doubts about the safety of the installation, please contact our product support team at 309-278-5303 or help@vivo-us.com for further assistance. Check carefully to make sure there are no missing or defective parts. Failure to report missing parts within 30 days may result in denial of free replacement.
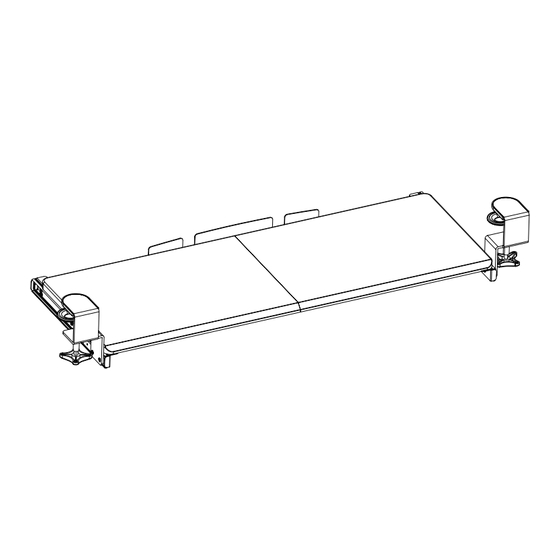
- Page 3 Package Contents A (x1) B (x2) C (x2) Keyboard Tray Sliding Bracket Clamp D (x2) E (x2) F (x1) Connecting Plate Keyboard Stop Included Hardware & Tools S-A (x6) S-B (x8) S-C (x12) M4x7mm M5x12mm M5x12mm Flat Screw Screw Head Screw *Some hardware included may not be used Weight Capacity: Tools Needed:...
-
Page 4: Assembly Steps
Assembly Steps STEP 1 Assemble Keyboard Tray (A) using Connecting Plates (E) and M5x12mm Flat Head Screws (S-C), and tighten with a Phillips screwdriver. STEP 2 Attach Keyboard Stop (F) to the back of Keyboard Tray (A) using M5x12mm Flat Head Screws (S-C). - Page 5 STEP 3 Attach Slider Brackets (B) to Keyboard Tray (A) using M5x12mm Screws (S-B), and tighten with a Phillips screwdriver. Note: With the Tray flipped upside-down, the Bracket with the “R” sticker will go on the left side of the assembly, and the Bracket with the “L” sticker will go on the right. The Slider Brackets (B) should protrude from the back of the Keyboard Tray.
- Page 6 STEP 4 Choosing Assembly Method Tray features two assembly options based on the desired extension distance. Extended Standard Standard Extended Tray will extend 9”(23cm) from desktop Tray will extend 10”(25.4cm) from edge when extended. desktop edge when extended. *Ensure you have 12” under desk clearance *Tray will remain partially extended free of obstacles for tray to fully retract.
- Page 7 STEP 5 Loosen Clamps (C) and place Pads (D) on the underside of each Clamp. Place assembled Keyboard Mount on the edge of the desk and tighten Clamps to secure. Slide keyboard tray forward/back as desired. Tray locks at fully extended position and at fully stored position.
- Page 8 Need Help? We’re Here For You Monday-Friday from 7am-7pm CST Saturday 8am-4pm CST Email Us Chat with Live Agent Give Us a Call help@vivo-us.com www.vivo-us.com 309-278-5303 ext. 1 FOR MORE GREAT VIVO PRODUCTS, CHECK OUT OUR WEBSITE AT: WWW.VIVO-US.COM VIVO-us @vivo_us @VIVOus VIVO...
Need help?
Do you have a question about the MOUNT-KB05E Series and is the answer not in the manual?
Questions and answers