Defender Sentinel Manual
- Quick start manual (21 pages) ,
- Quick start manual (48 pages)
Advertisement
- 1 WHAT YOU'LL NEED
- 2 WHAT'S INCLUDED
- 3 DEVICE SETUP
- 4 NVR ACTIVATION
- 5 NVR SETUP WIZARD
- 6 SETTING UP REMOTE VIEWING
- 7 CUSTOMIZE CHANNEL NAME
- 8 VISION MODES
- 9 SETTING UP EVENT NOTIFICATIONS
- 10 NOTIFICATION SCHEDULE
- 11 SET UP RECORDING SCHEDULE
- 12 ADD ADDITIONAL USERS
- 13 LIVE VIEW WITH AUDIO
- 14 AUDIO RECORD
- 15 LIVE VIEW PANEL EXPLANATION
- 16 USING THE APP
- 17 FREQUENTLY ASKED QUESTIONS
- 18 Documents / Resources
WHAT YOU'LL NEED
- TV or Monitor
- Hammer Drill & Appropriate Bit
- Phillips (#2) Screwdriver
- Ladder (if required)
- Cable Protectors (if required)
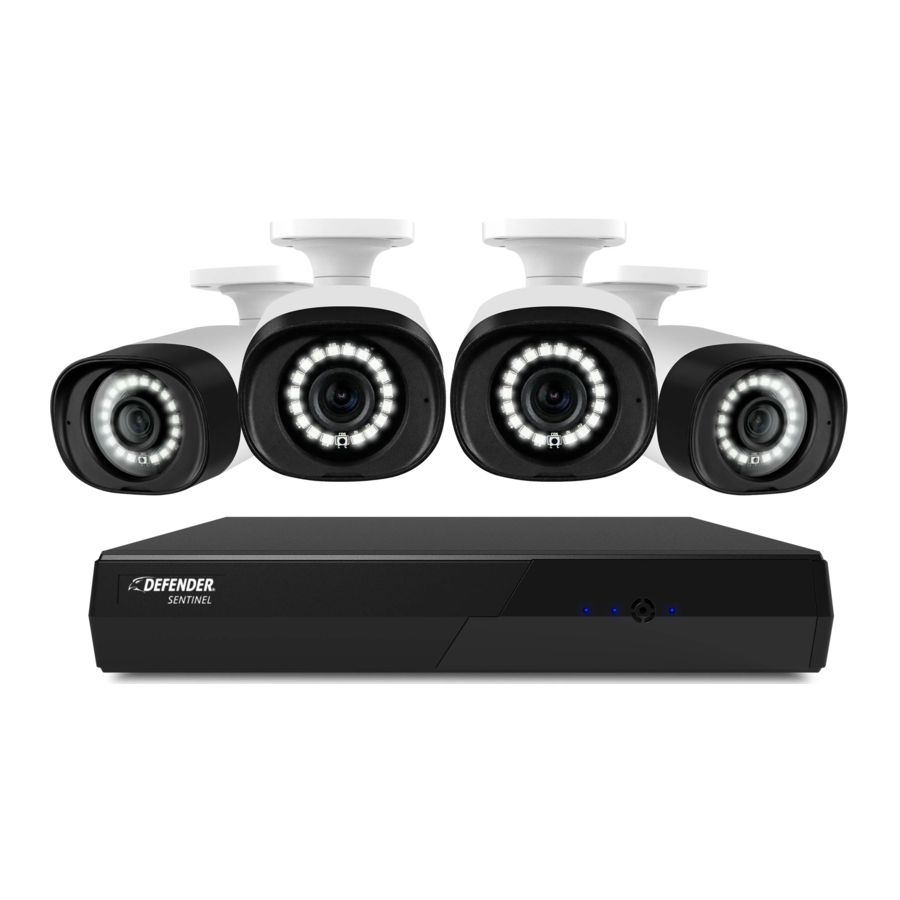
WHAT'S INCLUDED
| 8CH WITH 4 CAMERAS 4 x 4K UHD PoE IP Cameras 1 x 8 CH NVR with 1TB HDD 4 x 60ft Ethernet Cables 1 x HDMI Cable 1 x 6.5ft Ethernet Cable 1 x NVR Power Supply 1 x USB Mouse 4 x Camera Mounting Hardware 4 x RJ45 Waterproof Cap 1 x Quick Start Guide 1 x Window Warning Sticker 1 x Warranty Registration Insert 4 x Drilling Template Free Warranty | 8CH WITH 6 CAMERAS 6 x 4K UHD PoE IP Cameras 1 x 8 CH NVR with 1TB HDD 6 x 60ft Ethernet Cables 1 x HDMI Cable 1 x 6.5ft Ethernet Cable 1 x NVR Power Supply 1 x USB Mouse 6 x Camera Mounting Hardware 6 x RJ45 Waterproof Cap 1 x Quick Start Guide 1 x Window Warning Sticker 1 x Warranty Registration Insert 6 x Drilling Template Free Warranty | 8CH WITH 8 CAMERAS 8 x 4K UHD PoE IP Cameras 1 x 8 CH NVR with 1TB HDD 8 x 60ft Ethernet Cables 1 x HDMI Cable 1 x 6.5ft Ethernet Cable 1 x NVR Power Supply 1 x USB Mouse 8 x Camera Mounting Hardware 8 x RJ45 Waterproof Cap 1 x Quick Start Guide 1 x Window Warning Sticker 1 x Warranty Registration Insert 8 x Drilling Template Free Warranty | 16CH WITH 16 CAMERAS 16 x 4K UHD PoE IP Cameras 1 x 16 CH NVR with 2TB HDD 16 x 60ft Ethernet Cables 1 x HDMI Cable 1 x 6.5ft Ethernet Cable 1 x NVR Power Supply 1 x USB Mouse 16 x Camera Mounting Hardware 16 x RJ45 Waterproof Cap 1 x Quick Start Guide 1 x Window Warning Sticker 1 x Warranty Registration Insert 16 x Drilling Template Free Warranty |
DEVICE SETUP
PLEASE READ FIRST!
You must connect the NVR to a monitor or TV to complete the setup. We recommend verifying all accessories and completing the NVR setup before installing the cameras. For a full 4K viewing experience, use a 4K monitor/TV and view your live footage on full screen.

 Learn how to attach your RJ45 waterproof connector cap. Scan the QR Code:

- Connect the cameras, monitor, USB mouse, router, and power supply to the NVR.
- Camera
- RJ45 Waterproof Connector Cap: Connect the RJ45 waterproof connector cap on to each 60ft. ethernet cable.
- Ethernet Cable: Connect the 60ft Ethernet Cable to the Camera and NVR. Repeat for each camera.
(NOTE: Ensure the waterproof connector cap is tightened over the connection) - Modem/Router: Connect the modem/router (not included) to the NVR with the 6.5ft Ethernet Cable.
(NOTE: Wired Ethernet connection required, NVR cannot connect to the modem/router via Wi-Fi) - Monitor/TV: Connect the monitor/TV to the NVR with the HDMI cable.
- USB Mouse: Connect the USB mouse to the NVR.
- NVR Power: Connect the NVR power cable to a power outlet.
- USB Port
- Proper Camera Installation and Placement
Please Note: The accuracy of human detection will be influenced by multiple factors such as, distance from the camera, the size of the human, the height, angle and direction of the camera, and your night vision settings.
For optimal performance, follow the recommended guidelines below and set your night vision to SMART.
(See "Vision Mode" to customize your settings.)
Tip: When positioning your cameras, it's important to avoid any obstructions to the camera's lens and night vision. If the night vision reflects off of obstructions, such as a low hanging eaves, the rest of the image will appear dark in contrast.


- Angle the camera so that objects in the cameras field of view appear in the bottom 2/3 of the camera image.
- Choose a location where objects of interest will be no further than 50ft (15.24m) from the camera.
Optimal Human Detection Zone
The following measurements apply when the camera is pointed 15 degrees below horizontal
| Camera Height | Minimum Distance | Maximum Distance |
| 8.2 ft (2.5 m) | 2.8 ft (0.86 m) | 50 ft (15.24 m) |
| 9.8 ft (3 m) | 4.5 ft (1.39 m) | 49.5 ft (15.08 m) |
| 11.5 ft (3.5 m) | 6.3 ft (1.93 m) | 49 ft (14.93 m) |
NVR ACTIVATION
ADMIN PASSWORD

- Select your language.
- Create a password –PLEASE REMEMBER YOUR PASSWORD!
- Confirm the password.
- Leave Channel default password as is, no change required.
- Click"OK".
PATTERN UNLOCK
Draw an unlock pattern to access your system in place of a password. If you do not wish to create a pattern, skip this step.

- Click & drag to draw a pattern – you must connect at least 4 dots.
- Re-enter the unlock pattern to confirm.
- Click"OK".
Password Recovery
- Enter your email address and click "OK".
Please Note: We do not recommend skipping this step.


Security questions
Security questions are used to reset a forgotten password.

- Select 3 security questions and enter your answers.
- Click"OK".
REMEMBER YOUR ANSWERS! We recommend writing your questions and answers down and keeping them in a safe place for future reference.
NVR SETUP WIZARD
SETUP WIZARD

- Click "Setup Wizard" to start your NVR setup.
Network

- If you have a static IP address, make all necessary changes otherwise, no change is required.
- Click"Next".
Date and Time

- Select your Date and Time format.
- Select Enable NTP to automatically synchronize your date and time to your selected time zone. To manually enter your date and time, toggle off Enable NTP.
- NTP Server, no change is required.
- Sync Time Frequency (sec), no change is required.
- Click"Next".
Please Note: The Sync function will only work when your NVR is connected to the Internet. We recommend making no change to the NTP Server or Sync Time Frequency.
Camera

- Displays the cameras available to connect to the NVR. No change is required.
- Click"Next".
Disk

- Your NVR comes pre-formatted.
- Click"Next".
SETTING UP REMOTE VIEWING
Setup Wizard – Mobile Access
For remote viewing, the NVR must be connected to the Internet via an Ethernet Cable.
Please Note: The Device ID QR Code can only be scanned within the Defender Empower App. You will be prompted to do this in the next section "Account Setup".

- Open your camera and scan theDEFENDER EMPOWER APP QR Code on your monitor/TV screen to download the App.
- If you are unable to scan the QR code, searchDefender Empower in the App Store or the Google Play Store.
ACCOUNT SETUP
Please Note: All App screens & steps may vary slightly. Refer to "USING THE APP" for further reference.

Review and agree to the User Agreement and Privacy Policy.

Tap 'Sign Up' to register an account.

Select your region, enter your email address, and agree to User Agreement and Privacy Policy. Tap 'Get Verification Code'.

Enter the Verification Code sent to your email address. This may take up to 5 minutes to receive.

Create a password and tap 'Done'.

Tap 'Add Device'. Defender Would like you to use Bluetooth, Tap 'OK'.

Option 1: Tap the Scan icon [ - ] located on the top right.
Option 2: Wait for your App to discover nearby devices. Tap 'Add' to discover devices.

Option 1: Scan the "Device ID" QR code located on the Setup Wizard - Mobile Access screen of your NVR.

Option 2: Wait for the Adding Device process to finish. Do not leave this screen. Once your device is successfully added, tap 'Next'.

Select the edit icon  to change your device name. Enter a Device Name and tap 'Save' and 'Done'.

Tap each channel to load the camera footage.

The Mobile App setup is complete. Return to the NVR to finalize setup.
NVR SETUP
- Your NVR is now added to the Defender Empower App for remote viewing.
- Select"Next".
OUTPUT RESOLUTION
We recommend setting the output resolution to match the resolution of the monitor/TV. For the best viewing experience, we recommend using a 4K monitor/TV.

- Select the Output Resolution. When using a 4K monitor/TV select "3840x2160"
- Click "Finish".
Please Note: When a higher output resolution than the monitor/ TV is selected, the NVR will automatically default to the max output resolution of your screen.

Success! Your NVR is ready for use.
CUSTOMIZE CHANNEL NAME
Customize each channel name to your preference.

- Right click to view the main menu > Select"OSD" under Channel.
- Select the channel and enter a customized Channel Name.
- Toggle on/off"Time" and "Channel Name" to your preference to display this information in the camera footage.
- Select"Apply".
- Repeat for each channel or to duplicate the channel name for other channels, select"Copy" and apply to the desired channel(s). Select "OK" and "Apply".
- Right click to return to the main menu.
- Right click to return to live view.
VISION MODES
You have the option to customize each channel to one of three vision modes.
Please Note: Your camera's default setting is set to Double LED. If this is your preferred setting, skip this step

- Right click to view the main menu > Select"Sensor Setting" under Channel.
- Select"Night Vision".
- Select your preferred vision mode using the drop down options.
- Copy your preferred selection to all channels and select"Apply" to save.
DOUBLE LED - The camera will record in full color during the day, and black and white at night until motion is detected. When motion is detected, the spotlight will turn on for up to 60 seconds or as long as motion is detected, enabling color night recording during that duration.
IR - The camera will record full color during the day and black and white at night.
FULL COLOR - The camera will always record in color. At night, the spotlight will remain on to enable full color recording.
CLOSE - The camera will record in color during the day. At night, the camera's s recording color will be dependent on ambient lighting.
SETTING UP EVENT NOTIFICATIONS
Motion Detection

- Right click to view the main menu > Select Motion Detection under Alarm.
- Select the channel you wish to customize your notifications for.
- Toggle"Enable Motion Detection" on/off based on your preference.
- Toggle on/off as many Event Actions as desired. For immediate notification, we recommend toggling on "Push message to APP".Please Note: For email notifications, follow setup instructions found in our support center support.defendercameras.com.
- Select"Apply".
- Repeat for each channel or to duplicate the "Event Action" notification settings for other channels, select"Copy" and apply to the desired channel(s). Select "OK" and "Apply".
- Right click to return to the main menu.
- Right click to return to live view.
APP SETTINGS
Please Note: Motion Detection settings MUST be enabled/changed in your NVR and in your Defender Empower App Settings. Repeat for each channel.

Open the App and select your device.

Tap 'Settings'.

Tap 'Detection Alarm Settings'.

Turn on Motion Detection Alarm and select your 'Alarm Sensitivity Level'. We recommend medium.
DETECTION AREA
Please Note: This setting is only available when "Enable Motion Detection" is selected in "Setting Up Event Notifications".
Detection Area allows the system to notify you only when motion is detected in the selected regions. If you wish to be notified of all motion in the cameras field of view, skip this step.

- Right click to view the main menu > Select Motion Detection under Alarm > Select Detection Area.
- Select the channel you want to adjust the detection area for. Keep"Enable Motion Detection" selected.
- Click on the red boxes and drag to adjust the area where motion is detected. The area inside the red outline is your active detection area.
- Select"Apply".
- Repeat for each channel or to duplicate the detection area setting for other channels, select"Copy" and apply to the desired channel(s). Select "OK" and "Apply".
- Right click to return to the main menu.
- Right click to return to live view.
MOTION DETECTION

- Right click to view the main menu > Select Motion Detection under Alarm > Select Detection Area.
- Select the channel you want to adjust the customization for. Keep"Enable Motion Detection." selected.
- To receive notification on all motion detected, toggle off AI Detection.
- Select your sensitivity level preference. We recommend medium.
- With AI Detection on, your system will default to Human Detection.
- Select your preferred spotlight deterrence.
- Whitelight Alarm - The spotlight will flash for 30 seconds or until motion is no longer detected.
- Redlight Alarm - The spotlight will flash red and blue for 30 seconds or until motion is no longer detected.
NOTIFICATION SCHEDULE
By default, you will receive motion notifications 24/7. If this is your preferred setting, skip this step.
To be notified when motion is detected only during certain times of the day, customize your notification schedule.

- Right click to view the main menu > Select Motion Detection under Alarm > Select Notification Schedule.
- Select the channel you want to create a notification schedule for.
- Left Click and drag over the time of day you do not want to receive notifications. To deselect/select the entire day, click
![]() .
. - Select"Apply".
- Repeat for each channel or to duplicate the notification schedule setting for other channels, select"Copy" and apply to the desired channel(s). Select "OK" and "Apply".
- Right click to return to the main menu.
- Right click to return to live view.
SET UP RECORDING SCHEDULE
Customize your recording preference for each channel. Record continuously, when motion is detected, or a combination.
Please Note: By default, the NVR will record continuously ( ![]() ). If this is your preferred setting, skip this step.
). If this is your preferred setting, skip this step.

- Right-click to access the main menu > select"Record Schedule" under Record.
- Select the channel you wish to edit the recording schedule for.
- Select your preferred recording type (Continuous
![]() or Motion
or Motion ![]() ).
). - Hold and drag your mouse over the time and day you wish to record using your desired recording type. To edit or delete a setting, drag over the time again. To deselect/select the entire day, click
![]() .
. - Click"Apply".
- Repeat for each channel(s). To duplicate the recording schedule for other channels, select"Copy" and apply to the desired channel(s). Select "OK" and"Apply".
- Right click to return to the main menu.
- Right click to return to live view.
Please Note: Enable Record Audio allows your NVR to record the audio captured by the cameras.
"Alarm" is intended for professional use. To use this function, an external sensor must be connected to the NVR.
ADD ADDITIONAL USERS
Please Note: To share access via the Empower App only, an additional user does not need to be created. Refer to "Share App Access" to share remote access.
- To setup additional logins to the NVR for authorized users, right-click to access the main menu > Select User Account under System.

- Click "Add".


- Create a username and password.

- Confirm the password.
- Select the Group the user will be part of. Each Group has unique access.
- Click"OK".
- Right click to return to the main menu.
- Right click to return to live view.

LIVE VIEW WITH AUDIO
MONITOR/TV
Please Note: Live View or playback with audio on your monitor/TV is only available when your screen has audio capabilities and the NVR is connected via an HDMI cable or an external speaker (not included).
TIP!
In live view mode, only one camera can play audio at a time.
To enable audio in live view mode when connected to a Monitor/TV, from the live view screen left click on the channel and select the speaker icon 

- This will automatically disable the other channel with audio selected.
Please Note: Audio can only be heard from one channel at a time.
AUDIO RECORD

- Right click to view the main menu and select"Camera" under Channel menu.
- Select"Audio".
- Select the channel you wish to adjust the audio settings for from the Channel drop down.
- Toggle on Audio Recording and click"Apply" to save changes.
- Repeat steps for each channel you wish to record audio on.
LIVE VIEW PANEL EXPLANATION

- Instant Record (Record settings will be temporarily overwritten)
- Instant Playback
- Audio (Note: Must install an external microphone and/or speaker to live view with audio)
- Advance (Note: some features are not supported)
- Zoom In
- Image Settings
- Snapshot
- Home Button
- Camera View Layout
- Current Live View Page
- Auto Sequence
- Volume (External microphone (not supported by Defender Sentinel cameras) and speakers or monitor/TV must be installed to live view with audio.)
- Playback
- System Information
USING THE APP
The Defender Empower App allows you to remotely view live video or playback recorded footage, save and share recordings, share App access and receive customized notifications.


FREQUENTLY ASKED QUESTIONS
Can I allow other people to view my NVR remotely?
Yes. You can share your Defender Empower App access with up to 20 additional users. Each user must download the Defender Empower App and create their own account before sharing access.
Is Sentinel compatible with other Defender Camera security system?
No, Sentinel is not compatible with other Defender security systems. If replacing or adding additional cameras or NVR, check compatibility.
Can I view my live or recorded footage from a web browser?
No, we do not offer web viewing. You can view the footage from the free Defender Empower App with compatible iOS/Android smart phones/tablets, and through a TV or monitor connected to the NVR.
Can I Extend My Camera's Ethernet Cable?
Yes, you can extend each camera to a maximum of 180 feet. We recommend using Defender's certified authentic and genuine Ethernet cable when doing so.
How can I change the length of time before I am automatically signed out of my NVR?
From the NVR, right click to access the main menu > select User Account under System > select Adv. Setting > toggle on "Enable Auto Login" or change Auto Logout Time (min) to 0 or your preferred duration > select Apply.
How can I disable the Setup Wizard?
From the NVR, right click to access the main menu > select User Account under System > select Adv. Setting > toggle off "Enable Setup Wizard" > select Apply.
Documents / Resources
References
Download manual
Here you can download full pdf version of manual, it may contain additional safety instructions, warranty information, FCC rules, etc.
Advertisement


Need help?
Do you have a question about the Sentinel and is the answer not in the manual?
Questions and answers