Table of Contents
Advertisement
Advertisement
Table of Contents

Related Manuals for Defender PHOENIXM2


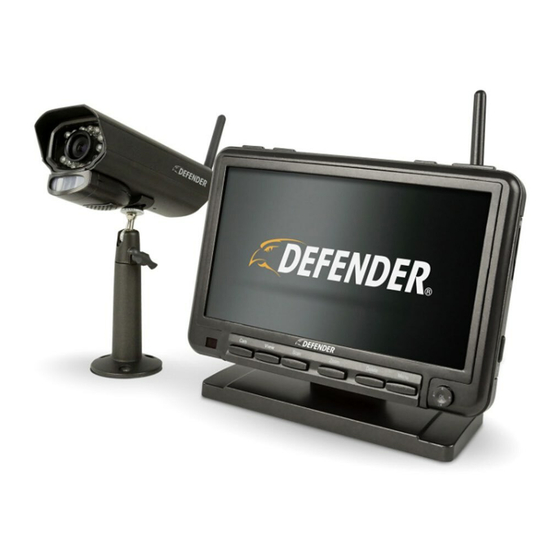
Summary of Contents for Defender PHOENIXM2
- Page 1 PHOENIXM2 User Manual...
-
Page 2: Important! Please Read
DEFENDER USA: 840 Aero Drive, Cheektowaga NY 14225 ® For more information about your product’s warranty, please visit our website at www.defender-usa.com. WARRANTY TERMS 1. DEFENDER products are guaranteed for a period of one year from the date of purchase against defects ®... -
Page 3: Thank You
CLASS B OR A PRODUCTION: This class (B) digital apparatus complies with Canadian ICES-003. DISCLAIMER DEFENDER does not endorse any of DEFENDER products for any illegal activities. DEFENDER is not ®... -
Page 4: Table Of Contents
TABLE OF CONTENTS IMPORTANT! PLEASE READ DO NOT RETURN THIS PRODUCT TO THE STORE ............................2 WARRANTY INFORMATION ..................................2 WARRANTY TERMS ....................................2 THANK YOU .......................................3 FCC ..........................................3 DISCLAIMER ......................................3 ABOUT YOUR PRODUCT FEATURES ........................................5 WHAT’S INCLUDED ....................................5 BUTTONS AND CONNECTIONS .................................6 MONITOR ......................................6 CAMERA ......................................7 INSTRUCTION... -
Page 5: About Your Product
Expandable up to 4 Cameras: This system can www.defender-usa.com/contact. Our experts will be support up to four cameras so you can monitor happy to assist you in English, French and Spanish. -
Page 6: Buttons And Connections
ABOUT YOUR PRODUCT BUTTONS AND CONNECTIONS Monitor cam 1 Menu 07 / 01 / 2015 11 : 45 : 08 DC IN 5V View Sleep Zoom Delete Menu 12. Zoom: While in live view mode, pressing zoom 1. Motion Record: Prompts the monitor to record will allow 1X zoom on the picture. -
Page 7: Camera
ABOUT YOUR PRODUCT Camera PAIR 1. Antenna: This removable antenna allows for a 8. Pair Button: Located at the back of the camera. better signal between the camera and monitor. Press this button when pairing the camera and monitor. For more information, please see Pairing 2. -
Page 8: Instruction
INSTRUCTION THINGS TO KNOW BEFORE YOU BEGIN! 1. The camera should be installed between 8 to 13ft above the area to be monitored. 2. For best results install the camera NO MORE than 100ft away from the monitor’s position to maintain a strong signal between the camera and monitor. -
Page 9: Installing Cameras
INSTRUCTION INSTALLING CAMERAS 1. Decide if the camera will be wall-mounted or 3. Ensure that the camera is strongly secured into sitting on a desk/tabletop. The camera can the wall. be adjusted for many mounting scenarios by 4. Adjust the camera to the desired viewing angle. rotating it to the required position. -
Page 10: Record
INSTRUCTION RECORD Setting Duration for Motion Record Allows you to set the length of time the unit will record once motion is no longer being detected. 1. Press the Menu button Select Record 3. Select Duration 4. Select the desired time for post-motion recording... -
Page 11: Accessing The Record Schedule
INSTRUCTION Accessing the Record Schedule 1. Press the Menu button 2. Select Record 4. This screen will be shown 3. Select Schedule Recording... -
Page 12: Understanding The Schedule Screen
INSTRUCTION Understanding the Schedule Screen 1. Day of the week: Use the LEFT or RIGHT navigation arrow keys on the joystick to change the day at the top. Corresponding record schedule for that day will appear below. 2. Time: The record schedule uses a 24 hour clock. 3. -
Page 13: Setting Up Schedule Record
INSTRUCTION Setting up Schedule Record 1. Press the Menu button 2. Select Record 4. Press OK when Modify is highlighted 3. Select Schedule Recording... -
Page 14: Setting Each Camera(S) For Schedule Recording
INSTRUCTION SETTING EACH CAMERA(S) FOR SCHEDULE RECORDING 1. Camera: To select the camera you would like to set up a Record Schedule for, use RIGHT or LEFT navigation arrows to move the Green box over the desired camera(s). Select OK to select each camera you wish to set a Record Schedule for. -
Page 15: Setting Sensitivity For Motion Detection
INSTRUCTION Setting Motion Record To enable Motion Recording, select the Motion button on the top of the screen. You will now see a Red moving man icon . The camera will now start recording when motion is detected. To enable Motion on all cameras, select the camera button to toggle the camera(s) and press the motion button on each. -
Page 16: Setting File Overwrite
INSTRUCTION NOTE: The higher the sensitivity level the more motion will be detected. The lower the sensitivity, the less activity the monitor will pick up 5. Select OK and you will return to the Video Motion Detect page Setting File Overwrite This gives the monitor permission to start overwriting previously recorded files when the memory card is full. -
Page 17: Camera Options
INSTRUCTION 4. Select Yes to confirm the overwrite or No, to return 3. Select File Overwrite to the Record Menu NOTE: If File Overwrite is not enabeled and the SD card becomes full, recording will stop. CAMERA OPTIONS Pairing Cameras Connecting the camera and monitor will allow the camera live feed screen and recorded to the SD card. - Page 18 INSTRUCTION 3. Select Pairing 4. Select which camera you would like to pair and the pair screen will appear with a 20 second count down cam 1 PAIR 07 / 01 / 2015 11 : 45 : 08 6. When pairing is successful the video will return to 5.
-
Page 19: Turning Cameras On/Off
INSTRUCTION Turning Cameras On/Off 1. Press the Menu button 2. Select Camera 3. Highlight which camera you would like to turn 4. When the desired camera is highlighted Blue: On or Off Press the LEFT navigation arrow to turn Off or the RIGHT navigation arrow to turn On... -
Page 20: Adjusting Camera Brightness
INSTRUCTION 5. Select OK to confirm the selection 6. You will see a Please Wait message. When complete you will return to the Camera Setup page Adjusting Camera Brightness 2. Select Camera 1. Press the Menu button... - Page 21 INSTRUCTION 3. Select Brightness 4. Using the LEFT or RIGHT navigation arrows, highlight the camera you would like to adjust and change the Brightness 6. Press OK to save the settings and you will return 5. When the desired camera is highlighted in Blue to the Camera Settings page press the RIGHT or LEFT navigation arrows until you reach the desired brightness level (1 low - 6...
-
Page 22: Changing The Camera Resolution
INSTRUCTION Changing the Camera Resolution The resolution can vary depending on the number of cameras paired with the unit. Please see the chart after the steps to understand the frames per second ratio and the changes to the frames per second when connecting more than one camera. - Page 23 INSTRUCTION 5. When the desired camera is highlighted in 6. Press OK to save the settings and you will return Blue, use the LEFT or RIGHT navigation arrows to to the Camera Setup Page change the Resolution Frames per second ratio: QVGA (Quarter Video Graphics Array) is a small- Number of QVGA...
-
Page 24: Monitor Settings
INSTRUCTION MONITOR SETTINGS Setting the Date and Time 1. Press the Menu button 2. Select Settings 3. Select Date and Time 4. Use the LEFT or RIGHT navigation arrows to highlight the box you would like to change (Example: Month, Day,Year, Hour, Minute, Second) -
Page 25: Returning To Default Settings
INSTRUCTION 5. When highlighted, use the UP or DOWN 6. Press OK to save the setting and you will return to navigation arrows to make changes the Settings page Returning to Default Settings 1. Press the Menu button 2. Select Settings... - Page 26 INSTRUCTION 3. Select Default Settings, press OK 4. Select Yes if you wish to set Default Settings or No to return to the Settings page NOTE: This will change the monitor back to the default settings. It will not delete footage from the SD card 5.
-
Page 27: Formatting Memory
INSTRUCTION Formatting Memory 1. Press the Menu button 2. Select Settings 3. Select Format Memory 4. Selecting No will return to the Settings page... -
Page 28: Changing The Time Zone
INSTRUCTION NOTE: Formatting the memory will delete the recorded footage from the SD Card, it will not change the settings 5. If you Select Yes, "Formatting Please Wait" will appear. The screen will return to the Settings page Changing the Time Zone 1. -
Page 29: Daylight Savings
INSTRUCTION 3. Select Time Zone 4. Use UP or DOWN navigation arrows to choose the desired Time Zone. Select the correct Time Zone and you will return to the Settings page Daylight Savings 1. Press the Menu button 2. Select Settings... - Page 30 INSTRUCTION 3. Select Time Zone 4. Use the RIGHT navigation arrow to highlight the Box next to Automatically adjust Clock for Daylight Savings Time 5. Use the UP navigation arrow until the Check 6. Press OK to save the settings and you will return mark appears.
-
Page 31: Firmware Update
1. Insert the SD card into the included adapter 2. Insert the adapter into the SD card reader (not included) on your PC or Mac NOTE: A firmware Update should only be applied if available and recommended by a Defender representative. View Sleep Zoom Delete Menu 4. - Page 32 INSTRUCTION 5. Press the Menu button 6. Select Settings 7. Select Firmware Upgrade 8. Confirm Firmware Upgrade...
-
Page 33: Setting Alert
INSTRUCTION CAUTION: During the firmware update do not remove the power supply 9. Select SD Card, and Yes to confirm. The system will take a few minutes to install the latest firmware. After upgrading the new Firmware, the monitor will automatically reboot Setting Alert An alarm will sound from the unit to alert you when motion has been detected. -
Page 34: Playback Recorded Files
INSTRUCTION 3. Use the LEFT or RIGHT navigation arrows to set 4. Press OK to save the setting and return to the Alarm Volume Main Menu page Playback Recorded Files 2. Once you have selected the date from which 1. When in Live Viewing Mode, select the OK button. you would like to view files, a list of files will appear The Recording File List (below) will appear a. -
Page 35: Deleting Individual Recorded Files
INSTRUCTION When watching videos you have the following options: 07 / 01 / 2015 11 : 45 : 08 View Sleep Zoom Delete Menu UP arrow/1: Pause b. RIGHT arrow/2: Stop c. DOWN arrow/3: Fast Forward 3. Use the UP and DOWN navigational arrows until the Red box is around the desired file, then d. -
Page 36: Troubleshooting
TROUBLESHOOTING No Picture/Signal • Make sure all the connections are secure and properly connected. Found on page 8 • Make sure your monitor is plugged into a power source from the 5V DC input on the back. Found on page 8 •... -
Page 37: Specifications
SPECIFICATIONS Monitor Camera 1/4" Color CMOS Image Monitor Type LCD Monitor Image sensor Sensor Screen Size 7" monitor IP Rating IP54 Wireless Frequency 2400Mhz~2483.5Mhz Maximum Wireless 4Mhz channel 450 ft Channel Frequencies Range (Line of Sight) separation Optimum Wireless Range Number of Cameras 150 ft (Line of Sight) - Page 38 DEFENDER-USA.COM...
Need help?
Do you have a question about the PHOENIXM2 and is the answer not in the manual?
Questions and answers