Table of Contents
Advertisement
Quick Links
Download this manual
See also:
Instruction Manual
QUICK START GUIDE
QUICK START GUIDE
QUICK START GUIDE
Congratulations on your purchase of the SN502-4CH! This user friendly system will allow you to monitor and protect your home or business. The coaching iMenu makes setting
up and using your DVR very easy with helpful information bubbles that appear to assist you. The SN502-4CH comes equipped with H.264 compression which allows you to record
and store more footage using less space, so you will never miss an important event. This manual was written to ensure that you get the most out of your SN502-4CH DVR.
SN502-4CH
SN502-4CH QSG.indd 1
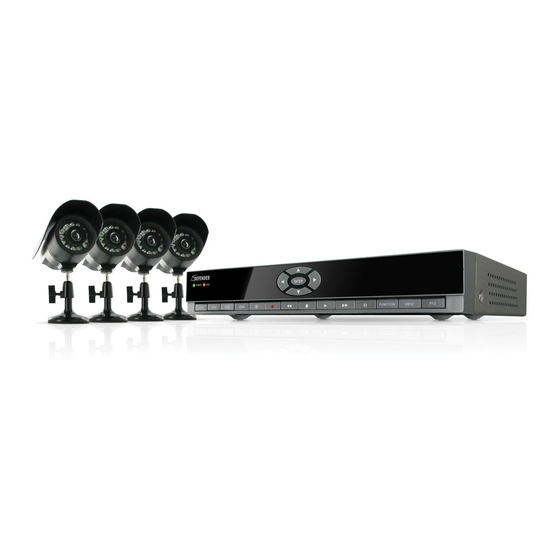
Smart Phone Compatible H.264 DVR Security System
4 Channel DVR w/ 4 Indoor/Outdoor Hi-Res Night Vision Cameras
1
04/02/2010 1:13:59 PM
Advertisement
Table of Contents

Subscribe to Our Youtube Channel
Related Manuals for Defender SN502-4CH


Summary of Contents for Defender SN502-4CH
- Page 1 DVR very easy with helpful information bubbles that appear to assist you. The SN502-4CH comes equipped with H.264 compression which allows you to record and store more footage using less space, so you will never miss an important event. This manual was written to ensure that you get the most out of your SN502-4CH DVR.
-
Page 2: Basic Setup
6. For additional help on mounting the cameras, please see the drilling template, located at the back of the users manual. Adjust camera to desired viewing angle Ensure the camera is secured into place For more information on camera mounting, please see Pg. 8 and 86 of the manual SN502-4CH SN502-4CH QSG.indd 2 04/02/2010 1:14:00 PM... - Page 3 5. Attach the BNC to RCA connector (L) to the video inputs (J) on the back of the DVR. 6. Connect the yellow male RCA plug (H) from the 60 ft cable to the BNC to RCA (K) connector on your DVR. 7. Repeat the above steps for all of the included cameras. SN502-4CH SN502-4CH QSG.indd 3 04/02/2010 1:14:01 PM...
-
Page 4: Connecting A Monitor
3. Insert the power supply wire into the rear DC 12V port on the DVR. • After a few seconds the splash screen will appear and the DVR will start up. For more information on basic setup please see Pg. 9-10 of manual SN502-4CH SN502-4CH QSG.indd 4 04/02/2010 1:14:04 PM... -
Page 5: Getting Started
Full Screen Quad Screen mouse is not necessary for operation Make sure that the mouse is connected to the top USB port on the back of the DVR before powering on. Zooming in Zooming in Zooming in SN502-4CH SN502-4CH QSG.indd 5 04/02/2010 1:14:04 PM... -
Page 6: Function Menu
DVR to move and when the the function menu please see Pg. 15 of the option is highlighted, press enter. see Pg. 12 of the manual. manual To exit, press the menu button. SN502-4CH SN502-4CH QSG.indd 6 04/02/2010 1:14:05 PM... -
Page 7: Networking Guide
To view what ports are being used with your DVR see the network setup menu on your DVR. Note: The computer and DVR need to be connected to the same router for initial setup. A computer will not always be necessary at the location to view the DVR. SN502-4CH SN502-4CH QSG.indd 7 04/02/2010 1:14:06 PM... -
Page 8: Preparing Your Computer For Viewing The Dvr
If the DVR needs to store PPPoE (DSL/ADSL) specifically add to the trusted sites list. To change for all web sites, use settings contact your ISP (Internet Service Provider) for the proper IP address settings. Method 1. (Methods on following pages) SN502-4CH SN502-4CH QSG.indd 8 04/02/2010 1:14:06 PM... - Page 9 6. Click OK. 2. Click on TOOLS. 7. Click “Apply”. 3. Click on INTERNET OPTIONS. 8. Close out of the Options window. 4. Click on the SECURITY tab, then click on the CUSTOM LEVEL button in this tab. SN502-4CH SN502-4CH QSG.indd 9 04/02/2010 1:14:06 PM...
- Page 10 If you are trying to access the DVR from a the computer. remote location you will add the “External IP Address” to the 10. Click “Apply”. trusted sites list. See “Testing Port Forwarding” Pg. 15 11. Click OK. SN502-4CH SN502-4CH QSG.indd 10 04/02/2010 1:14:06 PM...
-
Page 11: Viewing Your Dvr On Your Computer
DVR online. The default password for the web interface of the Internet Explorer. Click on the yellow information bar and then select “Install This DVR is: 123456. Add-on for All Users on This Computer…”. Please be patient as the installation process can take 1-2 minutes. SN502-4CH SN502-4CH QSG.indd 11 04/02/2010 1:14:07 PM... -
Page 12: Viewing Your Dvr Outside Of Your Network
1. Open up your web browser and go to: www.defender-usa.com/network 2. Once the site has loaded you will see a list with photos of different Defender DVR systems. Select the SN502-4CH. 2. You will then see a list with photos of different types of routers. - Page 13 • Your router may require a user name and password, if you do not know this you may have to contact your router NOTE: www.portforward.com is not affiliated with DEFENDER. manufacturer 7. Once you have completed port forwarding, see TESTING PORT FORWARDING.
-
Page 14: Testing Port Forwarding
9. If you receive an error message please view “IF YOU CANNOT CONNECT” on Pg. 59 of the manual. If you’re still having trouble you can always contact DEFENDER’s 24/7 support team. Note: www.whatsmyip.org and www.canyouseeme.org are not affiliated with DEFENDER. SN502-4CH SN502-4CH QSG.indd 14... - Page 15 (Online software instructions can be found on Pg 64 of the manual). Note: For more information on networking your DVR, viewing online, DYNDNS setup, troubleshooting and mobile viewing, please see the network guide in the manual Pg. 51-79 SN502-4CH SN502-4CH QSG.indd 15 04/02/2010 1:14:08 PM...
-
Page 16: Ddns (Dynamic Dns)
DVR before you can view your footage. Note: The DynDNS sites are not owned nor operated by DEFENDER and therefore support for these services will be done through their web site. SN502-4CH SN502-4CH QSG.indd 16... - Page 17 5. Read and agree to the Acceptable Use Policy (AUP) by checking the box and click “Create Account”. 6. An account verification email will be sent to the email address you supplied. You will need to follow the instructions listed on DYNDNS.org in order to complete the account activation. SN502-4CH SN502-4CH QSG.indd 17 04/02/2010 1:14:10 PM...
- Page 18 8. Leave all of the other options as they are, and click “Create New Host”. 9. Follow the on screen instructions to activate and view your free DDNS host name. 10. Your dynamic DNS settings have been created. SN502-4CH SN502-4CH QSG.indd 18 04/02/2010 1:14:11 PM...
-
Page 19: Logging Into Software
For more information on logging onto the DVR, the online software and Once the password is inserted, select login and the DVR software and viewing the recorded footage online, please see Online Software on Pg. 65 of footage will pop up. the users manual SN502-4CH SN502-4CH QSG.indd 19 04/02/2010 1:14:11 PM... -
Page 20: Online Software
“Default” button on the bottom of the screen • Apply: To save changes select “apply” at the bottom of the screen • Exit: To exit the menu, select “exit” at the bottom of the screen SN502-4CH SN502-4CH QSG.indd 20 04/02/2010 1:14:12 PM... -
Page 21: Mobile Viewing
Be sure to forward the mobile port IN ADDITION to ports 80 and 9000. Windows Mobile Symbian iPhone BlackBerry Note: For specific information on setting up your mobile device to view footage, please see Page 77 of the users manual SN502-4CH SN502-4CH QSG.indd 21 04/02/2010 1:14:12 PM... -
Page 22: Visit Us On The Web
Disclaimer DEFENDER does not endorse the use of any DEFENDER products for any illegal activities. DEFENDER is not responsible or liable in any way shape or form for any damage, vandalism, theft or any other action that may occur while a DEFENDER product is in use by the purchaser.
Need help?
Do you have a question about the SN502-4CH and is the answer not in the manual?
Questions and answers