
Related Manuals for Defender SENTINEL3


Summary of Contents for Defender SENTINEL3
-
Page 1: Quick Start Guide
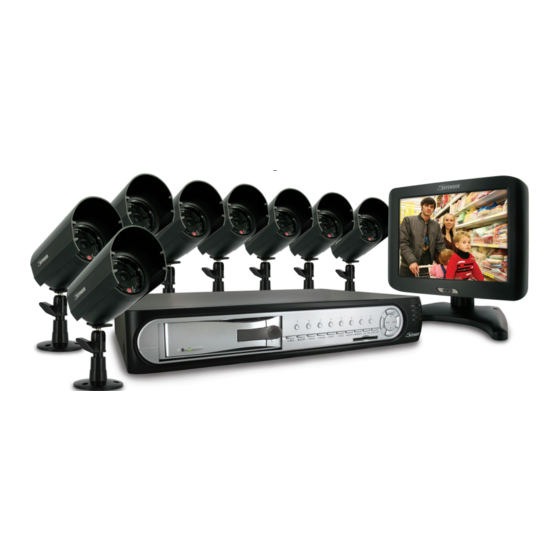
SETUP COMPLETE SENTINEL3 Deluxe Internet Accessible 8CH DVR System w/ 8 Hi-Res Indoor/Outdoor Night Vision Cameras and 8" LCD Monitor SETUP COMPLETE QUICK START GUIDE... -
Page 2: Step 1: Camera Installation
• W e recommend using a surge protected power bar and/or an Uninterrupted Power Supply (UPS) to power the DVR and camera system. MoUNTING THE CAMERAS SETUP 1. Screw each mounting bracket into each camera’s mounting hole, turning it clockwise. COMPLETE 2. Mount each camera in the desired location no more than 60 feet from the DVR unless you have purchased additional wiring. You may wall mount or desk mount these cameras. 3. Adjust cameras to the desired viewing angles. QUICK START GUIDE www.defender-usa.com... -
Page 3: Wiring The Cameras
5. Connect the 60ft video/power nection on the camera into the ply into the power jack lo- nectors to the camera inputs wire’s male RCA plug to SETUP 4 pin din male connection on cated on the 60 foot video/ and the monitor outputs on the VIDEO IN port for channels 1~8. the 60 foot video/power wire. power wire. back of the DVR. COMPLETE 3. Plug the camera’s power adapter into an AC outlet. QUICK START GUIDE www.defender-usa.com... -
Page 4: Step 2: Monitor Installation
SETUP port. Plug the other end into port on the monitor. the female end of the 3.5mm COMPLETE to RCA (female) wire. 1. Plug the monitor’s power adapter into a wall outlet. 2. Plug the other end of the power adapter into the DC IN 3. Ensure that the DVR is port on the monitor. plugged in and powered on. 3. Press the POWER button on the front of the unit. 4. Your cameras/DVR should now be displayed on the LCD. QUICK START GUIDE www.defender-usa.com... -
Page 5: Step 3: Dvr Installation
DVR does not have a power switch. This is for your security and helps to prevent users from accidentally turning the DVR off. SETUP 1. Insert the power supply wire into the rear DC 12V Port on the DVR. COMPLETE Insert the power cord into the power supply. 3. P lug the power cord into a power outlet. QUICK START GUIDE www.defender-usa.com... -
Page 6: Step 4: Dvr Networking Guide
NOTE: This guide was created using a cable modem and some procedures will be slightly different (minimum). depending on your hardware. If you are using a DSL modem, you may need to enter your PPPoE set- tings into the DVR (User name and password provided by your ISP.) QUICK START GUIDE www.defender-usa.com... -
Page 7: Prepare Your Computer
TOOLS area and select INTERNET OPTIONS. A screen NOTE: You will need to do this to any computer that you want to will open. view the footage from. 2. Select the SECURITY tab, then click on the CUSTOM LEVEL button in this tab. QUICK START GUIDE www.defender-usa.com... - Page 8 ENABLE If it is an option: • Allow automatic prompting for file and code downloads: ENABLE SETUP NOTE: If you do not have ActiveX installed and the previous step did not download it, go to www.download.com and search for COMPLETE ActiveX. Download the ActiveX Download Control. Your computer is now able to view the feed from the DVR. QUICK START GUIDE www.defender-usa.com...
-
Page 9: Prepare Your Dvr
3. Open IPEDIT.EXE from your desktop. Depending on your firewall Some versions of Internet Explorer will not work with a settings, a warning message may appear asking if you want to block space in the address bar. If this is the case, try it without the or unblock this program. Click Unblock. space. eg: 192.168.0.100:2000 QUICK START GUIDE www.defender-usa.com... - Page 10 SETUP COMPLETE STEP 4: DVR NETWoRKING GUIDE continued 7. The first time you logon to the DVR, an ActiveX Installation window will appear. Install the ActiveX control. SETUP COMPLETE 6. If entered successfully a window will open up with a login screen. The default USER NAME is admin. The default PASSWORD will be 1234. QUICK START GUIDE www.defender-usa.com...
-
Page 11: Connect To The Internet
6. Click the “Reboot” button. not know it, ask the person who configured your network. Portfor- 7. Power off the DVR and power it back on to confirm the changes. ward.com will provide you with each router’s default user name The changes will not take effect until you restart the DVR. and password. Follow the steps listed in the Port Forwarding section QUICK START GUIDE www.defender-usa.com... - Page 12 STEP 4: DVR NETWoRKING GUIDE continued D-LINK ROUTER EXAMPLE You will need to enable the ports by locating the port range forwarding screen. With some D-LINK routers the port forwarding screen is located within the Applications & Games or Filters tab; in others it is located in the Advanced Tools tab. SETUP COMPLETE 3. Select the Advanced tab. 1. Open your web browser. Enter the ROUTER IP address in the address bar and press ENTER. 2. Enter the user name admin. Leave the password blank followed by pressing the OK button (unless you have set up a user name and password for your router) QUICK START GUIDE www.defender-usa.com...
- Page 13 4. Select the Virtual Server tab. • Enable the Virtual server • In the Name field type in “DVR” • In the Private IP field enter the DVR’s IP address. • In the Protocol field, select Both (This will enable both TCP and UDP). • In the Private port enter the port number you need to forward. By default this DVR is set to port 2000. Use port 2000 unless you have a reason to change the DVR to another port (not recommended). • In the Public port re-enter the port number you entered in the private port field (e.g. 2000). • Select the Schedule to Always. • Ensure that the Virtual Server (or forwarding that is being SETUP set-up) is set to ENABLED. When complete, select the Apply button located at the bottom COMPLETE of the page to save your changes. Port forwarding is now complete! QUICK START GUIDE www.defender-usa.com...
-
Page 14: Find Your External Ip
DVR to match the settings provided to you by your Internet Service Provider (ISP). Consult your ISP for more information. DE- COMPLETE FENDER technical support cannot troubleshoot modems, since chang- ing these settings can potentially render your modem inoperable. See section Advanced Network Setup for PPPoE configuration instruc- tions in your user manual. You should also check all your network connections and go through the above steps again to make sure a configuration error was not made. QUICK START GUIDE www.defender-usa.com... -
Page 15: Forwarding Outside Your Network
5. Now check your email for the confirmation message. You will need to click the link in the body of this message to activate your account. The message may take up to 24 hours to arrive in your inbox. If you cannot find the message in your inbox, please check SETUP your junk/spam mail folder. 6. When you click the link, a window will appear that displays “Ac- COMPLETE count Confirmed.” Click on the login link and enter the user name and password you created. QUICK START GUIDE www.defender-usa.com... - Page 16 SETUP COMPLETE STEP 4: DVR NETWoRKING GUIDE continued 7. Click on the Services button located on 8. Click on the Dynamic DNS link 9. Click on the Get Started link located on the SETUP the top menu right menu COMPLETE QUICK START GUIDE www.defender-usa.com...
- Page 17 SETUP COMPLETE STEP 4: DVR NETWoRKING GUIDE continued SETUP COMPLETE 10. Type in a host name (subdomain name). We recommend you use 13. Leave all the rest of the options as-is, and click Create New Host. your first name or company name. 14. Your dynamic DNS settings have been created. 11. Choose a domain name from the dropdown menu. We recommend using the dvrdns.org suffix. 12. In the IP address field, type in your external IP address (it may also be shown below the field). QUICK START GUIDE www.defender-usa.com...
-
Page 18: Finalizing The Set-Up
5. Enter the username, password, and full domain name you configured at www.dyndns.com. Example: UserName: myname Password: mypassword SETUP DomainName: myname.dvrdns.org 6. Click the OK button located in this section to save your COMPLETE configuration. Reboot the DVR by powering it off and then on again to confirm the changes. You must reboot the DVR any time a change is made in the configuration menu. You should now be able to access your DVR simply by typing in 1. Log-on to your DVR through your computer by using either the your domain name (i.e. myname.dvrdns.org) internal or external IP address. Click the CONFIGURATION button. 3. Under the “Network DVR Setup” window, scroll down to DDNS Account Setting.” QUICK START GUIDE www.defender-usa.com... - Page 19 To avoid this problem all together, you can set your router to Static LAN IP, which will assign the same IP address to the DVR every time, even when the DVR or router is rebooted. SETUP COMPLETE QUICK START GUIDE www.defender-usa.com...
-
Page 20: Visit Us On The Web
Disclaimer DEFENDER does not endorse any of DEFENDER products for any illegal activities. DEFENDER is not responsible or liable in any way shape or form for any damage, vandalism, theft or any other action that may occur while a DEFENDER product is in use by the purchaser.
Need help?
Do you have a question about the SENTINEL3 and is the answer not in the manual?
Questions and answers