Table of Contents
Advertisement
Quick Links
Download this manual
See also:
User Manual
Advertisement
Table of Contents

Subscribe to Our Youtube Channel
Related Manuals for Insportline Gallop


Summary of Contents for Insportline Gallop
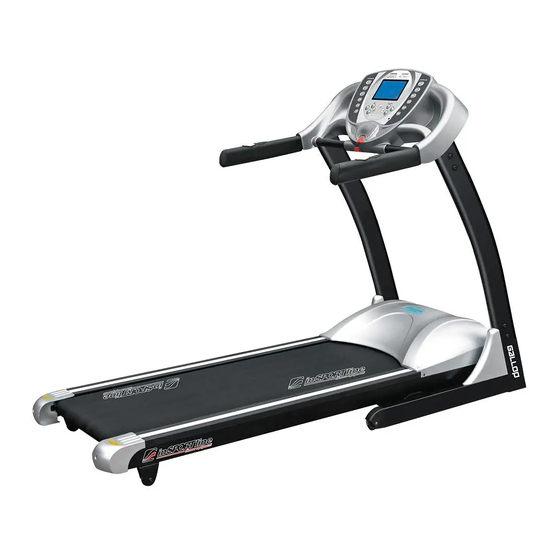
- Page 1 USER MANUAL – EN IN 1153 Treadmill inSPORTline Gallop...
-
Page 2: Table Of Contents
CONTENTS GENERAL SAFETY INSTRUCTIONS ....................3 SPECIAL SAFETY PRECAUTIONS ....................... 4 ASSEMBLY ............................4 UNPACKING & ASSEMBLY ........................5 ASSEMBLY DIAGRAM (1) ........................6 PARTS LIST ............................7 ASSEMBLY DIAGRAM (2) ........................9 ASSEMBLY INSTRUCTIONS ....................... 10 USAGE INSTRUCTIONS ........................11 TURNING ON THE TREADMILL ....................... -
Page 3: General Safety Instructions
Thank you Thanks for purchasing this product. The product will help you exercise your muscles in the correct way and to improve your fitness – and all this in a familiar environment. GENERAL SAFETY INSTRUCTIONS A great deal of emphasis was placed on safety in the design and manufacture of this fitness device. Still, it is very important that you strictly adhere to the following safety instructions. -
Page 4: Special Safety Precautions
SPECIAL SAFETY PRECAUTIONS POWER SOURCE: Choose a place in reach of a socket when placing the treadmill. Always connect the appliance to a socket with a grounded circuit and no other appliances connected to it. It is recommended not to use any extension cords. ... -
Page 5: Unpacking & Assembly
WARNING!: Use extreme caution when assembling this treadmill. Failure to do so could result in injury. NOTE: Each step number in the assembly instructions tells you what you will be doing. Read and understand all instructions thoroughly before assembling the treadmill. UNPACKING &... -
Page 6: Assembly Diagram (1)
ASSEMBLY DIAGRAM (1) Most of the displayed parts in this diagram are shipped pre-assembled. For spare parts, please do always specify parts numbers used on this diagram or in the following parts list. -
Page 7: Parts List
PARTS LIST ITEM DESCRIPTION Base frame Base frame cover Adjustable pad Front moving wheel set Front wheel set Incline frame Hex head bolt M8*60 Screw M4*12 Air shock End cover Main frame Left console mast Right console mast Filter Transformer Controller Incline motor Fuse... - Page 8 Motor cover Console down cover Console up cover Safety key Speaker Keystroke pcb Console cover Screen Speed sensor Shielded cable Screw M4*15 Hex head bolt M8*15 Hex head bolt M8*60 Moving wheel...
-
Page 9: Assembly Diagram (2)
ASSEMBLY DIAGRAM (2) -
Page 10: Assembly Instructions
ASSEMBLY INSTRUCTIONS Step 1: Attach the console masts to the base frame. a) Put the console wire through the console mast. b) Then attach left/right console mast into main frame with three M8X60mm bolts using washers and wrench. (Do not tighten the bolts) Step 2: Attach the console to the console mast a) Connect the wire from the console to the wire in the right console mast. -
Page 11: Usage Instructions
Step 3: Assemble the handle cover and base frame cover with four Screw M4*15. ATTENTION: be careful when you connect the two console—controller wires, There are pins inside connector, the pins must be straight, otherwise it will cause problems. (Insure pins are straight) Step 4: Tighten step 1, step 2 bolts. -
Page 12: Folding Instructions
FOLDING INSTRUCTIONS FOLDING THE TREADMILL: The treadmill can folded for space-saving storage. To fold the treadmill, lift the plate up and lock. NOTE: Make sure that the locking bolt is locked in place correctly. UNFOLDING THE TREADMILL: Pull out the locking bolt and fold the treadmill slowly and carefully down. SECURITY ALERT: The user must not use the heart grip plate when the speed of treadmill is above 16KM... -
Page 13: Training Monitor
TRAINING MONITOR TECHNICAL SPECIFICATIONS Time 00:00-99:59 Min Speed 0.8-22 km/h Incline 0-20 % Distance 0.00-99.9 km Calories 0-999 KCAL Pulse 70-200 / Min Program P1-P6 COMPUTER FUNCTIONS START: Press the START-KEY to begin your exercise. - Page 14 STOP: Press the stop button to pause the training. Press the START-KEY to continue working. SELECT: Press the SELECT-KEY you can enter preset training programs (P2-P6) selection. Then use the UP/DOWN key to choose a preset training program (P2-P6). Then you can use SELECT-KEY to select training speed and training time.
- Page 15 AUDIO INPUT: Support MP3 signal input. COMPUTER DISPLAY WEIGHT/AGE Select the user’s weight/age for the following training. Select the current user’s sex. PROGRAME Shows the selected training program. LEVEL Shows the level of the user selected. TIME Shows minutes and seconds of the elapsed or remaining time. INCLINE Shows the current running INCLINE.
- Page 16 DISTANCE Shows the completed or remaining distance in kilometers. CALORIES Shows estimated use of calories at the time of display. HEART RATE To show the current heart rate, touch both pulse sensors with your palms. COMPUTER OPERATIONS CHOOSING A PROGRAMME (P2-P6) ...
- Page 17 TIME setting: Press SELECT again into time setting The TIME shows 35 minutes Press FAST/SLOW to set time Press START to run Press FAST to increase speed Press SLOW to decrease speed Press UP to increase incline Press DOWN to decrease incline Pre-set time: 40minutes Pre-set level: L1, Segment: 20 segments PROGRAM setting:...
- Page 18 Pre-set level: L1, Segment: 20 segments PROGRAM setting: Press FAST/SLOW to access P2~P6 TIME setting: Press SELECT again into time setting The TIME shows 50 minutes Press FAST/SLOW to set time Press START to run Press FAST to increase speed Press SLOW to decrease speed Press UP to increase incline Press DOWN to decrease incline...
-
Page 19: Maintenance
HRC PROGRAM Step 1: Input weight, 68 kgs is a preset weight. Use "+" "-" (or “up” “down”) to adjust number, press "select" to confirm. (Available adjust range: 35-250) Step2: Input age, 30 is a preset age. Use "+" "-" (or “up” “down”) to adjust number, press "select" to confirm. -
Page 20: Lubrication
Repeat STEP 1 and STEP 2 until the slipping is eliminated. Be careful not to tighten the running belt tension too much as you can create excessive pressure on the front and rear roller bearings. An excessively tightened running belt may damage the roller bearings that would result in bearing noise from the front and rear rollers. -
Page 21: Cleaning
CLEANING Regular cleaning of the striding belt ensures a long product life. Warning: The treadmill must be turned off to avoid electrical shocks. The power cord must be pulled out of the socket, before starting the cleaning or maintenance. ... -
Page 22: General Fitness Tips
Show E3 The error of Speed over limit Adjust Speed feedback equipment or contact special service. TROUBLESHOOTING YOUR TREADMILL This treadmill is designed to be reliable and easy to use. However, if you experience a problem, please reference the trouble shooting guide listed below: PROBLEM: The console does not light up. -
Page 23: Warm-Up / Stretching Exercises
20 years 100-150 25 years 98-146 30 years 95-142 35 years 93-138 40 years 90-135 45 years 88-131 50 years 85-127 55 years 83-123 60 years 80-120 65 years 78-116 70 years 75-113 COPYRIGHT(c) 1997 AMERICAN HEART ASSOCIATI0N WARM-UP / STRETCHING EXERCISES A successful exercise session begins with warming up exercises and ends with exercises for cooling down and relaxing. - Page 24 EXERCISES FOR THE UPPER THIGH Support yourself by placing your hand on the wall, then reach down behind you and lift up your right or left foot as close to your buttocks as possible. Feel a comfortable tension in your front upper thigh. Maintain this position for 30 seconds if possible and repeat this exercise 2 times for each leg.
-
Page 25: Terms And Conditions Of Warranty, Warranty Claims
EXERCISES FOR THE CALVES/ACHILLES TENDON Place both hands on the wall and support your full body weight. Then move your left leg backwards and alternate it with your right leg. This stretches the back of the leg. Maintain this position for 30-40 seconds if possible. - Page 26 Borivojova 35/878, 130 00 Praha 3, Czech Republic Headquarters: Delnicka 957, 749 01 Vitkov, Czech Republic Warranty & Service Centre: Cermenska 486, 749 01 Vitkov, Czech Republic CRN: 26847264 VAT ID: CZ26847264 Phone: +420 556 300 970 E-mail: eshop@insportline.cz reklamace@insportline.cz servis@insportline.cz Web: www.insportline.cz...
- Page 27 INSPORTLINE s.r.o. Headquarters, Warranty & Service centre: Elektricna 6471, 911 01 Trencin, Slovakia CRN: 36311723 VAT ID: SK2020177082 Phone: +421(0)326 526 701 E-mail: objednavky@insportline.sk reklamacie@insportline.sk servis@insportline.sk Web: www.insportline.sk Date of Sale: Stamp and Signature of Seller:...
Need help?
Do you have a question about the Gallop and is the answer not in the manual?
Questions and answers