Table of Contents
Advertisement
Quick Links
Advertisement
Table of Contents

Related Manuals for Insportline Gardian G12TF


Summary of Contents for Insportline Gardian G12TF
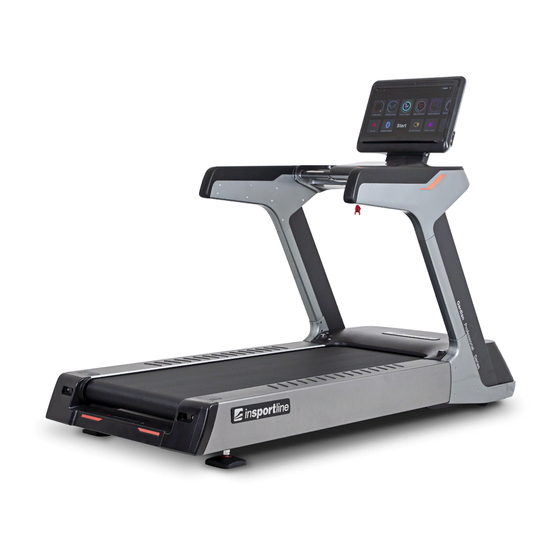
- Page 1 USER MANUAL – EN IN 19892 Motorized treadmill inSPORTline Gardian G12TF...
-
Page 2: Table Of Contents
CONTENTS SAFETY PRECAUTIONS ........................3 ATTENTION ............................3 SAFE USE ............................... 3 ASSEMBLY INSTRUCTIONS ......................... 4 TECHNICAL PARAMETERS ........................ 13 OPERATION INSTRUCTIONS ......................13 CONSOLE ............................. 13 INTERFACE ............................13 PROGRAMS ............................15 BUTTONS ............................37 ERRORS ............................... 39 SAFE EXERCISING ..........................39 GETTING START .......................... -
Page 3: Safety Precautions
SAFETY PRECAUTIONS WARNING! In order to avoid an accident, you have to pay attention to the following instructions: 1. Attach the safety key clip tightly to your clothes before exercising. 2. Swing your arms naturally when you are exercising. Don’t look downwards. 3. -
Page 4: Assembly Instructions
7. When you use the treadmill for the first time, hold the handrails until you are familiar with the device. 8. The treadmill equipment is made for special use. Please do not modify it and don’t make any improper maintenance. If the treadmill suddenly or continually increases its speed due to an electronic system problem, pull out the safety switch. - Page 5 STEP 1 Using a flat-blade screwdriver, press and turn the locking screw. The engine cover opens automatically. STEP 2 Attach Right and Left Posts (3) to Frame (152) with Screws M12 x 65 (86), M12 x 25 (78) and Flat Washer (99).
- Page 6 STEP 3 Connect the right-side Lower Signal wire (159) with Middle signal wire (172). Connect the Middle power wire (158) with the Lower power wire (173). Connect left TV signal middle wire (169) with the left TV signal lower wire (170). STEP 4 Close the engine cover.
- Page 7 STEP 5 Connect left right handrail light wire with TV signal wire, power wire, signal wire. Then fix the Console on the frame. Use M6 wrench. Lock tight the screws M8*20(91). Then use M5 ,lock tight 4 screws M8*15(20) with washers ∮9*∮16*t1.6(97). STEP 6 Connect the module connecting wire with video communication wire, then fix the display neck decorative cover to the console.
- Page 8 STEP 7 Connect the cables and then attach the display with M8 x 20 screws (91) and M6 wrench.
- Page 9 STEP 8 – CABLE CONNECTION 1. Prepare cables (169, 146) from left post (3L) 2. Prepare the cables (172, 158,146) from the right post (3R)
- Page 10 STEP 9 Then connect the cables on the left (156, 168) and on the right (156, 157, 171) from the console with the cables from right and left post (3L / R) STEP 10 Attach the console with M8 x 20 screws using an Allen key M6.
- Page 11 STEP 11 Use M5 wrench to attach 4 M8 x 15 screws and 4 washers ∮9 * M16 * t1. STEP 12 Attach the display holder with M8 x 45 screws and M6 key. STEP 13 Connect the wires from the control panel to the display. Then attach the display with M8 x 45 screws and M6 wrench.
- Page 12 STEP 15 Connect power and signal cables. STEP 16 Fasten all the screws on the posts, then use Screw M5x25 (80) to fasten Front cover (59/R), then use screw M4 x 15 (120) to fasten the front cover to the frame from inside. STEP 17 If the treadmill is not stable, use the wrench to rotate the support feet.
-
Page 13: Technical Parameters
TECHNICAL PARAMETERS 1 — 23 Km/h Assembly size (mm) 2280*945*1620 mm Speed range Incline range 1 - 20% Motor spec. (HP) 8 HP (PEAK) 220 – 240 V Running size (mm) 1650*600 mm Input Volt (V) N.W. 273 Kgs Max. output power 3000 W Operating 0 –... - Page 14 Volume adjustment Settings menu You can choose the interface language in the upper right corner: English, Chinese, Italian, Korean, French, German, Spanish, Russian, Arabic The WIFI and Bluetooth indicators are informational only...
-
Page 15: Programs
PROGRAMS TIME MODE Press TIME MODE to enter interface. Here you can set the length of your workout. The default value is 30 min, you can set a time from 1 to 99 min. Then press CONFIRM to start the countdown and the program will start. To return to the Main Menu, press RETURN. - Page 16 DISTANCE MODE Press DISTANCE MODE to enter interface. Here you can set the distance of your workout. The default value is 5 km, you can set a distance from 1 to 10 km. Then press CONFIRM to start the countdown and the program will start. To return to the Main Menu, press RETURN.
- Page 17 CALORIE MODE Press CALORIE MODE to enter interface. Here you can set the goal for burned calories. The default value is 50 calories, you can set the burned calories from 1 to 9999 calories. Then press CONFIRM to start the countdown and the program will start.
- Page 18 HEART RATE CONTROL Press HEARTH RATE CONTROL to enter interface. The program interface consists of 3 different pages. You can see the current page at the bottom of the display. The left page tests the user's pulse. (grab pulse handlebar plates for test) The middle page sets user information.
- Page 19 Right page compares data. Then press CONFIRM on the middle page to start the countdown and the program will start. To return to the Main Menu, press RETURN. Pressing CONFIRM will display the following: When the pulse reaches the desired value, a warning is displayed, and program stops. You can turn off the program earlier with PAUSE and STOP.
- Page 20 SCENE SELECTION Press SCENE SELECTION to enter settings. You can choose following: RACETRACK MODE – displays racetrack MAP MODE – User can set start and end destination. The system automatically sets the route according to the user's speed. (The belt does not use the GPS system. It uses Baidu maps for simulation.
- Page 21 SMALL TOWN STREET, BEACH, MOUNTAIN PLATEAU – Displays corresponding scene.
- Page 22 EXERCISE GUIDE Pressing EXERCISE GUIDE will display the following screen: SAFETY EXERCISE For more information on the exercises, see the chapters below. You will see a series of videos for a warm-up.
- Page 24 Use the arrow at the bottom left to return to the main screen. RUNNING GUIDE Sprint...
- Page 25 Walk uphill Quick walk...
- Page 26 Jogging FUNNY EXERCISE (zábavné cvičení) – k dispozici jsou 4 vide pro zpestření cvičení...
- Page 27 ABOUT THIS TREADMILL When you press ABOUT THIS TREADMILL, the following screen will appear: OPERATION INSTRUCTIONS – Not available at the moment MAINTENANCE INSTRUCTIONS – See chapters below...
- Page 29 FAT TEST Pressing FAT TEST will display: Fill in the following information: HIGHT WEIGHT Then grab the handlebars pulse plates for 5 seconds. The value is displayed. Press RETURN to return to the Main Menu. WARNING: The displayed values in the program are for reference only and do not serve medical purposes!
- Page 30 BLUETOOTH Press BLUETOOTH to enter the setting. Bluetooth input – Devices that are connected to the treadmill (phone, tablet, etc.) The treadmill can only transfer music, not files. When the following screen appears, press CLOSE: Turn on Bluetooth on the treadmill and on your smart device (tablet, mobile). Pair the devices. Use the buttons to control music: With Bluetooth output you can connect e.g.
- Page 31 START Press START to enter the setting. In the interface, you can set the speed, incline, pause, stop. With MUSIC, you can select music from your library. (a memory card or other music source must be connected) With VIDEO, the user can play videos. (a memory card or other music source must be connected)) With SCENE you can select a scene.
- Page 32 Vygenerovaný kód který uloží aktuální trénink, ne data za různé cvičení. INTERNET Press SURF THE INTERNET to enter the interface. Icons cannot be added or removed. Different language variations have a different program selection. Press to return to the main menu.
- Page 33 MEDIA LIBRARY Press MEDIA LIBRARY to enter the interface. You must connect an external device with following files: pictures, music, videos. PHOTO – file type JPG, PNG MUSIC – file type MP3 VIDEO – file type MP4, AVI, MOV TV INTERFACE Not available at this moment LOCAL APPLICATION Press LOCAL APPLICATION to enter the interface.
- Page 34 SETTINGS Press to enter the interface. The following screen will appear: Important information in the system settings. Therefore, they are password protected: 000007. Confirm the password with CONFIRM. The user can only enter the SETUP SYSTEM where he can set up WIFI connection, brightness etc. OTHER FEATURES WERE SET UP FOR MANUFACTURING AND FOR CURRENT USER IT'S FORBIDDEN TO CHANGE!
- Page 35 PROGRAM INTERFACE To enter the program, use the buttons on the console. Select a program and confirm with CONFIRM button. 30 min. training, divided into 16 segments Speed Incline Speed 10.0 10.0 12.0 10.0 10.0 Incline Speed Incline Speed 10.0 10.0 Incline Speed...
- Page 36 Incline Speed Incline Speed Incline Speed Incline Speed Incline Speed Incline Speed Incline Speed Incline Speed Incline Speed Incline Speed Incline Speed Incline Speed Incline Speed 10.0 Incline...
-
Page 37: Buttons
BUTTONS Buttons can operate independently of the display or with display. Displays the current incline. The default value is 0, the maximum value is 20%. Displays the current speed. The default value is 1.0 km / h, the maximum value is 23 km / h. Displays pulse and calories burned. - Page 38 Shortcut buttons for incline adjustment. The numbers show % value. Use the Up Arrow to increase the incline by 1%. Use the Down Arrow to decrease the incline by 1%. Shortcut buttons for speed adjustment. The number shows speed increase. The time mode button, by pressing the button with the screen on, will enter the Time Program.
-
Page 39: Errors
STOP the button stops program immediately and exits the program. Magnetic safety key, in case of emergency, disconnect the key and stop the belt immediately. You can connect external devices using the USB port. The port is not made to recharge other devices. 3 mm jack for headphones ERRORS The converter couldn’t receive the signal... -
Page 40: Getting Start
• Users who want to exercise while running should choose 8 km/h speed or higher. GETTING START PREPARATION If you are more than 45 years old or have health problems and this is your first time using a treadmill, please consult your doctor before exercising. Before you use the motorized treadmill, please stand aside and learn how to use it, e.g. - Page 41 Touch toes Bend your knees slightly and slowly stretch your body downwards. Relax your back and shoulders. Try to touch the toes. Keep the position for 10 - 15 seconds. Repeat approx. 3 times. Hamstring stretches Sitting on a cushion, stretch one leg straight and fold the other inward.
-
Page 42: Maintenance Instructions
Moderate use (3-5 hours per week) – every 6 months • Frequent use (more than 5 hours per week) – every 3 months • Always use silicon oil inSPORTline. MAINTENANCE GUIDELINES • In order to maintain and prolong the working life of your treadmill, we suggest that you power off for 10 minutes after every 2 hours of running. -
Page 43: Belt Adjustment
BELT ADJUSTMENT The poly V-Belt will gradually loosen and change shape after a long time usage and you will need to adjust it for safe use. How to judge: when you are running as usual, and your feet stamp on the running belt and you feel the pause sometimes, it indicates the V-Belt or running belt is loose. -
Page 44: Exploded Drawing
EXPLODED DRAWING... -
Page 45: Part List
PART LIST NÁZEV SPEC. NÁZEV SPEC. Main frame Upright decorative bar Incline bracket 23 L/R L/P Edging 3 L/R L/P Post 24 L/R L/P Edging inserting sheet Meter bracket Oil injection topple 5 L/R L/P Foam handrail 26 L/R L/P Edging top sheet Transporting wheel 27 L/R... - Page 46 Running belt Joint foot pad screw cover Multi- groove belt Brush Meter upper cover 68 L/R L/P handrail outer side cover Meter lower cover 69 L/R handrail inner side cover Display upper cover 70 L/R handrail decorative sheet Display lower cover 71 L/R rear cover...
- Page 47 Screw M6 x 8 Screw M4 x 8 Screw M8 x 45 Screw M4 x 12 Screw M8 x 20 Screw ST4.0 x 15 ∮4.1*∮4.4*t1 Washer Screw ST 5.5 x 40 ∮8.1*∮12.3*t2.1 Washer Screw ST 3.0 x 15 ∮10.2*∮18.8*t3 Washer Screw M4 x 15 ∮11*∮20*t2.0...
- Page 48 Single wire 500 mm Handrail decorative light wire Filter Upper signal wire 620 mm Power line Middle signal wire 1650 mm Power socket Lower signal wire 550 mm Power switch Upper module connecting 280 mm wire Overload protector Middle module connecting 300 mm wire Incline motor...
-
Page 49: Storage
STORAGE Keep the treadmill in a clean and dry environment. Make sure the power switch is turned off and the treadmill is not plugged into the power socket. IMPORTANT NOTICE • This treadmill comes with standard safety regulations and is suitable for professional use. Any other use is prohibited and may be dangerous to users. - Page 50 Tyto záruční podmínky a reklamační řád jsou nedílnou součástí každé kupní smlouvy uzavřené mezi prodávajícím a kupujícím. Záruční podmínky a reklamační řád jsou platné a závazné, pokud v kupní smlouvě či v dodatku v této smlouvě či jiné písemné dohodě nebude stranami dohodnuto jinak. Záruční...
- Page 51 Reklamace a servis: Čermenská 486, Vítkov 749 01 IČO: 26847264 DIČ: CZ26847264 Tel: +420 556 300 970 Mail: eshop@insportline.cz reklamace@insportline.cz servis@insportline.cz Web: www.inSPORTline.cz inSPORTline s.r.o. Centrála, reklamácie, servis: Električná 6471, Trenčín 911 01, SK IČO: 36311723 DIČ: SK2020177082 Tel.: +421(0)326 526 701 Mail: objednavky@insportline.cz reklamacie@insportline.cz servis@insportline.cz Web: www.inSPORTline.sk...
Need help?
Do you have a question about the Gardian G12TF and is the answer not in the manual?
Questions and answers