Advertisement
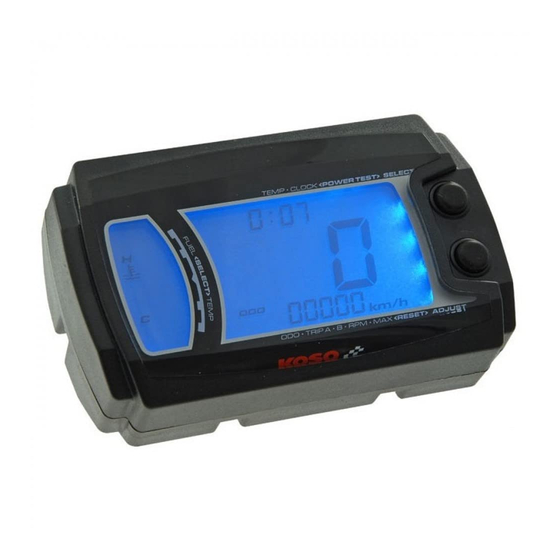
Thank you for purchasing our product. This product is a multifunction meter and is easy to install. Before using, please read t he instructions
●
carefully and retain them for future reference.
Attention!
● For installation, please follow the steps described. Any damage caused by wrong installation shall be imputed to the users.
● To avoid a short circuit from occuring do not pull or modify the wires during installation.
● Do not disassemble or change any parts. Opening and dissassembling this unit will void any warranty.
● Maintenance and repairs should be executed by our professionals only.
◎ Symbol description:
NOTE
Some procedures must be followed to avoid damages to the instrument.
WARNING!
Certain procedure must be followed to avoid damages to yourself, to the vehicle or others.
1-1
Accessory
1
Lcd meter X 1
5
PT 1/8 water temp
sensor X 1
M8/ S type speed
9
sensor
bracket
X 1
13
4 mm spanner X 1
17
M5 X 18L screw X 3
NOTE
Please contact
the local distributor
1-2
Option accessory
1
Oil temp sensor adapter
M12 X P1.5 X 15L
M14 X P1.25 X 15L
M14 X P1.5 X 15L
M16 X P1.5 X 15L
M18 X P1.5 X 15L
M20 X P1.0 X 15L
M20 X P1.5 X 15L
5
Disc magnet screw
5/16-18 X 22.1L
M5 X P0.8 X 12L
M6 X P1.0 X 12.6L
M6 X P1.0 X 19.7L
M6 X P1.0 X 24L
M8 X P1.25 X 22.5L M8 X P1.25 X 27.5L
M8 X P1.25 X 29L M10 X P1.25 X 28.3L
NOTE
Some of the option accessories may not sell. For the details, please contact the local distributor.
2
RPM wire set (Type ) X 1
A
6
Digital speed signal
sensor X 1
10
M10/ S type speed
sensor
bracket
X 1
Meter bracket
14
(for handle bar)
if the items you open are not the same, with the above-listed one.
Water temp
2
sensor adapter
M14
M16.M18
M22.M26 mm
Meter bracket
6
(for stem)
3
RPM wire set (Type ) X 1
B
7
D6 X 5L mm magnet X 6
11
M5 x 5L Hexagon socket
screw X 2
15
M5 washer X 3
Cylinder head
3
temp sensor
M10.
M14 mm
FLASH
LIGHT ON
HOLD THE
HOLD THE
BUTTON ONE
BUTTON 3
SECONDS
SECONDS
4
Temp sensor wire set X 1
8
Connect terminal X 12
12
2.5 mm spanner X 1
16
M5 X 12L screw X 2
4
Temp sensor
M10 X P1.0
M12 X P1.5
M14 X P1.25
M14 X P1.5
M16 X P1.5 / M18 X P1.5
wh017bb06a_P7-1
Advertisement
Table of Contents

Summary of Contents for Koso XR-SRN+
- Page 1 Thank you for purchasing our product. This product is a multifunction meter and is easy to install. Before using, please read t he instructions ● carefully and retain them for future reference. Attention! ● For installation, please follow the steps described. Any damage caused by wrong installation shall be imputed to the users. ●...
-
Page 2: Wiring Installation Instructions
Wiring installation instructions Brown / "+"Wire connect key on DC 12V main power switch Black / Ground wire connect to the vehicle body or the engine (It must be a good ground) Red / Postive pole (Connect to the battery DC 12V PT 1/8 (Accessory 5) Install the temp Temp sensor wire (Accessory 4) -
Page 3: Function, Setting Instruction
Function, setting instruction Display range: 0~360 km/h (0~225 MPH) ●Fuel levels Display range: 10 levels ●Speedometer Display unit: km/h & MPH for alternative Ù Ù Ù Ù Setting range: 100 , 250 , , 1200 , SW ○Display internal <0.5 second ○Fuel warning Setting range: 10~50% ;... - Page 4 The top speed test ●In main screen, press the Select + Adjust Speed up 0 km/h 3 km/h 180 km/h 179 km/h button one time the enter the power test The timer is When the speed automatic, so when screen. decreases, your bike start to the timer...
-
Page 5: Setting Screen
Setting screen EX. If the sensing point is setting 06P. ● Press the Select button to move to the ● ●Hold pressing the Adjust +Select button digit you want to set. for 3 seconds the enter the a1 setting screen. Press the Adjust button to change the... -
Page 6: The Clock Setting
The Backlight brightness setting EX. The fuel gauge need to be set to ● Ù 。 ●Press the Select button one time to enter ●Press the Adjust button to change the the backlight brightness setting screen. setting. Now the a6 is ashing! The fuel gauge resistance setting NOTE Ù... -
Page 7: Troubleshooting
Trouble shooting The following situation do not indicate malfunction of the meter. Please check the following before taking it in for repair. Trouble Check item Trouble Check item The meter doesn't work The power doesn't supply to the meter. Tachometer does not Please check the RPM sensor wiring is ●...


Need help?
Do you have a question about the XR-SRN+ and is the answer not in the manual?
Questions and answers